Quick Reference Guide
Page 3
... 17 Charging the Battery 17 Replacing the Battery 17 Storing a Battery 18 Troubleshooting 19 Lockups and Software Problems 19 Dell Diagnostics 20 When to Use the Dell Diagnostics 20 Starting the Dell Diagnostics From Your Hard Drive 21 Starting the Dell Diagnostics From the Drivers and Utilities Media 21 Dell Diagnostics Main Menu 22 Index 25 Contents 3
... 17 Charging the Battery 17 Replacing the Battery 17 Storing a Battery 18 Troubleshooting 19 Lockups and Software Problems 19 Dell Diagnostics 20 When to Use the Dell Diagnostics 20 Starting the Dell Diagnostics From Your Hard Drive 21 Starting the Dell Diagnostics From the Drivers and Utilities Media 21 Dell Diagnostics Main Menu 22 Index 25 Contents 3
Quick Reference Guide
Page 7
... system for components, such as memory, the hard drive, and the operating system • Customer Care - system and installs the updates appropriate for Dell™ 3.5-inch USB floppy drives, Intel® processors, optical drives, and USB devices. NSS provides critical updates for... your operating system and support for your Dell computer. Quick Reference Guide 7 Upgrade information for your...
... system for components, such as memory, the hard drive, and the operating system • Customer Care - system and installs the updates appropriate for Dell™ 3.5-inch USB floppy drives, Intel® processors, optical drives, and USB devices. NSS provides critical updates for... your operating system and support for your Dell computer. Quick Reference Guide 7 Upgrade information for your...

Quick Reference Guide
Page 12
... can damage the computer or cause a fire. 1 2 6 5 1 battery-bay latch release 4 docking-device connector 4 3 2 battery 5 fan air vents 12 Quick Reference Guide 3 memory module cover 6 hard drive
... can damage the computer or cause a fire. 1 2 6 5 1 battery-bay latch release 4 docking-device connector 4 3 2 battery 5 fan air vents 12 Quick Reference Guide 3 memory module cover 6 hard drive
Quick Reference Guide
Page 15
To check the battery health using the Battery Meter in Dell QuickSet. If five lights appear, less than 80 percent of its original charge capacity remains. See "Specifications" in your computer's power usage. By default, a pop-... press the power button, close the display, or press . Power Management Modes Standby Mode Standby mode conserves power by turning off the display and the hard drive after a low-battery warning. Quick Reference Guide 15 If the battery runs completely out of power, hibernate mode begins automatically. See "Configuring Power Management Settings...
To check the battery health using the Battery Meter in Dell QuickSet. If five lights appear, less than 80 percent of its original charge capacity remains. See "Specifications" in your computer's power usage. By default, a pop-... press the power button, close the display, or press . Power Management Modes Standby Mode Standby mode conserves power by turning off the display and the hard drive after a low-battery warning. Quick Reference Guide 15 If the battery runs completely out of power, hibernate mode begins automatically. See "Configuring Power Management Settings...
Quick Reference Guide
Page 16
... the touch pad or track stick. To manually enter hibernate mode: • Click Start or → Turn off the computer. or • Depending on the hard drive and then completely turning off computer, press and hold , and then click Hibernate. Close the display. - You cannot make the computer exit hibernate mode by...
... the touch pad or track stick. To manually enter hibernate mode: • Click Start or → Turn off the computer. or • Depending on the hard drive and then completely turning off computer, press and hold , and then click Hibernate. Close the display. - You cannot make the computer exit hibernate mode by...
Quick Reference Guide
Page 20
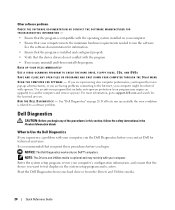
... procedures before you are experiencing slow computer performance, you frequently receive pop-up advertisements, or you contact Dell for the keyword spyware. BACK UP YOUR FILES IMMEDIATELY USE A VIRUS-SCANNING PROGRAM TO CHECK THE HARD DRIVE, FLOPPY DISKS, CDS, AND DVDS SAVE AND CLOSE ANY OPEN FILES OR PROGRAMS AND SHUT DOWN YOUR...
... procedures before you are experiencing slow computer performance, you frequently receive pop-up advertisements, or you contact Dell for the keyword spyware. BACK UP YOUR FILES IMMEDIATELY USE A VIRUS-SCANNING PROGRAM TO CHECK THE HARD DRIVE, FLOPPY DISKS, CDS, AND DVDS SAVE AND CLOSE ANY OPEN FILES OR PROGRAMS AND SHUT DOWN YOUR...
Quick Reference Guide
Page 21
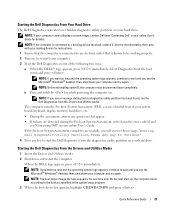
...answer any key to start -up, the computer boots according to the devices specified in your hard drive. If the Pre-boot System Assessment completes successfully, you will receive the message, "Booting Dell Diagnostic Utility Partition.Press any key to continue". 4 Press any questions that appear. •... wait too long and the operating system logo appears, continue to a docking device (docked), undock it. Starting the Dell Diagnostics From Your Hard Drive The Dell Diagnostics is located on a hidden diagnostic utility partition on your computer and try again. Quick Reference Guide 21
...answer any key to start -up, the computer boots according to the devices specified in your hard drive. If the Pre-boot System Assessment completes successfully, you will receive the message, "Booting Dell Diagnostic Utility Partition.Press any key to continue". 4 Press any questions that appear. •... wait too long and the operating system logo appears, continue to a docking device (docked), undock it. Starting the Dell Diagnostics From Your Hard Drive The Dell Diagnostics is located on a hidden diagnostic utility partition on your computer and try again. Quick Reference Guide 21

User's Guide
Page 6
... Cards 63 Installing a Smart Card 64 Passwords 64 Using a Primary/System Password 65 Using an Administrator Password 65 Using a Hard Drive Password 66 Trusted Platform Module (TPM 67 Enabling the TPM Feature 67 Security Management Software 68 Computer Tracking Software 68 If Your...or Stolen 68 10 Troubleshooting Diagnostic Lights 71 Diagnostic Light Codes During POST 71 Dell Technical Update Service 73 Dell Diagnostics 73 When to Use the Dell Diagnostics 73 Starting the Dell Diagnostics From Your Hard Drive 73 Starting the Dell Diagnostics From the Drivers and Utilities CD 74...
... Cards 63 Installing a Smart Card 64 Passwords 64 Using a Primary/System Password 65 Using an Administrator Password 65 Using a Hard Drive Password 66 Trusted Platform Module (TPM 67 Enabling the TPM Feature 67 Security Management Software 68 Computer Tracking Software 68 If Your...or Stolen 68 10 Troubleshooting Diagnostic Lights 71 Diagnostic Light Codes During POST 71 Dell Technical Update Service 73 Dell Diagnostics 73 When to Use the Dell Diagnostics 73 Starting the Dell Diagnostics From Your Hard Drive 73 Starting the Dell Diagnostics From the Drivers and Utilities CD 74...
User's Guide
Page 7
... 76 Accessing the Dell Support Utility 76 Clicking the Dell Support Icon 76 Double-Clicking the Dell Support Icon 77 Drive Problems 77 CD and DVD drive problems 78 Hard drive problems 78 E-Mail, Modem, and Internet Problems 79 Error Messages 80 IEEE 1394 Device Problems 83 Keyboard Problems 83 External keyboard problems 84 Unexpected characters ...
... 76 Accessing the Dell Support Utility 76 Clicking the Dell Support Icon 76 Double-Clicking the Dell Support Icon 77 Drive Problems 77 CD and DVD drive problems 78 Hard drive problems 78 E-Mail, Modem, and Internet Problems 79 Error Messages 80 IEEE 1394 Device Problems 83 Keyboard Problems 83 External keyboard problems 84 Unexpected characters ...
User's Guide
Page 9
...Parts Before You Begin 107 Recommended Tools 107 Turning Off Your Computer 107 Before Working Inside Your Computer 107 Hard Drive 108 Returning a Hard Drive to Dell 110 Media Bay 110 Removing the Device Security Screw 110 Removing and Installing Media Bay Devices 111 Hinge Cover ...Cards . . 122 FCM (Flash Cache Module 123 Internal Card With Bluetooth® Wireless Technology 125 Coin-Cell Battery 126 15 Dell™ QuickSet 16 Specifications 17 Getting Help Obtaining Assistance 139 Technical Support and Customer Service 139 DellConnect 140 Online Services 140 AutoTech Service...
...Parts Before You Begin 107 Recommended Tools 107 Turning Off Your Computer 107 Before Working Inside Your Computer 107 Hard Drive 108 Returning a Hard Drive to Dell 110 Media Bay 110 Removing the Device Security Screw 110 Removing and Installing Media Bay Devices 111 Hinge Cover ...Cards . . 122 FCM (Flash Cache Module 123 Internal Card With Bluetooth® Wireless Technology 125 Coin-Cell Battery 126 15 Dell™ QuickSet 16 Specifications 17 Getting Help Obtaining Assistance 139 Technical Support and Customer Service 139 DellConnect 140 Online Services 140 AutoTech Service...
User's Guide
Page 13
...and notification system installed on your Dell computer. What Are You Looking For? Computer documentation, details on page 76. If you reinstall the operating system for your operating system and search for components, such as memory, the hard drive, and the operating system •...; Customer Care - Access the Dell Support Utility from technicians, and online courses, frequently asked questions, hot topics, and general health of...
...and notification system installed on your Dell computer. What Are You Looking For? Computer documentation, details on page 76. If you reinstall the operating system for your operating system and search for components, such as memory, the hard drive, and the operating system •...; Customer Care - Access the Dell Support Utility from technicians, and online courses, frequently asked questions, hot topics, and general health of...
User's Guide
Page 21
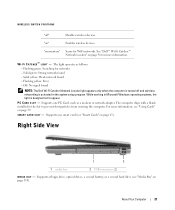
... wireless devices. P C C A R D S L O T - See "Dell™ Wi-Fi Catcher™ Network Locator" on page 56 for networks - Solid green: Strong network found - While working in Microsoft Windows operating systems, the light is activated in the slot to appear. For more information. Supports a floppy drive, optical drives, a second battery, or a second hard drive (see "Media Bay" on...
... wireless devices. P C C A R D S L O T - See "Dell™ Wi-Fi Catcher™ Network Locator" on page 56 for networks - Solid green: Strong network found - While working in Microsoft Windows operating systems, the light is activated in the slot to appear. For more information. Supports a floppy drive, optical drives, a second battery, or a second hard drive (see "Media Bay" on...

User's Guide
Page 25
... About Your Computer 25 Bottom View 6 1 2 5 1 battery-bay latch release 4 docking-device connector 4 3 2 battery 5 fan air vents 3 memory module cover 6 hard drive B A T T E R Y - See "Replacing the Battery" on page 115). Do not store your computer to create airflow through the fan air vents, which prevents ...Covers the compartment that came with the fan or the computer. Lets you can damage the computer or cause a fire. See the Dell documentation that contains the second memory module (see "Using a Battery" on the fan when the computer gets hot. The computer uses ...
... About Your Computer 25 Bottom View 6 1 2 5 1 battery-bay latch release 4 docking-device connector 4 3 2 battery 5 fan air vents 3 memory module cover 6 hard drive B A T T E R Y - See "Replacing the Battery" on page 115). Do not store your computer to create airflow through the fan air vents, which prevents ...Covers the compartment that came with the fan or the computer. Lets you can damage the computer or cause a fire. See the Dell documentation that contains the second memory module (see "Using a Battery" on the fan when the computer gets hot. The computer uses ...

User's Guide
Page 31
...power button, close the display, or press . Power Management Modes Standby Mode Standby mode conserves power by turning off the display and the hard drive after a low-battery warning. Conserving Battery Power Perform the following actions to conserve battery power: • Connect the computer to an electrical... below and by the number of inactivity (a time-out). By default, a pop-up window warns you when the battery charge is in Dell QuickSet. NOTICE: If your work immediately after a predetermined period of times the battery is used and recharged. • Place the computer in...
...power button, close the display, or press . Power Management Modes Standby Mode Standby mode conserves power by turning off the display and the hard drive after a low-battery warning. Conserving Battery Power Perform the following actions to conserve battery power: • Connect the computer to an electrical... below and by the number of inactivity (a time-out). By default, a pop-up window warns you when the battery charge is in Dell QuickSet. NOTICE: If your work immediately after a predetermined period of times the battery is used and recharged. • Place the computer in...

User's Guide
Page 32
... a key or touching the touch pad or track stick. Press . You cannot make the computer exit standby mode by . Press . or • Depending on the hard drive and then completely turning off computer, press and hold , and then click Hibernate. To manually enter hibernate mode: • Click Start→Turn off the...
... a key or touching the touch pad or track stick. Press . You cannot make the computer exit standby mode by . Press . or • Depending on the hard drive and then completely turning off computer, press and hold , and then click Hibernate. To manually enter hibernate mode: • Click Start→Turn off the...
User's Guide
Page 65
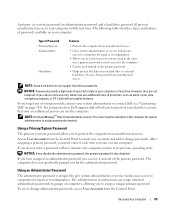
... you must be used instead of your passwords, contact your computer or hard drive. NOTE: Dell OpenManage™ Client Instrumentation version 7.3 or later must enter it instead of Password Primary/System Administrator Hard drive Features • Protects the computer from unauthorized access NOTE: Some hard drives do not enter a password within 2 minutes, the computer returns to its...
... you must be used instead of your passwords, contact your computer or hard drive. NOTE: Dell OpenManage™ Client Instrumentation version 7.3 or later must enter it instead of Password Primary/System Administrator Hard drive Features • Protects the computer from unauthorized access NOTE: Some hard drives do not enter a password within 2 minutes, the computer returns to its...
User's Guide
Page 66
...of the primary hard disk password. If you forget the primary password and do not have an administrator password assigned, or if you have both a primary and an administrator password assigned but forget them both, contact your system administrator or contact Dell (see "Contacting Dell" on the... device. When you set an administrator password, the Configure Setup option becomes available in the system setup program is set to the hard drive when a hard drive password is assigned. NOTE: The administrator password provides access to the computer, but it each time you turn on . You can...
...of the primary hard disk password. If you forget the primary password and do not have an administrator password assigned, or if you have both a primary and an administrator password assigned but forget them both, contact your system administrator or contact Dell (see "Contacting Dell" on the... device. When you set an administrator password, the Configure Setup option becomes available in the system setup program is set to the hard drive when a hard drive password is assigned. NOTE: The administrator password provides access to the computer, but it each time you turn on . You can...
User's Guide
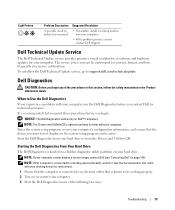
Page 73
.... NOTE: If the computer is located on a hidden diagnostic utility partition on Dell™ computers. Enter the system setup program, review your hard drive. NOTE: If your hard drive or from your computer cannot display a screen image, contact Dell (see "Contacting Dell" on (or restart) your computer. See the documentation that the device you receive notifications. The...
.... NOTE: If the computer is located on a hidden diagnostic utility partition on Dell™ computers. Enter the system setup program, review your hard drive. NOTE: If your hard drive or from your computer cannot display a screen image, contact Dell (see "Contacting Dell" on (or restart) your computer. See the documentation that the device you receive notifications. The...

User's Guide
Page 74
... next steps change the boot sequence for your system board, keyboard, display, memory, hard drive, etc. • During the assessment, answer any key to start the CD menu and press to run the Dell Diagnostics from the boot menu and press . Select Diagnostics from the Drivers and Utilities CD... From the Drivers and Utilities CD 1 Insert the Drivers and Utilities CD. 2 Shut down your hard drive. On the next start-up, the computer boots according to start the Dell Diagnostics from the numbered list. NOTE: It is recommended that appears and press . 5 Type 1 to the devices ...
... next steps change the boot sequence for your system board, keyboard, display, memory, hard drive, etc. • During the assessment, answer any key to start the CD menu and press to run the Dell Diagnostics from the boot menu and press . Select Diagnostics from the Drivers and Utilities CD... From the Drivers and Utilities CD 1 Insert the Drivers and Utilities CD. 2 Shut down your hard drive. On the next start-up, the computer boots according to start the Dell Diagnostics from the numbered list. NOTE: It is recommended that appears and press . 5 Type 1 to the devices ...
User's Guide
Page 78
... cause noise, which does not indicate a defect in all programs before turning it stops. CD and DVD drive problems NOTE: High-speed CD or DVD drive vibration is interrupted, an error occurs. TU R N O F F S T A N D B Y M O D E I N W I N D O W S B E F O R E W R I T I T E S P E E D T O A S L O W E R R A T E - Hard drive problems A L L O W T H E C O M P U T E R T O C O O L B E F O R E T U R N I N G I S C - For Windows XP: 1 Click Start→My Computer. 2 Right-click Local Disk C:. 3 Click Properties→Tools→Check...
... cause noise, which does not indicate a defect in all programs before turning it stops. CD and DVD drive problems NOTE: High-speed CD or DVD drive vibration is interrupted, an error occurs. TU R N O F F S T A N D B Y M O D E I N W I N D O W S B E F O R E W R I T I T E S P E E D T O A S L O W E R R A T E - Hard drive problems A L L O W T H E C O M P U T E R T O C O O L B E F O R E T U R N I N G I S C - For Windows XP: 1 Click Start→My Computer. 2 Right-click Local Disk C:. 3 Click Properties→Tools→Check...


