Quick Reference Guide
Page 7
...Dell computer. This support provides real-time health scans of your selections. • Software upgrades and troubleshooting hints - Find It Here • Solutions - Service call and order status, warranty, and repair information • Service and support - depending on the screen... self-support information. Contact information, service call status and support history, service contract, online discussions with other Dell customers Dell Support Website - Quick Reference Guide 7 NSS is an automated upgrade and notification system installed on my computer configuration...
...Dell computer. This support provides real-time health scans of your selections. • Software upgrades and troubleshooting hints - Find It Here • Solutions - Service call and order status, warranty, and repair information • Service and support - depending on the screen... self-support information. Contact information, service call status and support history, service contract, online discussions with other Dell customers Dell Support Website - Quick Reference Guide 7 NSS is an automated upgrade and notification system installed on my computer configuration...
Quick Reference Guide
Page 13
...• Using wireless communications devices, PC Cards, ExpressCards, media memory cards, or USB devices • Using high-brightness display settings, 3D screen savers, or other computers with your computer. NOTE: Battery operating time (the time the battery can install an optional second battery in the... mode (see "Configuring Power Management Settings" on disposing of a lithium-ion battery. For best results, operate the computer with your Dell computer. Depending on page 17). You can check the battery charge before you insert the battery into the computer (see "Checking the...
...• Using wireless communications devices, PC Cards, ExpressCards, media memory cards, or USB devices • Using high-brightness display settings, 3D screen savers, or other computers with your computer. NOTE: Battery operating time (the time the battery can install an optional second battery in the... mode (see "Configuring Power Management Settings" on disposing of a lithium-ion battery. For best results, operate the computer with your Dell computer. Depending on page 17). You can check the battery charge before you insert the battery into the computer (see "Checking the...

Quick Reference Guide
Page 19
...DVD. A program stops responding or crashes repeatedly NOTE: Software usually includes installation instructions in its documentation or on the screen. If necessary, uninstall and then reinstall the program. The Program Compatibility Wizard configures a program so it runs in...TO THE ELECTRICAL OUTLET. C H E C K T H E S O F T W A R E D O C U M E N T A T I Z A R D - Then restart your computer. A solid blue screen appears TU R N T H E C O M P U T E R O F F - If you are unable to get a response by pressing a key on your keyboard or moving your mouse, press and hold the power button...
...DVD. A program stops responding or crashes repeatedly NOTE: Software usually includes installation instructions in its documentation or on the screen. If necessary, uninstall and then reinstall the program. The Program Compatibility Wizard configures a program so it runs in...TO THE ELECTRICAL OUTLET. C H E C K T H E S O F T W A R E D O C U M E N T A T I Z A R D - Then restart your computer. A solid blue screen appears TU R N T H E C O M P U T E R O F F - If you are unable to get a response by pressing a key on your keyboard or moving your mouse, press and hold the power button...
Quick Reference Guide
Page 21
... From the Drivers and Utilities Media 1 Insert the Drivers and Utilities media. 2 Shut down your computer cannot display a screen image, contact Dell (see the Microsoft® Windows® desktop; Quick Reference Guide 21 then, shut down and restart the computer. NOTE: If ... the boot sequence for instructions. 1 Ensure that the computer is connected to an electrical outlet that is known to wait until you see "Contacting Dell" in your online User's Guide. See the documentation that came with your system board, keyboard, display, memory, hard drive, etc. •...
... From the Drivers and Utilities Media 1 Insert the Drivers and Utilities media. 2 Shut down your computer cannot display a screen image, contact Dell (see the Microsoft® Windows® desktop; Quick Reference Guide 21 then, shut down and restart the computer. NOTE: If ... the boot sequence for instructions. 1 Ensure that the computer is connected to an electrical outlet that is known to wait until you see "Contacting Dell" in your online User's Guide. See the documentation that came with your system board, keyboard, display, memory, hard drive, etc. •...
Quick Reference Guide
Page 22
... computer. If you want . This option allows you to select tests based on your computer. 7 When the Dell Diagnostics Main Menu screen appears, select the test you contact Dell, technical support will ask for your computer is encountered during a test, a message appears with an error code ...a description of devices in your Service Tag. 22 Quick Reference Guide If multiple versions are having. Dell Diagnostics Main Menu 1 After the Dell Diagnostics loads and the Main Menu screen appears, click the button for your computer. NOTE: It is recommended that you select Extended Test ...
... computer. If you want . This option allows you to select tests based on your computer. 7 When the Dell Diagnostics Main Menu screen appears, select the test you contact Dell, technical support will ask for your computer is encountered during a test, a message appears with an error code ...a description of devices in your Service Tag. 22 Quick Reference Guide If multiple versions are having. Dell Diagnostics Main Menu 1 After the Dell Diagnostics loads and the Main Menu screen appears, click the button for your computer. NOTE: It is recommended that you select Extended Test ...
Quick Reference Guide
Page 23
...test by changing the test settings. 5 When the tests are complete, close the Main Menu screen. 6 Remove the Dell Drivers and Utilities media (if applicable). To exit the Dell Diagnostics and restart the computer, close the test screen to return to your computer. Displays your computer or all devices from the Custom Test or...encountered, error codes, and the problem description. Quick Reference Guide 23 The device list may indicate requirements for all devices attached to the Main Menu screen. The Dell Diagnostics obtains configuration information for running the test.
...test by changing the test settings. 5 When the tests are complete, close the Main Menu screen. 6 Remove the Dell Drivers and Utilities media (if applicable). To exit the Dell Diagnostics and restart the computer, close the test screen to return to your computer. Displays your computer or all devices from the Custom Test or...encountered, error codes, and the problem description. Quick Reference Guide 23 The device list may indicate requirements for all devices attached to the Main Menu screen. The Dell Diagnostics obtains configuration information for running the test.
Quick Reference Guide
Page 25
... L labels Microsoft Windows, 6 Service Tag, 6 O operating system media, 8 reinstalling, 8 P power hibernate mode, 16 standby mode, 15 problems blue screen, 19 computer crashes, 19 computer does not start up, 19 computer stops responding, 19 Dell Diagnostics, 20 lockups, 19 program crashes, 19 program stops responding, 19 programs and Windows compatibility, 19 slow computer...
... L labels Microsoft Windows, 6 Service Tag, 6 O operating system media, 8 reinstalling, 8 P power hibernate mode, 16 standby mode, 15 problems blue screen, 19 computer crashes, 19 computer does not start up, 19 computer stops responding, 19 Dell Diagnostics, 20 lockups, 19 program crashes, 19 program stops responding, 19 programs and Windows compatibility, 19 slow computer...
User's Guide
Page 4
... Display Adjusting Brightness 43 Switching the Video Image From Your Computer Display to a Projector. . . . 43 Making Images and Text Look Bigger or Sharper on the Screen: Setting Display Resolution and Refresh Rate 43 Microsoft® Windows® XP 44 Windows Vista 44 Using an External Monitor Simultaneously as an Extension of...
... Display Adjusting Brightness 43 Switching the Video Image From Your Computer Display to a Projector. . . . 43 Making Images and Text Look Bigger or Sharper on the Screen: Setting Display Resolution and Refresh Rate 43 Microsoft® Windows® XP 44 Windows Vista 44 Using an External Monitor Simultaneously as an Extension of...
User's Guide
Page 7
... 76 Accessing the Dell Support Utility 76 Clicking the Dell Support Icon 76 Double-Clicking the Dell Support Icon 77 Drive Problems 77 CD and DVD drive problems 78 Hard drive problems 78 E-Mail, Modem, and Internet Problems 79 Error Messages ...stops responding 85 A program stops responding or crashes repeatedly 85 A program is designed for an earlier Microsoft® Windows® operating system 85 A solid blue screen appears 85 Other software problems 85 Memory Problems 86 Network Problems 86 General 86 PC Card or ExpressCard Problems 87 Power Problems 87 Ensuring Sufficient...
... 76 Accessing the Dell Support Utility 76 Clicking the Dell Support Icon 76 Double-Clicking the Dell Support Icon 77 Drive Problems 77 CD and DVD drive problems 78 Hard drive problems 78 E-Mail, Modem, and Internet Problems 79 Error Messages ...stops responding 85 A program stops responding or crashes repeatedly 85 A program is designed for an earlier Microsoft® Windows® operating system 85 A solid blue screen appears 85 Other software problems 85 Memory Problems 86 Network Problems 86 General 86 PC Card or ExpressCard Problems 87 Power Problems 87 Ensuring Sufficient...
User's Guide
Page 8
... is difficult to read 92 If only part of the display is readable 92 11 System Setup Program Overview 93 Viewing the System Setup Screens 93 System Setup Screens 94 Commonly Used Settings 94 Changing the Boot Sequence 94 Changing COM Ports 95 12 Traveling With Your Computer Identifying Your Computer 97...
... is difficult to read 92 If only part of the display is readable 92 11 System Setup Program Overview 93 Viewing the System Setup Screens 93 System Setup Screens 94 Commonly Used Settings 94 Changing the Boot Sequence 94 Changing COM Ports 95 12 Traveling With Your Computer Identifying Your Computer 97...
User's Guide
Page 14
...to use the Operating System CD (see "Dell™ QuickSet" on network activity, the Power Management Dell QuickSet Help Wizard, hotkeys, and other items controlled by Dell QuickSet. For more information on Dell QuickSet, see "Reinstalling Windows" on your ...computer. To reinstall your computer. NOTE: The color of your CD varies based on the operating system you reinstall your operating system, use the Drivers and Utilities CD to reinstall drivers for the devices that describes your problem. 4 Follow the instructions on the screen...
...to use the Operating System CD (see "Dell™ QuickSet" on network activity, the Power Management Dell QuickSet Help Wizard, hotkeys, and other items controlled by Dell QuickSet. For more information on Dell QuickSet, see "Reinstalling Windows" on your ...computer. To reinstall your computer. NOTE: The color of your CD varies based on the operating system you reinstall your operating system, use the Drivers and Utilities CD to reinstall drivers for the devices that describes your problem. 4 Follow the instructions on the screen...

User's Guide
Page 26
... • E-mail messages • Toolbar settings • Window sizes • Internet bookmarks You can transfer the data to your old computer screen appears, go to your old or source computer. This information may not be available in Windows XP. Transferring Information to a New Computer The ... the new computer for the file transfer: 1 Start the Files and Settings Transfer Wizard. 2 When the Files and Settings Transfer Wizard welcome screen appears, click Next. 3 On the Which computer is optional and may not be included with the Files and Settings Transfer Wizard. For instructions...
... • E-mail messages • Toolbar settings • Window sizes • Internet bookmarks You can transfer the data to your old computer screen appears, go to your old or source computer. This information may not be available in Windows XP. Transferring Information to a New Computer The ... the new computer for the file transfer: 1 Start the Files and Settings Transfer Wizard. 2 When the Files and Settings Transfer Wizard welcome screen appears, click Next. 3 On the Which computer is optional and may not be included with the Files and Settings Transfer Wizard. For instructions...

User's Guide
Page 27
...the disk creation completes and the Now go to your old computer message appears, do you want to the path for transferring your new computer. screen, click Old Computer→Next. To copy data from the old computer: 1 On the old computer, insert the wizard disk. 2 Click ...: 1 Click Start→Files and Settings Transfer Wizard. 2 When the Files and Settings Transfer Wizard welcome screen appears, click Next. 3 On the Which computer is this ? screen, click I want to transfer? screen, select the items you chose for fastwiz (on the new computer, click Next. 2 On the Where ...
...the disk creation completes and the Now go to your old computer message appears, do you want to the path for transferring your new computer. screen, click Old Computer→Next. To copy data from the old computer: 1 On the old computer, insert the wizard disk. 2 Click ...: 1 Click Start→Files and Settings Transfer Wizard. 2 When the Files and Settings Transfer Wizard welcome screen appears, click Next. 3 On the Which computer is this ? screen, click I want to transfer? screen, select the items you chose for fastwiz (on the new computer, click Next. 2 On the Where ...
User's Guide
Page 28
...and click Next. After the information has been copied, the Completing the Collection Phase screen appears. 8 Click Finish. To transfer data to the new computer: 1 On the Now go to the Dell™ Knowledge Base document may not be available in progress. NOTE: For more ...information about this procedure, search support.dell.com for transferring your old computer screen on the screen by the Windows Easy Transfer wizard. 28 About Your Computer Follow the instructions provided on the new computer, click ...
...and click Next. After the information has been copied, the Completing the Collection Phase screen appears. 8 Click Finish. To transfer data to the new computer: 1 On the Now go to the Dell™ Knowledge Base document may not be available in progress. NOTE: For more ...information about this procedure, search support.dell.com for transferring your old computer screen on the screen by the Windows Easy Transfer wizard. 28 About Your Computer Follow the instructions provided on the new computer, click ...
User's Guide
Page 29
... a Battery 29 NOTE: Because the battery may increase the risk of your computer. One battery is recommended that shipped with your Dell™ portable computer with the main battery installed at all times. You can hold a charge) decreases over time. To view...; Using wireless communications devices, PC Cards, ExpressCards, media memory cards, or USB devices • Using high-brightness display settings, 3D screen savers, or other computers with a compatible battery purchased from other power-intensive programs such as standard equipment in maximum performance mode (see ...
... a Battery 29 NOTE: Because the battery may increase the risk of your computer. One battery is recommended that shipped with your Dell™ portable computer with the main battery installed at all times. You can hold a charge) decreases over time. To view...; Using wireless communications devices, PC Cards, ExpressCards, media memory cards, or USB devices • Using high-brightness display settings, 3D screen savers, or other computers with a compatible battery purchased from other power-intensive programs such as standard equipment in maximum performance mode (see ...
User's Guide
Page 42
... memory and preventing DVD playback, adjust the display properties. 1 Click Start→Control Panel→Display. 2 Click Settings and click and drag the bar in Screen resolution to change the setting to 1024 by 768 pixels. 3 Click the drop-down to increase or decrease the volume. Volume Control Window 1 Click the...
... memory and preventing DVD playback, adjust the display properties. 1 Click Start→Control Panel→Display. 2 Click Settings and click and drag the bar in Screen resolution to change the setting to 1024 by 768 pixels. 3 Click the drop-down to increase or decrease the volume. Volume Control Window 1 Click the...
User's Guide
Page 43
... or docking device. Press to . Using the Display Adjusting Brightness When a Dell™ computer is connected to an external monitor and you try to change the brightness level, the Brightness Meter may appear, but the brightness level on the Screen: Setting Display Resolution and Refresh Rate NOTE: If you change the display...
... or docking device. Press to . Using the Display Adjusting Brightness When a Dell™ computer is connected to an external monitor and you try to change the brightness level, the Brightness Meter may appear, but the brightness level on the Screen: Setting Display Resolution and Refresh Rate NOTE: If you change the display...
User's Guide
Page 44
... can damage an external monitor by using . In contrast, lower resolution causes text and images to decrease/increase the screen resolution. 4 Click How do I get the best display? NOTE: Use only the Dell-installed video drivers, which are not visible, you increase resolution, items appear smaller on an external monitor, see the...
... can damage an external monitor by using . In contrast, lower resolution causes text and images to decrease/increase the screen resolution. 4 Click How do I get the best display? NOTE: Use only the Dell-installed video drivers, which are not visible, you increase resolution, items appear smaller on an external monitor, see the...

User's Guide
Page 45
...Panel icon, click Display. 5 In the Display Properties window, click the Settings tab. Using the Display 45 If necessary, press to bring the screen image back to close the Display Properties window. Windows Vista® 1 Click the Windows Vista Start button, , and click Control Panel. 2 ...Under Appearance and Personalization, click Adjust screen resolution. Using an External Monitor Simultaneously as an Extension of Your Computer Display You can attach an external monitor or projector to the other,...
...Panel icon, click Display. 5 In the Display Properties window, click the Settings tab. Using the Display 45 If necessary, press to bring the screen image back to close the Display Properties window. Windows Vista® 1 Click the Windows Vista Start button, , and click Control Panel. 2 ...Under Appearance and Personalization, click Adjust screen resolution. Using an External Monitor Simultaneously as an Extension of Your Computer Display You can attach an external monitor or projector to the other,...
User's Guide
Page 46
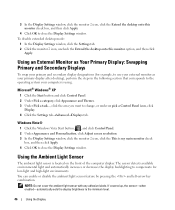
Windows Vista® 1 Click the Windows Vista Start button, , and click Control Panel. 2 Under Appearance and Personalization, click Adjust screen resolution. 3 In the Display Settings window, click the monitor 2 icon, click the This is my main monitor check box, and then click Apply. 4 Click OK ...
Windows Vista® 1 Click the Windows Vista Start button, , and click Control Panel. 2 Under Appearance and Personalization, click Adjust screen resolution. 3 In the Display Settings window, click the monitor 2 icon, click the This is my main monitor check box, and then click Apply. 4 Click OK ...


