
Quick Reference Guide
Page 28
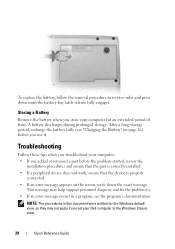
.... This message may not apply if you set your computer: • If you added or removed a part before you use it. To replace the battery, follow the removal procedure in reverse order and press down the exact message. NOTE: The procedures in this document were written for ...• If a peripheral device does not work, ensure that the device is properly connected. • If an error message appears on the screen, write down until the battery-bay latch release fully engages. A battery discharges during prolonged storage. Storing a Battery Remove the battery when you troubleshoot ...
.... This message may not apply if you set your computer: • If you added or removed a part before you use it. To replace the battery, follow the removal procedure in reverse order and press down the exact message. NOTE: The procedures in this document were written for ...• If a peripheral device does not work, ensure that the device is properly connected. • If an error message appears on the screen, write down until the battery-bay latch release fully engages. A battery discharges during prolonged storage. Storing a Battery Remove the battery when you troubleshoot ...
Service Manual
Page 46
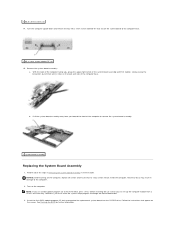
...use a BIOS update program CD to boot from you must enter the system setup program to remove the system board assembly. 1 system board assembly Replacing the System Board Assembly 1. NOTICE: Before turning on the computer. Failure to do so may result in reverse order. Follow the instructions that ... the System Board Assembly in damage to the computer base. 1 M2 x 3-mm screws labeled "B" (4) 15. With the back of their access holes on the screen. b. 1 M2.5 x 5-mm screws (2) 14. slowly easing the connectors out of the computer facing you can set up the computer to flash the BIOS,...
...use a BIOS update program CD to boot from you must enter the system setup program to remove the system board assembly. 1 system board assembly Replacing the System Board Assembly 1. NOTICE: Before turning on the computer. Failure to do so may result in reverse order. Follow the instructions that ... the System Board Assembly in damage to the computer base. 1 M2 x 3-mm screws labeled "B" (4) 15. With the back of their access holes on the screen. b. 1 M2.5 x 5-mm screws (2) 14. slowly easing the connectors out of the computer facing you can set up the computer to flash the BIOS,...


