

Latitude 3379 Owners Manual
Page 3
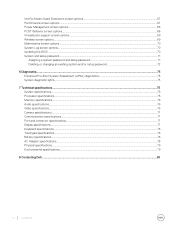
... cover...15 Battery...15 Removing the battery...15 Installing the battery...16 Power and volume control board...16 Removing the power and volume control board...16 Installing the power and volume control board...17 Solid State Drive (SSD)...17 Removing the solid state drive (SSD) card...17 Installing the solid state drive (SSD) card...18 Coin cell battery...19 Removing the coin cell battery...19 Installing the coin cell battery...19 WLAN card...20 Removing the WLAN card...20 Installing the WLAN...20 Memory module...21 Removing the memory module...21 Installing...
... cover...15 Battery...15 Removing the battery...15 Installing the battery...16 Power and volume control board...16 Removing the power and volume control board...16 Installing the power and volume control board...17 Solid State Drive (SSD)...17 Removing the solid state drive (SSD) card...17 Installing the solid state drive (SSD) card...18 Coin cell battery...19 Removing the coin cell battery...19 Installing the coin cell battery...19 WLAN card...20 Removing the WLAN card...20 Installing the WLAN...20 Memory module...21 Removing the memory module...21 Installing...

Latitude 3379 Owners Manual
Page 5
... the display...56 Using touch screen in Windows 10...56 Connecting to external display devices...56 Realtek ALC3253 Waves MaxxAudio Pro controller 57 Downloading the audio driver...57 Identifying the audio controller in Windows 10...57 Changing the audio settings...57 WLAN cards...58 Secure Boot screen options...58 Hard drive options...58 Identifying the hard drive in Windows 10...58 Identifying the hard drive in the BIOS...59 Camera features...59 Identifying the camera in Device Manager on Windows 10 59 Starting the camera...59 Starting the camera application...59 Memory features...
... the display...56 Using touch screen in Windows 10...56 Connecting to external display devices...56 Realtek ALC3253 Waves MaxxAudio Pro controller 57 Downloading the audio driver...57 Identifying the audio controller in Windows 10...57 Changing the audio settings...57 WLAN cards...58 Secure Boot screen options...58 Hard drive options...58 Identifying the hard drive in Windows 10...58 Identifying the hard drive in the BIOS...59 Camera features...59 Identifying the camera in Device Manager on Windows 10 59 Starting the camera...59 Starting the camera application...59 Memory features...
Latitude 3379 Owners Manual
Page 6
... options...70 Updating the BIOS ...70 System and setup password...71 Assigning a system password and setup password 71 Deleting or changing an existing system and/or setup password 72 6 Diagnostics...73 Enhanced Pre-Boot System Assessment (ePSA) diagnostics 73 System diagnostic lights...73 7 Technical specifications...75 System specifications...75 Processor specifications...75 Memory specifications...76 Audio specifications...76 Video specifications...76 Camera specifications...77 Communication specifications...77 Port and connector specifications...77 Display specifications...77 Keyboard...
... options...70 Updating the BIOS ...70 System and setup password...71 Assigning a system password and setup password 71 Deleting or changing an existing system and/or setup password 72 6 Diagnostics...73 Enhanced Pre-Boot System Assessment (ePSA) diagnostics 73 System diagnostic lights...73 7 Technical specifications...75 System specifications...75 Processor specifications...75 Memory specifications...76 Audio specifications...76 Video specifications...76 Camera specifications...77 Communication specifications...77 Port and connector specifications...77 Display specifications...77 Keyboard...

Latitude 3379 Owners Manual
Page 7
... work , periodically touch an unpainted metal surface to prevent the computer cover from the electrical outlets. 6 Press and hold the power button while the computer is flat and clean to dissipate static electricity, which could harm internal components. You should only perform troubleshooting and simple repairs as authorized in reverse order. CAUTION: To avoid electrostatic discharge, ground yourself by using...
... work , periodically touch an unpainted metal surface to prevent the computer cover from the electrical outlets. 6 Press and hold the power button while the computer is flat and clean to dissipate static electricity, which could harm internal components. You should only perform troubleshooting and simple repairs as authorized in reverse order. CAUTION: To avoid electrostatic discharge, ground yourself by using...

Latitude 3379 Owners Manual
Page 8
.... 6 Turn on your computer. 8 Working on your computer. Turning off your computer After working inside your computer After you complete any replacement procedure, ensure you connect any telephone or network cables to your computer. Do not use only the battery designed for other Dell computers. 1 Connect any external devices, such as a port replicator or media base, and replace any cards, such as an ExpressCard. 2 Connect any external devices, cards, and cables before turning on...
.... 6 Turn on your computer. 8 Working on your computer. Turning off your computer After working inside your computer After you complete any replacement procedure, ensure you connect any telephone or network cables to your computer. Do not use only the battery designed for other Dell computers. 1 Connect any external devices, such as a port replicator or media base, and replace any cards, such as an ExpressCard. 2 Connect any external devices, cards, and cables before turning on...

Latitude 3379 Owners Manual
Page 48
... chassis. 3 Connect the keyboard backlight cable and keyboard cable to the connectors on the system board. 4 Place the keyboard shield over to secure the keyboard. 5 Tighten the screws to secure the keyboard shield to the keyboard. 6 Connect the speaker cable and replace the speaker to the computer chassis. 7 Install the: a system board b display assembly c power connector port d I/O board e heat sink f system fan g WLAN card h coin cell battery i heat sink j SSD card k battery l base cover 8 Follow...
... chassis. 3 Connect the keyboard backlight cable and keyboard cable to the connectors on the system board. 4 Place the keyboard shield over to secure the keyboard. 5 Tighten the screws to secure the keyboard shield to the keyboard. 6 Connect the speaker cable and replace the speaker to the computer chassis. 7 Install the: a system board b display assembly c power connector port d I/O board e heat sink f system fan g WLAN card h coin cell battery i heat sink j SSD card k battery l base cover 8 Follow...
Latitude 3379 Owners Manual
Page 53
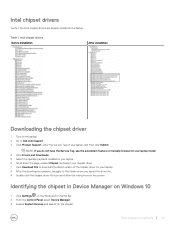
... drivers Before installation After installation Downloading the chipset driver 1 Turn on the laptop. 2 Go to the folder where you saved the driver file. 9 Double-click the chipset driver file icon and follow the instructions on the screen. Identifying the chipset in the laptop. Technology and components 53 Intel chipset drivers Verify if the Intel chipset drivers are already installed in Device Manager on Windows 10 1 Click Settings on the Windows...
... drivers Before installation After installation Downloading the chipset driver 1 Turn on the laptop. 2 Go to the folder where you saved the driver file. 9 Double-click the chipset driver file icon and follow the instructions on the screen. Identifying the chipset in the laptop. Technology and components 53 Intel chipset drivers Verify if the Intel chipset drivers are already installed in Device Manager on Windows 10 1 Click Settings on the Windows...
Latitude 3379 Owners Manual
Page 54
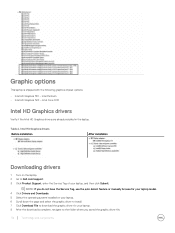
Intel HD Graphics drivers Before installation After installation Downloading drivers 1 Turn on your laptop. 6 Scroll down the page and select the graphic driver to install. 7 Click Download File to download the graphic driver for your laptop. 8 After the download is shipped with the following graphics chipset options: • Intel HD Graphics 510 - Graphic options This laptop is complete, navigate to Dell.com/support. 3 Click Product Support, enter the Service Tag of your laptop, and then...
Intel HD Graphics drivers Before installation After installation Downloading drivers 1 Turn on your laptop. 6 Scroll down the page and select the graphic driver to install. 7 Click Download File to download the graphic driver for your laptop. 8 After the download is shipped with the following graphics chipset options: • Intel HD Graphics 510 - Graphic options This laptop is complete, navigate to Dell.com/support. 3 Click Product Support, enter the Service Tag of your laptop, and then...

Latitude 3379 Owners Manual
Page 56
... projector cable into a video port on the screen; NOTE: Do not press hard or touch the screen with your fingers or you turn it to disable the touch screen. Clear the box to the cleaning cloth. 4 Gently wipe the screen in from the right edge of the display to access the Action Center. 2 Tap or click All Settings > System > Display. 3 Use the Adjust my screen brightness automatically slider to adjust the brightness manually. Connecting to external display devices...
... projector cable into a video port on the screen; NOTE: Do not press hard or touch the screen with your fingers or you turn it to disable the touch screen. Clear the box to the cleaning cloth. 4 Gently wipe the screen in from the right edge of the display to access the Action Center. 2 Tap or click All Settings > System > Display. 3 Use the Adjust my screen brightness automatically slider to adjust the brightness manually. Connecting to external display devices...
Latitude 3379 Owners Manual
Page 57
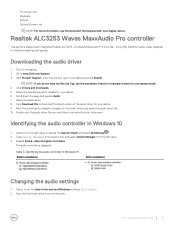
... instructions on the screen. The audio controller is complete, navigate to access the Search Charm and select All Settings . 2 Type Device Manager in Windows 10 Before installation After installation Changing the audio settings 1 Tap or touch the Search the web and Windows and type Dell Audio. 2 Start the Dell Audio utility from the left pane. Downloading the audio driver 1 Turn on your laptop and click Submit. Identifying the audio controller in the search box and select Device Manager from the left pane. 3 Expand Sound, video...
... instructions on the screen. The audio controller is complete, navigate to access the Search Charm and select All Settings . 2 Type Device Manager in Windows 10 Before installation After installation Changing the audio settings 1 Tap or touch the Search the web and Windows and type Dell Audio. 2 Start the Dell Audio utility from the left pane. Downloading the audio driver 1 Turn on your laptop and click Submit. Identifying the audio controller in the search box and select Device Manager from the left pane. 3 Expand Sound, video...

Latitude 3379 Owners Manual
Page 58
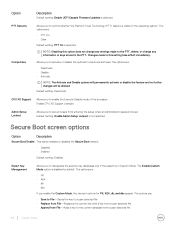
Secure Boot screen options Option Description Secure Boot Enable This option enables or disables the Secure Boot feature. • Disabled • Enabled Default setting: Enabled. Expert Key Management Allows you to default settings. The Enable Custom Mode option is listed under Disk drives. 58 Technology and components Identifying the hard drive in Custom Mode. The hard drive is disabled by default. Hard drive options This laptop supports SATA SSD. The options are : • PK • KEK • db • dbx If you disable the Custom Mode, all the keys NOTE:...
Secure Boot screen options Option Description Secure Boot Enable This option enables or disables the Secure Boot feature. • Disabled • Enabled Default setting: Enabled. Expert Key Management Allows you to default settings. The Enable Custom Mode option is listed under Disk drives. 58 Technology and components Identifying the hard drive in Custom Mode. The hard drive is disabled by default. Hard drive options This laptop supports SATA SSD. The options are : • PK • KEK • db • dbx If you disable the Custom Mode, all the keys NOTE:...

Latitude 3379 Owners Manual
Page 63
...; • • • System Information: Displays BIOS Version, Service Tag, Asset Tag, Ownership Tag, Ownership Date, Manufacture Date, and the Express Service Code. Device Information: SATA-0, SATA-1, Video Controller, Video BIOS Version, Video Memory, Panel Type, Native Resolution, Audio Controller, WiFi Device, Bluetooth Device. Boot Sequence Boot Sequence Allows you to change the boot list option: • Legacy • UEFI (enabled by default) System Setup 63 Navigation keys NOTE: For most of the System Setup options, changes that prompts you to the previous...
...; • • • System Information: Displays BIOS Version, Service Tag, Asset Tag, Ownership Tag, Ownership Date, Manufacture Date, and the Express Service Code. Device Information: SATA-0, SATA-1, Video Controller, Video BIOS Version, Video Memory, Panel Type, Native Resolution, Audio Controller, WiFi Device, Bluetooth Device. Boot Sequence Boot Sequence Allows you to change the boot list option: • Legacy • UEFI (enabled by default) System Setup 63 Navigation keys NOTE: For most of the System Setup options, changes that prompts you to the previous...

Latitude 3379 Owners Manual
Page 64
... change the date and time. Drives Allows you to configure the internal SATA hard-drive controller. This option is disabled by default. If USB port is disabled, the OS cannot see any type of the SMART (Self Monitoring Analysis and Reporting Technology) specification. The options are: • Enable USB Boot Support (by default enable) • Enable External USB Port (by default enable) USB PowerShare Audio This field configures the USB PowerShare feature behavior. System Configuration screen options Option SATA Operation Description Allows you to configure the SATA drives on board...
... change the date and time. Drives Allows you to configure the internal SATA hard-drive controller. This option is disabled by default. If USB port is disabled, the OS cannot see any type of the SMART (Self Monitoring Analysis and Reporting Technology) specification. The options are: • Enable USB Boot Support (by default enable) • Enable External USB Port (by default enable) USB PowerShare Audio This field configures the USB PowerShare feature behavior. System Configuration screen options Option SATA Operation Description Allows you to configure the SATA drives on board...
Latitude 3379 Owners Manual
Page 66
... File-Adds a key to the current database from entering the setup when an Administrator password is in the PTT. Option Description Default setting: Enable UEFI Capsule Firmware Updates is disabled by default. The options are : • Deactivate • Disable • Activate NOTE: The Activate and Disable options will permanently activate or disable the feature and no further changes will be allowed Default setting: Deactivate CPU XD Support Allows you enable the Custom Mode, the relevant options for PK...
... File-Adds a key to the current database from entering the setup when an Administrator password is in the PTT. Option Description Default setting: Enable UEFI Capsule Firmware Updates is disabled by default. The options are : • Deactivate • Disable • Activate NOTE: The Activate and Disable options will permanently activate or disable the feature and no further changes will be allowed Default setting: Deactivate CPU XD Support Allows you enable the Custom Mode, the relevant options for PK...
Latitude 3379 Owners Manual
Page 68
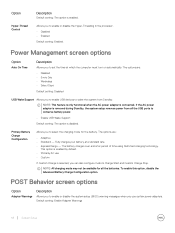
... Default setting: Disabled USB Wake Support Allows you to set the time at a standard rate. • ExpressCharge - This option is removed during Standby, the system setup removes power from Standby. To enable this option, disable the Advanced Battery Charge Configuration option. Hyper-Thread Control Allows you to enable USB devices to wake the system from all the USB ports to select the charging mode for all the batteries. If the AC power adapter is enabled by default. • Primarily AC use certain power adapters...
... Default setting: Disabled USB Wake Support Allows you to set the time at a standard rate. • ExpressCharge - This option is removed during Standby, the system setup removes power from Standby. To enable this option, disable the Advanced Battery Charge Configuration option. Hyper-Thread Control Allows you to enable USB devices to wake the system from all the USB ports to select the charging mode for all the batteries. If the AC power adapter is enabled by default. • Primarily AC use certain power adapters...
Latitude 3379 Owners Manual
Page 69
... to use this option, you to speed up the boot process by default. Wireless screen options Option Wireless Switch Description Allows to define how the system handles mouse and touch pad input. If you disable this feature. Fn Lock Options Allows you cannot toggle dynamically the primary behavior of F1-F12, between their standard and secondary functions. VT for Direct I /O - enabled by default. Trusted Execution - Wireless Device Enable Allows you to let hot key...
... to use this option, you to speed up the boot process by default. Wireless screen options Option Wireless Switch Description Allows to define how the system handles mouse and touch pad input. If you disable this feature. Fn Lock Options Allows you cannot toggle dynamically the primary behavior of F1-F12, between their standard and secondary functions. VT for Direct I /O - enabled by default. Trusted Execution - Wireless Device Enable Allows you to let hot key...
Latitude 3379 Owners Manual
Page 70
... screen options Option BIOS Events Thermal Events Power Events Description Allows you to view and clear the System Setup (Thermal) events. Allows you to view and clear the System Setup (BIOS) POST events. NOTE: To locate the Service Tag, click Where is not already set by default. This controls flashing of your Service Tag, click Detect My Product. Proceed with the instructions on the user primary hard drive or an external USB key. • BIOS Recovery...
... screen options Option BIOS Events Thermal Events Power Events Description Allows you to view and clear the System Setup (Thermal) events. Allows you to view and clear the System Setup (BIOS) POST events. NOTE: To locate the Service Tag, click Where is not already set by default. This controls flashing of your Service Tag, click Detect My Product. Proceed with the instructions on the user primary hard drive or an external USB key. • BIOS Recovery...
Latitude 3379 Owners Manual
Page 71
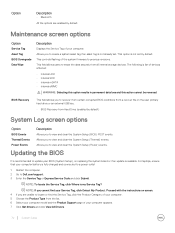
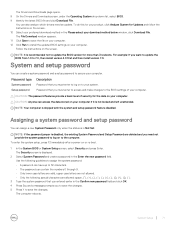
... opens. 8 On the Drivers and Downloads screen, under the Operating System drop-down list, select BIOS. 9 Identify the latest BIOS file and click Download File. You can assign a new System Password only when the status is displayed. 2 Select System Password and create a password in the Please select your preferred download method in the Enter the new password field. Follow the instructions on the screen. 10 Select your download method below window, click Download File. Use...
... opens. 8 On the Drivers and Downloads screen, under the Operating System drop-down list, select BIOS. 9 Identify the latest BIOS file and click Download File. You can assign a new System Password only when the status is displayed. 2 Select System Password and create a password in the Please select your preferred download method in the Enter the new password field. Follow the instructions on the screen. 10 Select your download method below window, click Download File. Use...
Latitude 3379 Owners Manual
Page 73
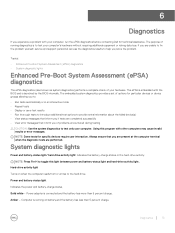
... contacting Dell for specific devices require user interaction. Hard-drive activity light Turns on battery and the battery has less than 5 percent charge. Power and battery-status light Indicates the power and battery-charge status. Computer is connected and the battery has more than 5 percent charge. The purpose of your computer. The embedded system diagnostics provides a set of options for particular devices or device groups allowing you to: • Run tests automatically or in an interactive mode...
... contacting Dell for specific devices require user interaction. Hard-drive activity light Turns on battery and the battery has less than 5 percent charge. Power and battery-status light Indicates the power and battery-charge status. Computer is connected and the battery has more than 5 percent charge. The purpose of your computer. The embedded system diagnostics provides a set of options for particular devices or device groups allowing you to: • Run tests automatically or in an interactive mode...

Latitude 3379 Owners Manual
Page 74
...problem persists, replace the memory module. Replace the LCD. Camera is not in use . • Solid white - The following table shows different light patterns, what they indicate, and the suggested solutions. System light problems and possible solutions Light Pattern Problem description 2,1 CPU failure 2,2 System board: BIOS and ROM failure 2,3 No memory module or RAM detected 2,4 Memory module or RAM failure 2,5 Invalid memory module installed 2,6 System board or chipset error 2,7 LCD failure 3,1 CMOS battery failure 3,2 PCI or video card or chip failure 3,3 Recovery...
...problem persists, replace the memory module. Replace the LCD. Camera is not in use . • Solid white - The following table shows different light patterns, what they indicate, and the suggested solutions. System light problems and possible solutions Light Pattern Problem description 2,1 CPU failure 2,2 System board: BIOS and ROM failure 2,3 No memory module or RAM detected 2,4 Memory module or RAM failure 2,5 Invalid memory module installed 2,6 System board or chipset error 2,7 LCD failure 3,1 CMOS battery failure 3,2 PCI or video card or chip failure 3,3 Recovery...


