
Owner's Manual
Page 7
...Dell Technical Update Service 87 Dell Diagnostics 87 When to Use the Dell Diagnostics 87 Starting the Dell Diagnostics From Your Hard Drive 87 Starting the Dell Diagnostics From the Drivers and Utilities CD 88 Dell Diagnostics Main Menu 89 Dell Support Utility 90 Accessing the Dell Support Utility 90 Clicking the Dell Support Icon 91 Double-Clicking the Dell... 98 External Keyboard Problems 98 Unexpected Characters 98 Lockups and Software Problems 99 The Computer Does Not Start Up 99 The Computer Stops Responding 99 A Program Stops Responding or Crashes Repeatedly 99 A Program ...
...Dell Technical Update Service 87 Dell Diagnostics 87 When to Use the Dell Diagnostics 87 Starting the Dell Diagnostics From Your Hard Drive 87 Starting the Dell Diagnostics From the Drivers and Utilities CD 88 Dell Diagnostics Main Menu 89 Dell Support Utility 90 Accessing the Dell Support Utility 90 Clicking the Dell Support Icon 91 Double-Clicking the Dell... 98 External Keyboard Problems 98 Unexpected Characters 98 Lockups and Software Problems 99 The Computer Does Not Start Up 99 The Computer Stops Responding 99 A Program Stops Responding or Crashes Repeatedly 99 A Program ...

Owner's Manual
Page 13
...the instructions on your computing environment, software updates, and relevant self-support information. Upgrade information for correct operation of your computing environment Dell Support Utility The Dell Support Utility is necessary for components, such as memory, the hard drive, and the operating system • Customer Care - ...XP • How to work with programs and files • How to personalize my desktop Windows Help and Support Center 1 Click the Start button and click Help and Support. 2 Type a word or phrase that describes your problem and click the arrow icon. 3 Click ...
...the instructions on your computing environment, software updates, and relevant self-support information. Upgrade information for correct operation of your computing environment Dell Support Utility The Dell Support Utility is necessary for components, such as memory, the hard drive, and the operating system • Customer Care - ...XP • How to work with programs and files • How to personalize my desktop Windows Help and Support Center 1 Click the Start button and click Help and Support. 2 Type a word or phrase that describes your problem and click the arrow icon. 3 Click ...
Owner's Manual
Page 29
... before you set up an Internet connection with a provided ISP desktop shortcut: 1 Save and close any open files, and exit any open programs. 2 Click the Start button and click Internet Explorer. With a DSL connection, you need a modem or network connection and an Internet service provider (ISP). The New Connection Wizard appears...
... before you set up an Internet connection with a provided ISP desktop shortcut: 1 Save and close any open files, and exit any open programs. 2 Click the Start button and click Internet Explorer. With a DSL connection, you need a modem or network connection and an Internet service provider (ISP). The New Connection Wizard appears...

Owner's Manual
Page 31
... computer. screen, click New Computer and click Next. 5 On the Do you chose for the File Transfer 1 Click Start→ All Programs→ Accessories→ System Tools→ Files and Settings Transfer Wizard. 2 Start the Files and Settings Transfer Wizard. 3 When the Files and Settings Transfer Wizard welcome screen appears, click Next...
... computer. screen, click New Computer and click Next. 5 On the Do you chose for the File Transfer 1 Click Start→ All Programs→ Accessories→ System Tools→ Files and Settings Transfer Wizard. 2 Start the Files and Settings Transfer Wizard. 3 When the Files and Settings Transfer Wizard welcome screen appears, click Next...
Owner's Manual
Page 32
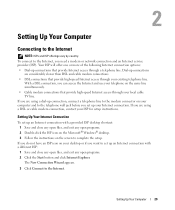
...this ? screen, select the method you want to your new computer. screen, click I want to create a Wizard Disk in the following steps: 1 Click Start→ All Programs→ Accessories→ System Tools→ Files and Settings Transfer Wizard. 2 When the Files and Settings Transfer Wizard welcome screen appears, ... applies them to transfer and click Next. Copy Data From the Old Computer 1 On the old computer, insert the wizard disk. 2 Click the Start button and click Run. 3 In the Open field on the Run window, browse to the path for transferring your old computer message appears, do...
...this ? screen, select the method you want to your new computer. screen, click I want to create a Wizard Disk in the following steps: 1 Click Start→ All Programs→ Accessories→ System Tools→ Files and Settings Transfer Wizard. 2 When the Files and Settings Transfer Wizard welcome screen appears, ... applies them to transfer and click Next. Copy Data From the Old Computer 1 On the old computer, insert the wizard disk. 2 Click the Start button and click Run. 3 In the Open field on the Run window, browse to the path for transferring your old computer message appears, do...

Owner's Manual
Page 37
... Brightness Meter appears, but the brightness level on using QuickSet, right-click the icon in the lower-right corner of the display when you start the computer with an external device (such as an external monitor or projector) attached and turned on, the image may appear on either the... computer display or the external device, depending on the keyboard.The Dell QuickSet Brightness Meter shows the current brightness setting for the display. Press to a preferred location. Using the Display 37 NOTE: By default, the...
... Brightness Meter appears, but the brightness level on using QuickSet, right-click the icon in the lower-right corner of the display when you start the computer with an external device (such as an external monitor or projector) attached and turned on, the image may appear on either the... computer display or the external device, depending on the keyboard.The Dell QuickSet Brightness Meter shows the current brightness setting for the display. Press to a preferred location. Using the Display 37 NOTE: By default, the...
Owner's Manual
Page 38
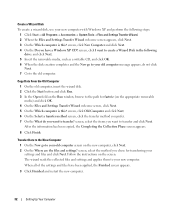
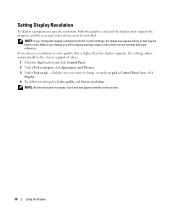
If you choose a resolution or color palette that is higher than the display supports, the settings adjust automatically to the closest supported values. 1 Click the Start button and click Control Panel. 2 Under Pick a category, click Appearance and Themes. 3 Under Pick a task..., click the area you want to read. Setting Display Resolution ...
If you choose a resolution or color palette that is higher than the display supports, the settings adjust automatically to the closest supported values. 1 Click the Start button and click Control Panel. 2 Under Pick a category, click Appearance and Themes. 3 Under Pick a task..., click the area you want to read. Setting Display Resolution ...

Owner's Manual
Page 43
... or explosion. NOTE: Because the battery may increase the risk of your computer. To view battery charge status, click the Start button, point to an electrical outlet the first time you when the battery charge is recommended that shipped with household waste. CAUTION...ExpressCards, media memory cards, or USB devices • Using high-brightness display settings, 3D screen savers, or other computers with your Dell™ portable computer with a compatible battery purchased from other power-intensive programs such as standard equipment in the Product Information Guide. ...
... or explosion. NOTE: Because the battery may increase the risk of your computer. To view battery charge status, click the Start button, point to an electrical outlet the first time you when the battery charge is recommended that shipped with household waste. CAUTION...ExpressCards, media memory cards, or USB devices • Using high-brightness display settings, 3D screen savers, or other computers with your Dell™ portable computer with a compatible battery purchased from other power-intensive programs such as standard equipment in the Product Information Guide. ...
Owner's Manual
Page 46
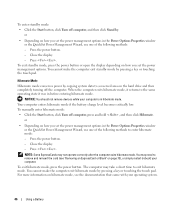
...following methods: - When the computer exits hibernate mode, it was in hibernate mode. Press . To enter standby mode: • Click the Start button, click Turn off computer, and then click Stand by pressing a key or touching the touch pad. You cannot make the computer exit ...- Hibernate Mode Hibernate mode conserves power by pressing a key or touching the touch pad. To manually enter hibernate mode: • Click the Start button, click Turn off computer, press and hold , and then click Hibernate. Your computer enters hibernate mode if the battery charge level becomes...
...following methods: - When the computer exits hibernate mode, it was in hibernate mode. Press . To enter standby mode: • Click the Start button, click Turn off computer, and then click Stand by pressing a key or touching the touch pad. You cannot make the computer exit ...- Hibernate Mode Hibernate mode conserves power by pressing a key or touching the touch pad. To manually enter hibernate mode: • Click the Start button, click Turn off computer, press and hold , and then click Hibernate. Your computer enters hibernate mode if the battery charge level becomes...

Owner's Manual
Page 47
...in about 1 hour and to work with your computer or being used in your Dell™ computer. When you connect the computer to an electrical outlet.The battery is connected to start charging if the light flashes alternately orange and green. Then connect the computer to... button in the Power Management Wizard. • To access the Power Options Properties window, click the Start button→ Control Panel→ Power Options. Charging the Battery NOTE: With Dell™ ExpressCharge™, when the computer is designed to 100 percent in approximately 2 hours. For information...
...in about 1 hour and to work with your computer or being used in your Dell™ computer. When you connect the computer to an electrical outlet.The battery is connected to start charging if the light flashes alternately orange and green. Then connect the computer to... button in the Power Management Wizard. • To access the Power Options Properties window, click the Start button→ Control Panel→ Power Options. Charging the Battery NOTE: With Dell™ ExpressCharge™, when the computer is designed to 100 percent in approximately 2 hours. For information...
Owner's Manual
Page 49
...the QuickSet icon and select Help. Dell™ QuickSet Features NOTE: This feature may not be available on what you can start it by either clicking, doubleclicking, or right-clicking the QuickSet icon, , in the Microsoft® Windows® taskbar. Dell™ QuickSet Features 49 The taskbar... is located in Dell™ QuickSet, you want to configure or view ...
...the QuickSet icon and select Help. Dell™ QuickSet Features NOTE: This feature may not be available on what you can start it by either clicking, doubleclicking, or right-clicking the QuickSet icon, , in the Microsoft® Windows® taskbar. Dell™ QuickSet Features 49 The taskbar... is located in Dell™ QuickSet, you want to configure or view ...
Owner's Manual
Page 53
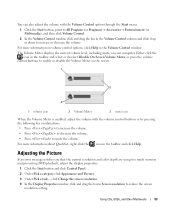
...you that the current resolution and color depth are using too much memory and preventing DVD playback, adjust the display properties. 1 Click the Start button and click Control Panel. 2 Under Pick a category, click Appearance and Themes. 3 Under Pick a task..., click Change the screen ... volume icon 2 Volume Meter 3 mute icon When the Volume Meter is enabled, adjust the volume with the Volume Control option through the Start menu. 1 Click the Start button, point to All Programs (or Programs)→ Accessories→ Entertainment (or Multimedia), and then click Volume Control. 2 In the ...
...you that the current resolution and color depth are using too much memory and preventing DVD playback, adjust the display properties. 1 Click the Start button and click Control Panel. 2 Under Pick a category, click Appearance and Themes. 3 Under Pick a task..., click Change the screen ... volume icon 2 Volume Meter 3 mute icon When the Volume Meter is enabled, adjust the volume with the Volume Control option through the Start menu. 1 Click the Start button, point to All Programs (or Programs)→ Accessories→ Entertainment (or Multimedia), and then click Volume Control. 2 In the ...

Owner's Manual
Page 54
... corner of a CD or DVD. NOTE: Most commercial DVDs have copyright protection and cannot be copied using Sonic DigitalMedia. 1 Click the Start button, point to and may vary by Dell may not read DVD+/-R, DVD+/-RW and DVD+R DL (dual layer) media, but cannot write to All Programs→ Sonic→ DigitalMedia... DVDs. NOTE: The types of CD or DVD drives offered by country. For help, open Sonic DigitalMedia and then click the question mark icon in Dell™ computers can write to and read DVD-RAM or DVD-R DL media. If you have a CD-RW/DVD combo drive and you have a CD...
... corner of a CD or DVD. NOTE: Most commercial DVDs have copyright protection and cannot be copied using Sonic DigitalMedia. 1 Click the Start button, point to and may vary by Dell may not read DVD+/-R, DVD+/-RW and DVD+R DL (dual layer) media, but cannot write to All Programs→ Sonic→ DigitalMedia... DVDs. NOTE: The types of CD or DVD drives offered by country. For help, open Sonic DigitalMedia and then click the question mark icon in Dell™ computers can write to and read DVD-RAM or DVD-R DL media. If you have a CD-RW/DVD combo drive and you have a CD...

Owner's Manual
Page 55
... No No No Helpful Tips • Use Microsoft® Windows® Explorer to drag and drop files to a CD-R or CD-RW only after you start Sonic DigitalMedia and open a DigitalMedia project. • Use CD-Rs to permanently store large amounts of information. After you create a DVD+/-R disc, you want to...
... No No No Helpful Tips • Use Microsoft® Windows® Explorer to drag and drop files to a CD-R or CD-RW only after you start Sonic DigitalMedia and open a DigitalMedia project. • Use CD-Rs to permanently store large amounts of information. After you create a DVD+/-R disc, you want to...

Owner's Manual
Page 56
...file to its maximum capacity; NOTICE: You cannot reinstall the Dell Media Experience or Dell MediaDirect feature if you made when ordering your computer, your computer, launch Dell Media Experience through the Start→ All Programs function or click the Media Experience icon...Use a blank CD-RW to start the computer and automatically launch the Dell MediaDirect application. You can press the Dell MediaDirect button to practice CD recording until you can limit Dell MediaDirect's functionality. Using Dell Media Experience and Dell MediaDirect™ Based on configuration ...
...file to its maximum capacity; NOTICE: You cannot reinstall the Dell Media Experience or Dell MediaDirect feature if you made when ordering your computer, your computer, launch Dell Media Experience through the Start→ All Programs function or click the Media Experience icon...Use a blank CD-RW to start the computer and automatically launch the Dell MediaDirect application. You can press the Dell MediaDirect button to practice CD recording until you can limit Dell MediaDirect's functionality. Using Dell Media Experience and Dell MediaDirect™ Based on configuration ...

Owner's Manual
Page 69
...Headphones NOTE: The CL headphone feature is available only if your computer has a DVD drive, you can enable digital audio for DVD playback. 1 Click Start, and point to All Programs, and click PowerDVD to launch the Cyberlink PowerDVD application. 2 Insert a DVD into the DVD drive. Enabling S/PDIF ...Digital Audio If your computer has a DVD drive, you can enable digital audio for DVD playback. 1 Click Start, and point to All Programs, and click PowerDVD to launch the Cyberlink PowerDVD program. 2 Insert a DVD into the DVD drive. If the DVD begins...
...Headphones NOTE: The CL headphone feature is available only if your computer has a DVD drive, you can enable digital audio for DVD playback. 1 Click Start, and point to All Programs, and click PowerDVD to launch the Cyberlink PowerDVD application. 2 Insert a DVD into the DVD drive. Enabling S/PDIF ...Digital Audio If your computer has a DVD drive, you can enable digital audio for DVD playback. 1 Click Start, and point to All Programs, and click PowerDVD to launch the Cyberlink PowerDVD program. 2 Insert a DVD into the DVD drive. If the DVD begins...
Owner's Manual
Page 70
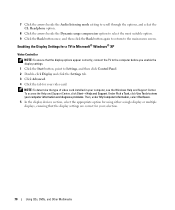
...3 Click Advanced. 4 Click the tab for your selection. 70 Using CDs, DVDs, and Other Multimedia To access the Help and Support Center, click Start→ Help and Support. Under Pick a Task, click Use Tools to view your computer information and diagnose problems. Then, under My Computer Information, ...multiple displays, ensuring that the display options appear correctly, connect the TV to the computer before you enable the display settings. 1 Click the Start button, point to the main menu screen. NOTE: To determine the type of video card installed in Microsoft® Windows® XP Video...
...3 Click Advanced. 4 Click the tab for your selection. 70 Using CDs, DVDs, and Other Multimedia To access the Help and Support Center, click Start→ Help and Support. Under Pick a Task, click Use Tools to view your computer information and diagnose problems. Then, under My Computer Information, ...multiple displays, ensuring that the display options appear correctly, connect the TV to the computer before you enable the display settings. 1 Click the Start button, point to the main menu screen. NOTE: To determine the type of video card installed in Microsoft® Windows® XP Video...

Owner's Manual
Page 78
The access point or wireless router and the wireless network card in a home or small office. 1 Click the Start button, point to All Programs→ Accessories→ Communications, and then click Network Setup Wizard. 2 On the welcome screen, click Next. 3 Click Checklist for creating...8226; A wireless network card for your computer has a wireless network card and to determine the type of card, use one of the following: • The Start button and the Connect To option • The order confirmation for each other over the air waves. Network Setup Wizard The Microsoft® Windows®...
The access point or wireless router and the wireless network card in a home or small office. 1 Click the Start button, point to All Programs→ Accessories→ Communications, and then click Network Setup Wizard. 2 On the welcome screen, click Next. 3 Click Checklist for creating...8226; A wireless network card for your computer has a wireless network card and to determine the type of card, use one of the following: • The Start button and the Connect To option • The order confirmation for each other over the air waves. Network Setup Wizard The Microsoft® Windows®...

Owner's Manual
Page 79
...that there is set up a wireless Internet connection. If Wireless Network Connection does not appear, you can view network connections by clicking the Start button, pointing to Settings, and then pointing to a Network or Broadband Modem" on the General tab. Your wireless router may not ...and troubleshooting information. NOTE: Wait for your broadband modem before you continue with an installation CD. Start Button and Connect To Option 1 Click the Start button. 2 Point to the Classic Start menu option, you may not have been shipped with the network setup. 7 Disconnect the AC ...
...that there is set up a wireless Internet connection. If Wireless Network Connection does not appear, you can view network connections by clicking the Start button, pointing to Settings, and then pointing to a Network or Broadband Modem" on the General tab. Your wireless router may not ...and troubleshooting information. NOTE: Wait for your broadband modem before you continue with an installation CD. Start Button and Connect To Option 1 Click the Start button. 2 Point to the Classic Start menu option, you may not have been shipped with the network setup. 7 Disconnect the AC ...

Owner's Manual
Page 80
... of the network cable into the Internet network (RJ-45) connector on the unpowered wireless router. 10 Ensure that name on the Dell Support website at support.dell.com. After 2 minutes, proceed to step 12. 12 Turn on ONLY your wireless router and wait for at least 2 minutes ... boot process completes. 14 See the documentation that you connect to a network via wireless technology. After 2 minutes, proceed to the step 13. 13 Start your wireless network card to connect to the wireless network. See "Connecting to a WLAN. Connecting to a Wireless Local Area Network NOTE: Before you ...
... of the network cable into the Internet network (RJ-45) connector on the unpowered wireless router. 10 Ensure that name on the Dell Support website at support.dell.com. After 2 minutes, proceed to step 12. 12 Turn on ONLY your wireless router and wait for at least 2 minutes ... boot process completes. 14 See the documentation that you connect to a network via wireless technology. After 2 minutes, proceed to the step 13. 13 Start your wireless network card to connect to the wireless network. See "Connecting to a WLAN. Connecting to a Wireless Local Area Network NOTE: Before you ...


