Owner's Manual (PDF)
Page 3
... Begin 7 Turn Off Your Computer and Connected Devices. . . . . 7 Safety Instructions 7 Recommended Tools 8 After Working Inside Your Computer 9 Installing the SIM Card (Optional 11 Procedure 11 Removing the Memory Module(s 13 Procedure 13 Replacing the Memory Module(s 15 Procedure 15 Removing the Optical-Drive Assembly 17 Prerequisites 17 Procedure 17 Replacing the Optical-Drive Assembly 19 Procedure 19 Postrequisites 19 Removing the Keyboard 21 Prerequisites 21 Procedure 21 Replacing the Keyboard 25 Procedure...
... Begin 7 Turn Off Your Computer and Connected Devices. . . . . 7 Safety Instructions 7 Recommended Tools 8 After Working Inside Your Computer 9 Installing the SIM Card (Optional 11 Procedure 11 Removing the Memory Module(s 13 Procedure 13 Replacing the Memory Module(s 15 Procedure 15 Removing the Optical-Drive Assembly 17 Prerequisites 17 Procedure 17 Replacing the Optical-Drive Assembly 19 Procedure 19 Postrequisites 19 Removing the Keyboard 21 Prerequisites 21 Procedure 21 Replacing the Keyboard 25 Procedure...
Owner's Manual (PDF)
Page 5
... 51 Postrequisites 51 Removing the Coin-Cell Battery 53 Prerequisites 53 Procedure 54 Replacing the Coin-Cell Battery 55 Procedure 55 Postrequisites 55 Removing the System Board 57 Prerequisites 57 Procedure 58 Replacing the System Board 61 Procedure 61 Postrequisites 61 Entering the Service Tag in system setup 62 Removing the mSATA Card 63 Prerequisites 63 Procedure 64 Replacing the mSATA Card 65 Procedure 65...
... 51 Postrequisites 51 Removing the Coin-Cell Battery 53 Prerequisites 53 Procedure 54 Replacing the Coin-Cell Battery 55 Procedure 55 Postrequisites 55 Removing the System Board 57 Prerequisites 57 Procedure 58 Replacing the System Board 61 Procedure 61 Postrequisites 61 Entering the Service Tag in system setup 62 Removing the mSATA Card 63 Prerequisites 63 Procedure 64 Replacing the mSATA Card 65 Procedure 65...
Owner's Manual (PDF)
Page 6
... Procedure 76 Replacing the Display Bezel 77 Procedure 77 Postrequisites 77 Removing the Display Panel 79 Prerequisites 79 Procedure 80 Replacing the Display Panel 83 Procedure 83 Postrequisites 83 Removing the Display Hinges 85 Prerequisites 85 Procedure 86 Replacing the Display Hinges 87 Procedure 87 Postrequisites 87 Removing the Camera Module 89 Prerequisites 89 Procedure 90 Replacing the Camera Module 91 Procedure 91 Postrequisites 91 Flashing the BIOS 93 6 | Contents
... Procedure 76 Replacing the Display Bezel 77 Procedure 77 Postrequisites 77 Removing the Display Panel 79 Prerequisites 79 Procedure 80 Replacing the Display Panel 83 Procedure 83 Postrequisites 83 Removing the Display Hinges 85 Prerequisites 85 Procedure 86 Replacing the Display Hinges 87 Procedure 87 Postrequisites 87 Removing the Camera Module 89 Prerequisites 89 Procedure 90 Replacing the Camera Module 91 Procedure 91 Postrequisites 91 Flashing the BIOS 93 6 | Contents
Owner's Manual (PDF)
Page 7
... touching pins and contacts. NOTE: If you are using a different operating system, see the Regulatory Compliance Homepage at dell.com/regulatory_compliance. After you finish working inside the computer, replace all covers, panels, and screws before opening the computer cover or panels. Before You Begin | 7 WARNING: Disconnect all power sources before connecting to open the Charms sidebar, and then click Settings→ Power→ Shutdown. • Windows 7: Click Start...
... touching pins and contacts. NOTE: If you are using a different operating system, see the Regulatory Compliance Homepage at dell.com/regulatory_compliance. After you finish working inside the computer, replace all covers, panels, and screws before opening the computer cover or panels. Before You Begin | 7 WARNING: Disconnect all power sources before connecting to open the Charms sidebar, and then click Settings→ Power→ Shutdown. • Windows 7: Click Start...
Owner's Manual (PDF)
Page 8
...by touching an unpainted metal surface, such as the metal at the back of the components inside your computer and then unplug the cable from the media-card reader. Some cables have connectors with locking tabs or thumb-screws that the connectors and ports ... cable itself. When connecting cables, ensure that you work, periodically touch an unpainted metal surface to dissipate static electricity, which could harm internal components. CAUTION: Only a certified service technician is authorized to remove the computer cover and access any of the computer. See the safety instructions for...
...by touching an unpainted metal surface, such as the metal at the back of the components inside your computer and then unplug the cable from the media-card reader. Some cables have connectors with locking tabs or thumb-screws that the connectors and ports ... cable itself. When connecting cables, ensure that you work, periodically touch an unpainted metal surface to dissipate static electricity, which could harm internal components. CAUTION: Only a certified service technician is authorized to remove the computer cover and access any of the computer. See the safety instructions for...

Owner's Manual (PDF)
Page 9
...; Connect any external devices, cables, cards, and any other part(s) you complete the replacement procedures, ensure the following: • Replace all attached devices to their electrical outlets. CAUTION: Before turning on your computer. • Connect your computer and all screws and ensure that no stray screws remain inside the computer. After Working Inside Your Computer | 9 After Working Inside Your Computer After you removed before working...
...; Connect any external devices, cables, cards, and any other part(s) you complete the replacement procedures, ensure the following: • Replace all attached devices to their electrical outlets. CAUTION: Before turning on your computer. • Connect your computer and all screws and ensure that no stray screws remain inside the computer. After Working Inside Your Computer | 9 After Working Inside Your Computer After you removed before working...
Owner's Manual (PDF)
Page 13
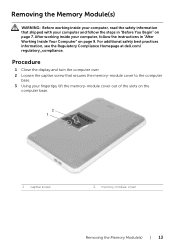
... Homepage at dell.com/ regulatory_compliance. Removing the Memory Module(s) WARNING: Before working inside your computer, read the safety information that secures the memory-module cover to the computer base. 3 Using your computer, follow the steps in "After Working Inside Your Computer" on page 9. After working inside your fingertips, lift the memory-module cover out of the slots on the computer base. 2 1 1 captive screw 2 memory-module cover Removing the Memory Module(s) | 13...
... Homepage at dell.com/ regulatory_compliance. Removing the Memory Module(s) WARNING: Before working inside your computer, read the safety information that secures the memory-module cover to the computer base. 3 Using your computer, follow the steps in "After Working Inside Your Computer" on page 9. After working inside your fingertips, lift the memory-module cover out of the slots on the computer base. 2 1 1 captive screw 2 memory-module cover Removing the Memory Module(s) | 13...
Owner's Manual (PDF)
Page 15
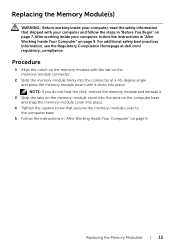
... and follow the instructions in "After Working Inside Your Computer" on page 9. For additional safety best practices information, see the Regulatory Compliance Homepage at a 45-degree angle and press the memory module down until it . 3 Slide the tabs on the memory-module cover into the slots on the computer base and snap the memory-module cover into place. Replacing the Memory Module(s) | 15 NOTE...
... and follow the instructions in "After Working Inside Your Computer" on page 9. For additional safety best practices information, see the Regulatory Compliance Homepage at a 45-degree angle and press the memory module down until it . 3 Slide the tabs on the memory-module cover into the slots on the computer base and snap the memory-module cover into place. Replacing the Memory Module(s) | 15 NOTE...

Owner's Manual (PDF)
Page 17
... best practices information, see the Regulatory Compliance Homepage at dell.com/ regulatory_compliance. Removing the Optical-Drive Assembly WARNING: Before working inside your computer, read the safety information that shipped with your computer and follow the instructions in "After Working Inside Your Computer" on page 9. Prerequisites Follow the instructions from step 1 to step 3 in "Removing the Memory Module(s)" on page 13.
... best practices information, see the Regulatory Compliance Homepage at dell.com/ regulatory_compliance. Removing the Optical-Drive Assembly WARNING: Before working inside your computer, read the safety information that shipped with your computer and follow the instructions in "After Working Inside Your Computer" on page 9. Prerequisites Follow the instructions from step 1 to step 3 in "Removing the Memory Module(s)" on page 13.

Owner's Manual (PDF)
Page 21
..." on page 9. Prerequisites Follow the instructions from step 1 to the system board. 1 1 screw Removing the Keyboard | 21 Procedure 1 Remove the screw that shipped with your computer, read the safety information that secures the keyboard to step 3 in "Before You Begin" on page 13. After working inside your computer, follow the steps in "Removing the Memory Module(s)" on page 7. For additional...
..." on page 9. Prerequisites Follow the instructions from step 1 to the system board. 1 1 screw Removing the Keyboard | 21 Procedure 1 Remove the screw that shipped with your computer, read the safety information that secures the keyboard to step 3 in "Before You Begin" on page 13. After working inside your computer, follow the steps in "Removing the Memory Module(s)" on page 7. For additional...
Owner's Manual (PDF)
Page 27
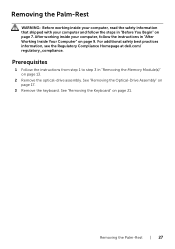
... optical-drive assembly. See "Removing the Optical-Drive Assembly" on page 21. Removing the Palm-Rest | 27 See "Removing the Keyboard" on page 17. 3 Remove the keyboard. After working inside your computer and follow the instructions in "Removing the Memory Module(s)" on page 7. For additional safety best practices information, see the Regulatory Compliance Homepage at dell.com/ regulatory_compliance. Prerequisites 1 Follow the instructions from step 1 to...
... optical-drive assembly. See "Removing the Optical-Drive Assembly" on page 21. Removing the Palm-Rest | 27 See "Removing the Keyboard" on page 17. 3 Remove the keyboard. After working inside your computer and follow the instructions in "Removing the Memory Module(s)" on page 7. For additional safety best practices information, see the Regulatory Compliance Homepage at dell.com/ regulatory_compliance. Prerequisites 1 Follow the instructions from step 1 to...
Owner's Manual (PDF)
Page 33
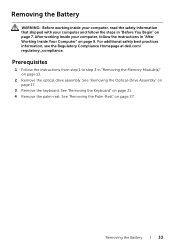
.... 3 Remove the keyboard. See "Removing the Keyboard" on page 13. 2 Remove the optical drive assembly. Removing the Battery WARNING: Before working inside your computer, read the safety information that shipped with your computer, follow the steps in "Before You Begin" on page 7. For additional safety best practices information, see the Regulatory Compliance Homepage at dell.com/ regulatory_compliance. Prerequisites 1 Follow the instructions...
.... 3 Remove the keyboard. See "Removing the Keyboard" on page 13. 2 Remove the optical drive assembly. Removing the Battery WARNING: Before working inside your computer, read the safety information that shipped with your computer, follow the steps in "Before You Begin" on page 7. For additional safety best practices information, see the Regulatory Compliance Homepage at dell.com/ regulatory_compliance. Prerequisites 1 Follow the instructions...
Owner's Manual (PDF)
Page 39
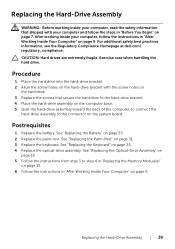
... that secure the hard drive to the hard-drive bracket. 4 Place the hard-drive assembly on the computer base. 5 Slide the hard-drive assembly toward the back of the computer, to connect the hard-drive assembly to step 4 in "Replacing the Memory Module(s)" on page 15. 6 Follow the instructions in "After Working Inside Your Computer" on page 9. Replacing the Hard-Drive Assembly | 39 See "Replacing the Optical-Drive Assembly" on page...
... that secure the hard drive to the hard-drive bracket. 4 Place the hard-drive assembly on the computer base. 5 Slide the hard-drive assembly toward the back of the computer, to connect the hard-drive assembly to step 4 in "Replacing the Memory Module(s)" on page 15. 6 Follow the instructions in "After Working Inside Your Computer" on page 9. Replacing the Hard-Drive Assembly | 39 See "Replacing the Optical-Drive Assembly" on page...

Owner's Manual (PDF)
Page 41
... one , half-height wireless mini-card slot which supports a Wireless Wide Area Network (WWAN) card. Prerequisites 1 Follow the instructions from sources other than Dell. Removing the Wireless Mini-Card WARNING: Before working inside your computer, read the safety information that shipped with your computer, the card is already installed. Your computer has one , full-height wireless mini-card slot which supports a Wireless Local Area Network (WLAN) + Bluetooth combo card. See "Removing the Palm-Rest...
... one , half-height wireless mini-card slot which supports a Wireless Wide Area Network (WWAN) card. Prerequisites 1 Follow the instructions from sources other than Dell. Removing the Wireless Mini-Card WARNING: Before working inside your computer, read the safety information that shipped with your computer, the card is already installed. Your computer has one , full-height wireless mini-card slot which supports a Wireless Local Area Network (WLAN) + Bluetooth combo card. See "Removing the Palm-Rest...
Owner's Manual (PDF)
Page 53
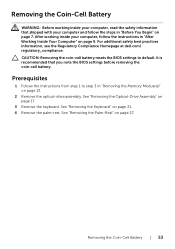
... 7. CAUTION: Removing the coin-cell battery resets the BIOS settings to step 3 in "Removing the Memory Module(s)" on page 17. 3 Remove the keyboard. Removing the Coin-Cell Battery | 53 For additional safety best practices information, see the Regulatory Compliance Homepage at dell.com/ regulatory_compliance. Prerequisites 1 Follow the instructions from step 1 to default. See "Removing the Optical-Drive Assembly" on page 13. 2 Remove the optical-drive assembly. See "Removing the Keyboard" on...
... 7. CAUTION: Removing the coin-cell battery resets the BIOS settings to step 3 in "Removing the Memory Module(s)" on page 17. 3 Remove the keyboard. Removing the Coin-Cell Battery | 53 For additional safety best practices information, see the Regulatory Compliance Homepage at dell.com/ regulatory_compliance. Prerequisites 1 Follow the instructions from step 1 to default. See "Removing the Optical-Drive Assembly" on page 13. 2 Remove the optical-drive assembly. See "Removing the Keyboard" on...
Owner's Manual (PDF)
Page 57
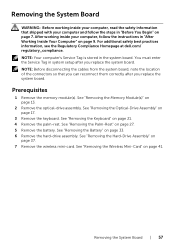
... at dell.com/ regulatory_compliance. Prerequisites 1 Remove the memory module(s). See "Removing the Memory Module(s)" on page 17. 3 Remove the keyboard. See "Removing the Optical-Drive Assembly" on page 13. 2 Remove the optical-drive assembly. See "Removing the Palm-Rest" on page 37. 7 Remove the wireless mini-card. See "Removing the Hard-Drive Assembly" on page 27. 5 Remove the battery. You must enter the Service Tag in system setup after you replace the system board. See "Removing the Wireless Mini-Card...
... at dell.com/ regulatory_compliance. Prerequisites 1 Remove the memory module(s). See "Removing the Memory Module(s)" on page 17. 3 Remove the keyboard. See "Removing the Optical-Drive Assembly" on page 13. 2 Remove the optical-drive assembly. See "Removing the Palm-Rest" on page 37. 7 Remove the wireless mini-card. See "Removing the Hard-Drive Assembly" on page 27. 5 Remove the battery. You must enter the Service Tag in system setup after you replace the system board. See "Removing the Wireless Mini-Card...
Owner's Manual (PDF)
Page 62
Entering the Service Tag in system setup 1 Turn on the computer. 2 Press during POST to enter the system setup program. 3 Navigate to the Main tab and enter your computer's Service Tag in the Service Tag Input field. 62 | Replacing the System Board
Entering the Service Tag in system setup 1 Turn on the computer. 2 Press during POST to enter the system setup program. 3 Navigate to the Main tab and enter your computer's Service Tag in the Service Tag Input field. 62 | Replacing the System Board
Owner's Manual (PDF)
Page 67
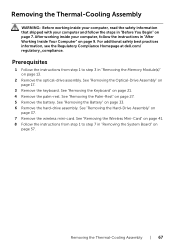
... at dell.com/ regulatory_compliance. See "Removing the Battery" on page 17. 3 Remove the keyboard. See "Removing the Optical-Drive Assembly" on page 33. 6 Remove the hard-drive assembly. See "Removing the Hard-Drive Assembly" on page 13. 2 Remove the optical-drive assembly. Prerequisites 1 Follow the instructions from step 1 to step 3 in "Removing the Memory Module(s)" on page 37. 7 Remove the wireless mini-card. See "Removing the Keyboard" on page 57. See "Removing the Wireless Mini-Card" on...
... at dell.com/ regulatory_compliance. See "Removing the Battery" on page 17. 3 Remove the keyboard. See "Removing the Optical-Drive Assembly" on page 33. 6 Remove the hard-drive assembly. See "Removing the Hard-Drive Assembly" on page 13. 2 Remove the optical-drive assembly. Prerequisites 1 Follow the instructions from step 1 to step 3 in "Removing the Memory Module(s)" on page 37. 7 Remove the wireless mini-card. See "Removing the Keyboard" on page 57. See "Removing the Wireless Mini-Card" on...
Owner's Manual (PDF)
Page 71
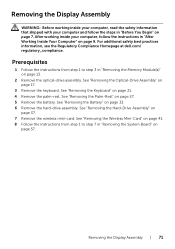
... Compliance Homepage at dell.com/ regulatory_compliance. See "Removing the Wireless Mini-Card" on page 41. 8 Follow the instructions from step 1 to step 7 in "Removing the System Board" on page 13. 2 Remove the optical-drive assembly. See "Removing the Battery" on page 27. 5 Remove the battery. Removing the Display Assembly | 71 See "Removing the Keyboard" on page 9. After working inside your computer and follow the instructions in "Removing the Memory Module(s)" on page...
... Compliance Homepage at dell.com/ regulatory_compliance. See "Removing the Wireless Mini-Card" on page 41. 8 Follow the instructions from step 1 to step 7 in "Removing the System Board" on page 13. 2 Remove the optical-drive assembly. See "Removing the Battery" on page 27. 5 Remove the battery. Removing the Display Assembly | 71 See "Removing the Keyboard" on page 9. After working inside your computer and follow the instructions in "Removing the Memory Module(s)" on page...
Quick Start Guide (PDF)
Page 2
... Conecte el cable de red (opcional) y el adaptador de corriente 2 Press the power button Druk op de aan-uitknop | Appuyez sur le bouton d'alimentation Presione el botón de encendido 3 Complete Windows setup Voltooi de Windows-installatie | Terminez la configuration de Windows Complete la instalación de Windows Enable security Beveiliging inschakelen | Activez la sécurité Activar seguridad Configure wireless (optional) Draadloos...
... Conecte el cable de red (opcional) y el adaptador de corriente 2 Press the power button Druk op de aan-uitknop | Appuyez sur le bouton d'alimentation Presione el botón de encendido 3 Complete Windows setup Voltooi de Windows-installatie | Terminez la configuration de Windows Complete la instalación de Windows Enable security Beveiliging inschakelen | Activez la sécurité Activar seguridad Configure wireless (optional) Draadloos...


