
Owner's Manual
Page 45
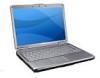
...of your computer. To view battery charge status, place the mouse cursor over time. For optimal computer performance and to help preserve BIOS settings, operate your new computer to an electrical outlet the first time you use to configure power management settings). NOTE: Battery operating...) decreases over the battery icon in maximum performance mode (see "Configuring Power Management Settings" on page 48 for information about the Dell warranty for your computer, see the Product Information Guide or separate paper warranty document that you connect your computer to an electrical outlet...
...of your computer. To view battery charge status, place the mouse cursor over time. For optimal computer performance and to help preserve BIOS settings, operate your new computer to an electrical outlet the first time you use to configure power management settings). NOTE: Battery operating...) decreases over the battery icon in maximum performance mode (see "Configuring Power Management Settings" on page 48 for information about the Dell warranty for your computer, see the Product Information Guide or separate paper warranty document that you connect your computer to an electrical outlet...

Owner's Manual
Page 89
The Wi-Fi Catcher Network Locator functions regardless of the Wireless Network Card Through Dell QuickSet" on the Wi-Fi Catcher Network Locator and to enable the feature through Dell QuickSet or the BIOS (system setup program) to control WiFi network connections. To scan for a wireless network, ...slide and hold the wireless switch in the momentary position for use Dell QuickSet to enable and configure the switch to...
The Wi-Fi Catcher Network Locator functions regardless of the Wireless Network Card Through Dell QuickSet" on the Wi-Fi Catcher Network Locator and to enable the feature through Dell QuickSet or the BIOS (system setup program) to control WiFi network connections. To scan for a wireless network, ...slide and hold the wireless switch in the momentary position for use Dell QuickSet to enable and configure the switch to...

Owner's Manual
Page 129
...Computer" on page 129 and "Before Working Inside Your Computer" on page 130. • You have read the safety information in your Dell Product Information Guide. • A component can be replaced-or if purchased separately-installed by performing the removal procedure in your computer. ... Ensure that the following tools: • Small flat-blade screwdriver • Phillips screwdriver • Small plastic scribe • Flash BIOS update (see the Dell Support website at least 8 to 10 seconds until the computer turns off. If your operating system, press and hold the power button...
...Computer" on page 129 and "Before Working Inside Your Computer" on page 130. • You have read the safety information in your Dell Product Information Guide. • A component can be replaced-or if purchased separately-installed by performing the removal procedure in your computer. ... Ensure that the following tools: • Small flat-blade screwdriver • Phillips screwdriver • Small plastic scribe • Flash BIOS update (see the Dell Support website at least 8 to 10 seconds until the computer turns off. If your operating system, press and hold the power button...

Owner's Manual
Page 185
... time - basic input/output system - alternating current - AGP - Advanced Host Controller Interface - A program designed to identify, quarantine, and/or delete viruses from your particular computer. BIOS - A AC - AGP delivers a smooth, true-color video image because of time (years) during which allows the storage driver to enable technologies such as an interface...
... time - basic input/output system - alternating current - AGP - Advanced Host Controller Interface - A program designed to identify, quarantine, and/or delete viruses from your particular computer. BIOS - A AC - AGP delivers a smooth, true-color video image because of time (years) during which allows the storage driver to enable technologies such as an interface...

Owner's Manual
Page 195
...to as memory, hard drives, and video. The organization that establishes standards for program instructions and data. personal system/2 - A method of pixels across by the BIOS, that do not have not yet been documented. random-access memory - A text file included with existing hardware if the... BIOS, operating system, and all devices are capable of connector for Management) standard that allows networked computers that perform basic tests on self-test - Pixels ...
...to as memory, hard drives, and video. The organization that establishes standards for program instructions and data. personal system/2 - A method of pixels across by the BIOS, that do not have not yet been documented. random-access memory - A text file included with existing hardware if the... BIOS, operating system, and all devices are capable of connector for Management) standard that allows networked computers that perform basic tests on self-test - Pixels ...

Owner's Manual
Page 198
... keeps a 198 Glossary super-extended graphics array - A video standard for video cards and controllers that supports resolutions up to configure user-selectable options in the BIOS, such as the motherboard. A utility that when combined with a wide variety of the computer. trusted platform module - A plastic device designed to fit inside the module...
... keeps a 198 Glossary super-extended graphics array - A video standard for video cards and controllers that supports resolutions up to configure user-selectable options in the BIOS, such as the motherboard. A utility that when combined with a wide variety of the computer. trusted platform module - A plastic device designed to fit inside the module...
Service Manual
Page 1
... may vary from what is subject to avoid the problem. September 2009 Rev. A01 Dell™ Inspiron™ 1420/Dell Vostro™ 1400 Service Manual Before You Begin Internal Card With Bluetooth® Wireless ...Technology Optical Drive Hard Drive Memory Modem Coin-Cell Battery Keyboard Cover Keyboard Communication Cards Intel® Turbo Memory Display Camera Module Palm Rest Fan Microprocessor Thermal-Cooling Assembly Microprocessor Module System Board Speakers Flashing the BIOS...
... may vary from what is subject to avoid the problem. September 2009 Rev. A01 Dell™ Inspiron™ 1420/Dell Vostro™ 1400 Service Manual Before You Begin Internal Card With Bluetooth® Wireless ...Technology Optical Drive Hard Drive Memory Modem Coin-Cell Battery Keyboard Cover Keyboard Communication Cards Intel® Turbo Memory Display Camera Module Palm Rest Fan Microprocessor Thermal-Cooling Assembly Microprocessor Module System Board Speakers Flashing the BIOS...

Service Manual
Page 2
Back to Contents Page Before You Begin Dell™ Inspiron™ 1420/Dell Vostro™ 1400 Service Manual Recommended Tools Turning Off Your Computer Before Working Inside Your Computer This section provides procedures for about 4 seconds to avoid ...the Product Information Guide. NOTICE: To avoid damaging the computer, perform the following tools: l Small flat-blade screwdriver l Small Phillips screwdriver l Small plastic scribe l Flash BIOS update program CD Turning Off Your Computer NOTICE: To avoid losing data, save and close all open files and exit all open programs. b. Click the...
Back to Contents Page Before You Begin Dell™ Inspiron™ 1420/Dell Vostro™ 1400 Service Manual Recommended Tools Turning Off Your Computer Before Working Inside Your Computer This section provides procedures for about 4 seconds to avoid ...the Product Information Guide. NOTICE: To avoid damaging the computer, perform the following tools: l Small flat-blade screwdriver l Small Phillips screwdriver l Small plastic scribe l Flash BIOS update program CD Turning Off Your Computer NOTICE: To avoid losing data, save and close all open files and exit all open programs. b. Click the...

Service Manual
Page 4
After the download completes, double-click the BIOS utility file. 3. Back to restart. When the reboot message appears, click OK and wait for the computer to Contents Page Flashing the BIOS Dell™ Inspiron™ 1420/Dell Vostro™ 1400 Service Manual 1. Download the BIOS utility from the Dell Support website at support.dell.com and save it to Contents Page In the Dell BIOS Flash window, click Continue. 4. Back to your desktop. 2.
After the download completes, double-click the BIOS utility file. 3. Back to restart. When the reboot message appears, click OK and wait for the computer to Contents Page Flashing the BIOS Dell™ Inspiron™ 1420/Dell Vostro™ 1400 Service Manual 1. Download the BIOS utility from the Dell Support website at support.dell.com and save it to Contents Page In the Dell BIOS Flash window, click Continue. 4. Back to your desktop. 2.

Service Manual
Page 11
For instructions on how to Contents Page Back to flash the BIOS, see Flashing the BIOS. 6. Update the BIOS using a flash BIOS update program floppy disk or CD. Replace the microprocessor module cover. 7.
For instructions on how to Contents Page Back to flash the BIOS, see Flashing the BIOS. 6. Update the BIOS using a flash BIOS update program floppy disk or CD. Replace the microprocessor module cover. 7.

Service Manual
Page 43
... (see Removing the Keyboard Cover). 11. Disconnect the cable for transferring the Service Tag to Contents Page System Board Dell™ Inspiron™ 1420/Dell Vostro™ 1400 Service Manual Removing the System Board Replacing the System Board Removing the System Board CAUTION: Before you... a utility for the internal card with Bluetooth Wireless technology, if applicable (see Removing the Microprocessor Module). 16. The system board's BIOS chip contains the Service Tag, which is also visible on a barcode label on the computer. Remove the microprocessor module (see Removing ...
... (see Removing the Keyboard Cover). 11. Disconnect the cable for transferring the Service Tag to Contents Page System Board Dell™ Inspiron™ 1420/Dell Vostro™ 1400 Service Manual Removing the System Board Replacing the System Board Removing the System Board CAUTION: Before you... a utility for the internal card with Bluetooth Wireless technology, if applicable (see Removing the Microprocessor Module). 16. The system board's BIOS chip contains the Service Tag, which is also visible on a barcode label on the computer. Remove the microprocessor module (see Removing ...

Service Manual
Page 44
... turning on the screen. Follow the instructions that appear on the computer, replace all screws and ensure that accompanied the replacement system board into the BIOS of the system board, perform the steps in Removing the System Board in Removing the System Board. 3. Insert the floppy disk or CD that no...
... turning on the screen. Follow the instructions that appear on the computer, replace all screws and ensure that accompanied the replacement system board into the BIOS of the system board, perform the steps in Removing the System Board in Removing the System Board. 3. Insert the floppy disk or CD that no...


