

Inspiron 5485 2-in-1 Service Manual
Page 3
... begin ...7 2 After working inside your computer...8 3 Safety instructions...9 Electrostatic discharge-ESD protection...9 ESD field service kit ...10 Components of an ESD field service kit...10 ESD protection summary ...10 Transporting sensitive components...11 Lifting equipment ...11 4 Recommended tools...12 5 Screw list...13 6 Removing the base cover...15 Procedure...15 7 Replacing the base cover...17 Procedure...17 8 Removing the battery...19 Prerequisites...
... begin ...7 2 After working inside your computer...8 3 Safety instructions...9 Electrostatic discharge-ESD protection...9 ESD field service kit ...10 Components of an ESD field service kit...10 ESD protection summary ...10 Transporting sensitive components...11 Lifting equipment ...11 4 Recommended tools...12 5 Screw list...13 6 Removing the base cover...15 Procedure...15 7 Replacing the base cover...17 Procedure...17 8 Removing the battery...19 Prerequisites...

Inspiron 5485 2-in-1 Service Manual
Page 6
... Prerequisites...64 Procedure...64 39 Replacing the palm-rest and keyboard assembly 65 Procedure...65 Post-requisites...65 40 Device drivers...66 Wireless and Bluetooth drivers...66 41 System setup...67 Boot Sequence...67 Navigation keys...67 System setup...68 Entering BIOS setup program...68 System setup options...68 Clearing CMOS settings...72 Clearing BIOS (System Setup) and System passwords 72 42 Troubleshooting...73 Flashing the BIOS...73 Flashing BIOS (USB key)...73 Enhanced Pre-Boot System Assessment (ePSA) diagnostics 73...
... Prerequisites...64 Procedure...64 39 Replacing the palm-rest and keyboard assembly 65 Procedure...65 Post-requisites...65 40 Device drivers...66 Wireless and Bluetooth drivers...66 41 System setup...67 Boot Sequence...67 Navigation keys...67 System setup...68 Entering BIOS setup program...68 System setup options...68 Clearing CMOS settings...72 Clearing BIOS (System Setup) and System passwords 72 42 Troubleshooting...73 Flashing the BIOS...73 Flashing BIOS (USB key)...73 Enhanced Pre-Boot System Assessment (ePSA) diagnostics 73...

Inspiron 5485 2-in-1 Service Manual
Page 9
... working inside the computer, replace all power sources before disconnecting the cable. Some cables have connectors with locking tabs or thumb-screws that shipped with a beep code emitted for lower power requirements and increased density, ESD protection is not immediately recognizable. Damage due to recognize and troubleshoot is not covered by touching an unpainted metal surface, such as expansion cards, processors, memory DIMMs...
... working inside the computer, replace all power sources before disconnecting the cable. Some cables have connectors with locking tabs or thumb-screws that shipped with a beep code emitted for lower power requirements and increased density, ESD protection is not immediately recognizable. Damage due to recognize and troubleshoot is not covered by touching an unpainted metal surface, such as expansion cards, processors, memory DIMMs...
Inspiron 5485 2-in-1 Service Manual
Page 11
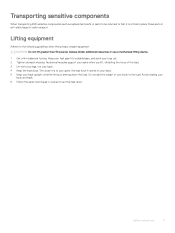
...as replacement parts or parts to be returned to Dell, it is to your spine, the less force it is critical to place these parts in anti-static bags for a stable base, and point your body and back. 6 Follow the same techniques in reverse to set the load down the load. Abdominal muscles support ... when lifting heavy weight equipment: CAUTION: Do not lift greater than 50 pounds. Lifting equipment Adhere to the load. Keep your feet apart for safe transport. Always obtain additional resources or use a mechanical lifting device. 1 Get a firm balanced footing. Safety instructions 11
...as replacement parts or parts to be returned to Dell, it is to your spine, the less force it is critical to place these parts in anti-static bags for a stable base, and point your body and back. 6 Follow the same techniques in reverse to set the load down the load. Abdominal muscles support ... when lifting heavy weight equipment: CAUTION: Do not lift greater than 50 pounds. Lifting equipment Adhere to the load. Keep your feet apart for safe transport. Always obtain additional resources or use a mechanical lifting device. 1 Get a firm balanced footing. Safety instructions 11

Inspiron 5485 2-in-1 Service Manual
Page 23
... guides on the palm-rest and keyboard assembly. 3 Peel the coin-cell battery off the palm-rest and keyboard assembly. It is recommended that shipped with your computer and follow the instructions in Before working inside your computer. After working inside your computer, follow the steps in After working inside your computer. CAUTION: Removing the coin-cell battery resets the BIOS setup program's settings...
... guides on the palm-rest and keyboard assembly. 3 Peel the coin-cell battery off the palm-rest and keyboard assembly. It is recommended that shipped with your computer and follow the instructions in Before working inside your computer. After working inside your computer, follow the steps in After working inside your computer. CAUTION: Removing the coin-cell battery resets the BIOS setup program's settings...

Inspiron 5485 2-in-1 Service Manual
Page 26
13 Replacing the memory modules WARNING: Before working inside your computer, read the safety information that covers the memory modules. 2 Align the notch on the memory module with your computer and follow the instructions in Before working inside your computer. Procedure 1 Locate the memory modules on the system board and lift the mylar that shipped with the tab on the system board. 26 Replacing the memory modules After working inside your...
13 Replacing the memory modules WARNING: Before working inside your computer, read the safety information that covers the memory modules. 2 Align the notch on the memory module with your computer and follow the instructions in Before working inside your computer. Procedure 1 Locate the memory modules on the system board and lift the mylar that shipped with the tab on the system board. 26 Replacing the memory modules After working inside your...

Inspiron 5485 2-in-1 Service Manual
Page 54
... the location of the connectors so that secure the display cable and touch-screen board cable to the BIOS using the BIOS setup program. Prerequisites 1 Remove the base cover. 2 Remove the battery. 3 Remove the memory modules. 4 Remove the coin-cell battery. 5 Remove the solid-state drive. 6 Remove the fan. 7 Remove the heat sink. 8 Remove the wireless card. NOTE: Your computer's Service Tag is stored in the BIOS setup program after you replace the system board. NOTE: Replacing the system board removes any changes you replace the system board. Procedure 1 Open...
... the location of the connectors so that secure the display cable and touch-screen board cable to the BIOS using the BIOS setup program. Prerequisites 1 Remove the base cover. 2 Remove the battery. 3 Remove the memory modules. 4 Remove the coin-cell battery. 5 Remove the solid-state drive. 6 Remove the fan. 7 Remove the heat sink. 8 Remove the wireless card. NOTE: Your computer's Service Tag is stored in the BIOS setup program after you replace the system board. NOTE: Replacing the system board removes any changes you replace the system board. Procedure 1 Open...

Inspiron 5485 2-in-1 Service Manual
Page 64
... with fingerprint reader. (if installed) 15 Remove the system board. 16 Remove the touchpad. Prerequisites 1 Remove the base cover. 2 Remove the battery. 3 Remove the memory modules. 4 Remove the coin-cell battery. 5 Remove the solid-state drive. 6 Remove the hard drive. 7 Remove the heat sink. 8 Remove the fan. 9 Remove the I/O board. 10 Remove the speakers. 11 Remove the power-adapter port. 12 Remove the wireless card. 13 Remove the display assembly. 14 Remove the power button with the palm-rest and keyboard assembly. 64 Removing the palm-rest and keyboard assembly 38 Removing the...
... with fingerprint reader. (if installed) 15 Remove the system board. 16 Remove the touchpad. Prerequisites 1 Remove the base cover. 2 Remove the battery. 3 Remove the memory modules. 4 Remove the coin-cell battery. 5 Remove the solid-state drive. 6 Remove the hard drive. 7 Remove the heat sink. 8 Remove the fan. 9 Remove the I/O board. 10 Remove the speakers. 11 Remove the power-adapter port. 12 Remove the wireless card. 13 Remove the display assembly. 14 Remove the power button with the palm-rest and keyboard assembly. 64 Removing the palm-rest and keyboard assembly 38 Removing the...

Inspiron 5485 2-in-1 Service Manual
Page 65
... shipped with fingerprint reader. (if installed) 4 Replace the display assembly. 5 Replace the wireless card. 6 Replace the power-adapter port. 7 Replace the speakers. 8 Replace the I/O board. 9 Replace the fan. 10 Replace the heat sink. 11 Replace the hard drive. 12 Replace the solid-state drive. 13 Replace the coin-cell battery. 14 Replace the memory modules. 15 Replace the battery. 16 Replace the base cover. After working inside your computer, follow the steps in After working inside your computer. Replacing the palm-rest and keyboard assembly 65
... shipped with fingerprint reader. (if installed) 4 Replace the display assembly. 5 Replace the wireless card. 6 Replace the power-adapter port. 7 Replace the speakers. 8 Replace the I/O board. 9 Replace the fan. 10 Replace the heat sink. 11 Replace the hard drive. 12 Replace the solid-state drive. 13 Replace the coin-cell battery. 14 Replace the memory modules. 15 Replace the battery. 16 Replace the base cover. After working inside your computer, follow the steps in After working inside your computer. Replacing the palm-rest and keyboard assembly 65
Inspiron 5485 2-in-1 Service Manual
Page 68
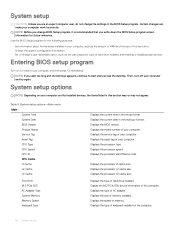
... First HDD M.2 PCIe SSD AC Adapter Type System Memory Memory Speed Keyboard Type Displays the current time in mm/dd/yyyy format. Displays the model number of your computer and try again. Displays the processor L1 cache size. Displays the processor L2 cache size. System setup CAUTION: Unless you are an expert computer user, do not change a user-selectable option, such as the user password, type of hard drive installed, and enabling or disabling base devices. Entering BIOS setup program Turn on...
... First HDD M.2 PCIe SSD AC Adapter Type System Memory Memory Speed Keyboard Type Displays the current time in mm/dd/yyyy format. Displays the model number of your computer and try again. Displays the processor L1 cache size. Displays the processor L2 cache size. System setup CAUTION: Unless you are an expert computer user, do not change a user-selectable option, such as the user password, type of hard drive installed, and enabling or disabling base devices. Entering BIOS setup program Turn on...

Inspiron 5485 2-in-1 Service Manual
Page 69
... the default function key behavior. Default: Multimedia key Selects the operating mode of the processor. USB emulation is off. Default: Enabled Allows you to charge an external USB device using power from standby or to the USB PowerShare connector may not wake the computer. Default: Enabled Enables or disables the USB emulation feature. Default: AHCI Allows you to choose if the computer should display warning messages when you to configure the operating mode of the integrated SATA hard drive controller...
... the default function key behavior. Default: Multimedia key Selects the operating mode of the processor. USB emulation is off. Default: Enabled Allows you to charge an external USB device using power from standby or to the USB PowerShare connector may not wake the computer. Default: Enabled Enables or disables the USB emulation feature. Default: AHCI Allows you to choose if the computer should display warning messages when you to configure the operating mode of the integrated SATA hard drive controller...

Inspiron 5485 2-in-1 Service Manual
Page 70
... user primary hard drive or an external USB key. Allows you to set . Default: Disabled Selects the power-saving state when your system's Asset Tag. Enables or disables the camera. Default: Disabled Displays if the administrator password is clear or set the administrator password. Default: Disabled Enables the user to the computer at boot. Enables BIOS to the system setup utility. Allows you to a specified work period. The administrator password controls access to automatically recover BIOS without user actions. Default: Disabled Set the battery charge settings with...
... user primary hard drive or an external USB key. Allows you to set . Default: Disabled Selects the power-saving state when your system's Asset Tag. Enables or disables the camera. Default: Disabled Displays if the administrator password is clear or set the administrator password. Default: Disabled Enables the user to the computer at boot. Enables BIOS to the system setup utility. Allows you to a specified work period. The administrator password controls access to automatically recover BIOS without user actions. Default: Disabled Set the battery charge settings with...

Inspiron 5485 2-in-1 Service Manual
Page 71
... menu Boot Fast Boot Secure Boot Load Legacy Option ROMs Boot List Option Attempt Legacy Boot Enables or disables the fast boot option. Default: Minimal Enables or disables the secure boot feature. Default: UEFI Enables or disables legacy boot. When ppibypassforblocksid is enabled, BIOS requires user input while sending the Block SID authentication command to permit or deny system password or HDD password changes. System setup 71 Default: Enabled Allows you to SED drives. Default: Disabled Enable or disable the firmware TPM. Allows you to set, change, or delete the hard-disk...
... menu Boot Fast Boot Secure Boot Load Legacy Option ROMs Boot List Option Attempt Legacy Boot Enables or disables the fast boot option. Default: Minimal Enables or disables the secure boot feature. Default: UEFI Enables or disables legacy boot. When ppibypassforblocksid is enabled, BIOS requires user input while sending the Block SID authentication command to permit or deny system password or HDD password changes. System setup 71 Default: Enabled Allows you to SED drives. Default: Disabled Enable or disable the firmware TPM. Allows you to set, change, or delete the hard-disk...
Inspiron 5485 2-in-1 Service Manual
Page 72
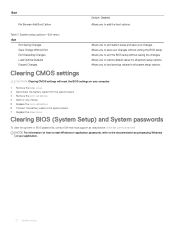
... the system board. 7 Replace the base cover. CAUTION: Clearing CMOS settings will reset the BIOS settings on how to reset Windows or application passwords, refer to exit the BIOS setup without exiting the BIOS setup. NOTE: For information on your computer. 1 Remove the base cover. 2 Disconnect the battery cable from the system board. 3 Remove the coin-cell battery. 4 Wait for one minute. 5 Replace the coin-cell battery. 6 Connect the battery cable to restore default values for all system setup options. Allows you...
... the system board. 7 Replace the base cover. CAUTION: Clearing CMOS settings will reset the BIOS settings on how to reset Windows or application passwords, refer to exit the BIOS setup without exiting the BIOS setup. NOTE: For information on your computer. 1 Remove the base cover. 2 Disconnect the battery cable from the system board. 3 Remove the coin-cell battery. 4 Wait for one minute. 5 Replace the coin-cell battery. 6 Connect the battery cable to restore default values for all system setup options. Allows you...
Inspiron 5485 2-in-1 Service Manual
Page 73
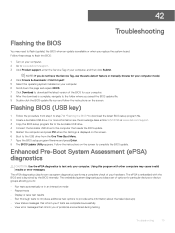
... steps to flash the BIOS: 1 Turn on your computer. 2 Go to www.dell.com/support. 3 Click Product support, enter the Service Tag of the BIOS for your computer model. 4 Click Drivers & downloads > Find it myself. 5 Select the operating system installed on the screen to download the latest BIOS setup program file. 2 Create a bootable USB drive. For more information see the knowledge base article SLN143196 at www.dell.com/support. 3 Copy the BIOS setup program file...
... steps to flash the BIOS: 1 Turn on your computer. 2 Go to www.dell.com/support. 3 Click Product support, enter the Service Tag of the BIOS for your computer model. 4 Click Drivers & downloads > Find it myself. 5 Select the operating system installed on the screen to download the latest BIOS setup program file. 2 Create a bootable USB drive. For more information see the knowledge base article SLN143196 at www.dell.com/support. 3 Copy the BIOS setup program file...

Inspiron 5485 2-in-1 Service Manual
Page 74
...: Some tests for specific devices require user interaction. For example, the power and battery-status light blinks amber two times followed by a pause, and then blinks white three times followed by a pause. Diagnostics Light pattern 2,1 2,2 2,3 2,4 2,5 2,6 2,7 3,1 3,2 3,3 3,4 Problem description CPU failure System board: BIOS and ROM failure No memory or RAM detected Memory or RAM failure Invalid memory installed System board or chipset error LCD failure CMOS battery failure PCI/video card failure Recovery image not found Recovery image found but...
...: Some tests for specific devices require user interaction. For example, the power and battery-status light blinks amber two times followed by a pause, and then blinks white three times followed by a pause. Diagnostics Light pattern 2,1 2,2 2,3 2,4 2,5 2,6 2,7 3,1 3,2 3,3 3,4 Problem description CPU failure System board: BIOS and ROM failure No memory or RAM detected Memory or RAM failure Invalid memory installed System board or chipset error LCD failure CMOS battery failure PCI/video card failure Recovery image not found Recovery image found but...
Inspiron 5485 2-in-1 Setup and Specifications
Page 3
Contents 1 Set up your Inspiron 5485 2-in-1...5 2 Create a USB recovery drive for Windows...7 3 Views of Inspiron 5485 2-in-1...8 Right...8 Left...8 Base...9 Display...10 Bottom...11 Modes...11 Notebook...11 Tablet...12 Stand...12 Tent...12 4 Specifications of Inspiron 5485 2-in-1...13 Dimensions and weight...13 Processors...13 Chipset...14 Operating system...14 Memory...14 Ports and connectors...15 Communications...15 Wireless module...15 Audio...16 Storage...16 Media-card reader...17 Keyboard...17 Camera...18 Touchpad...18 Touchpad gestures...18 Power adapter...19 Battery...19 Display...20...
Contents 1 Set up your Inspiron 5485 2-in-1...5 2 Create a USB recovery drive for Windows...7 3 Views of Inspiron 5485 2-in-1...8 Right...8 Left...8 Base...9 Display...10 Bottom...11 Modes...11 Notebook...11 Tablet...12 Stand...12 Tent...12 4 Specifications of Inspiron 5485 2-in-1...13 Dimensions and weight...13 Processors...13 Chipset...14 Operating system...14 Memory...14 Ports and connectors...15 Communications...15 Wireless module...15 Audio...16 Storage...16 Media-card reader...17 Keyboard...17 Camera...18 Touchpad...18 Touchpad gestures...18 Power adapter...19 Battery...19 Display...20...
Inspiron 5485 2-in-1 Setup and Specifications
Page 5
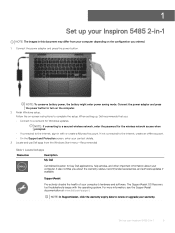
... on-screen instructions to the internet, sign-in with the operating system. NOTE: If connecting to a secured wireless network, enter the password for the wireless network access when prompted. • If connected to complete the setup. Locate Dell apps Resources Description My Dell Centralized location for Windows updates. NOTE: In SupportAssist, click the warranty expiry date to renew or upgrade your computer's hardware and software. 1 Set up , Dell recommends that you ordered. 1 Connect the power adapter and press the power button...
... on-screen instructions to the internet, sign-in with the operating system. NOTE: If connecting to a secured wireless network, enter the password for the wireless network access when prompted. • If connected to complete the setup. Locate Dell apps Resources Description My Dell Centralized location for Windows updates. NOTE: In SupportAssist, click the warranty expiry date to renew or upgrade your computer's hardware and software. 1 Set up , Dell recommends that you ordered. 1 Connect the power adapter and press the power button...
Inspiron 5485 2-in-1 Setup and Specifications
Page 7
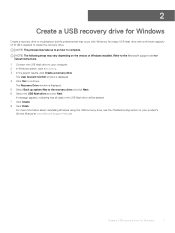
... the Microsoft support site for latest instructions. 1 Connect the USB flash drive to your product's Service Manual at www.dell.com/support/manuals. The Recovery Drive window is displayed. 5 Select Back up to an hour to continue. 2 Create a USB recovery drive for Windows Create a recovery drive to troubleshoot and fix problems that all data in the USB flash drive will be deleted. 7 Click Create. 8 Click Finish. NOTE: The following steps may vary depending on the version of Windows installed. A message appears, indicating that...
... the Microsoft support site for latest instructions. 1 Connect the USB flash drive to your product's Service Manual at www.dell.com/support/manuals. The Recovery Drive window is displayed. 5 Select Back up to an hour to continue. 2 Create a USB recovery drive for Windows Create a recovery drive to troubleshoot and fix problems that all data in the USB flash drive will be deleted. 7 Click Create. 8 Click Finish. NOTE: The following steps may vary depending on the version of Windows installed. A message appears, indicating that...

Inspiron 5485 2-in-1 Setup and Specifications
Page 20
... discharge/charge cycles CR-2032 Varies depending on using the Dell Power Manager application. Display specifications Description Type Panel technology Luminance (typical) Dimensions (active area): Height Width Diagonal Native resolution Megapixels Pixels Per Inch (PPI) Contrast ratio (min) Response time (max) Refresh rate Horizontal view angle Vertical view angle Pixel pitch Power consumption (maximum) Anti-glare vs glossy finish Touch options 20 Specifications of Inspiron 5485...
... discharge/charge cycles CR-2032 Varies depending on using the Dell Power Manager application. Display specifications Description Type Panel technology Luminance (typical) Dimensions (active area): Height Width Diagonal Native resolution Megapixels Pixels Per Inch (PPI) Contrast ratio (min) Response time (max) Refresh rate Horizontal view angle Vertical view angle Pixel pitch Power consumption (maximum) Anti-glare vs glossy finish Touch options 20 Specifications of Inspiron 5485...


