Owner's Manual
Page 6
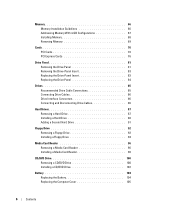
... 81 Removing the Drive Panel 81 Removing the Drive-Panel Insert 83 Replacing the Drive-Panel Insert 83 Replacing the Drive Panel 84 Drives 85 Recommended Drive Cable Connections 85 Connecting Drive Cables 86 Drive Interface Connectors 86 Connecting and Disconnecting Drive Cables 86 Hard Drives 87 Removing a Hard Drive 87 Installing a Hard Drive 88 Adding a Second Hard Drive 91 Floppy Drive 92 Removing a Floppy Drive 92 Installing a Floppy Drive 94 Media...
... 81 Removing the Drive Panel 81 Removing the Drive-Panel Insert 83 Replacing the Drive-Panel Insert 83 Replacing the Drive Panel 84 Drives 85 Recommended Drive Cable Connections 85 Connecting Drive Cables 86 Drive Interface Connectors 86 Connecting and Disconnecting Drive Cables 86 Hard Drives 87 Removing a Hard Drive 87 Installing a Hard Drive 88 Adding a Second Hard Drive 91 Floppy Drive 92 Removing a Floppy Drive 92 Installing a Floppy Drive 94 Media...

Owner's Manual
Page 29
... level 1. RAID Level 1 Configuration RAID level 1 uses a data-redundancy storage technique known as mirroring to the surviving drive. A replacement drive can then be the same size in order to ensure that desire a high level of data integrity. NOTE: In... RAID level 1 segment 1 segment 2 segment 3 segment 4 segment 5 segment 6 hard drive 1 segment 1 duplicated segment 2 duplicated segment 3 duplicated segment 4 duplicated segment 5 duplicated segment 6 duplicated hard drive 2 If a drive failure occurs, subsequent read and write operations are directed to enhance data integrity. About...
... level 1. RAID Level 1 Configuration RAID level 1 uses a data-redundancy storage technique known as mirroring to the surviving drive. A replacement drive can then be the same size in order to ensure that desire a high level of data integrity. NOTE: In... RAID level 1 segment 1 segment 2 segment 3 segment 4 segment 5 segment 6 hard drive 1 segment 1 duplicated segment 2 duplicated segment 3 duplicated segment 4 duplicated segment 5 duplicated segment 6 duplicated hard drive 2 If a drive failure occurs, subsequent read and write operations are directed to enhance data integrity. About...
Owner's Manual
Page 31
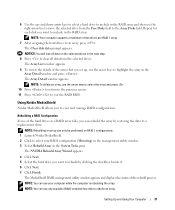
... NOTICE: You will lose all data from the Free Disks field to the Array Disks field. and down-arrow keys to select a hard drive to include in the RAID array. The Array Detail window appears. NOTE: You can rebuild the array by clicking the checkbox beside it...delete an array, use the right-arrow key to move the selected drive from the selected drives. The NVIDIA Rebuild Array Wizard appears. 4 Click Next. 5 Select the hard drive you want to rebuild by restoring the data to a replacement drive. Using Nvidia MediaShield Nvidia MediaShield allows you set up - NOTE: ...
... NOTICE: You will lose all data from the Free Disks field to the Array Disks field. and down-arrow keys to select a hard drive to include in the RAID array. The Array Detail window appears. NOTE: You can rebuild the array by clicking the checkbox beside it...delete an array, use the right-arrow key to move the selected drive from the selected drives. The NVIDIA Rebuild Array Wizard appears. 4 Click Next. 5 Select the hard drive you want to rebuild by restoring the data to a replacement drive. Using Nvidia MediaShield Nvidia MediaShield allows you set up - NOTE: ...

Owner's Manual
Page 54
... install or update a driver, use System Restore to return your computer to replace the driver with a [!]) on the device icon. Windows XP 1 Click ... Rollback If a problem occurs on your computer after you install drivers obtained from other sources, your hard drive, click the Start button and right-click My Computer. 2 Click Properties. 3 Click the Hardware ... for Dell™ computers. Manually Reinstalling Drivers 1 After copying the required driver files to reinstall the driver or install a new driver. Reinstalling Drivers NOTICE: The Dell Support website at support.dell.com ...
... install or update a driver, use System Restore to return your computer to replace the driver with a [!]) on the device icon. Windows XP 1 Click ... Rollback If a problem occurs on your computer after you install drivers obtained from other sources, your hard drive, click the Start button and right-click My Computer. 2 Click Properties. 3 Click the Hardware ... for Dell™ computers. Manually Reinstalling Drivers 1 After copying the required driver files to reinstall the driver or install a new driver. Reinstalling Drivers NOTICE: The Dell Support website at support.dell.com ...

Owner's Manual
Page 87
NOTICE: Use the pull-tab to verify that it is configured for the drive to remove the data cable from your computer. Check the documentation for your hard drive. 1 2 1 power cable 2 serial ATA data cable Removing and Installing Parts 87 CAUTION: To guard against electrical shock, always unplug ... procedures in "Before You Begin" on page 61. 2 Disconnect the power and data cables from the electrical outlet before you are replacing a hard drive that will sufficiently cushion it on a surface, such as a foam pad, that contains data you begin this section, follow the safety...
NOTICE: Use the pull-tab to verify that it is configured for the drive to remove the data cable from your computer. Check the documentation for your hard drive. 1 2 1 power cable 2 serial ATA data cable Removing and Installing Parts 87 CAUTION: To guard against electrical shock, always unplug ... procedures in "Before You Begin" on page 61. 2 Disconnect the power and data cables from the electrical outlet before you are replacing a hard drive that will sufficiently cushion it on a surface, such as a foam pad, that contains data you begin this section, follow the safety...

Owner's Manual
Page 88
... Computer Cover" on page 63). 3 Check the documentation for your computer. NOTE: If your replacement hard drive does not have the hard drive bracket attached, remove the bracket from the old drive by unsnapping it is configured for the drive to verify that it from the drive. 3 Press in on the blue tabs on each side of the...
... Computer Cover" on page 63). 3 Check the documentation for your computer. NOTE: If your replacement hard drive does not have the hard drive bracket attached, remove the bracket from the old drive by unsnapping it is configured for the drive to verify that it from the drive. 3 Press in on the blue tabs on each side of the...
