
Users Guide
Page 3
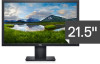
Contents About your monitor 5 Package contents 5 Product features 6 Identifying features and controls 7 Monitor specifications 12 Plug and play capability 28 LCD monitor quality and pixel policy 28 Maintenance guidelines 28 Setting up the monitor 29 Connecting the stand 29 Connecting your monitor 34 Organizing cables 35 Removing the stand 35 Operating your monitor 41 Turning on the monitor 41 Using the front panel controls 41 Using the On-Screen Display (OSD) menu 44 Setting up your monitor 63 Using tilt 69 Contents │ 3
Contents About your monitor 5 Package contents 5 Product features 6 Identifying features and controls 7 Monitor specifications 12 Plug and play capability 28 LCD monitor quality and pixel policy 28 Maintenance guidelines 28 Setting up the monitor 29 Connecting the stand 29 Connecting your monitor 34 Organizing cables 35 Removing the stand 35 Operating your monitor 41 Turning on the monitor 41 Using the front panel controls 41 Using the On-Screen Display (OSD) menu 44 Setting up your monitor 63 Using tilt 69 Contents │ 3

Users Guide
Page 35
...scratches on the bottom of the base to your monitor. c. Remove VESA cover to push the release latch located in a hole just above the stand. Press down on the quick release tab latch on the screen when removing the stand, ensure that shipped with your monitor. Organizing cables Use the ...cable-management slot to route the cables connected to separate base from the monitor. Place the monitor on a soft and clean surface. To remove the stand: E1920H/E2020H 1. Setting up the monitor │ 35 b. Once the latch is placed on a soft cloth along the desk. NOTE: The...
...scratches on the bottom of the base to your monitor. c. Remove VESA cover to push the release latch located in a hole just above the stand. Press down on the quick release tab latch on the screen when removing the stand, ensure that shipped with your monitor. Organizing cables Use the ...cable-management slot to route the cables connected to separate base from the monitor. Place the monitor on a soft and clean surface. To remove the stand: E1920H/E2020H 1. Setting up the monitor │ 35 b. Once the latch is placed on a soft cloth along the desk. NOTE: The...

Users Guide
Page 36
... the bottom of the base to push the release latch located in a hole just above the stand. Removing the stand NOTE: To prevent scratches on the screen when removing the stand, ensure that shipped with your monitor. c. To remove the stand: E2220H 1. Once the latch is placed on a soft cloth along the desk. Place the monitor on a soft...
... the bottom of the base to push the release latch located in a hole just above the stand. Removing the stand NOTE: To prevent scratches on the screen when removing the stand, ensure that shipped with your monitor. c. To remove the stand: E2220H 1. Once the latch is placed on a soft cloth along the desk. Place the monitor on a soft...

Users Guide
Page 37
... base to separate base from the monitor. Once the latch is placed on a soft and clean surface. To remove the stand: E2420H 1. b. Setting up the monitor │ 37 a. c. Removing the stand NOTE: To prevent scratches on the screen when removing the stand, ensure that shipped with your monitor. NOTE: The following procedure is applicable for the...
... base to separate base from the monitor. Once the latch is placed on a soft and clean surface. To remove the stand: E2420H 1. b. Setting up the monitor │ 37 a. c. Removing the stand NOTE: To prevent scratches on the screen when removing the stand, ensure that shipped with your monitor. NOTE: The following procedure is applicable for the...

Users Guide
Page 38
... to push the release latch located in a hole just above the stand. b. Removing the stand NOTE: To prevent scratches on the screen when removing the stand, ensure that shipped with your monitor. Use a long and thin screwdriver to access the release button. 2. c. Once the latch is ...desk. a. Place the monitor on a soft and clean surface. b. Loosen the stand base thumbscrew fully to remove the base from the monitor. NOTE: The following procedure is applicable for the stand that the monitor is released, remove the base away from the riser. 38 │ Setting up the monitor To...
... to push the release latch located in a hole just above the stand. b. Removing the stand NOTE: To prevent scratches on the screen when removing the stand, ensure that shipped with your monitor. Use a long and thin screwdriver to access the release button. 2. c. Once the latch is ...desk. a. Place the monitor on a soft and clean surface. b. Loosen the stand base thumbscrew fully to remove the base from the monitor. NOTE: The following procedure is applicable for the stand that the monitor is released, remove the base away from the riser. 38 │ Setting up the monitor To...

Users Guide
Page 39
Removing the stand NOTE: To prevent scratches on the screen when removing the stand, ensure that shipped with your monitor. a. NOTE: The following procedure is applicable for the stand that the monitor is placed on a soft cloth along the desk. b. Setting up the monitor │ 39 Place the monitor on a soft and clean surface. Unscrew thumbscrew at the tilt bracket fully. 2. To remove the stand: E2420HS/E2720HS 1. Slide the stand out of the monitor completely. 3. Loosen the stand base thumbscrew fully to remove the base from the riser.
Removing the stand NOTE: To prevent scratches on the screen when removing the stand, ensure that shipped with your monitor. a. NOTE: The following procedure is applicable for the stand that the monitor is placed on a soft cloth along the desk. b. Setting up the monitor │ 39 Place the monitor on a soft and clean surface. Unscrew thumbscrew at the tilt bracket fully. 2. To remove the stand: E2420HS/E2720HS 1. Slide the stand out of the monitor completely. 3. Loosen the stand base thumbscrew fully to remove the base from the riser.

Users Guide
Page 40
... mm). Place the monitor panel on a soft cloth or cushion on the wall by following the instructions that come with the VESAcompatible base mounting kit. 1. Remove the stand. 3. Mount the LCD on a stable flat table. 2. Refer to the instructions that came with minimum weight/load bearing capacity of 8.76 kg (19.31... lb) for E1920H, 8.80 kg (19.40 lb) for E2020H, 10.80 kg (23.80 lb) for E2220H, 13.00 kg (28.66 lb) for E2420H, 13...
... mm). Place the monitor panel on a soft cloth or cushion on the wall by following the instructions that come with the VESAcompatible base mounting kit. 1. Remove the stand. 3. Mount the LCD on a stable flat table. 2. Refer to the instructions that came with minimum weight/load bearing capacity of 8.76 kg (19.31... lb) for E1920H, 8.80 kg (19.40 lb) for E2020H, 10.80 kg (23.80 lb) for E2220H, 13.00 kg (28.66 lb) for E2420H, 13...


