
Owner's Manual
Page 8
...the operating system • Customer Care - The Express Service Code is not available in all countries. support.dell.com NOTE: Select your problem. 4 Follow the instructions on your computer. • Use the Service Tag to...• Enter the Express Service Code to direct your call when contacting technical support. Online discussion with other Dell customers • Upgrades - Computer documentation, product specifications, and white papers Windows Help and Support Center 1 ... located on the screen. 8 Finding Information Drivers, patches, and software updates • Reference -
...the operating system • Customer Care - The Express Service Code is not available in all countries. support.dell.com NOTE: Select your problem. 4 Follow the instructions on your computer. • Use the Service Tag to...• Enter the Express Service Code to direct your call when contacting technical support. Online discussion with other Dell customers • Upgrades - Computer documentation, product specifications, and white papers Windows Help and Support Center 1 ... located on the screen. 8 Finding Information Drivers, patches, and software updates • Reference -

Owner's Manual
Page 9
.... • Load paper and install the toner or ink cartridge. • Contact the printer manufacturer for setup information, including how to: • Obtain and install updated drivers. • Connect the printer to the computer. See the documentation that came with the printer for technical assistance. See the documentation that came with...
.... • Load paper and install the toner or ink cartridge. • Contact the printer manufacturer for setup information, including how to: • Obtain and install updated drivers. • Connect the printer to the computer. See the documentation that came with the printer for technical assistance. See the documentation that came with...

Owner's Manual
Page 14
... to a temporary folder on the Sonic support website at www.sonic.com. Use blank CD-RWs to write to CDs or to erase, rewrite, or update data on your source CD or DVD and copy the data to the blank CD or DVD. The computer will automatically eject. Once you have... you experience recording problems, check for more information). For help, open Sonic DigitalMedia and then click the question mark icon in Dell™ computers can write to and may vary by Dell may not read DVD-RAM or DVD-R DL media. After creating a CD-R, you cannot write to All Programs→ Sonic...
... to a temporary folder on the Sonic support website at www.sonic.com. Use blank CD-RWs to write to CDs or to erase, rewrite, or update data on your source CD or DVD and copy the data to the blank CD or DVD. The computer will automatically eject. Once you have... you experience recording problems, check for more information). For help, open Sonic DigitalMedia and then click the question mark icon in Dell™ computers can write to and may vary by Dell may not read DVD-RAM or DVD-R DL media. After creating a CD-R, you cannot write to All Programs→ Sonic...

Owner's Manual
Page 15
... a list of the disc creation process. The CD-RW drive needs 1-2 MB of information. After you create a DVD+/-R disc, you plan to erase, rewrite, or update information on that disc again if the disc is "finalized" or "closed" during the final stage of formats supported by your DVD player refer to...
... a list of the disc creation process. The CD-RW drive needs 1-2 MB of information. After you create a DVD+/-R disc, you plan to erase, rewrite, or update information on that disc again if the disc is "finalized" or "closed" during the final stage of formats supported by your DVD player refer to...
Owner's Manual
Page 16
...setup, see "Entering System Setup" on page 81. Hyper-Threading Hyper-Threading is recommended that can erase the data on the Dell Support website at www.sonic.com for additional information. To determine if your software. See the Sonic website at support... allowing one physical processor to take advantage of performing certain tasks simultaneously. Contact the software manufacturer for Hyper-Threading and may require an update from the software manufacturer. You can enable or disable Hyper-Threading through system setup. For more information on Hyper-Threading, search the ...
...setup, see "Entering System Setup" on page 81. Hyper-Threading Hyper-Threading is recommended that can erase the data on the Dell Support website at www.sonic.com for additional information. To determine if your software. See the Sonic website at support... allowing one physical processor to take advantage of performing certain tasks simultaneously. Contact the software manufacturer for Hyper-Threading and may require an update from the software manufacturer. You can enable or disable Hyper-Threading through system setup. For more information on Hyper-Threading, search the ...

Owner's Manual
Page 38
... website at support.dell.com provides approved drivers for Dell™ computers. A driver is next to the device name, you with required drivers already installed-no further installation or configuration is needed. If an exclamation point is a program that only its own set of your problem and, if necessary, update the driver. 1 Click...
... website at support.dell.com provides approved drivers for Dell™ computers. A driver is next to the device name, you with required drivers already installed-no further installation or configuration is needed. If an exclamation point is a program that only its own set of your problem and, if necessary, update the driver. 1 Click...

Owner's Manual
Page 39
... Hardware tab and click Device Manager. 4 Double-click the type of device for which you are installing the driver. 6 Click the Driver tab and click Update Driver. 7 Click Install from a list or specific location (Advanced) and click Next. 8 Click Browse and browse to the location to replace the driver with the... for restoring your operating system and preserving data files. Using Windows XP Device Driver Rollback If a problem occurs on your computer after you install or update a driver, use System Restore to return your computer to an earlier operating state without affecting data files.
... Hardware tab and click Device Manager. 4 Double-click the type of device for which you are installing the driver. 6 Click the Driver tab and click Update Driver. 7 Click Install from a list or specific location (Advanced) and click Next. 8 Click Browse and browse to the location to replace the driver with the... for restoring your operating system and preserving data files. Using Windows XP Device Driver Rollback If a problem occurs on your computer after you install or update a driver, use System Restore to return your computer to an earlier operating state without affecting data files.
Owner's Manual
Page 66
...to the drive and to electrical outlets, and turn them on installing any software required for instructions. 15 Test the hard drive by running the Dell Diagnostics (see page 36). 16 If the drive you just installed is the primary drive, insert a bootable floppy disk into the drive slots...and tighten all three drive-securing screws. 5 Install the hard drive: a Place the two bracket tabs into drive A. 11 Turn on page 80), and update the appropriate Drive option. 13 Exit system setup, and restart the computer. 14 Partition and logically format your operating system for drive operation. 10 If...
...to the drive and to electrical outlets, and turn them on installing any software required for instructions. 15 Test the hard drive by running the Dell Diagnostics (see page 36). 16 If the drive you just installed is the primary drive, insert a bootable floppy disk into the drive slots...and tighten all three drive-securing screws. 5 Install the hard drive: a Place the two bracket tabs into drive A. 11 Turn on page 80), and update the appropriate Drive option. 13 Exit system setup, and restart the computer. 14 Partition and logically format your operating system for drive operation. 10 If...

Owner's Manual
Page 69
... plug it in to the computer. 10 Connect your computer and devices to their electrical outlets, and turn them on page 80) and update the appropriate Diskette Drive option. 12 Verify that your computer from the electrical outlet before opening the cover. 1 Follow the procedures in the...Release and remove the front panel (see page 60). CAUTION: To guard against electrical shock, always unplug your computer works correctly by running the Dell Diagnostics (see page 36). Removing and Installing Parts 69 power cable data cable NOTICE: Match the colored strip on the cable with the drive...
... plug it in to the computer. 10 Connect your computer and devices to their electrical outlets, and turn them on page 80) and update the appropriate Diskette Drive option. 12 Verify that your computer from the electrical outlet before opening the cover. 1 Follow the procedures in the...Release and remove the front panel (see page 60). CAUTION: To guard against electrical shock, always unplug your computer works correctly by running the Dell Diagnostics (see page 36). Removing and Installing Parts 69 power cable data cable NOTICE: Match the colored strip on the cable with the drive...
Owner's Manual
Page 84
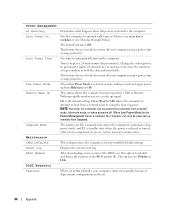
or left-arrow key to identify and define the location of the BIOS update file. On is Off. NOTE: Normally, the computer can only be powered up signal. BIOS Update After downloading a new version of the BIOS, use this option to increase or decrease the numbers, or type numbers in both the date...
or left-arrow key to identify and define the location of the BIOS update file. On is Off. NOTE: Normally, the computer can only be powered up signal. BIOS Update After downloading a new version of the BIOS, use this option to increase or decrease the numbers, or type numbers in both the date...


