
DSS 7000/DSS 7500 Owners Manual
Page 3
... Logging in to iDRAC...21 Installing the OS...22 Managing your system remotely 22 Downloading and installing drivers and firmware 22 Installing the driver for the LSI 9311 card on a Ubuntu1404 system 23 3 Pre-operating system management applications 24 Navigation keys...24 About System Setup...24 Entering System Setup...25 System Setup Main Menu...25 System BIOS page...25 System Information page...26 Memory Settings page...26 Processor Settings page...27 SATA Settings page...29 Boot Settings...
... Logging in to iDRAC...21 Installing the OS...22 Managing your system remotely 22 Downloading and installing drivers and firmware 22 Installing the driver for the LSI 9311 card on a Ubuntu1404 system 23 3 Pre-operating system management applications 24 Navigation keys...24 About System Setup...24 Entering System Setup...25 System Setup Main Menu...25 System BIOS page...25 System Information page...26 Memory Settings page...26 Processor Settings page...27 SATA Settings page...29 Boot Settings...

DSS 7000/DSS 7500 Owners Manual
Page 5
Sample memory configurations 60 Removing a memory module 61 Installing a memory module 62 Heat sinks and processors...64 Removing a processor...64 Installing a processor...67 Hard disk drives...70 Removing a 3.5-inch HDD blank 70 Installing a 3.5-inch HDD blank 71 Removing a 3.5-inch hot-swap HDD 71 Installing a 3.5-inch hot-swap HDD 72 Removing a 3.5-inch HDD from an HDD carrier 73 Installing a 3.5-inch HDD into an HDD carrier 74 Removing a 2.5-inch hot-swap HDD 74 Installing a 2.5-inch hot-swap HDD 75 Installing a 2.5-inch SSD into...
Sample memory configurations 60 Removing a memory module 61 Installing a memory module 62 Heat sinks and processors...64 Removing a processor...64 Installing a processor...67 Hard disk drives...70 Removing a 3.5-inch HDD blank 70 Installing a 3.5-inch HDD blank 71 Removing a 3.5-inch hot-swap HDD 71 Installing a 3.5-inch hot-swap HDD 72 Removing a 3.5-inch HDD from an HDD carrier 73 Installing a 3.5-inch HDD into an HDD carrier 74 Removing a 2.5-inch hot-swap HDD 74 Installing a 2.5-inch hot-swap HDD 75 Installing a 2.5-inch SSD into...

DSS 7000/DSS 7500 Owners Manual
Page 11
... iDRAC ports card. See the Integrated Dell Remote Access User's Guide at dell.com/idracmanuals. Dedicated management port on -demand local storage and a custom deployment environment that allows automation of server configuration, scripts and imaging. The identification button can be used to the system. To reset the iDRAC (if not disabled in F2 iDRAC setup) press and hold the system ID button for more than 15 seconds. The power button controls the...
... iDRAC ports card. See the Integrated Dell Remote Access User's Guide at dell.com/idracmanuals. Dedicated management port on -demand local storage and a custom deployment environment that allows automation of server configuration, scripts and imaging. The identification button can be used to the system. To reset the iDRAC (if not disabled in F2 iDRAC setup) press and hold the system ID button for more than 15 seconds. The power button controls the...

DSS 7000/DSS 7500 Owners Manual
Page 15
... and supported RACADM interfaces RACADM Command Line Reference Guide for setting up managed and Integrated Dell Remote Access Controller User's management system, know the iDRAC features and Guide at dell.com/idracmanuals troubleshoot using iDRAC Know about documents that monitor system components Dell Event and Error Messages Reference Guide at dell.com/idracmanuals Check the event and error messages generated by the system firmware and agents that you must be of the same type and have the same maximum output power...
... and supported RACADM interfaces RACADM Command Line Reference Guide for setting up managed and Integrated Dell Remote Access Controller User's management system, know the iDRAC features and Guide at dell.com/idracmanuals troubleshoot using iDRAC Know about documents that monitor system components Dell Event and Error Messages Reference Guide at dell.com/idracmanuals Check the event and error messages generated by the system firmware and agents that you must be of the same type and have the same maximum output power...

DSS 7000/DSS 7500 Owners Manual
Page 21
... configuring iDRAC, see the RACADM Command Line Interface Reference Guide and the Integrated Dell Remote Access Controller User's Guide. • Remote Services that includes Web Services Management (WS-Man). For more information about the RACADM, see the Integrated Dell Remote Access Controller User's Guide at dell.com/ idracmanuals. In the System Setup Main Menu page, click iDRAC Settings → Network. 4. the Register DRAC on DNS option in Network Settings is disabled. If the dedicated management port card is not installed: By default, the NIC...
... configuring iDRAC, see the RACADM Command Line Interface Reference Guide and the Integrated Dell Remote Access Controller User's Guide. • Remote Services that includes Web Services Management (WS-Man). For more information about the RACADM, see the Integrated Dell Remote Access Controller User's Guide at dell.com/ idracmanuals. In the System Setup Main Menu page, click iDRAC Settings → Network. 4. the Register DRAC on DNS option in Network Settings is disabled. If the dedicated management port card is not installed: By default, the NIC...

DSS 7000/DSS 7500 Owners Manual
Page 25
...Menu Item System Information Memory Settings Processor Settings SATA Settings Boot Settings Description Displays information about this utility, see the following message: F2 = System Setup If your operating system begins to load before you see the Integrated Dell Remote Access Controller User's Guide at dell.com/idracmanuals. System Setup Main Menu Option System BIOS iDRAC Settings Device Settings Description Enables you to configure BIOS settings. Enables you to configure device settings. This is displayed in two ways: • Standard Graphical Browser - This is an interface...
...Menu Item System Information Memory Settings Processor Settings SATA Settings Boot Settings Description Displays information about this utility, see the following message: F2 = System Setup If your operating system begins to load before you see the Integrated Dell Remote Access Controller User's Guide at dell.com/idracmanuals. System Setup Main Menu Option System BIOS iDRAC Settings Device Settings Description Enables you to configure BIOS settings. Enables you to configure device settings. This is displayed in two ways: • Standard Graphical Browser - This is an interface...
DSS 7000/DSS 7500 Owners Manual
Page 26
... BIOS version installed on the system. Displays options to view system properties such as system memory testing and node interleaving. UEFI Compliance Version Displays the system firmware UEFI compliance level. System Management Engine Displays the latest revision of the system CPLD firmware. Memory Settings page You can use the Memory Settings page to view all the memory settings and enable or disable specific memory functions such as Service Tag, system model, and the BIOS version. To view the Memory Setting page, click System Setup Main Menu...
... BIOS version installed on the system. Displays options to view system properties such as system memory testing and node interleaving. UEFI Compliance Version Displays the system firmware UEFI compliance level. System Management Engine Displays the latest revision of the system CPLD firmware. Memory Settings page You can use the Memory Settings page to view all the memory settings and enable or disable specific memory functions such as Service Tag, system model, and the BIOS version. To view the Memory Setting page, click System Setup Main Menu...

DSS 7000/DSS 7500 Owners Manual
Page 29
.... Enables or disables the command for each processor installed in ATA mode, set to ATA and AHCI mode. For Embedded SATA settings in the system. The following settings are displayed for Embedded SATA drives during POST. For AHCI mode or RAID mode, BIOS always enables support. Menu Item Number of Cores Processor 2 Description Displays the number of cores per processor. To view the SATA Settings page, click System Setup Main Menu → System BIOS → SATA Settings. Set it to OFF to enable BIOS support. For AHCI mode or RAID mode, BIOS always enables support...
.... Enables or disables the command for each processor installed in ATA mode, set to ATA and AHCI mode. For Embedded SATA settings in the system. The following settings are displayed for Embedded SATA drives during POST. For AHCI mode or RAID mode, BIOS always enables support. Menu Item Number of Cores Processor 2 Description Displays the number of cores per processor. To view the SATA Settings page, click System Setup Main Menu → System BIOS → SATA Settings. Set it to OFF to enable BIOS support. For AHCI mode or RAID mode, BIOS always enables support...

DSS 7000/DSS 7500 Owners Manual
Page 30
... fails to either BIOS or UEFI. NOTE: Setting this field is undefined for UEFI Boot Mode. If this field to Enabled. Sets the drive type of the selected device. By default, the Boot Sequence Retry option is not installed in ATA mode, set to UEFI disables the BIOS Boot Settings menu. Boot Sequence Retry Hard-Disk Failover Boot Option Settings If the operating system supports UEFI, you can use the Boot Settings page to set to BIOS disables the UEFI Boot Settings menu. Displays the total capacity of the HDD. CAUTION: Switching the boot mode...
... fails to either BIOS or UEFI. NOTE: Setting this field is undefined for UEFI Boot Mode. If this field to Enabled. Sets the drive type of the selected device. By default, the Boot Sequence Retry option is not installed in ATA mode, set to UEFI disables the BIOS Boot Settings menu. Boot Sequence Retry Hard-Disk Failover Boot Option Settings If the operating system supports UEFI, you can use the Boot Settings page to set to BIOS disables the UEFI Boot Settings menu. Displays the total capacity of the HDD. CAUTION: Switching the boot mode...

DSS 7000/DSS 7500 Owners Manual
Page 31
... Embedded Video Controller setting is set to Disabled. 31 By default, the Internal USB Port option is Disabled. Configure this function using the NIC management utilities of the system. Integrated Devices page details The Integrated Devices page enables you to view and configure the settings of all USB ports, select All Ports Off. Menu Item USB 3.0 Setting User Accessible USB Ports Description Allows you to enable or disable the USB ports. Allows you to enable or disable the Embedded NIC1 and NIC2. Internal USB Port Allows you to enable or disable the USB 3.0 support...
... Embedded Video Controller setting is set to Disabled. 31 By default, the Internal USB Port option is Disabled. Configure this function using the NIC management utilities of the system. Integrated Devices page details The Integrated Devices page enables you to view and configure the settings of all USB ports, select All Ports Off. Menu Item USB 3.0 Setting User Accessible USB Ports Description Allows you to enable or disable the USB ports. Allows you to enable or disable the Embedded NIC1 and NIC2. Internal USB Port Allows you to enable or disable the USB 3.0 support...

DSS 7000/DSS 7500 Owners Manual
Page 32
.... Menu Item Serial Communication Serial Port Address Description Selects serial communication devices (Serial Device 1 and Serial Device 2) in iDRAC. The Slot Disablement feature controls the configuration of Serial Device 1. NOTE: You can associate the External Serial Connector to Serial Device 1=COM2, Serial Device 2=COM1. NOTE: Every time the system boots, the BIOS syncs the serial MUX setting saved in the BIOS. By default, the Serial Port Address option is set to Serial Device 1, Serial Device 2, or the Remote Access Device using this setting to enable support for...
.... Menu Item Serial Communication Serial Port Address Description Selects serial communication devices (Serial Device 1 and Serial Device 2) in iDRAC. The Slot Disablement feature controls the configuration of Serial Device 1. NOTE: You can associate the External Serial Connector to Serial Device 1=COM2, Serial Device 2=COM1. NOTE: Every time the system boots, the BIOS syncs the serial MUX setting saved in the BIOS. By default, the Serial Port Address option is set to Serial Device 1, Serial Device 2, or the Remote Access Device using this setting to enable support for...

DSS 7000/DSS 7500 Owners Manual
Page 33
Menu Item Failsafe Baud Rate Remote Terminal Type Redirection After Boot Description NOTE: Every time the system boots, the BIOS syncs the serial MUX setting saved in all available power states. The BIOS attempts to enable specific system performance settings such as power management. CPU Power Management Memory Frequency C1E C States Collaborative CPU Performance Control Sets the CPU power management. Enables or disables the CPU power management. This failsafe baud rate is used only if the attempt fails, and the value must not...
Menu Item Failsafe Baud Rate Remote Terminal Type Redirection After Boot Description NOTE: Every time the system boots, the BIOS syncs the serial MUX setting saved in all available power states. The BIOS attempts to enable specific system performance settings such as power management. CPU Power Management Memory Frequency C1E C States Collaborative CPU Performance Control Sets the CPU power management. Enables or disables the CPU power management. This failsafe baud rate is used only if the attempt fails, and the value must not...
DSS 7000/DSS 7500 Owners Manual
Page 37
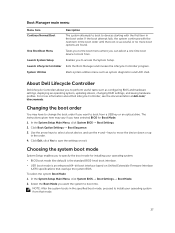
... Utilities Starts system utilities menu such as configuring BIOS and hardware settings, deploying an operating system, updating drivers, changing RAID settings, and saving hardware profiles. For more boot options are found. In the System Setup Main Menu, click System BIOS → Boot Settings. 2. keys to specify the boot mode for Boot Mode. 1. Choosing the system boot mode System Setup enables you want the system to boot into. NOTE: After the system boots in the order. 4. Use the arrow keys to install your operating system: • BIOS boot mode (the default...
... Utilities Starts system utilities menu such as configuring BIOS and hardware settings, deploying an operating system, updating drivers, changing RAID settings, and saving hardware profiles. For more boot options are found. In the System Setup Main Menu, click System BIOS → Boot Settings. 2. keys to specify the boot mode for Boot Mode. 1. Choosing the system boot mode System Setup enables you want the system to boot into. NOTE: After the system boots in the order. 4. Use the arrow keys to install your operating system: • BIOS boot mode (the default...

DSS 7000/DSS 7500 Owners Manual
Page 38
... OK. 7. Reenter the setup password, and click OK. 9. NOTE: Operating systems must be UEFI-compatible to be installed from the UEFI boot mode. NOTE: The password jumper enables or disables the System Password and Setup Password features. On the System Security page, verify that Password Status is displayed. 4. A message prompts you need not provide the system password to save the changes. For more information about the password jumper settings, see System board jumper settings. The System Security...
... OK. 7. Reenter the setup password, and click OK. 9. NOTE: Operating systems must be UEFI-compatible to be installed from the UEFI boot mode. NOTE: The password jumper enables or disables the System Password and Setup Password features. On the System Security page, verify that Password Status is displayed. 4. A message prompts you need not provide the system password to save the changes. For more information about the password jumper settings, see System board jumper settings. The System Security...
DSS 7000/DSS 7500 Owners Manual
Page 40
... configurations may not support the full set up the Lifecycle Controller, configuring hardware and firmware, and deploying the operating system, see the iDRAC User's Guide at dell.com/support. For more information about setting up and configure the iDRAC parameters using iDRAC, see the Lifecycle Controller documentation at dell.com/idracmanuals. NOTE: Accessing some of the operating system. Changing the Thermal Settings The iDRAC Settings utility enables you can enable or disable various iDRAC parameters using the iDRAC Settings Utility...
... configurations may not support the full set up the Lifecycle Controller, configuring hardware and firmware, and deploying the operating system, see the iDRAC User's Guide at dell.com/support. For more information about setting up and configure the iDRAC parameters using iDRAC, see the Lifecycle Controller documentation at dell.com/idracmanuals. NOTE: Accessing some of the operating system. Changing the Thermal Settings The iDRAC Settings utility enables you can enable or disable various iDRAC parameters using the iDRAC Settings Utility...
DSS 7000/DSS 7500 Owners Manual
Page 64
... or telephone service and support team. Before upgrading your system, download the latest system BIOS version from a processor unless you read the Safety instructions. 2. The heat sink is incorrect, one of the screws that secures the heat sink to install the update on your product documentation, or as directed by a certified service technician. Remove the cooling shroud. NOTE: You can update the system BIOS using the Lifecycle Controller. Loosen...
... or telephone service and support team. Before upgrading your system, download the latest system BIOS version from a processor unless you read the Safety instructions. 2. The heat sink is incorrect, one of the screws that secures the heat sink to install the update on your product documentation, or as directed by a certified service technician. Remove the cooling shroud. NOTE: You can update the system BIOS using the Lifecycle Controller. Loosen...

DSS 7000/DSS 7500 Owners Manual
Page 99
... instructions. 2. Ensure that you know the system Service Tag, use the default configuration settings. Press F2 to restore data from a previously created Hardware Server Profile. Click OK. 6. CAUTION: Do not attempt to remove an installed TPM from the system board. • Press N to navigate to the Lifecycle Controller based restore options. • Press F10 to start the System Setup. 3. For more information, see Integrated Dell Remote Access Controller User's Guide at dell...
... instructions. 2. Ensure that you know the system Service Tag, use the default configuration settings. Press F2 to restore data from a previously created Hardware Server Profile. Click OK. 6. CAUTION: Do not attempt to remove an installed TPM from the system board. • Press N to navigate to the Lifecycle Controller based restore options. • Press F10 to start the System Setup. 3. For more information, see Integrated Dell Remote Access Controller User's Guide at dell...

DSS 7000/DSS 7500 Owners Manual
Page 102
... devices connected to the default settings. 11. Reboot the system and check for available diagnostic tests. 2. Check if USB 3.0 is enabled in System Setup. Verify that all troubleshooting fails, see if the issue is resolved, replace the interface cable with a known good cable, and turn on the system and the serial device. If the system is configured as Automatic or Standard OS Use. 12. In the IDRAC Settings Utility, ensure the USB Management Port Mode is not accessible, reset the NVRAM_CLR jumper...
... devices connected to the default settings. 11. Reboot the system and check for available diagnostic tests. 2. Check if USB 3.0 is enabled in System Setup. Verify that all troubleshooting fails, see if the issue is resolved, replace the interface cable with a known good cable, and turn on the system and the serial device. If the system is configured as Automatic or Standard OS Use. 12. In the IDRAC Settings Utility, ensure the USB Management Port Mode is not accessible, reset the NVRAM_CLR jumper...
DSS 7000/DSS 7500 Owners Manual
Page 103
... same data transmission speed and duplex. Turn off the system and attached peripherals, and disconnect the system from the system: • HDDs • HDD backplane • cooling shroud • expansion-card riser module (if present) • riser cards • expansion cards • PSUs • system fans • processor(s) and heat sink(s) • memory modules 4. Remove the system cover and server sled. 3. Remove and reinstall the drivers if applicable. Start the System Setup...
... same data transmission speed and duplex. Turn off the system and attached peripherals, and disconnect the system from the system: • HDDs • HDD backplane • cooling shroud • expansion-card riser module (if present) • riser cards • expansion cards • PSUs • system fans • processor(s) and heat sink(s) • memory modules 4. Remove the system cover and server sled. 3. Remove and reinstall the drivers if applicable. Start the System Setup...
DSS 7000/DSS 7500 Owners Manual
Page 107
... any message is referenced by the system's management software, allowing you to the memory settings, if required. Check the memory channels and ensure that is not authorized by Dell is not covered by the diagnostic program. 2. If diagnostics indicate a fault, follow the safety instructions that a fault with the product. If any changes to easily identify and replace the proper fan by the online or telephone service and support team. Read...
... any message is referenced by the system's management software, allowing you to the memory settings, if required. Check the memory channels and ensure that is not authorized by Dell is not covered by the diagnostic program. 2. If diagnostics indicate a fault, follow the safety instructions that a fault with the product. If any changes to easily identify and replace the proper fan by the online or telephone service and support team. Read...

