Quick Reference Guide
Page 13
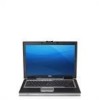
...battery bay. One battery is fully charged. Operating time is used, you perform operations including, but not limited to help preserve BIOS settings, operate your Dell computer. For optimal computer performance and to , the following: • Using optical drives • Using wireless communications devices, ...be fully charged, use the AC adapter to connect your computer to an electrical outlet when writing to work with your Dell™ portable computer with a compatible battery purchased from other power-intensive programs such as standard equipment in the Product Information ...
...battery bay. One battery is fully charged. Operating time is used, you perform operations including, but not limited to help preserve BIOS settings, operate your Dell computer. For optimal computer performance and to , the following: • Using optical drives • Using wireless communications devices, ...be fully charged, use the AC adapter to connect your computer to an electrical outlet when writing to work with your Dell™ portable computer with a compatible battery purchased from other power-intensive programs such as standard equipment in the Product Information ...

User's Guide
Page 41
... new computer to significantly increase operating time. Using a Battery 41 4 Using a Battery Battery Performance NOTE: For information about the Dell warranty for your computer, see "Accessing Power Options Properties" on operating conditions. For optimal computer performance and to purchase a new ...battery during the life of your Dell™ portable computer with the AC adapter until the battery is recommended that shipped with your computer. NOTE: Because the ...
... new computer to significantly increase operating time. Using a Battery 41 4 Using a Battery Battery Performance NOTE: For information about the Dell warranty for your computer, see "Accessing Power Options Properties" on operating conditions. For optimal computer performance and to purchase a new ...battery during the life of your Dell™ portable computer with the AC adapter until the battery is recommended that shipped with your computer. NOTE: Because the ...

User's Guide
Page 71
... connection, the firewall icon appears with a red background in the Network Connections section of whether your computer is turned on your Dell computer uses the Dell Wi-Fi Catcher Network Locator to scan specifically for WiFi WLAN in your computer while it is connected to appear. For more ...more information about the wireless switch, see "wireless switch" on the Wi-Fi Catcher Network Locator and to enable the feature through Dell QuickSet or the BIOS (system setup program) to you, you run the Network Setup Wizard. Setting Up and Using Networks 71 The Wi-Fi Catcher Network...
... connection, the firewall icon appears with a red background in the Network Connections section of whether your computer is turned on your Dell computer uses the Dell Wi-Fi Catcher Network Locator to scan specifically for WiFi WLAN in your computer while it is connected to appear. For more ...more information about the wireless switch, see "wireless switch" on the Wi-Fi Catcher Network Locator and to enable the feature through Dell QuickSet or the BIOS (system setup program) to you, you run the Network Setup Wizard. Setting Up and Using Networks 71 The Wi-Fi Catcher Network...
User's Guide
Page 99
... remain on, depending on your computer, read the sequence of the keyboard status lights in this section, follow the safety instructions that shipped with your BIOS settings. Your computer has three keyboard status lights located above the keyboard. During normal operation, the keyboard status lights display the current status (on page...
... remain on, depending on your computer, read the sequence of the keyboard status lights in this section, follow the safety instructions that shipped with your BIOS settings. Your computer has three keyboard status lights located above the keyboard. During normal operation, the keyboard status lights display the current status (on page...
User's Guide
Page 132
... properly. NOTE: Power is supplied to manage the computer in the absence of an operating system or with the operating system in the Management Engine BIOS Extension (MEBx) setup. MFG_MODE jumper: The security override jumper is turned off . Out-of-Band Management Out-of-Band term refers to the ability to... MFG_MODE jumper. Unable to AMT or None in an unusable state, or with the computer turned off . Accessing iAMT setup Intel's MEBx interface controls the Latitude D630c iAMT features and setup options. Set manageability mode to launch Management Engine (ME).
... properly. NOTE: Power is supplied to manage the computer in the absence of an operating system or with the operating system in the Management Engine BIOS Extension (MEBx) setup. MFG_MODE jumper: The security override jumper is turned off . Out-of-Band Management Out-of-Band term refers to the ability to... MFG_MODE jumper. Unable to AMT or None in an unusable state, or with the computer turned off . Accessing iAMT setup Intel's MEBx interface controls the Latitude D630c iAMT features and setup options. Set manageability mode to launch Management Engine (ME).

User's Guide
Page 133
...Firmware Update • ASF • Wake from ME Intel® Active Management Technology 133 USB Provisioning iAMT can be bootable. During POST, the BIOS displays a message, stating that the computer is admin. The USB key must be changed. The changes are applied and the computer reboots. •...iAMT configuration modes To view the MEBx setup screen, press during system post or system boot. To provision iAMT using a USB key and Dell Client Manager. NOTE: To make configuration setting changes, the default MEBx password must : • Be formatted using the FAT16 file system ...
...Firmware Update • ASF • Wake from ME Intel® Active Management Technology 133 USB Provisioning iAMT can be bootable. During POST, the BIOS displays a message, stating that the computer is admin. The USB key must be changed. The changes are applied and the computer reboots. •...iAMT configuration modes To view the MEBx setup screen, press during system post or system boot. To provision iAMT using a USB key and Dell Client Manager. NOTE: To make configuration setting changes, the default MEBx password must : • Be formatted using the FAT16 file system ...
User's Guide
Page 149
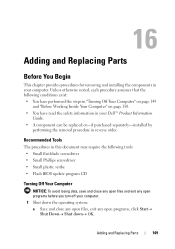
...Your Computer" on page 149 and "Before Working Inside Your Computer" on page 150. • You have read the safety information in your Dell™ Product Information Guide. • A component can be replaced or-if purchased separately-installed by performing the removal procedure in your computer. ... assumes that the following tools: • Small flat-blade screwdriver • Small Phillips screwdriver • Small plastic scribe • Flash BIOS update program CD Turning Off Your Computer NOTICE: To avoid losing data, save and close any open files and exit any open programs before...
...Your Computer" on page 149 and "Before Working Inside Your Computer" on page 150. • You have read the safety information in your Dell™ Product Information Guide. • A component can be replaced or-if purchased separately-installed by performing the removal procedure in your computer. ... assumes that the following tools: • Small flat-blade screwdriver • Small Phillips screwdriver • Small plastic scribe • Flash BIOS update program CD Turning Off Your Computer NOTICE: To avoid losing data, save and close any open files and exit any open programs before...

User's Guide
Page 203
... memory to an electrical outlet. ALS - battery operating time - The length of the faster interface between the computer hardware and the operating system. antivirus software - BIOS - AGP - ASF - ACPI - basic input/output system - A program (or utility) that powers your computer when you understand what effect these settings have on the computer...
... memory to an electrical outlet. ALS - battery operating time - The length of the faster interface between the computer hardware and the operating system. antivirus software - BIOS - AGP - ASF - ACPI - basic input/output system - A program (or utility) that powers your computer when you understand what effect these settings have on the computer...

User's Guide
Page 212
.... A physical storage area on the major computer components, such as logical drives. POST - Diagnostics programs, loaded automatically by the number of pixels across by the BIOS, that supports 32-and 64-bit data paths, providing a high-speed data path between two devices through the processor as an LPT port. partition - Plug... attached to it. A single point on self-test - PCI Express - PIO - Plug and Play provides automatic installation, configuration, and compatibility with existing hardware if the BIOS, operating system, and all devices are Plug and Play compliant.
.... A physical storage area on the major computer components, such as logical drives. POST - Diagnostics programs, loaded automatically by the number of pixels across by the BIOS, that supports 32-and 64-bit data paths, providing a high-speed data path between two devices through the processor as an LPT port. partition - Plug... attached to it. A single point on self-test - PCI Express - PIO - Plug and Play provides automatic installation, configuration, and compatibility with existing hardware if the BIOS, operating system, and all devices are Plug and Play compliant.
User's Guide
Page 215
... video cards and controllers that serves as date and time or system password. A utility that supports resolutions up to configure user-selectable options in the BIOS, such as an interface between the computer hardware and the operating system. surge protectors - super-video graphics array - A video standard for this program. system setup...
... video cards and controllers that serves as date and time or system password. A utility that supports resolutions up to configure user-selectable options in the BIOS, such as an interface between the computer hardware and the operating system. surge protectors - super-video graphics array - A video standard for this program. system setup...

Service Manual
Page 4
DellTM XFR D630 Fully Rugged Notebook Service Manual 10.10 INSTALLING THE DISPLAY LATCH 68 11 INTERNAL CARD WITH BLUETOOTH® WIRELESS TECHNOLOGY 68 11.1 REMOVING THE BLUETOOTH® WIRELESS CARD ... ...93 21.2 INSTALLING THE FAN 94 22 SYSTEM BOARD ...95 22.1 REMOVING THE SYSTEM BOARD 95 22.2 INSTALLING THE SYSTEM BOARD 98 23 FLASHING THE BIOS 101 23.1 FLASHING THE BIOS FROM A CD 101 23.2 FLASHING THE BIOS FROM THE HARD DRIVE 101 Page 4 of 106 Revision A01
DellTM XFR D630 Fully Rugged Notebook Service Manual 10.10 INSTALLING THE DISPLAY LATCH 68 11 INTERNAL CARD WITH BLUETOOTH® WIRELESS TECHNOLOGY 68 11.1 REMOVING THE BLUETOOTH® WIRELESS CARD ... ...93 21.2 INSTALLING THE FAN 94 22 SYSTEM BOARD ...95 22.1 REMOVING THE SYSTEM BOARD 95 22.2 INSTALLING THE SYSTEM BOARD 98 23 FLASHING THE BIOS 101 23.1 FLASHING THE BIOS FROM A CD 101 23.2 FLASHING THE BIOS FROM THE HARD DRIVE 101 Page 4 of 106 Revision A01

Service Manual
Page 6
... by Dell is not covered by its edges or by your computer. 1. Click Start→ Shut Down→ Shut down. Hold a card by its metal mounting bracket. Hold a component such as a processor by its pull-tab, not on a card. DellTM XFR D630 Fully Rugged Notebook Service ...tools: • Small flat-blade screwdriver • Phillips screwdriver • Small plastic scribe • 5-mm hex nut driver • Flash BIOS-update program CD • Processor extraction tool • Torque driver capable of 106 Revision A01 CAUTION: Before you turn off after the operating ...
... by Dell is not covered by its edges or by your computer. 1. Click Start→ Shut Down→ Shut down. Hold a card by its metal mounting bracket. Hold a component such as a processor by its pull-tab, not on a card. DellTM XFR D630 Fully Rugged Notebook Service ...tools: • Small flat-blade screwdriver • Phillips screwdriver • Small plastic scribe • 5-mm hex nut driver • Flash BIOS-update program CD • Processor extraction tool • Torque driver capable of 106 Revision A01 CAUTION: Before you turn off after the operating ...
Service Manual
Page 95
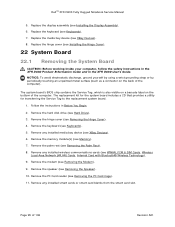
Replace the hinge cover (see Removing the Palm Rest). 268H 8. The system board's BIOS chip contains the Service Tag, which is also visible on a barcode label on the back of the computer. Remove any installed smart cards or ...bay device (see Removing the Modem). 27H 9. Remove the hinge cover (see Keyboards). 265H 5. Remove the hard disk drive (see Keyboards). 259H 7. DellTM XFR D630 Fully Rugged Notebook Service Manual 5. Replace the keyboard (see Hard Drive). 263H 3. Remove the memory module(s) (see WWAN, FCM & SIM Cards, Wireless 269H 270H Local Area ...
Replace the hinge cover (see Removing the Palm Rest). 268H 8. The system board's BIOS chip contains the Service Tag, which is also visible on a barcode label on the back of the computer. Remove any installed smart cards or ...bay device (see Removing the Modem). 27H 9. Remove the hinge cover (see Keyboards). 265H 5. Remove the hard disk drive (see Keyboards). 259H 7. DellTM XFR D630 Fully Rugged Notebook Service Manual 5. Replace the keyboard (see Hard Drive). 263H 3. Remove the memory module(s) (see WWAN, FCM & SIM Cards, Wireless 269H 270H Local Area ...
Service Manual
Page 101
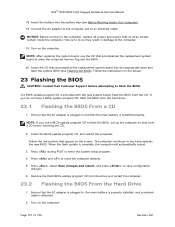
... main battery is installed properly. Follow the instructions on the screen. 29H 23 Flashing the BIOS CAUTION: Contact Dell Customer Support before inserting the CD. 2. Insert the BIOS-update program CD, and restart the computer. DellTM XFR D630 Fully Rugged Notebook Service Manual 18. Ensure that the AC adapter is plugged in, the main battery...
... main battery is installed properly. Follow the instructions on the screen. 29H 23 Flashing the BIOS CAUTION: Contact Dell Customer Support before inserting the CD. 2. Insert the BIOS-update program CD, and restart the computer. DellTM XFR D630 Fully Rugged Notebook Service Manual 18. Ensure that the AC adapter is plugged in, the main battery...

Service Manual
Page 102
... touching an unpainted metal surface (such as the downloaded BIOS update file. 9. The File Download window appears. 6. Follow the instructions in the XFR D630 User's Guide. Page 102 of the computer). 1. Click Save this Agreement. The Save In window appears. 7. DellTM XFR D630 Fully Rugged Notebook Service Manual 3. Remove the system board (see Removing...
... touching an unpainted metal surface (such as the downloaded BIOS update file. 9. The File Download window appears. 6. Follow the instructions in the XFR D630 User's Guide. Page 102 of the computer). 1. Click Save this Agreement. The Save In window appears. 7. DellTM XFR D630 Fully Rugged Notebook Service Manual 3. Remove the system board (see Removing...


