
User's Guide
Page 2
... 14 Installing internal options...14 Installing hardware options...30 Attaching cables...32 Setting up the printer software...34 Networking...36 Verifying printer setup...42 Loading paper and specialty media 44 Setting the paper size and type...44 Configuring Universal paper settings...44 Loading the 550‑sheet tray...44 Loading the 2100‑sheet tray...
... 14 Installing internal options...14 Installing hardware options...30 Attaching cables...32 Setting up the printer software...34 Networking...36 Verifying printer setup...42 Loading paper and specialty media 44 Setting the paper size and type...44 Configuring Universal paper settings...44 Loading the 550‑sheet tray...44 Loading the 2100‑sheet tray...

User's Guide
Page 3
... a directory list...77 Canceling a print job...77 Canceling a print job from the printer control panel 77 Canceling a print job from the computer ...77 Understanding printer menus 79 Menus list...79 Paper menu...79 Reports menu...90 Network/Ports menu...91 Security menu...104 Settings menu...107 Help... menu...127 Saving money and the environment 128 Saving paper and toner...128 Saving energy...128 Recycling...132 Securing the printer 133 Using the security lock feature...133 Statement of Volatility...133 Erasing volatile memory...134 Erasing ...
... a directory list...77 Canceling a print job...77 Canceling a print job from the printer control panel 77 Canceling a print job from the computer ...77 Understanding printer menus 79 Menus list...79 Paper menu...79 Reports menu...90 Network/Ports menu...91 Security menu...104 Settings menu...107 Help... menu...127 Saving money and the environment 128 Saving paper and toner...128 Saving energy...128 Recycling...132 Securing the printer 133 Using the security lock feature...133 Statement of Volatility...133 Erasing volatile memory...134 Erasing ...

User's Guide
Page 4
...-457 169 Troubleshooting 172 Understanding the printer messages...172 Solving printer problems...189 Solving print problems...197 Leave paper in bin. [451 168 [x]‑page jam, remove paper, open expander rear door. Leave paper in bin. [41y.xx 165 [x]‑page jam, remove paper, open stapler door. Contents 4 Maintaining the printer 137 Estimated number of remaining pages...
...-457 169 Troubleshooting 172 Understanding the printer messages...172 Solving printer problems...189 Solving print problems...197 Leave paper in bin. [451 168 [x]‑page jam, remove paper, open expander rear door. Leave paper in bin. [41y.xx 165 [x]‑page jam, remove paper, open stapler door. Contents 4 Maintaining the printer 137 Estimated number of remaining pages...
User's Guide
Page 8
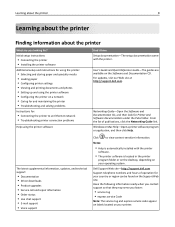
... Ethernet network • Troubleshooting printer connection problems Help using the printer software • Configuring the printer on your printer. Notes: • Help is automatically installed with the printer. Dell Support Web site-http://support.dell.com Support telephone numbers and...setup instructions: • Connecting the printer • Installing the printer software Additional setup and instructions for using the printer: • Selecting and storing paper and specialty media • Loading paper • Configuring printer settings • Viewing and printing documents...
... Ethernet network • Troubleshooting printer connection problems Help using the printer software • Configuring the printer on your printer. Notes: • Help is automatically installed with the printer. Dell Support Web site-http://support.dell.com Support telephone numbers and...setup instructions: • Connecting the printer • Installing the printer software Additional setup and instructions for using the printer: • Selecting and storing paper and specialty media • Loading paper • Configuring printer settings • Viewing and printing documents...
User's Guide
Page 9
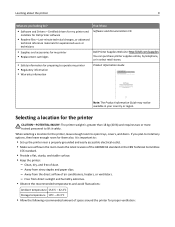
...; Provide a flat, sturdy, and stable surface. • Keep the printer: - Away from stray staples and paper clips. - When selecting a location for the printer, leave enough room to lift it here Software and Documentation CD Dell Printer Supplies Web site-http://dell.com/supplies You can purchase printer supplies online, by telephone, or in select retail stores. Product...
...; Provide a flat, sturdy, and stable surface. • Keep the printer: - Away from stray staples and paper clips. - When selecting a location for the printer, leave enough room to lift it here Software and Documentation CD Dell Printer Supplies Web site-http://dell.com/supplies You can purchase printer supplies online, by telephone, or in select retail stores. Product...

User's Guide
Page 12
... Sleep mode: • Press any hard button. • Pull out Tray 1 or load paper in the printer settings. 3 Arrow buttons Scroll up and operate the printer. 2 Select button Submit changes made in the multipurpose feeder. • Open a door or cover. • Send a print job from the computer. • Perform a power‑...
... Sleep mode: • Press any hard button. • Pull out Tray 1 or load paper in the printer settings. 3 Arrow buttons Scroll up and operate the printer. 2 Select button Submit changes made in the multipurpose feeder. • Open a door or cover. • Send a print job from the computer. • Perform a power‑...

User's Guide
Page 44
... specialty media The selection and handling of equipment instability, load each tray separately. Setting the paper size and type 1 From the printer control panel, navigate to: > Settings > > Paper Menu > > Paper Size/Type > 2 Press the up or down arrow button to select the tray or feeder, and then ... > select unit of Loading the 550‑sheet tray CAUTION-POTENTIAL INJURY: To reduce the risk of paper and specialty media can affect how reliably documents print. From the printer control panel, navigate to change the settings. For more information, see "Avoiding jams" on page 152 ...
... specialty media The selection and handling of equipment instability, load each tray separately. Setting the paper size and type 1 From the printer control panel, navigate to: > Settings > > Paper Menu > > Paper Size/Type > 2 Press the up or down arrow button to select the tray or feeder, and then ... > select unit of Loading the 550‑sheet tray CAUTION-POTENTIAL INJURY: To reduce the risk of paper and specialty media can affect how reliably documents print. From the printer control panel, navigate to change the settings. For more information, see "Avoiding jams" on page 152 ...

User's Guide
Page 45
Loading paper and specialty media 45 2 Squeeze and slide the width guide to the correct position for the size of the paper being loaded until it clicks into place. 1 2 Note: Use the paper size indicators on the bottom of the tray to help position the guides.
Loading paper and specialty media 45 2 Squeeze and slide the width guide to the correct position for the size of the paper being loaded until it clicks into place. 1 2 Note: Use the paper size indicators on the bottom of the tray to help position the guides.

User's Guide
Page 46
Loading paper and specialty media 46 3 Unlock the length guide, and then squeeze and slide the guide to the correct position for the size of the paper being loaded. 1 2 3 Notes: • Lock the length guide for all paper sizes. • Use the paper size indicators on the bottom of the tray to help position the guides.
Loading paper and specialty media 46 3 Unlock the length guide, and then squeeze and slide the guide to the correct position for the size of the paper being loaded. 1 2 3 Notes: • Lock the length guide for all paper sizes. • Use the paper size indicators on the bottom of the tray to help position the guides.

User's Guide
Page 47
Without an optional staple finisher With an optional staple finisher One‑sided printing One‑sided printing Straighten the edges on whether an optional staple finisher is installed or not. Note: Make sure the paper or envelope is loaded properly. • There are different ways for loading letterhead depending on a level surface. 5 Load the paper stack with the printable side facedown. Do not fold or crease the paper. Loading paper and specialty media 47 4 Flex and fan the sheets to loosen them.
Without an optional staple finisher With an optional staple finisher One‑sided printing One‑sided printing Straighten the edges on whether an optional staple finisher is installed or not. Note: Make sure the paper or envelope is loaded properly. • There are different ways for loading letterhead depending on a level surface. 5 Load the paper stack with the printable side facedown. Do not fold or crease the paper. Loading paper and specialty media 47 4 Flex and fan the sheets to loosen them.

User's Guide
Page 48
Load paper as shown in the illustration. • If you are loading envelopes, then make sure that the flap side is facing up and the envelopes are on the left side of the tray. Loading paper and specialty media 48 Without an optional staple finisher With an optional staple finisher Two‑sided printing Two‑sided printing • Do not slide the paper into the tray.
Load paper as shown in the illustration. • If you are loading envelopes, then make sure that the flap side is facing up and the envelopes are on the left side of the tray. Loading paper and specialty media 48 Without an optional staple finisher With an optional staple finisher Two‑sided printing Two‑sided printing • Do not slide the paper into the tray.

User's Guide
Page 49
... length guide. 7 Insert the tray. 8 From the printer control panel, set the paper size and type in the tray. Warning-Potential Damage: Overfilling the tray can cause paper jams. 6 For custom‑ or Universal‑size paper, adjust the paper guides to match the paper loaded in the Paper menu to lightly touch the sides of equipment...
... length guide. 7 Insert the tray. 8 From the printer control panel, set the paper size and type in the tray. Warning-Potential Damage: Overfilling the tray can cause paper jams. 6 For custom‑ or Universal‑size paper, adjust the paper guides to match the paper loaded in the Paper menu to lightly touch the sides of equipment...

User's Guide
Page 50
Loading paper and specialty media 50 Loading A5‑size paper a Pull up and slide the width guide to the position for A5. 1 2 LGOLFFCOLLTIOR b Squeeze and slide the length guide to the position for A5 until it clicks into place. 1 2
Loading paper and specialty media 50 Loading A5‑size paper a Pull up and slide the width guide to the position for A5. 1 2 LGOLFFCOLLTIOR b Squeeze and slide the length guide to the position for A5 until it clicks into place. 1 2

User's Guide
Page 51
Loading paper and specialty media 51 c Remove the A5 length guide from its designated slot. Note: Press the A5 length guide until it clicks into its holder. 1 2 d Insert the A5 length guide into place. Loading A4‑, letter‑, legal‑, oficio‑, and folio‑size paper a Pull up and slide the width guide to the correct position for the size of the paper being loaded. 1 2 LGOLFFCOLLTIOR
Loading paper and specialty media 51 c Remove the A5 length guide from its designated slot. Note: Press the A5 length guide until it clicks into its holder. 1 2 d Insert the A5 length guide into place. Loading A4‑, letter‑, legal‑, oficio‑, and folio‑size paper a Pull up and slide the width guide to the correct position for the size of the paper being loaded. 1 2 LGOLFFCOLLTIOR

User's Guide
Page 52
c Put the A5 length guide in its place. If the A5 length guide is still attached to step d. Loading paper and specialty media 52 b If the A5 length guide is not attached, then proceed to the length guide, then remove it from its holder. 1 2
c Put the A5 length guide in its place. If the A5 length guide is still attached to step d. Loading paper and specialty media 52 b If the A5 length guide is not attached, then proceed to the length guide, then remove it from its holder. 1 2

User's Guide
Page 53
Straighten the edges on whether an optional staple finisher is loaded properly. • There are different ways for the size of the paper being loaded until it clicks into place. 3 Flex and fan the sheets to loosen them. Do not fold or crease the paper. Note: Make sure the paper is installed or not. Loading paper and specialty media 53 d Squeeze the length guide and slide it to the correct position for loading letterhead depending on a level surface. 4 Load the paper stack with the printable side facedown.
Straighten the edges on whether an optional staple finisher is loaded properly. • There are different ways for the size of the paper being loaded until it clicks into place. 3 Flex and fan the sheets to loosen them. Do not fold or crease the paper. Note: Make sure the paper is installed or not. Loading paper and specialty media 53 d Squeeze the length guide and slide it to the correct position for loading letterhead depending on a level surface. 4 Load the paper stack with the printable side facedown.

User's Guide
Page 54
ABC ABC Loading paper and specialty media 54 Without an optional staple finisher With an optional staple finisher ABC One‑sided printing ABC One‑sided printing Two‑sided printing Two‑sided printing
ABC ABC Loading paper and specialty media 54 Without an optional staple finisher With an optional staple finisher ABC One‑sided printing ABC One‑sided printing Two‑sided printing Two‑sided printing

User's Guide
Page 55
Note: Press the paper stack down while inserting the tray. Warning-Potential Damage: Overfilling the tray can cause paper jams. 5 Insert the tray. Loading paper and specialty media 55 • Make sure the paper is below the maximum paper fill indicator.
Note: Press the paper stack down while inserting the tray. Warning-Potential Damage: Overfilling the tray can cause paper jams. 5 Insert the tray. Loading paper and specialty media 55 • Make sure the paper is below the maximum paper fill indicator.

User's Guide
Page 56
Note: Do not load or close the multipurpose feeder while a job is printing. Note: Set the correct paper size and type to match the paper loaded in the Paper menu to avoid paper jams and print quality problems. Loading the multipurpose feeder 1 Pull down the multipurpose feeder door. Loading paper and specialty media 56 6 From the printer control panel, set the size and type in the tray.
Note: Do not load or close the multipurpose feeder while a job is printing. Note: Set the correct paper size and type to match the paper loaded in the Paper menu to avoid paper jams and print quality problems. Loading the multipurpose feeder 1 Pull down the multipurpose feeder door. Loading paper and specialty media 56 6 From the printer control panel, set the size and type in the tray.

User's Guide
Page 57
Note: Guide the extender gently so that the multipurpose feeder is fully extended and open. 3 Slide the width guide to the correct position for the size of the tray to help position the guides. 4 Prepare the paper or specialty media for loading. • Flex and fan the sheets to loosen them. Do not fold or crease the paper. Straighten the edges on the bottom of the paper being loaded. Note: Use the paper size indicators on a level surface. Loading paper and specialty media 57 2 Pull the multipurpose feeder extender.
Note: Guide the extender gently so that the multipurpose feeder is fully extended and open. 3 Slide the width guide to the correct position for the size of the tray to help position the guides. 4 Prepare the paper or specialty media for loading. • Flex and fan the sheets to loosen them. Do not fold or crease the paper. Straighten the edges on the bottom of the paper being loaded. Note: Use the paper size indicators on a level surface. Loading paper and specialty media 57 2 Pull the multipurpose feeder extender.


