Owner's Manual
Page 7
... Removing the System Board 84 Prerequisites 84 Procedure 85 48 Replacing the System Board 87 Procedure 87 Postrequisites 87 Entering the Service Tag in the BIOS 88 49 Removing the Wireless Mini-Card 89 Prerequisites 89 Procedure 89 Contents | 7
... Removing the System Board 84 Prerequisites 84 Procedure 85 48 Replacing the System Board 87 Procedure 87 Postrequisites 87 Entering the Service Tag in the BIOS 88 49 Removing the Wireless Mini-Card 89 Prerequisites 89 Procedure 89 Contents | 7
Owner's Manual
Page 8
50 Replacing the Wireless Mini-Card 91 Procedure 91 Postrequisites 92 51 Removing the Subwoofer 93 Prerequisites 93 Procedure 94 52 Replacing the Subwoofer 95 Procedure 95 Postrequisites 95 53 System Setup 97 Overview 97 Entering System Setup 97 System Setup Screens 98 System Setup Options 98 Boot Sequence 103 54 Flashing the BIOS 105 8 | Contents
50 Replacing the Wireless Mini-Card 91 Procedure 91 Postrequisites 92 51 Removing the Subwoofer 93 Prerequisites 93 Procedure 94 52 Replacing the Subwoofer 95 Procedure 95 Postrequisites 95 53 System Setup 97 Overview 97 Entering System Setup 97 System Setup Screens 98 System Setup Options 98 Boot Sequence 103 54 Flashing the BIOS 105 8 | Contents
Owner's Manual
Page 18
.... 18 | Removing the Coin-Cell Battery CAUTION: Removing the coin-cell battery resets the BIOS settings to the manufacturer's instructions. For additional safety best practices information, see the Regulatory Compliance Homepage at dell.com/ regulatory_compliance. however, without a coin-cell battery, the configuration information is erased if... setup. 9 Removing the Coin-Cell Battery WARNING: Before working inside your computer, read the safety information that you note the BIOS settings before removing the coin-cell battery. See "Removing the Battery Pack" on page 9.
.... 18 | Removing the Coin-Cell Battery CAUTION: Removing the coin-cell battery resets the BIOS settings to the manufacturer's instructions. For additional safety best practices information, see the Regulatory Compliance Homepage at dell.com/ regulatory_compliance. however, without a coin-cell battery, the configuration information is erased if... setup. 9 Removing the Coin-Cell Battery WARNING: Before working inside your computer, read the safety information that you note the BIOS settings before removing the coin-cell battery. See "Removing the Battery Pack" on page 9.
Owner's Manual
Page 82
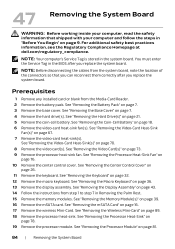
...and follow the steps in "Before You Begin" on page 89. 18 Remove the processor heat-sink. You must enter the Service Tag in the BIOS after you replace the system board. See "Removing the Base Cover" on page 16. 17 Remove the wireless Mini-Card. See "Removing the ... Tag is stored in Removing the Palm Rest. 15 Remove the memory modules. For additional safety best practices information, see the Regulatory Compliance Homepage at dell.com/regulatory_compliance. See "Removing the Coin-Cell Battery" on page 32. 12 Remove the macro keyboard. See "Removing the Display Assembly" on page ...
...and follow the steps in "Before You Begin" on page 89. 18 Remove the processor heat-sink. You must enter the Service Tag in the BIOS after you replace the system board. See "Removing the Base Cover" on page 16. 17 Remove the wireless Mini-Card. See "Removing the ... Tag is stored in Removing the Palm Rest. 15 Remove the memory modules. For additional safety best practices information, see the Regulatory Compliance Homepage at dell.com/regulatory_compliance. See "Removing the Coin-Cell Battery" on page 32. 12 Remove the macro keyboard. See "Removing the Display Assembly" on page ...
Owner's Manual
Page 86
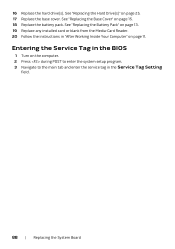
... Computer" on the computer. 2 Press during POST to enter the system setup program. 3 Navigate to the main tab and enter the service tag in the BIOS 1 Turn on page 11. 16 Replace the hard drive(s). Entering the Service Tag in the Service Tag Setting field. 88 | Replacing the System Board
... Computer" on the computer. 2 Press during POST to enter the system setup program. 3 Navigate to the main tab and enter the service tag in the BIOS 1 Turn on page 11. 16 Replace the hard drive(s). Entering the Service Tag in the Service Tag Setting field. 88 | Replacing the System Board
Owner's Manual
Page 96
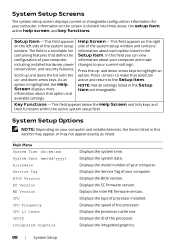
... Not all settings listed in the Setup Item. Main Menu System Time (hh:mm:ss) System Date (mm/dd/yyyy) Alienware Service Tag BIOS Version EC Version ME Version CPU CPU Frequency CPU L3 Cache CPUID Integrated Graphics Displays the system time. Displays the processor cache size...and installed devices, the items listed in this section may appear, or may not appear exactly as listed. Key Functions - Displays the BIOS version. System Setup Screens The system setup screen displays current or changeable configuration information for your computer, including installed hardware, power conservation,...
... Not all settings listed in the Setup Item. Main Menu System Time (hh:mm:ss) System Date (mm/dd/yyyy) Alienware Service Tag BIOS Version EC Version ME Version CPU CPU Frequency CPU L3 Cache CPUID Integrated Graphics Displays the system time. Displays the processor cache size...and installed devices, the items listed in this section may appear, or may not appear exactly as listed. Key Functions - Displays the BIOS version. System Setup Screens The system setup screen displays current or changeable configuration information for your computer, including installed hardware, power conservation,...

Owner's Manual
Page 97
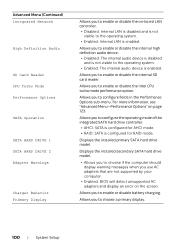
.... Allows you to enable or disable the Intel Virtualization technology. Allows you to enable or disable the Intel SpeedStep technology. This feature defines how the BIOS, in the absence of USB device (floppy, hard drive, or memory key) when this feature may not wake the computer. Disabling this option is turned...
.... Allows you to enable or disable the Intel Virtualization technology. Allows you to enable or disable the Intel SpeedStep technology. This feature defines how the BIOS, in the absence of USB device (floppy, hard drive, or memory key) when this feature may not wake the computer. Disabling this option is turned...
Owner's Manual
Page 98
... not visible to enable or disable the internal SD card reader. Allows you use AC adapters that are not supported by your computer. • Enabled: BIOS will detect unsupported AC adapters and display an error on the screen.
... not visible to enable or disable the internal SD card reader. Allows you use AC adapters that are not supported by your computer. • Enabled: BIOS will detect unsupported AC adapters and display an error on the screen.
Owner's Manual
Page 102
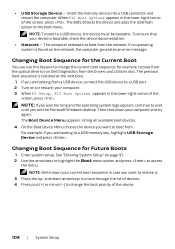
... in the lower-right corner of the device. 104 | System Setup Changing Boot Sequence for the Current Boot You can use this feature to run Dell Diagnostics from the network. • USB Storage Device - To ensure that your computer and try again. Then shut down your device is bootable, ... Use the arrow keys to highlight the Boot menu option and press to change the current boot sequence, for Future Boots 1 Enter system setup. The BIOS detects the device and adds the USB flash option to a USB device, the device must be bootable. Insert the memory device into a USB connector ...
... in the lower-right corner of the device. 104 | System Setup Changing Boot Sequence for the Current Boot You can use this feature to run Dell Diagnostics from the network. • USB Storage Device - To ensure that your computer and try again. Then shut down your device is bootable, ... Use the arrow keys to highlight the Boot menu option and press to change the current boot sequence, for Future Boots 1 Enter system setup. The BIOS detects the device and adds the USB flash option to a USB device, the device must be bootable. Insert the memory device into a USB connector ...
Owner's Manual
Page 103
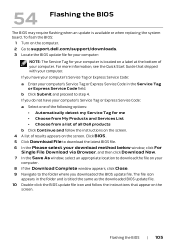
54 Flashing the BIOS The BIOS may require flashing when an update is located on a label at the bottom of your computer: NOTE: The Service Tag for me • Choose from My Products and Services List • Choose from a list of results appears on the screen. 4 A list of all Dell products b Click Continue and... Browser, and then click Download Now. 7 In the Save As window, select an appropriate location to download the file on the computer. 2 Go to support.dell.com/support/downloads. 3 Locate the BIOS update file for your computer.
54 Flashing the BIOS The BIOS may require flashing when an update is located on a label at the bottom of your computer: NOTE: The Service Tag for me • Choose from My Products and Services List • Choose from a list of results appears on the screen. 4 A list of all Dell products b Click Continue and... Browser, and then click Download Now. 7 In the Save As window, select an appropriate location to download the file on the computer. 2 Go to support.dell.com/support/downloads. 3 Locate the BIOS update file for your computer.


