
Owner's Manual
Page 8
Postrequsites 72 43 Removing the Optical Drive 73 Prerequsites 73 Procedure 73 44 Replacing the Optical Drive 76 Procedure 76 Postrequsites 76 45 Removing the System Board 77 Prerequsites 77 Procedure 78 46 Replacing the System Board 79 Procedure 79 Postrequsites 79 Entering the Service Tag in the BIOS 80 47 System Setup 81 Configuring the System Setup 81 Entering System Setup 81 System Setup Screens 81 System Setup Options 82 48 Flashing the BIOS 88 8 | Contents
Postrequsites 72 43 Removing the Optical Drive 73 Prerequsites 73 Procedure 73 44 Replacing the Optical Drive 76 Procedure 76 Postrequsites 76 45 Removing the System Board 77 Prerequsites 77 Procedure 78 46 Replacing the System Board 79 Procedure 79 Postrequsites 79 Entering the Service Tag in the BIOS 80 47 System Setup 81 Configuring the System Setup 81 Entering System Setup 81 System Setup Screens 81 System Setup Options 82 48 Flashing the BIOS 88 8 | Contents
Owner's Manual
Page 81
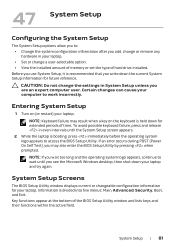
... it is divided into five menus: Main, Advanced, Security, Boot, and Exit. Certain changes can cause your laptop. System Setup Screens The BIOS Setup Utility window displays current or changeable configuration information for your computer to work incorrectly. Information is recommended that you write down...within the active field. NOTE: If you wait too long and the operating system logo appears, continue to wait until the System Setup screen appears. 2 While the laptop is booting, press immediately before the operating system logo appears to access the BIOS Setup Utility. Entering ...
... it is divided into five menus: Main, Advanced, Security, Boot, and Exit. Certain changes can cause your laptop. System Setup Screens The BIOS Setup Utility window displays current or changeable configuration information for your computer to work incorrectly. Information is recommended that you write down...within the active field. NOTE: If you wait too long and the operating system logo appears, continue to wait until the System Setup screen appears. 2 While the laptop is booting, press immediately before the operating system logo appears to access the BIOS Setup Utility. Entering ...
Owner's Manual
Page 84
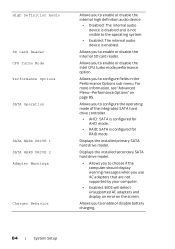
... of the integrated SATA hard drive controller. • AHCI: SATA is configured for RAID mode. For more information, see "Advanced Menu-Performance Options" on the screen. Displays the installed primary SATA hard drive model. Allows you to enable or disable the Intel CPU turbo mode performance option. High Definition Audio SD...
... of the integrated SATA hard drive controller. • AHCI: SATA is configured for RAID mode. For more information, see "Advanced Menu-Performance Options" on the screen. Displays the installed primary SATA hard drive model. Allows you to enable or disable the Intel CPU turbo mode performance option. High Definition Audio SD...
Owner's Manual
Page 88
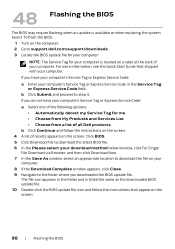
...as the downloaded BIOS update file. 10 Double-click the BIOS update file icon and follow the instructions on the screen. 4 A list of results appears on the computer. 2 Go to support.dell.com/support/downloads. 3 Locate the BIOS update file for your computer's Service Tag or Express Service Code in ...the folder and is available or when replacing the system board. For more information, see the Quick Start Guide that appear on the screen. 88 | Flashing the ...
...as the downloaded BIOS update file. 10 Double-click the BIOS update file icon and follow the instructions on the screen. 4 A list of results appears on the computer. 2 Go to support.dell.com/support/downloads. 3 Locate the BIOS update file for your computer's Service Tag or Express Service Code in ...the folder and is available or when replacing the system board. For more information, see the Quick Start Guide that appear on the screen. 88 | Flashing the ...

