Owner's Manual
Page 4
... Module(s) . . . . 22 Prerequsites 22 Procedure 22 12 Replacing the Memory Module(s) . . . . 24 Procedure 24 Postrequsites 25 13 Removing the Graphics-Card Heat Sink Fan 26 Prerequsites 26 Procedure 27 14 Replacing the Graphics-Card Heat Sink Fan 28 Procedure 28 Postrequsites 28 15 Removing the Processor Heat-Sink Fan 29 Prerequsites 29 Procedure 30...
... Module(s) . . . . 22 Prerequsites 22 Procedure 22 12 Replacing the Memory Module(s) . . . . 24 Procedure 24 Postrequsites 25 13 Removing the Graphics-Card Heat Sink Fan 26 Prerequsites 26 Procedure 27 14 Replacing the Graphics-Card Heat Sink Fan 28 Procedure 28 Postrequsites 28 15 Removing the Processor Heat-Sink Fan 29 Prerequsites 29 Procedure 30...
Owner's Manual
Page 5
18 Replacing the Graphics-Card Assembly 34 Procedure 34 Postrequsites 34 19 Removing the Processor Heat-Sink 35 Prerequsites 35 Procedure 36 20 Replacing the Processor Heat-Sink 37 Procedure ...
18 Replacing the Graphics-Card Assembly 34 Procedure 34 Postrequsites 34 19 Removing the Processor Heat-Sink 35 Prerequsites 35 Procedure 36 20 Replacing the Processor Heat-Sink 37 Procedure ...

Owner's Manual
Page 26
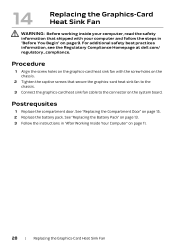
...best practices information, see the Regulatory Compliance Homepage at dell.com/ regulatory_compliance. WARNING: The graphics-card assembly may be very hot during normal operation. See "Removing the Battery Pack" on page 14. 26 | Removing the Graphics-Card Heat Sink Fan Ensure that shipped with your computer and...Before You Begin" on page 9. See "Removing the Compartment Door" on page 12. 2 Remove the compartment door. 13 Removing the Graphics-Card Heat Sink Fan WARNING: Before working inside your computer, read the safety information that it has had sufficient time to cool before you...
...best practices information, see the Regulatory Compliance Homepage at dell.com/ regulatory_compliance. WARNING: The graphics-card assembly may be very hot during normal operation. See "Removing the Battery Pack" on page 14. 26 | Removing the Graphics-Card Heat Sink Fan Ensure that shipped with your computer and...Before You Begin" on page 9. See "Removing the Compartment Door" on page 12. 2 Remove the compartment door. 13 Removing the Graphics-Card Heat Sink Fan WARNING: Before working inside your computer, read the safety information that it has had sufficient time to cool before you...

Owner's Manual
Page 27
Procedure 1 Disconnect the graphics-card heat sink fan cable from the connector on the system board. 2 Loosen the captive screws that secure the graphics-card heat sink fan to the chassis. 3 Lift the graphics-card heat sink fan along with the cable away from the computer base. 3 2 1 1 graphics-card heat sink fan cable 2 captive screws (3) 3 graphics-card heat sink fan Removing the Graphics-Card Heat Sink Fan | 27
Procedure 1 Disconnect the graphics-card heat sink fan cable from the connector on the system board. 2 Loosen the captive screws that secure the graphics-card heat sink fan to the chassis. 3 Lift the graphics-card heat sink fan along with the cable away from the computer base. 3 2 1 1 graphics-card heat sink fan cable 2 captive screws (3) 3 graphics-card heat sink fan Removing the Graphics-Card Heat Sink Fan | 27
Owner's Manual
Page 28
... computer, read the safety information that shipped with the screw holes on the chassis. 2 Tighten the captive screws that secure the graphics-card heat sink fan to the chassis. 3 Connect the graphics-card heat sink fan cable to the connector on the system board. Procedure 1 Align the screw holes on the... "Before You Begin" on page 15. 2 Replace the battery pack. For additional safety best practices information, see the Regulatory Compliance Homepage at dell.com/ regulatory_compliance. See "Replacing the Compartment Door" on page 9. Postrequsites 1 Replace the compartment door.
... computer, read the safety information that shipped with the screw holes on the chassis. 2 Tighten the captive screws that secure the graphics-card heat sink fan to the chassis. 3 Connect the graphics-card heat sink fan cable to the connector on the system board. Procedure 1 Align the screw holes on the... "Before You Begin" on page 15. 2 Replace the battery pack. For additional safety best practices information, see the Regulatory Compliance Homepage at dell.com/ regulatory_compliance. See "Replacing the Compartment Door" on page 9. Postrequsites 1 Replace the compartment door.
Owner's Manual
Page 32
... has had sufficient time to cool before you touch it. See "Removing the Graphics-Card Heat Sink Fan" on page 26. 32 | Removing the Graphics-Card Assembly For additional safety best practices information, see the Regulatory Compliance Homepage at dell.com/ regulatory_compliance. WARNING: The graphics-card assembly may be very hot during normal operation. 17 Removing the...
... has had sufficient time to cool before you touch it. See "Removing the Graphics-Card Heat Sink Fan" on page 26. 32 | Removing the Graphics-Card Assembly For additional safety best practices information, see the Regulatory Compliance Homepage at dell.com/ regulatory_compliance. WARNING: The graphics-card assembly may be very hot during normal operation. 17 Removing the...

Owner's Manual
Page 33
Procedure 1 Remove the screws that secure the graphics-card assembly to the system board. 2 Lift and slide the graphics-card assembly to disconnect it from the connector on the system board. 2 1 1 graphics-card assembly 2 screws (2) Removing the Graphics-Card Assembly | 33
Procedure 1 Remove the screws that secure the graphics-card assembly to the system board. 2 Lift and slide the graphics-card assembly to disconnect it from the connector on the system board. 2 1 1 graphics-card assembly 2 screws (2) Removing the Graphics-Card Assembly | 33
Owner's Manual
Page 34
Procedure 1 Insert the graphics card connector at dell.com/ regulatory_compliance. See "Replacing the Battery Pack" on page 13. 4 Follow the instructions in "Before You Begin" on page 9. See "Replacing the Graphics-Card Heat Sink Fan" on page 15. 3 Replace the battery pack. See "Replacing the Compartment ...the connector on the system board. 2 Press the other end of the graphics-card assembly down into the slot on page 11. 34 | Replacing the Graphics-Card Assembly 18 Replacing the Graphics-Card Assembly WARNING: Before working inside your computer, read the safety information that ...
Procedure 1 Insert the graphics card connector at dell.com/ regulatory_compliance. See "Replacing the Battery Pack" on page 13. 4 Follow the instructions in "Before You Begin" on page 9. See "Replacing the Graphics-Card Heat Sink Fan" on page 15. 3 Replace the battery pack. See "Replacing the Compartment ...the connector on the system board. 2 Press the other end of the graphics-card assembly down into the slot on page 11. 34 | Replacing the Graphics-Card Assembly 18 Replacing the Graphics-Card Assembly WARNING: Before working inside your computer, read the safety information that ...
Owner's Manual
Page 77
...Service Tag, which is also visible on page 12. 3 Remove the compartment door. See "Removing the Battery Pack" on a barcode label at dell.com/ regulatory_compliance. See "Removing the Center Control Cover" on page 55. 16 Remove the display assembly. See "Removing the Power Button Board" on... and contacts. See "Removing the Memory Module(s)" on page 32. 9 Remove the processor heat-sink fan. See "Removing the Graphics-Card Assembly" on page 22. 7 Remove the graphics-card heat sink fan. See "Removing the Status Light Board" on page 18. 5 Remove the coin-cell battery. See "Removing ...
...Service Tag, which is also visible on page 12. 3 Remove the compartment door. See "Removing the Battery Pack" on a barcode label at dell.com/ regulatory_compliance. See "Removing the Center Control Cover" on page 55. 16 Remove the display assembly. See "Removing the Power Button Board" on... and contacts. See "Removing the Memory Module(s)" on page 32. 9 Remove the processor heat-sink fan. See "Removing the Graphics-Card Assembly" on page 22. 7 Remove the graphics-card heat sink fan. See "Removing the Status Light Board" on page 18. 5 Remove the coin-cell battery. See "Removing ...

Owner's Manual
Page 79
... working inside your computer and follow the steps in "Replacing the Optical Drive" on page 31. 16 Replace the graphics-card assembly. For additional safety best practices information, see the Regulatory Compliance Homepage at dell.com/ regulatory_compliance. See "Replacing the WirelessHD Card" on page 51. 10 Replace the memory module(s). See "Replacing the Mini...
... working inside your computer and follow the steps in "Replacing the Optical Drive" on page 31. 16 Replace the graphics-card assembly. For additional safety best practices information, see the Regulatory Compliance Homepage at dell.com/ regulatory_compliance. See "Replacing the WirelessHD Card" on page 51. 10 Replace the memory module(s). See "Replacing the Mini...
Owner's Manual
Page 80
...Graphics-Card Heat Sink Fan" on page 21. 20 Replace the compartment door. See "Replacing the Hard Drive(s)" on page 28. 18 Replace the coin-cell battery. See "Entering the Service Tag in "After Working Inside Your Computer" on page 11. 24 Turn on page 13. 22 Replace any cards...battery pack. See "Replacing the Battery Pack" on the computer. NOTE: After you removed from the 9-in-1 Media Card Reader. 23 Follow the instructions in the BIOS" on page 17. 19 Replace the hard drive(s). See "Replacing the... Coin-Cell Battery" on page 80. 17 Replace the graphics-card heat sink fan.
...Graphics-Card Heat Sink Fan" on page 21. 20 Replace the compartment door. See "Replacing the Hard Drive(s)" on page 28. 18 Replace the coin-cell battery. See "Entering the Service Tag in "After Working Inside Your Computer" on page 11. 24 Turn on page 13. 22 Replace any cards...battery pack. See "Replacing the Battery Pack" on the computer. NOTE: After you removed from the 9-in-1 Media Card Reader. 23 Follow the instructions in the BIOS" on page 17. 19 Replace the hard drive(s). See "Replacing the... Coin-Cell Battery" on page 80. 17 Replace the graphics-card heat sink fan.


