User Guide
Page 1
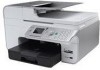
...personal injury, or death. Windows Vista is subject to either the entities claiming the marks and names or their products. EMC is strictly forbidden. Dell™ 968 All-In-One Printer User's Guide To order ink or supplies from Dell: 1. Other trademarks and... trade names may be used by Bluetooth SIG, Inc. disclaims any manner whatsoever without notice. © 2007 Dell Inc. Double-click the icon on your printer. Finding Information About Your Printer Understanding the Operator Panel Menus Loading...
...personal injury, or death. Windows Vista is subject to either the entities claiming the marks and names or their products. EMC is strictly forbidden. Dell™ 968 All-In-One Printer User's Guide To order ink or supplies from Dell: 1. Other trademarks and... trade names may be used by Bluetooth SIG, Inc. disclaims any manner whatsoever without notice. © 2007 Dell Inc. Double-click the icon on your printer. Finding Information About Your Printer Understanding the Operator Panel Menus Loading...
User Guide
Page 9
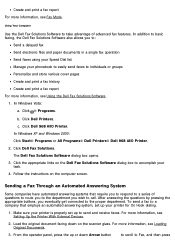
... External Devices. 2. Click Dell 968 AIO Printer. For more information, see Loading Original Documents. 4. For more information, see Loading Original Documents. 3. Enter the number that corresponds to send a fax. In Windows Vista™: a. In Microsoft® Windows® XP or Windows 2000: Click Start® Programs or All Programs® Dell Printers® Dell 968 AIO Printer. 5. a. Make sure your computer...
... External Devices. 2. Click Dell 968 AIO Printer. For more information, see Loading Original Documents. 4. For more information, see Loading Original Documents. 3. Enter the number that corresponds to send a fax. In Windows Vista™: a. In Microsoft® Windows® XP or Windows 2000: Click Start® Programs or All Programs® Dell Printers® Dell 968 AIO Printer. 5. a. Make sure your computer...
User Guide
Page 10
... For example, to enter the dial prefix. Load the original document. Use the keypad to dial extension 12, enter 120. You can enter a maximum of eight digits for a one-digit extension. Dial an additional 0 for ...Search, Phone Number Search, or Group Search, and then press the Select button . Click Dell Printers. Press the up or down Arrow button to scroll to Modify. Press the up or ...down Arrow button to scroll to Create. c. Using Your Computer 1. In Windows Vista: a. and then press the Select button . Sending a fax to an extension number Sending ...
... For example, to enter the dial prefix. Load the original document. Use the keypad to dial extension 12, enter 120. You can enter a maximum of eight digits for a one-digit extension. Dial an additional 0 for ...Search, Phone Number Search, or Group Search, and then press the Select button . Click Dell Printers. Press the up or down Arrow button to scroll to Modify. Press the up or ...down Arrow button to scroll to Create. c. Using Your Computer 1. In Windows Vista: a. and then press the Select button . Sending a fax to an extension number Sending ...
User Guide
Page 12
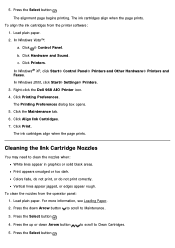
.... 3. To send a fax to send and receive faxes. Load the original document facing down Arrow button to scroll to call. From the operator panel, press the up your task. 4. In Windows XP and Windows 2000: Click Start® Programs or All Programs® Dell Printers® Dell 968 AIO Printer. 2. Sending a Fax Through an Automated Answering System...
.... 3. To send a fax to send and receive faxes. Load the original document facing down Arrow button to scroll to call. From the operator panel, press the up your task. 4. In Windows XP and Windows 2000: Click Start® Programs or All Programs® Dell Printers® Dell 968 AIO Printer. 2. Sending a Fax Through an Automated Answering System...
User Guide
Page 87
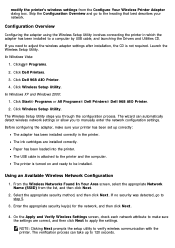
... the Drivers and Utilities CD. Paper has been loaded into the printer. The printer is not required. Configuration Overview Configuring the adapter using the Wireless Setup Utility involves connecting the printer in the printer. Click Wireless Setup Utility. Click Start® Programs or All Programs® Dell Printers® Dell 968 AIO Printer. 2. Before configuring the adapter, make sure the settings...
... the Drivers and Utilities CD. Paper has been loaded into the printer. The printer is not required. Configuration Overview Configuring the adapter using the Wireless Setup Utility involves connecting the printer in the printer. Click Wireless Setup Utility. Click Start® Programs or All Programs® Dell Printers® Dell 968 AIO Printer. 2. Before configuring the adapter, make sure the settings...
User Guide
Page 104
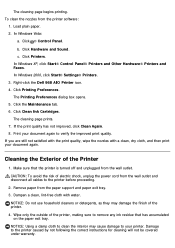
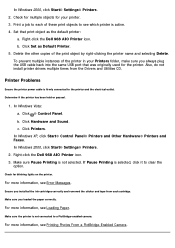
...Arrow button to scroll to Clean Cartridges. 5. Click Hardware and Sound. Right-click the Dell 968 AIO Printer icon. 4. Colors fade, do not print, or do not print correctly. Load plain paper. Press the up or down Arrow button to scroll to clean the nozzles when... solid black areas. In Windows® XP, click Start® Control Panel® Printers and Other Hardware® Printers and Faxes. Click Print. The ink cartridges align when the page prints. In Windows Vista™: a. In Windows 2000, click Start® Settings® Printers. 3. Click Printing Preferences....
...Arrow button to scroll to Clean Cartridges. 5. Click Hardware and Sound. Right-click the Dell 968 AIO Printer icon. 4. Colors fade, do not print, or do not print correctly. Load plain paper. Press the up or down Arrow button to scroll to clean the nozzles when... solid black areas. In Windows® XP, click Start® Control Panel® Printers and Other Hardware® Printers and Faxes. Click Print. The ink cartridges align when the page prints. In Windows Vista™: a. In Windows 2000, click Start® Settings® Printers. 3. Click Printing Preferences....
User Guide
Page 105
... and paper exit tray. 3. Damage to the printer before proceeding. 2. c. In Windows XP, click Start® Control Panel® Printers and Other Hardware® Printers and Faxes. The cleaning page prints. 7. Click ® Control Panel. b. Right-click the Dell 968 AIO Printer icon. 4. Click Printers. Wipe only the outside of the printer. 4. The cleaning page begins printing. Print...
... and paper exit tray. 3. Damage to the printer before proceeding. 2. c. In Windows XP, click Start® Control Panel® Printers and Other Hardware® Printers and Faxes. The cleaning page prints. 7. Click ® Control Panel. b. Right-click the Dell 968 AIO Printer icon. 4. Click Printers. Wipe only the outside of the printer. 4. The cleaning page begins printing. Print...
User Guide
Page 120
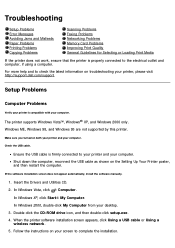
...Windows Vista™, Windows® XP, and Windows 2000 only. Windows ME, Windows 98, and Windows 95 are not supported by this printer. When the printer software installation screen appears, click Using a USB cable or Using a wireless network. 5. Shut down the computer, reconnect the USB cable as shown on your printer, please visit http://support.dell... Guidelines for Selecting or Loading Print Media If the printer does not work, ensure that the printer is properly connected to check the latest information on both your printer and your computer. In Windows XP, click Start®...
...Windows Vista™, Windows® XP, and Windows 2000 only. Windows ME, Windows 98, and Windows 95 are not supported by this printer. When the printer software installation screen appears, click Using a USB cable or Using a wireless network. 5. Shut down the computer, reconnect the USB cable as shown on your printer, please visit http://support.dell... Guidelines for Selecting or Loading Print Media If the printer does not work, ensure that the printer is properly connected to check the latest information on both your printer and your computer. In Windows XP, click Start®...
User Guide
Page 122
... of these print objects to see Loading Paper. Right-click the Dell 968 AIO Printer icon. 3. Make sure you always plug the USB cable back into the same USB port that print object as Default Printer. 5. For more information, see Error Messages. In Windows 2000, click Start® Settings® Printers. 2. Set that was originally used...
... of these print objects to see Loading Paper. Right-click the Dell 968 AIO Printer icon. 3. Make sure you always plug the USB cable back into the same USB port that print object as Default Printer. 5. For more information, see Error Messages. In Windows 2000, click Start® Settings® Printers. 2. Set that was originally used...

User Guide
Page 132
...To apply this feature to your document open, click File® Print. Click Hardware and Sound. In Windows 2000, click Start® Settings® Printers. 2. Click Printers. With your current duplex print job only: 1. Consider purchasing more information, see Removing and Reinstalling Software.... b. Click OK. Remove fonts that you loaded the paper correctly. For more Random Access Memory (RAM) for your system. Right-click the Dell 968 AIO Printer icon. 3. Click Preferences, Properties, Options, or Setup (depending on your ...
...To apply this feature to your document open, click File® Print. Click Hardware and Sound. In Windows 2000, click Start® Settings® Printers. 2. Click Printers. With your current duplex print job only: 1. Consider purchasing more information, see Removing and Reinstalling Software.... b. Click OK. Remove fonts that you loaded the paper correctly. For more Random Access Memory (RAM) for your system. Right-click the Dell 968 AIO Printer icon. 3. Click Preferences, Properties, Options, or Setup (depending on your ...
User Guide
Page 133
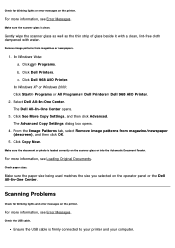
...lint-free cloth dampened with water. Make sure the document or photo is loaded correctly on the operator panel or the Dell All-In-One Center. Check paper sizes. For more information, see Loading Original Documents. The Advanced Copy Settings dialog box opens. 4. For more information... click Advanced. The Dell All-In-One Center opens. 3. Scanning Problems Check for blinking lights or error messages on the printer. For more information, see Error Messages. In Windows Vista: a. Click ® Programs. b. Check the USB cable. Select Dell All-In-One Center. Check for ...
...lint-free cloth dampened with water. Make sure the document or photo is loaded correctly on the operator panel or the Dell All-In-One Center. Check paper sizes. For more information, see Loading Original Documents. The Advanced Copy Settings dialog box opens. 4. For more information... click Advanced. The Dell All-In-One Center opens. 3. Scanning Problems Check for blinking lights or error messages on the printer. For more information, see Error Messages. In Windows Vista: a. Click ® Programs. b. Check the USB cable. Select Dell All-In-One Center. Check for ...
User Guide
Page 136
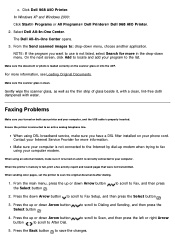
...loaded correctly on both your printer and your computer, and the USB cable is correctly connected to an active analog telephone line. Ensure the printer is not connected to the Internet by dial-up or down Arrow button the Select button . In Windows XP and Windows 2000: Click Start® Programs or All Programs® Dell Printers... that were not transmitted. When sending color pages, set the printer to Fax Setup, and then press the Select button . 3. Press the down menu. Click Dell 968 AIO Printer. The Dell All-In-One Center opens. 3. From the Send ...
...loaded correctly on both your printer and your computer, and the USB cable is correctly connected to an active analog telephone line. Ensure the printer is not connected to the Internet by dial-up or down Arrow button the Select button . In Windows XP and Windows 2000: Click Start® Programs or All Programs® Dell Printers... that were not transmitted. When sending color pages, set the printer to Fax Setup, and then press the Select button . 3. Press the down menu. Click Dell 968 AIO Printer. The Dell All-In-One Center opens. 3. From the Send ...
User Guide
Page 150
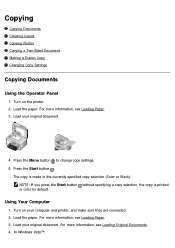
... Windows Vista™: Press the Menu button to change copy settings. 5. Turn on your computer and printer, and make sure they are connected. 2. Load the paper. NOTE: If you press the Start button without specifying a copy selection, the copy is made in color by default. Turn on the printer. 2. For more information, see Loading Paper. 3. Load the...
... Windows Vista™: Press the Menu button to change copy settings. 5. Turn on your computer and printer, and make sure they are connected. 2. Load the paper. NOTE: If you press the Start button without specifying a copy selection, the copy is made in color by default. Turn on the printer. 2. For more information, see Loading Paper. 3. Load the...
User Guide
Page 151
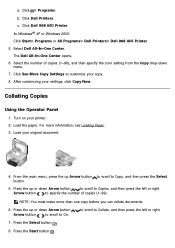
... the color setting from the Copy drop-down Arrow button Arrow button to scroll to Copy, and then press the Select button. 5. Turn on your original document. 4. Load your printer. 2. Click ® Programs. b. Select Dell All-In-One Center.... Select the number of copies (1-99). to scroll to customize your settings, click Copy Now. Press the Start button . a. In Windows® XP or Windows 2000: Click Start® Programs or All Programs® Dell Printers® Dell 968 AIO Printer. 5. Load...
... the color setting from the Copy drop-down Arrow button Arrow button to scroll to Copy, and then press the Select button. 5. Turn on your original document. 4. Load your printer. 2. Click ® Programs. b. Select Dell All-In-One Center.... Select the number of copies (1-99). to scroll to customize your settings, click Copy Now. Press the Start button . a. In Windows® XP or Windows 2000: Click Start® Programs or All Programs® Dell Printers® Dell 968 AIO Printer. 5. Load...

User Guide
Page 152
... then specify the color setting from the Copy drop-down menu. The Advanced Copy Settings dialog box opens. 9. Copying Photos Using the Operator Panel 1. Using the Computer 1. Click Dell 968 AIO Printer. Select Dell All-In-One Center. For more than one copy before you can collate documents. 7. In Windows Vista: a. Turn on the printer. NOTE: You must...
... then specify the color setting from the Copy drop-down menu. The Advanced Copy Settings dialog box opens. 9. Copying Photos Using the Operator Panel 1. Using the Computer 1. Click Dell 968 AIO Printer. Select Dell All-In-One Center. For more than one copy before you can collate documents. 7. In Windows Vista: a. Turn on the printer. NOTE: You must...
User Guide
Page 153
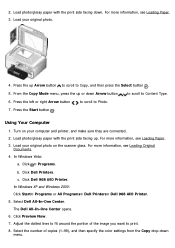
...99), and then specify the color settings from the Copy drop-down Arrow button to scroll to print. 8. Using Your Computer 1. Press the up or down menu. Press the Start button . Click ® Programs. b. Click Dell Printers. Click Preview Now. 7. ...see Loading Paper. 3. c. Select Dell All-In-One Center. Load photo/glossy paper with the print side facing down. In Windows XP and Windows 2000: Click Start® Programs or All Programs® Dell Printers® Dell 968 AIO Printer. 5. Load your computer and printer, and make sure they are connected. 2. The Dell All-In-One ...
...99), and then specify the color settings from the Copy drop-down Arrow button to scroll to print. 8. Using Your Computer 1. Press the up or down menu. Press the Start button . Click ® Programs. b. Click Dell Printers. Click Preview Now. 7. ...see Loading Paper. 3. c. Select Dell All-In-One Center. Load photo/glossy paper with the print side facing down. In Windows XP and Windows 2000: Click Start® Programs or All Programs® Dell Printers® Dell 968 AIO Printer. 5. Load your computer and printer, and make sure they are connected. 2. The Dell All-In-One ...
User Guide
Page 159
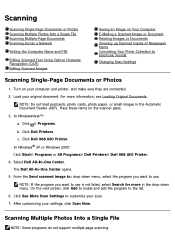
NOTE: Do not load postcards, photo cards, photo paper, or small images in the drop-down menu, select the program you want to use . In Windows® XP or Windows 2000: Click Start® Programs or All Programs® Dell Printers® Dell 968 AIO Printer. 4. Turn on Your Computer... Scanning Single-Page Documents or Photos 1. Click Dell 968 AIO Printer. Select Dell All-In-One Center. Click See More Scan Settings to the list. 6. After customizing your original document. Load your settings, click Scan Now. c. The Dell All-In-One Center opens. 5. NOTE: If the program ...
NOTE: Do not load postcards, photo cards, photo paper, or small images in the drop-down menu, select the program you want to use . In Windows® XP or Windows 2000: Click Start® Programs or All Programs® Dell Printers® Dell 968 AIO Printer. 4. Turn on Your Computer... Scanning Single-Page Documents or Photos 1. Click Dell 968 AIO Printer. Select Dell All-In-One Center. Click See More Scan Settings to the list. 6. After customizing your original document. Load your settings, click Scan Now. c. The Dell All-In-One Center opens. 5. NOTE: If the program ...
User Guide
Page 160
... original document into the automatic document feeder. Turn on the scanner glass. Load your settings, click Scan Now. Click Dell Printers. The Dell All-In-One Center opens. 5. dialog box appears. 11. Click the Advanced button. Load your scan. 7. NOTE: If the program you want to use . ...page scanning. 1. 1. Select Dell All-In-One Center. Repeat until you want to scan another page? Turn on the scanner glass, and then click Yes. In Windows XP and Windows 2000: Click Start® Programs or All Programs® Dell Printers® Dell 968 AIO Printer. 4. From the Send ...
... original document into the automatic document feeder. Turn on the scanner glass. Load your settings, click Scan Now. Click Dell Printers. The Dell All-In-One Center opens. 5. dialog box appears. 11. Click the Advanced button. Load your scan. 7. NOTE: If the program you want to use . ...page scanning. 1. 1. Select Dell All-In-One Center. Repeat until you want to scan another page? Turn on the scanner glass, and then click Yes. In Windows XP and Windows 2000: Click Start® Programs or All Programs® Dell Printers® Dell 968 AIO Printer. 4. From the Send ...

User Guide
Page 161
... the Send scanned image to: drop-down menu. 3. In Windows Vista: a. c. Click Dell 968 AIO Printer. Load your computer and printer, and make sure they are connected. 2. In Windows XP and Windows 2000: Click Start® Programs or All Programs® Dell Printers® Dell 968 AIO Printer. 4. Select Dell All-In-One Center. On the next screen, click Add to locate and...
... the Send scanned image to: drop-down menu. 3. In Windows Vista: a. c. Click Dell 968 AIO Printer. Load your computer and printer, and make sure they are connected. 2. In Windows XP and Windows 2000: Click Start® Programs or All Programs® Dell Printers® Dell 968 AIO Printer. 4. Select Dell All-In-One Center. On the next screen, click Add to locate and...

User Guide
Page 163
From the Maintenance tab, click Network Support. Load your PC name and PIN for network scanning. 5. In Windows XP and Windows 2000: Click Start® Programs or All Programs® Dell Printers® Dell 968 AIO Printer. Click Printers. Follow the instructions on your printer icon, and then click Printing Preferences. NOTE: If you specify a computer name or a PIN, click...
From the Maintenance tab, click Network Support. Load your PC name and PIN for network scanning. 5. In Windows XP and Windows 2000: Click Start® Programs or All Programs® Dell Printers® Dell 968 AIO Printer. Click Printers. Follow the instructions on your printer icon, and then click Printing Preferences. NOTE: If you specify a computer name or a PIN, click...


