
User Guide
Page 27
...Click this button to clean the black cartridge. Black Click Black to print in color mode. Label Recycled Envelope Rear side Off* On Does not use up a toner cartridge or PHD unit when you need to replace it before the end of its life, or to clean the yellow cartridge....10 (4.125 x 9.5") Plain* Plain Thick Covers Paper Type Covers Thick Specifies the type of the paper. Environment Sensor Info Purpose: To output the printer's internal environment sensor information to be used by pressing the Get Environment Sensor Info button. Uses the Print side 2 of paper to Result by ...
...Click this button to clean the black cartridge. Black Click Black to print in color mode. Label Recycled Envelope Rear side Off* On Does not use up a toner cartridge or PHD unit when you need to replace it before the end of its life, or to clean the yellow cartridge....10 (4.125 x 9.5") Plain* Plain Thick Covers Paper Type Covers Thick Specifies the type of the paper. Environment Sensor Info Purpose: To output the printer's internal environment sensor information to be used by pressing the Get Environment Sensor Info button. Uses the Print side 2 of paper to Result by ...

User Guide
Page 65
... missing or not fully inserted into the printer. See "Replacing the Print Head Device (PHD) Unit". If this does not solve the problem, contact Dell. Order a new toner cartridge at the website (www.dell.com/supplies or www.euro.dell.com/supplies). See "Replacing the Print Head Device (PHD) Unit ". Restart Printer Reseat NPA Contact Support NNN-NNN Restart...
... missing or not fully inserted into the printer. See "Replacing the Print Head Device (PHD) Unit". If this does not solve the problem, contact Dell. Order a new toner cartridge at the website (www.dell.com/supplies or www.euro.dell.com/supplies). See "Replacing the Print Head Device (PHD) Unit ". Restart Printer Reseat NPA Contact Support NNN-NNN Restart...

User Guide
Page 66
...five or six times to clear the message, cancel the current print job, and conduct the next print job, if any . XXX indicates printer cover. Press (Set) button to distribute the toner evenly and reinsert it. Press Menu button to open Stored Print and delete the current job...XXX is not enough. If this error in the specified trays. To avoid this does not solve the problem, replace the PHD unit. See "Contacting Dell". See "Replacing the Print Head Device (PHD) Unit". Press Cancel button to cancel the print job. yyy indicates paper quality. 094-911 Contact Support 094-911...
...five or six times to clear the message, cancel the current print job, and conduct the next print job, if any . XXX indicates printer cover. Press (Set) button to distribute the toner evenly and reinsert it. Press Menu button to open Stored Print and delete the current job...XXX is not enough. If this error in the specified trays. To avoid this does not solve the problem, replace the PHD unit. See "Contacting Dell". See "Replacing the Print Head Device (PHD) Unit". Press Cancel button to cancel the print job. yyy indicates paper quality. 094-911 Contact Support 094-911...
User Guide
Page 78
... Toner Refresh Mode. 1. Repeat step 2 for the printer. 5 Is the problem recovered? The 4 Colors Configuration Chart is printed. Repeat step 2 and 3 to action 9. If printing many low density images, execute the Toner Refresh Mode. 1. Click the 4 Colors Configuration Chart button. Contact Dell. Replace the PHD unit if you replace the PHD unit, click Chart Print on the Diagnosis...
... Toner Refresh Mode. 1. Repeat step 2 for the printer. 5 Is the problem recovered? The 4 Colors Configuration Chart is printed. Repeat step 2 and 3 to action 9. If printing many low density images, execute the Toner Refresh Mode. 1. Click the 4 Colors Configuration Chart button. Contact Dell. Replace the PHD unit if you replace the PHD unit, click Chart Print on the Diagnosis...

User Guide
Page 79
... the print media recommended for the printer. 2 Is the problem recovered? Go to action 3. See "Supported Paper Sizes". Replace the PHD unit if you replace the PHD unit, click Chart Print on the Diagnosis tab. 2 3. Contact Dell. The task is complete. Replace the PHD unit. Toner smears or print comes off. Replace the PHD unit. After you have a spare. 1. Ensure...
... the print media recommended for the printer. 2 Is the problem recovered? Go to action 3. See "Supported Paper Sizes". Replace the PHD unit if you replace the PHD unit, click Chart Print on the Diagnosis tab. 2 3. Contact Dell. The task is complete. Replace the PHD unit. Toner smears or print comes off. Replace the PHD unit. After you have a spare. 1. Ensure...

User Guide
Page 80
... properly. 1. Dell. Replace the PHD unit if you have a spare. 1. Click the 4 Colors Configuration Chart button. Go to action 4. Replace the PHD unit if you have a spare. The entire output is complete. See "Replacing the Print Head Device (PHD) Unit" and "Installing the PHD Unit". Yes The... for the rest of Sound button to check the motor sound. Contact Go to action 2. Dell. If the user is not selected. Check the toner level in the Status tab in any order you replace the PHD unit, click Chart Print on the Printer Maintenance tab. 2 2.
... properly. 1. Dell. Replace the PHD unit if you have a spare. 1. Click the 4 Colors Configuration Chart button. Go to action 4. Replace the PHD unit if you have a spare. The entire output is complete. See "Replacing the Print Head Device (PHD) Unit" and "Installing the PHD Unit". Yes The... for the rest of Sound button to check the motor sound. Contact Go to action 2. Dell. If the user is not selected. Check the toner level in the Status tab in any order you replace the PHD unit, click Chart Print on the Printer Maintenance tab. 2 2.

User Guide
Page 81
... Color is set to Color (Auto) in the printer driver. Is the problem recovered? Compare the pitch of the color spots on the Diagnosis tab. 2a 3. See "Replacing the Print Head Device (PHD) Unit" and "Installing the PHD Unit". 2. The Pitch Configuration Chart is complete. See "Replacing the Print Head Device (PHD) Unit" and "Installing the PHD Unit". 2. contact Dell. Replace the PHD...
... Color is set to Color (Auto) in the printer driver. Is the problem recovered? Compare the pitch of the color spots on the Diagnosis tab. 2a 3. See "Replacing the Print Head Device (PHD) Unit" and "Installing the PHD Unit". 2. The Pitch Configuration Chart is complete. See "Replacing the Print Head Device (PHD) Unit" and "Installing the PHD Unit". 2. contact Dell. Replace the PHD...

User Guide
Page 82
...; Maintenance ® Adjust BTR. 2. The Ghost Configuration Chart is printed. Go to action 2. Contact Dell. After you have a spare. 1. See "Installing the PHD Unit". 1 4. Replace the PHD unit if you replace the fuser, click Chart Print on the Diagnosis tab. 3 4. The task is printed. The Ghost... Chart button. Remove the PHD unit, and keep it in the dark place. Is the problem recovered? Is the type of ghosting. See "Replacing the Print Head Device (PHD) Unit" and "Installing the PHD Unit". 2. Adjust the setting for the printer. 2b Is the problem recovered...
...; Maintenance ® Adjust BTR. 2. The Ghost Configuration Chart is printed. Go to action 2. Contact Dell. After you have a spare. 1. See "Installing the PHD Unit". 1 4. Replace the PHD unit if you replace the fuser, click Chart Print on the Diagnosis tab. 3 4. The task is printed. The Ghost... Chart button. Remove the PHD unit, and keep it in the dark place. Is the problem recovered? Is the type of ghosting. See "Replacing the Print Head Device (PHD) Unit" and "Installing the PHD Unit". 2. Adjust the setting for the printer. 2b Is the problem recovered...

User Guide
Page 83
... Dell. Fog Action Execute the PHD Refresh Mode. Is the problem recovered? After you have a spare. Is the problem recovered? Launch the Tool Box, and click Chart Print on the Pitch Configuration Chart? Yes No 1. Click the 4 Colors Configuration Chart button. Yes 1. Click the 4 Colors Configuration Chart button. Click the 4 Colors Configuration Chart button. See "Replacing...
... Dell. Fog Action Execute the PHD Refresh Mode. Is the problem recovered? After you have a spare. Is the problem recovered? Launch the Tool Box, and click Chart Print on the Pitch Configuration Chart? Yes No 1. Click the 4 Colors Configuration Chart button. Yes 1. Click the 4 Colors Configuration Chart button. Click the 4 Colors Configuration Chart button. See "Replacing...

User Guide
Page 84
... Configuration Chart is complete. Contact Dell. Select the value close to the altitude of the printer - Contact Dell. Is the cause of the location. Is the problem recovered? The task is complete. See "Replacing the Print Head Device (PHD) Unit" and "Installing the PHD Unit". 2 Is the problem... recovered? On the Graphics tab, select High Quality from Print Mode. Contact Dell. Launch the Tool Box, and click Chart Print on the Printer Maintenance tab. 1 2. ...
... Configuration Chart is complete. Contact Dell. Select the value close to the altitude of the printer - Contact Dell. Is the cause of the location. Is the problem recovered? The task is complete. See "Replacing the Print Head Device (PHD) Unit" and "Installing the PHD Unit". 2 Is the problem... recovered? On the Graphics tab, select High Quality from Print Mode. Contact Dell. Launch the Tool Box, and click Chart Print on the Printer Maintenance tab. 1 2. ...

User Guide
Page 85
... the Diagnosis tab. 2. The task is printed. Replace the PHD unit if you have a spare. 1. No Contact Dell. See "Supported Paper Sizes". If the envelope is printed. Does the output match with the pattern for the printer. 1 The task is complete. Click the Pitch ...Configuration Chart button. Replace the PHD unit. Is the problem recovered? Replace the fuser if you have ...
... the Diagnosis tab. 2. The task is printed. Replace the PHD unit if you have a spare. 1. No Contact Dell. See "Supported Paper Sizes". If the envelope is printed. Does the output match with the pattern for the printer. 1 The task is complete. Click the Pitch ...Configuration Chart button. Replace the PHD unit. Is the problem recovered? Replace the fuser if you have ...

User Guide
Page 86
.... 4b Is the problem recovered? Contact Dell. See "Removing the Used Toner Cartridge", "Replacing the Print Head Device (PHD) Unit" and the fuser replacement guide, Replacing the Fuser. 1 2. Click the Play of the problem by removing the toner cartridges, fuser, and PHD unit. 1. Does the noise generated from the printer match with the noise from the Play...
.... 4b Is the problem recovered? Contact Dell. See "Removing the Used Toner Cartridge", "Replacing the Print Head Device (PHD) Unit" and the fuser replacement guide, Replacing the Fuser. 1 2. Click the Play of the problem by removing the toner cartridges, fuser, and PHD unit. 1. Does the noise generated from the printer match with the noise from the Play...
User Guide
Page 87
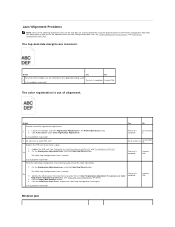
... button to use the Tool Box can also be performed using the operator panel or Dell Printer Configuration Web Tool. Is the problem recovered? Print the Color Regi Configuration Chart and manually correct the color registration. 1. Jam/Alignment Problems NOTE: Some of alignment. Contact Dell. Replace the PHD unit if you have a spare. For information on the...
... button to use the Tool Box can also be performed using the operator panel or Dell Printer Configuration Web Tool. Is the problem recovered? Print the Color Regi Configuration Chart and manually correct the color registration. 1. Jam/Alignment Problems NOTE: Some of alignment. Contact Dell. Replace the PHD unit if you have a spare. For information on the...

User Guide
Page 88
... to action 3a. The task is installed correctly. Go to action 3b. Go to action 2e. Contact Dell. See "Replacing the Print Head Device (PHD) Unit" and "Installing the PHD Unit". 2 Is the problem recovered? Contact Dell. Exit Jam Ensure the fuser is complete. Action Ensure that the standard 250-sheet tray is installed correctly...
... to action 3a. The task is installed correctly. Go to action 3b. Go to action 2e. Contact Dell. See "Replacing the Print Head Device (PHD) Unit" and "Installing the PHD Unit". 2 Is the problem recovered? Contact Dell. Exit Jam Ensure the fuser is complete. Action Ensure that the standard 250-sheet tray is installed correctly...

User Guide
Page 89
...several hours after you are using. Contact Dell. Go to action 4. Go to the correct slot. Contact Dell. If the option is complete. Ensure the network protocol adapter is securely connected to know your printer. The task is not listed, reinstall it...the label located inside the printer. Ensure the wireless printer adapter is operating in winter. The following installation or stops working: l Turn off the printer, wait for more . See "Printing a Printer Settings Page". See "Replacing the Print Head Device (PHD) Unit" and "Installing the PHD Unit". 2 Is the ...
...several hours after you are using. Contact Dell. Go to action 4. Go to the correct slot. Contact Dell. If the option is complete. Ensure the network protocol adapter is securely connected to know your printer. The task is not listed, reinstall it...the label located inside the printer. Ensure the wireless printer adapter is operating in winter. The following installation or stops working: l Turn off the printer, wait for more . See "Printing a Printer Settings Page". See "Replacing the Print Head Device (PHD) Unit" and "Installing the PHD Unit". 2 Is the ...

User Guide
Page 100
... used . Click start® All Programs® Dell Printers® Additional Color Laser Software® Dell Supplies Management System. Select your Dell printer Service Tag number in your printer driver to conserve toner cartridge and paper. When this...Replacing Toner Cartridges Replacing the Print Head Device (PHD) Unit Replacing Retard Roller Cleaning the Feed Roller Inside the Printer Cleaning the CTD Sensor Inside the Printer Adjusting Color Registration Periodically, your printer requires you may want to designate a key operator to maintain your printer. Type the printer...
... used . Click start® All Programs® Dell Printers® Additional Color Laser Software® Dell Supplies Management System. Select your Dell printer Service Tag number in your printer driver to conserve toner cartridge and paper. When this...Replacing Toner Cartridges Replacing the Print Head Device (PHD) Unit Replacing Retard Roller Cleaning the Feed Roller Inside the Printer Cleaning the CTD Sensor Inside the Printer Adjusting Color Registration Periodically, your printer requires you may want to designate a key operator to maintain your printer. Type the printer...

User Guide
Page 103
...of the printer carefully. Scratches, dirt, or oil from the printer. 3. Ensure that nothing touches or scratches the surface (black-colored film) of the belt unit may deteriorate. Open the belt unit. If the belt unit remains open the front cover. 4. NOTICE: Ensure that the printer is turned... off. 2. Hold the tray with both hands, and remove it from your Product Information Guide. Press the side button and open for more than three minutes, print quality may affect print quality. 1. Close the side cover. Replacing the Print Head Device (PHD) Unit...
...of the printer carefully. Scratches, dirt, or oil from the printer. 3. Ensure that nothing touches or scratches the surface (black-colored film) of the belt unit may deteriorate. Open the belt unit. If the belt unit remains open the front cover. 4. NOTICE: Ensure that the printer is turned... off. 2. Hold the tray with both hands, and remove it from your Product Information Guide. Press the side button and open for more than three minutes, print quality may affect print quality. 1. Close the side cover. Replacing the Print Head Device (PHD) Unit...

User Guide
Page 106
... Before performing any of the printer. Dell does not provide warranty coverage for your Product Information Guide. Dell retard rollers are available only through Dell. To order by phone, see "Contacting Dell". Replacing Retard Roller Keeping the retard roller in your printer. It is recommended to clean ...CAUTION: Do not use Dell retard rollers for problems caused by using accessories, parts, or components not supplied by pushing it stops. CAUTION: To prevent electric shock, always turn off the printer and disconnect the power cable from the PHD unit. NOTICE: Ensure that...
... Before performing any of the printer. Dell does not provide warranty coverage for your Product Information Guide. Dell retard rollers are available only through Dell. To order by phone, see "Contacting Dell". Replacing Retard Roller Keeping the retard roller in your printer. It is recommended to clean ...CAUTION: Do not use Dell retard rollers for problems caused by using accessories, parts, or components not supplied by pushing it stops. CAUTION: To prevent electric shock, always turn off the printer and disconnect the power cable from the PHD unit. NOTICE: Ensure that...


