Manual
Page 3
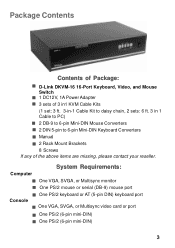
One PS/2 (6-pin mini-DIN) 3 D-Link DKVM-16 16-Port Keyboard, Video, and Mouse Switch ! 1 DC12V, 1A Power Adapter ! 3 sets of the above items are missing, please contact your reseller. One PS/2 keyboard or AT (5-pin DIN) keyboard port Console ! ...Multisync video card or port ! One VGA, SVGA, or Multisync monitor ! Manual ! 2 Rack Mount Brackets 8 Screws If any of 3 in1 KVM Cable Kits (1 set: 3 ft. 3-in-1 Cable Kit to daisy chain, 2 sets: 6 ft. 3 in 1 Cable to PC) ! 2 DB-9 to 6-pin Mini-DIN Mouse Converters ! 2 DIN 5-pin to 6-pin Mini-DIN Keyboard Converters ! System Requirements...
One PS/2 (6-pin mini-DIN) 3 D-Link DKVM-16 16-Port Keyboard, Video, and Mouse Switch ! 1 DC12V, 1A Power Adapter ! 3 sets of the above items are missing, please contact your reseller. One PS/2 keyboard or AT (5-pin DIN) keyboard port Console ! ...Multisync video card or port ! One VGA, SVGA, or Multisync monitor ! Manual ! 2 Rack Mount Brackets 8 Screws If any of 3 in1 KVM Cable Kits (1 set: 3 ft. 3-in-1 Cable Kit to daisy chain, 2 sets: 6 ft. 3 in 1 Cable to PC) ! 2 DB-9 to 6-pin Mini-DIN Mouse Converters ! 2 DIN 5-pin to 6-pin Mini-DIN Keyboard Converters ! System Requirements...
Manual
Page 5
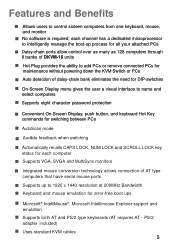
... PCs ! Features and Benefits ! No software is required; Integrated mouse conversion technology allows connection of DKVM-16 units ! Microsoft® IntelliMouse®, Microsoft Intellimouse Explorer support and emulation ! Audible feedback when switching ! Uses standard KVM cables 5 Allows users to name and select computers ! Hot Plug provides the ability to 1920 x 1440 resolution at 200MHz Bandwidth...
... PCs ! Features and Benefits ! No software is required; Integrated mouse conversion technology allows connection of DKVM-16 units ! Microsoft® IntelliMouse®, Microsoft Intellimouse Explorer support and emulation ! Audible feedback when switching ! Uses standard KVM cables 5 Allows users to name and select computers ! Hot Plug provides the ability to 1920 x 1440 resolution at 200MHz Bandwidth...

Manual
Page 7
Hardware Installation (Continued) WARNING Make sure that your computers, DKVM-16, keyboard, mouse, and monitor are powered off before attempting to connect the cabling to avoid damage to your DKVM-16 Step 1 Find a convenient place to place your DKVM-16. When mounting to a rack, attach the included brackets to the side panels...makes it mountable on the back of your monitor, to the DKVM-16. Step 2 Connect the monitor console to the HD DB-15 female port, labeled with your cables so that all of the DKVM-16. Connect the attached cable, or the one included with the monitor symbol at the ...
Hardware Installation (Continued) WARNING Make sure that your computers, DKVM-16, keyboard, mouse, and monitor are powered off before attempting to connect the cabling to avoid damage to your DKVM-16 Step 1 Find a convenient place to place your DKVM-16. When mounting to a rack, attach the included brackets to the side panels...makes it mountable on the back of your monitor, to the DKVM-16. Step 2 Connect the monitor console to the HD DB-15 female port, labeled with your cables so that all of the DKVM-16. Connect the attached cable, or the one included with the monitor symbol at the ...

Manual
Page 9
... PS/2 mouse port on the back panel of the computer, and the other end of the cable to the rear panel of the DKVM-16. Be sure to add a serial to PS/2 converter included with the DKVM-16 before connecting the 3-in -1 cable, locate the mouse connector (green) and connect one end of the included VGA... cable (15-pin HDDB Male / Male) to the PC1 PS/2 mouse port on the back of PC 9 Back of the PC. Connect the other...
... PS/2 mouse port on the back panel of the computer, and the other end of the cable to the rear panel of the DKVM-16. Be sure to add a serial to PS/2 converter included with the DKVM-16 before connecting the 3-in -1 cable, locate the mouse connector (green) and connect one end of the included VGA... cable (15-pin HDDB Male / Male) to the PC1 PS/2 mouse port on the back of PC 9 Back of the PC. Connect the other...
Manual
Page 10
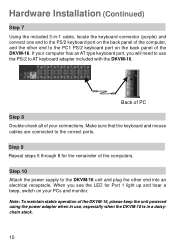
... Repeat steps 5 through 8 for Port 1 light up and hear a beep, switch on the back panel of your PCs and monitor. If your computer has an AT type keyboard port, you see the LED for the remainder of the DKVM-16, please keep the unit powered using the power adapter when in use the... PS/2 to AT keyboard adapter included with the DKVM-16. Make sure that the keyboard and mouse cables are connected to use , especially when the DKVM-16 is in a daisychain stack. 10 Note: To maintain stable operation of the computers. Back of PC Step ...
... Repeat steps 5 through 8 for Port 1 light up and hear a beep, switch on the back panel of your PCs and monitor. If your computer has an AT type keyboard port, you see the LED for the remainder of the DKVM-16, please keep the unit powered using the power adapter when in use the... PS/2 to AT keyboard adapter included with the DKVM-16. Make sure that the keyboard and mouse cables are connected to use , especially when the DKVM-16 is in a daisychain stack. 10 Note: To maintain stable operation of the computers. Back of PC Step ...

Manual
Page 11
... this time, it will communicate with the keyboard and mouse. Hardware Installation (Continued) Step 11 Now power up all cables for proper connections before going to the trouble-shooting section of the KVM switch or run Hot Key) while the computers are in the same manner. You may check to choose the next... computer and verify the functionality in the boot-up process. The first computer will be shown on the KVM at this is OK, use the...
... this time, it will communicate with the keyboard and mouse. Hardware Installation (Continued) Step 11 Now power up all cables for proper connections before going to the trouble-shooting section of the KVM switch or run Hot Key) while the computers are in the same manner. You may check to choose the next... computer and verify the functionality in the boot-up process. The first computer will be shown on the KVM at this is OK, use the...

Manual
Page 16
... 2 Slave (Bank 2) Bank 3 Slave (Bank 3) Bank 8 Slave (Bank 8) 16 Step 2 Please repeat step 2 to daisy-chain up to 8 DKVM-16s. You can daisy chain up to as many as 8 DKVM-16s. Please use the attached 3 feet 3-in -one Cable Kit to daisy chain the KVM Switches. Daisy-Chaining the DKVM-16 Please closely follow the steps below to daisy-chain...
... 2 Slave (Bank 2) Bank 3 Slave (Bank 3) Bank 8 Slave (Bank 8) 16 Step 2 Please repeat step 2 to daisy-chain up to 8 DKVM-16s. You can daisy chain up to as many as 8 DKVM-16s. Please use the attached 3 feet 3-in -one Cable Kit to daisy chain the KVM Switches. Daisy-Chaining the DKVM-16 Please closely follow the steps below to daisy-chain...
Manual
Page 21
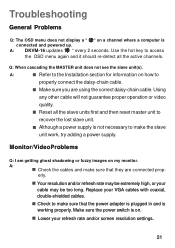
A: DKVM-16 updates " " every 2 seconds. Using any other cable will not guarantee proper operation or video quality. ! Although a power supply is not necessary to make sure that they are using the correct daisy-chain cable. A: ! erly. ! Check to access the OSD menu again and it should ... your refresh rate and/or screen resolution settings. 21 Make sure the power switch is on a channel where a computer is working properly. Lower your VGA cables with coaxial, double-shielded cables. ! Q: When cascading the MASTER unit does not see the slave unit(s). Your resolution and...
A: DKVM-16 updates " " every 2 seconds. Using any other cable will not guarantee proper operation or video quality. ! Although a power supply is not necessary to make sure that they are using the correct daisy-chain cable. A: ! erly. ! Check to access the OSD menu again and it should ... your refresh rate and/or screen resolution settings. 21 Make sure the power switch is on a channel where a computer is working properly. Lower your VGA cables with coaxial, double-shielded cables. ! Q: When cascading the MASTER unit does not see the slave unit(s). Your resolution and...
Manual
Page 22
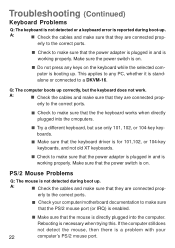
... prop- erly to the correct ports. ! Check to a DKVM-16. PS/2 Mouse Problems Q: The mouse is not detected during boot-up correctly, but use only 101, 102, or 104-key keyboards. ! Check the cables and make sure that the mouse is directly plugged into the cmoputers... different keyboard, but the keyboard does not work. A: ! Check to make sure that they are connected prop- Make sure the power switch is necessary when trying this. Make sure that the the keyboard works when directly plugged into the computer. Troubleshooting (Continued) Keyboard Problems Q: ...
... prop- erly to the correct ports. ! Check to a DKVM-16. PS/2 Mouse Problems Q: The mouse is not detected during boot-up correctly, but use only 101, 102, or 104-key keyboards. ! Check the cables and make sure that the mouse is directly plugged into the cmoputers... different keyboard, but the keyboard does not work. A: ! Check to make sure that they are connected prop- Make sure the power switch is necessary when trying this. Make sure that the the keyboard works when directly plugged into the computer. Troubleshooting (Continued) Keyboard Problems Q: ...
Manual
Page 23
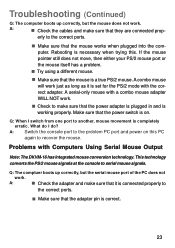
...mouse. ! A serial-only mouse with Computers Using Serial Mouse Output Note: The DKVM-16 has integrated mouse conversion technology. Check to another, mouse movement is a true PS/2 mouse. What do ? Problems with a combo mouse adapter WILL NOT work. ! A: Switch the console port to the problem PC port and power on . Q: The ... make sure that they are connected prop- Troubleshooting (Continued) Q: The computer boots up correctly, but the mouse does not work. Check the cables and make sure that the power switch is connected properly to serial mouse signals.
...mouse. ! A serial-only mouse with Computers Using Serial Mouse Output Note: The DKVM-16 has integrated mouse conversion technology. Check to another, mouse movement is a true PS/2 mouse. What do ? Problems with a combo mouse adapter WILL NOT work. ! A: Switch the console port to the problem PC port and power on . Q: The ... make sure that they are connected prop- Troubleshooting (Continued) Q: The computer boots up correctly, but the mouse does not work. Check the cables and make sure that the power switch is connected properly to serial mouse signals.


