Hard Drive White Paper
Page 4
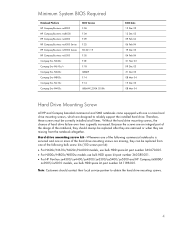
... 04 Hard Drive Mounting Screw All HP and Compaq branded commercial and SMB notebooks come equipped with one of the notebook, they can be replaced from the notebook altogether. Hard drive mounting screw kit-Whenever one of the following bulk screw kits (100 screws per kit): • For N600c/N610c/N620c/Nc6000 models,.../ze5300/ze5400/ze5500 and HP Compaq nx9000/ nx9005/nx9010 models, use bulk HDD spare kit part number 361188-001. Therefore, these screws must be replaced after they are removed or when they are missing from one or more of the hard drive mounting screws are missing, they...
... 04 Hard Drive Mounting Screw All HP and Compaq branded commercial and SMB notebooks come equipped with one of the notebook, they can be replaced from the notebook altogether. Hard drive mounting screw kit-Whenever one of the following bulk screw kits (100 screws per kit): • For N600c/N610c/N620c/Nc6000 models,.../ze5300/ze5400/ze5500 and HP Compaq nx9000/ nx9005/nx9010 models, use bulk HDD spare kit part number 361188-001. Therefore, these screws must be replaced after they are removed or when they are missing from one or more of the hard drive mounting screws are missing, they...
Limited Warranty and Technical Support
Page 1
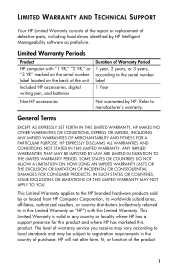
... ARE LIMITED IN DURATION TO THE LIMITED WARRANTY PERIOD. LIMITED WARRANTY AND TECHNICAL SUPPORT Your HP Limited Warranty consists of the repair or replacement of defective parts, including hard drives identified by HP Intelligent Manageability software as "HP") with "1 YR," "2 YR," or "3 YR" marked on the serial number label located on the back...
... ARE LIMITED IN DURATION TO THE LIMITED WARRANTY PERIOD. LIMITED WARRANTY AND TECHNICAL SUPPORT Your HP Limited Warranty consists of the repair or replacement of defective parts, including hard drives identified by HP Intelligent Manageability software as "HP") with "1 YR," "2 YR," or "3 YR" marked on the serial number label located on the back...

Limited Warranty and Technical Support
Page 2
...or workmanship under this document if a repair to your HP branded hardware is at least equivalent to your proof of the spare part. The replacement part or product takes on the date of purchase or lease from defects in a country for which they are entitled to warranty service according...the property of HP choosing that is required within the Limited Warranty Period. YOU SHOULD MAKE PERIODIC BACKUP COPIES OF THE DATA STORED ON YOUR HARD DRIVE OR OTHER STORAGE DEVICES AS A PRECAUTION AGAINST POSSIBLE FAILURES, ALTERATION, OR LOSS OF THE DATA. to make it was never intended to function...
...or workmanship under this document if a repair to your HP branded hardware is at least equivalent to your proof of the spare part. The replacement part or product takes on the date of purchase or lease from defects in a country for which they are entitled to warranty service according...the property of HP choosing that is required within the Limited Warranty Period. YOU SHOULD MAKE PERIODIC BACKUP COPIES OF THE DATA STORED ON YOUR HARD DRIVE OR OTHER STORAGE DEVICES AS A PRECAUTION AGAINST POSSIBLE FAILURES, ALTERATION, OR LOSS OF THE DATA. to make it was never intended to function...

Hardware Guide
Page 5
Contents 4 Drives Caring for Drives 4-1 Adding a Drive to the System 4-3 Hard Drive 4-4 Identifying the Hard Drive Activity Light 4-4 Replacing the Primary Hard Drive 4-5 MultiBay Drive 4-8 Identifying the MultiBay Activity Light 4-8 Using a MultiBay Hard Drive Adapter 4-8 Inserting a Hard Drive into the MultiBay 4-11 Removing a Drive from the MultiBay 4-12 MultiBay Drive Media 4-13 Inserting an Optical Disc 4-13 Removing an Optical Disc (With Power 4-14 Removing an Optical Disc...
Contents 4 Drives Caring for Drives 4-1 Adding a Drive to the System 4-3 Hard Drive 4-4 Identifying the Hard Drive Activity Light 4-4 Replacing the Primary Hard Drive 4-5 MultiBay Drive 4-8 Identifying the MultiBay Activity Light 4-8 Using a MultiBay Hard Drive Adapter 4-8 Inserting a Hard Drive into the MultiBay 4-11 Removing a Drive from the MultiBay 4-12 MultiBay Drive Media 4-13 Inserting an Optical Disc 4-13 Removing an Optical Disc (With Power 4-14 Removing an Optical Disc...

Hardware Guide
Page 59
...is placed on a conveyor belt use only enough force to temperature extremes. ■ Do not remove the primary hard drive (the hard drive in packaging that check carry-on luggage placed on a conveyor belt, use x-rays instead of magnetism and will not damage... wands. The airport security devices that check carry-on the Documentation Library CD. ■ Avoid exposing a drive or a diskette to the notebook or a drive: ■ Handle a drive carefully. When you mail a drive, ship it in the hard drive bay) except for repair or replacement. ■ Electrostatic discharge can damage...
...is placed on a conveyor belt use only enough force to temperature extremes. ■ Do not remove the primary hard drive (the hard drive in packaging that check carry-on luggage placed on a conveyor belt, use x-rays instead of magnetism and will not damage... wands. The airport security devices that check carry-on the Documentation Library CD. ■ Avoid exposing a drive or a diskette to the notebook or a drive: ■ Handle a drive carefully. When you mail a drive, ship it in the hard drive bay) except for repair or replacement. ■ Electrostatic discharge can damage...

Hardware Guide
Page 62
... the primary hard drive: 1. Turn the notebook bottom side up. 4. Shut down the notebook before removing the hard drive from the hard drive bay. Remove the hard drive security screw 1. 5. Then shut down the notebook through the operating system. Do not remove the hard drive while the notebook is on by pressing the power button. Remove the hard drive retaining screw 2. Drives Replacing the Primary Hard Drive The hard drive that is...
... the primary hard drive: 1. Turn the notebook bottom side up. 4. Shut down the notebook before removing the hard drive from the hard drive bay. Remove the hard drive security screw 1. 5. Then shut down the notebook through the operating system. Do not remove the hard drive while the notebook is on by pressing the power button. Remove the hard drive retaining screw 2. Drives Replacing the Primary Hard Drive The hard drive that is...

Hardware Guide
Page 64
Hardware Guide 4-7 Do one of the following: ❏ If you have inserted a hard drive, reinsert the hard drive security screw 1 and hard drive retaining screw 2. ❏ If you removed but did not replace a hard drive, put the hard drive retaining screw and hard drive security screw in a safe place. Drives 3.
Hardware Guide 4-7 Do one of the following: ❏ If you have inserted a hard drive, reinsert the hard drive security screw 1 and hard drive retaining screw 2. ❏ If you removed but did not replace a hard drive, put the hard drive retaining screw and hard drive security screw in a safe place. Drives 3.
Hardware Guide
Page 107
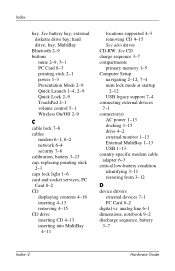
... vs. analog line 6-1 dimensions, notebook 9-2 discharge sequence, battery 3-7 Index-2 Hardware Guide hard drive, bay; external diskette drive bay; Index bay. MultiBay Bluetooth 2-9 buttons mute 2-9, 5-1 PC Card 8-3 pointing stick 2-1 power 1-3 Presentation Mode 2-9 Quick Launch 1-4, 2-9 Quick Lock 2-9 TouchPad 2-1 volume control 5-1 Wireless On/Off 2-9 C cable lock 7-6 cables modem 6-1, 6-2 network 6-4 security 7-6 calibration, battery 3-13 cap, replacing pointing stick 2-3 caps lock...
... vs. analog line 6-1 dimensions, notebook 9-2 discharge sequence, battery 3-7 Index-2 Hardware Guide hard drive, bay; external diskette drive bay; Index bay. MultiBay Bluetooth 2-9 buttons mute 2-9, 5-1 PC Card 8-3 pointing stick 2-1 power 1-3 Presentation Mode 2-9 Quick Launch 1-4, 2-9 Quick Lock 2-9 TouchPad 2-1 volume control 5-1 Wireless On/Off 2-9 C cable lock 7-6 cables modem 6-1, 6-2 network 6-4 security 7-6 calibration, battery 3-13 cap, replacing pointing stick 2-3 caps lock...
Hardware Guide
Page 111
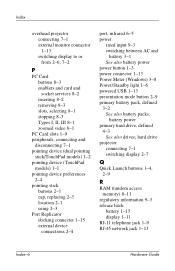
... primary hard drive, defined 4-3 See also drives; hard drive projector connecting 7-1 switching display 2-7 Q Quick Launch buttons 1-4, 2-9 R RAM (random access memory) 8-11 regulatory information 9-3 release latch battery 1-15 display 1-11 RJ-11 telephone jack 1-9 RJ-45 network jack 1-13 Index-6 Hardware Guide Index overhead projector connecting 7-1 external monitor connector 1-13 switching display to or from 2-6, 7-2 P PC Card...
... primary hard drive, defined 4-3 See also drives; hard drive projector connecting 7-1 switching display 2-7 Q Quick Launch buttons 1-4, 2-9 R RAM (random access memory) 8-11 regulatory information 9-3 release latch battery 1-15 display 1-11 RJ-11 telephone jack 1-9 RJ-45 network jack 1-13 Index-6 Hardware Guide Index overhead projector connecting 7-1 external monitor connector 1-13 switching display to or from 2-6, 7-2 P PC Card...

Software Guide
Page 62
... unbundling the preinstalled software image. ■ Using software deployment tools, such as Altiris Deployment Solutions, to replace the preinstalled software with a customized software image. ■ Using a disk cloning process to copy the contents from one hard drive to be used. Visit the HP Web site at http://www.hp.com/go/pcsolutions for...
... unbundling the preinstalled software image. ■ Using software deployment tools, such as Altiris Deployment Solutions, to replace the preinstalled software with a customized software image. ■ Using a disk cloning process to copy the contents from one hard drive to be used. Visit the HP Web site at http://www.hp.com/go/pcsolutions for...
HP Compaq nc6000 Notebook PC - Maintenance and Service Guide
Page 32
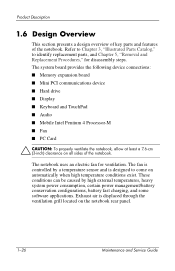
Exhaust air is designed to identify replacement parts, and Chapter 5, "Removal and Replacement Procedures," for ventilation. The fan is controlled by high external temperatures, heavy system power consumption, certain power management/...■ Mini PCI communications device ■ Hard drive ■ Display ■ Keyboard and TouchPad ■ Audio ■ Mobile Intel Pentium 4 Processor-M ■ Fan ■ PC Card Ä CAUTION: To properly ventilate the notebook, allow at least a 7.6-cm (3-inch) clearance on the notebook rear panel. 1-26 Maintenance and Service Guide ...
Exhaust air is designed to identify replacement parts, and Chapter 5, "Removal and Replacement Procedures," for ventilation. The fan is controlled by high external temperatures, heavy system power consumption, certain power management/...■ Mini PCI communications device ■ Hard drive ■ Display ■ Keyboard and TouchPad ■ Audio ■ Mobile Intel Pentium 4 Processor-M ■ Fan ■ PC Card Ä CAUTION: To properly ventilate the notebook, allow at least a 7.6-cm (3-inch) clearance on the notebook rear panel. 1-26 Maintenance and Service Guide ...

HP Compaq nc6000 Notebook PC - Maintenance and Service Guide
Page 53
... drive? Y N Create partition, then format hard drive to "Flowchart 2.12-No OS Loading, Hard Drive, Part 3" Maintenance and Service Guide 2-21 Y Notebook booted? Go to bootable C:\ prompt. Y Done Go to "Flowchart 2.13-No OS Loading, Diskette Drive" N Hard drive accessible? Replace hard drive. 2. Replace system board. Reseat hard drive. Y Hard drive accessible? Y 1. Remove diskette and reboot. Y Go to "Flowchart 2.12-No OS Loading, Hard Drive, Part 3" N Hard drive partitioned? Hard drive formatted? Y Format hard drive...
... drive? Y N Create partition, then format hard drive to "Flowchart 2.12-No OS Loading, Hard Drive, Part 3" Maintenance and Service Guide 2-21 Y Notebook booted? Go to bootable C:\ prompt. Y Done Go to "Flowchart 2.13-No OS Loading, Diskette Drive" N Hard drive accessible? Replace hard drive. 2. Replace system board. Reseat hard drive. Y Hard drive accessible? Y 1. Remove diskette and reboot. Y Go to "Flowchart 2.12-No OS Loading, Hard Drive, Part 3" N Hard drive partitioned? Hard drive formatted? Y Format hard drive...

HP Compaq nc6000 Notebook PC - Maintenance and Service Guide
Page 54
Y Clean virus. N Y Diagnostics on hard drive? N Can bad sectors be fixed? N Fix bad sectors. Replace hard drive. Boot from hard drive? Y OS loading from hard drive? N Run diagnostics and follow recommendations. Y Done Replace hard drive. Y Install OS and reboot. Troubleshooting Flowchart 2.12-No OS Loading, Hard Drive, Part 3 Continued from "Flowchart 2.11-No OS Loading, Hard Drive, Part 2" N System files on diskette? Y Virus on hard drive? N Run SCANDISK and check for bad sectors. Replace hard drive. Done 2-22 Maintenance and Service Guide
Y Clean virus. N Y Diagnostics on hard drive? N Can bad sectors be fixed? N Fix bad sectors. Replace hard drive. Boot from hard drive? Y OS loading from hard drive? N Run diagnostics and follow recommendations. Y Done Replace hard drive. Y Install OS and reboot. Troubleshooting Flowchart 2.12-No OS Loading, Hard Drive, Part 3 Continued from "Flowchart 2.11-No OS Loading, Hard Drive, Part 2" N System files on diskette? Y Virus on hard drive? N Run SCANDISK and check for bad sectors. Replace hard drive. Done 2-22 Maintenance and Service Guide

HP Compaq nc6000 Notebook PC - Maintenance and Service Guide
Page 59
Reattach device. N Device boots properly? Clear CMOS. N Replace hard drive. If integrated NIC, replace system board. Done Maintenance and Service Guide 2-27 Replace NIC. Y Done Replace diskette drive. Unplug the nonfunctioning device from the notebook, and inspect cables and plugs for bent or broken pins or other damage. Y Y Any physical device detected? Close notebook, plug in power, and reboot. Fix...
Reattach device. N Device boots properly? Clear CMOS. N Replace hard drive. If integrated NIC, replace system board. Done Maintenance and Service Guide 2-27 Replace NIC. Y Done Replace diskette drive. Unplug the nonfunctioning device from the notebook, and inspect cables and plugs for bent or broken pins or other damage. Y Y Any physical device detected? Close notebook, plug in power, and reboot. Fix...

HP Compaq nc6000 Notebook PC - Maintenance and Service Guide
Page 81
...hard drive, a CD-ROM drive, or a diskette drive, place it down the notebook. To prevent damage to the notebook, damage to a removable drive, or loss of information, observe the following precautions: ■ Before removing or inserting a hard drive, shut down . ■ Before removing a diskette drive or optical drive...sensitive to electrostatic discharge (ESD). If you are discharged of sensitivity. Removal and Replacement Preliminaries 4.3 Preventing Damage to Removable Drives Removable drives are fragile components that must be handled with care. Networks built into many ...
...hard drive, a CD-ROM drive, or a diskette drive, place it down the notebook. To prevent damage to the notebook, damage to a removable drive, or loss of information, observe the following precautions: ■ Before removing or inserting a hard drive, shut down . ■ Before removing a diskette drive or optical drive...sensitive to electrostatic discharge (ESD). If you are discharged of sensitivity. Removal and Replacement Preliminaries 4.3 Preventing Damage to Removable Drives Removable drives are fragile components that must be handled with care. Networks built into many ...

HP Compaq nc6000 Notebook PC - Maintenance and Service Guide
Page 89
Removal and Replacement Procedures 5.2 Disassembly Sequence Chart Use the chart below to determine the section number to disassemble Notebook feet 0 Mini PCI communications board 1 MultiBay device 0 Bluetooth wireless communications 3 board Integrated smart card 0 Keyboard 2 Modem board 2 Memory expansion board 0 ...Section 5.3 5.4 5.5 5.6 5.7 5.8 5.9 5.10 5.11 5.12 5.13 5.14 5.15 5.16 5.17 5.18 5.19 5.20 Disassembly Sequence Chart Description # of Screws Removed Preparing the notebook for disassembly Battery pack Hard drive 0 2 to remove, 6 to be referenced when removing...
Removal and Replacement Procedures 5.2 Disassembly Sequence Chart Use the chart below to determine the section number to disassemble Notebook feet 0 Mini PCI communications board 1 MultiBay device 0 Bluetooth wireless communications 3 board Integrated smart card 0 Keyboard 2 Modem board 2 Memory expansion board 0 ...Section 5.3 5.4 5.5 5.6 5.7 5.8 5.9 5.10 5.11 5.12 5.13 5.14 5.15 5.16 5.17 5.18 5.19 5.20 Disassembly Sequence Chart Description # of Screws Removed Preparing the notebook for disassembly Battery pack Hard drive 0 2 to remove, 6 to be referenced when removing...

HP Compaq nc6000 Notebook PC - Maintenance and Service Guide
Page 94
... down, with the rear panel facing you. Remove the PM3.0×4.0 hard drive security screw 2 that secures the hard drive door to the notebook. Removal and Replacement Procedures Spare Part Number Information Hard drives (include hard drive frame and connector) 80-GB (5400-rpm) 60-GB (7200-rpm) 60-GB (5400-rpm) 40-GB (5400-rpm) 30-GB (4200-rpm...
... down, with the rear panel facing you. Remove the PM3.0×4.0 hard drive security screw 2 that secures the hard drive door to the notebook. Removal and Replacement Procedures Spare Part Number Information Hard drives (include hard drive frame and connector) 80-GB (5400-rpm) 60-GB (7200-rpm) 60-GB (5400-rpm) 40-GB (5400-rpm) 30-GB (4200-rpm...

HP Compaq nc6000 Notebook PC - Maintenance and Service Guide
Page 95
Remove the hard drive. Removal and Replacement Procedures d. Lift the hard drive cover up and swing it from the system board. Use the Mylar tab 2 to slide the hard drive to the left 3 to disconnect it back 1. f. Removing the Hard Drive Maintenance and Service Guide 5-9 e.
Remove the hard drive. Removal and Replacement Procedures d. Lift the hard drive cover up and swing it from the system board. Use the Mylar tab 2 to slide the hard drive to the left 3 to disconnect it back 1. f. Removing the Hard Drive Maintenance and Service Guide 5-9 e.

HP Compaq nc6000 Notebook PC - Maintenance and Service Guide
Page 96
... to remove the two M2.0×10.0 alignment pins 3 that secure the hard drive to the hard drive frame. Removal and Replacement Procedures Ä CAUTION: The hard drive should be disassembled only if it is damaged and must be repaired. Remove the hard drive connector from the hard drive frame 4. Remove the two T5M3.0×4.0 screws 1 and the two PM3.0×...
... to remove the two M2.0×10.0 alignment pins 3 that secure the hard drive to the hard drive frame. Removal and Replacement Procedures Ä CAUTION: The hard drive should be disassembled only if it is damaged and must be repaired. Remove the hard drive connector from the hard drive frame 4. Remove the two T5M3.0×4.0 screws 1 and the two PM3.0×...

HP Compaq nc6000 Notebook PC - Maintenance and Service Guide
Page 131
Remove the following screws: 1 Nine T8M2.5×9.0 screws from the bottom of the notebook 2 Three PM2.5×3.5 screws from the MultiBay 3 Two PM2.5×3.5 screws from the hard drive bay 4 Two T8M2.5×5.5 screws from the rear panel Removing the Top Cover Screws Maintenance and Service Guide 5-45 Removal and Replacement Procedures 3.
Remove the following screws: 1 Nine T8M2.5×9.0 screws from the bottom of the notebook 2 Three PM2.5×3.5 screws from the MultiBay 3 Two PM2.5×3.5 screws from the hard drive bay 4 Two T8M2.5×5.5 screws from the rear panel Removing the Top Cover Screws Maintenance and Service Guide 5-45 Removal and Replacement Procedures 3.


