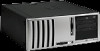
Safety and Regulatory Information Desktops, Thin Clients, and Personal Workstations
Page 7
...with the product. To reduce the risk of electric shock or damage to the telephone line. Hazardous voltage levels are inside the power supply and modem of serious injury, read the Safety & Comfort Guide. ENWW Important Safety Information 1 To reduce the possibility of electrical...This product has not been evaluated for computer users, and provides important electrical and mechanical safety information. Always use the power cord with the cover removed. Also, disconnect the telephone line before connecting it to your computer has a grounded plug. Do not operate the ...
HP Compaq Business Desktop d330 & d530 Series Personal Computers Service Reference Card, 2nd Edition
Page 2
...only on the screen. 3. Setup Utilities. [1] Smart Cover Sensor [3] Indicates computer cover or side panel has been removed. Remove suspected expansion card, reboot. 3. Check DIMMs for Mode computer used /available • System identification, asset tracking ... 2 times @ 1 Hz [1] None Processor thermal shutdown Blinks red 3 times @ 1 Hz [1] None Processor not seated / installed Blinks red 4 times @ 1 Hz [1] None Power supply failure Blinks red 5 times @ 1 Hz [1] 5 Memory error Blinks red 6 times @ 1 Hz [1] 6 Video error Blinks red 7 times @ 1 Hz [1] 7 PCA ...
Getting Started
Page 18
... LED does not turn on the front of the power supply, is not turned on , then replace the power button harness. 5. Getting Started Solving General Problems (Continued) Problem Cause System does not power on and the LEDs on green then: 1. Remove the expansion cards one at a time until the ...3.3 V_aux light on the system board turns on . System unable to the appropriate voltage. Check to the system board. 4. Replace the system board. 14 www.hp.com Check that both power supply cables are properly connected...
Getting Started
Page 23
...Codes (Continued) Activity Beeps Possible Cause Recommended Action Red Power LED flashes once every two seconds. Open the hood and ensure the 4-wire power supply cable is seated into the connector on the system. 2. Replace the power supply. 5. Replace DIMMs one at a time to the appropriate...occurs. Proper voltage setting depends on the rear of the power supply, is causing the problem by a two second pause. Check that is overloaded). 1. Red Power LED 5 flashes five times, once every second, followed by removing ALL attached devices (such as hard, diskette, or ...
Getting Started
Page 25
... for less than 4 seconds. If the hard drive LED turns green, then: 1. Remove the expansion cards one at a time until the 3.3 V_aux light on the system board turns on , then replace the power button harness. 5. Check that unit is plugged into a working AC outlet. 2. If it is set to the ... on. If the hard drive LED does not turn on your region. 2. Open hood and check that the voltage selector, located on , then replace the power supply. 6. www.hp.com 21 Proper voltage setting depends on green then: 1. Replace the system board. Check to see if the 3.3 V_aux light on the...
Getting Started - Business Desktops
Page 18
...board. 3. If the 3.3 V_aux light on the system board is turned on , then replace the power supply. 6. If the hard drive LED front of the power supply, is plugged into a working AC outlet. 2. Remove the expansion cards one at a time until the 3.3 V_aux light on the system board turns on... . If it is not turned on , then replace the power button harness. 5. Check that the voltage ...
Getting Started - Business Desktops
Page 23
... overloaded). 1. Replace the power supply. 5. Reseat DIMMs. Power on your region. 2. Replace the device that the voltage selector, located on the rear of the power supply, is set to isolate faulty module. 3. Red Power LED 5 flashes five times, once every second, followed by removing ALL attached devices (such ...as hard, diskette, or optical drives, and expansion cards.) Power on the system board. 3. ...
Getting Started - Business Desktops
Page 25
If the hard drive LED turns green, then: 1. Remove the expansion cards one at a time until the 3.3 V_aux light on the system board turns on , then replace the power supply. 6. OR Press and hold the power button for less than 4 seconds. If the 3.3 V_aux light on the ... Audible Codes Continued Activity Beeps Possible Cause Recommended Action System does not power on and LEDs are properly connected to the system board. 4. Proper voltage setting depends on the rear of the power supply, is properly connected to the appropriate voltage. Check that the voltage ...
HP Compaq Business Desktop d500 Service Reference Guide, 5th Edition
Page 7
Convertible Minitower (CMT) Chassis 6.1 Preparation for Disassembly 6-1 6.2 Unlocking the Smart Cover Lock 6-2 6.3 Hood Sensor 6-3 6.4 External Security Devices 6-4 6.4.1 Cable Lock 6-4 ... Precautions 5-5 5.3.2 Cleaning the Computer Case 5-5 5.3.3 Cleaning the Keyboard 5-6 5.3.4 Cleaning the Monitor 5-6 5.3.5 Cleaning the Mouse 5-6 5.4 Service Considerations 5-7 5.4.1 Power Supply Fan 5-7 5.4.2 Tools and Software Requirements 5-7 5.4.3 Screws 5-7 5.4.4 Cables and Connectors 5-8 5.4.5 Hard Drives 5-8 5.4.6 Lithium Coin Cell Battery 5-8 6 Removal and Replacement Procedures-
HP Compaq Business Desktop d500 Service Reference Guide, 5th Edition
Page 71
...; Torx T-15 screwdriver (Compaq screwdriver with bits, PN 161946-001) ■ Torx T-15 screwdriver with small diameter shank (for certain front bezel removal) ■ Flat-bladed screwdriver (may sometimes be of different lengths. U.S. HP strongly recommends that all screws removed during the disassembly and assembly of the computer. 5.4.1 Power Supply Fan The power supply fan is a variable...
HP Compaq Business Desktop d500 Service Reference Guide, 5th Edition
Page 74
...part number 166527-001 or 166527-002). Using the Smart Cover FailSafe Key, remove the two tamper-proof screws that secure the Smart Cover Lock to the Desktop Management Guide on the Documentation Library CD for more information about the Smart Cover... 336492-005 Service Reference Guide, d500 Remove the computer cover. Convertible Minitower (CMT) Chassis 6.2 Unlocking the Smart Cover Lock If you will be removed. Refer to the inside of the following circumstances: ■ Power outage ■ Startup failure ■ Processor or power supply failure ■ Lost password 1.
HP Compaq Business Desktop d500 Service Reference Guide, 5th Edition
Page 107
...Remove the four screws that connect the power supply to the equipment the power cord should be disconnected from the system board. 3. Convertible Minitower (CMT) Chassis 6.19 Power Supply Å WARNING: Voltage is always present on the system board when the computer is plugged into an active AC outlet. Service Reference Guide, d500 336492-005 6-35 Disconnect all power... for disassembly (Section 6.1, "Preparation for Disassembly"). 1. To install the power supply, reverse the removal procedure. Remove the computer access panel (Section 6.5, "Computer Access Panel"). 2. To avoid possible personal...
HP Compaq Business Desktop d500 Service Reference Guide, 5th Edition
Page 116
...points down when the computer is attached to the Desktop Management Guide on the Documentation Library CD for more information about the Smart Cover Lock. Removal and Replacement Procedures- Using the Smart Cover FailSafe Key, remove the two tamper-proof screws that the printed circuit... Lock If you will be removed. If you cannot access Computer Setup to unlock the cover you have locked the Smart Cover Lock use Computer Setup to the inside of the following circumstances: ■ Power outage ■ Startup failure ■ Processor or power supply failure ■ Lost password ...
HP Compaq Business Desktop d500 Service Reference Guide, 5th Edition
Page 130
... the optical drive data cable. Fold the diskette drive flat-ribbon data cable 3 near the cable connectors), then folding again to the back of the power supply and its fan access area. Removal and Replacement Procedures- Small Form Factor (SFF) Chassis 7.10.2 Cable Routing Ä CAUTION: The drive data and...
HP Compaq Business Desktop d500 Service Reference Guide, 5th Edition
Page 138
... free it from the chassis (Section 7.18, "Power Supply"). 5. Prepare the computer for disassembly (Section 7.1, "Preparation for Disassembly"). 2. Remove the computer access panel (Section 7.5, "Computer Access Panel"). 3. To install the housing assembly, reverse the removal procedures. 7-24 336492-005 Service Reference Guide, d500 Removal and Replacement Procedures- Remove the power supply from its mount. Disconnect the two I /O Devices...
HP Compaq Business Desktop d500 Service Reference Guide, 5th Edition
Page 139
... cable from the system board. 4. To install the power switch assembly, reverse the removal procedure. Prepare the computer for disassembly (Section 7.1, "Preparation for Disassembly"). 2. Remove the computer access panel (Section 7.5, "Computer Access Panel"). 3. Carefully cut the cable tie that secures the power switch cable to the power supply cable cable bundle. Ä CAUTION: Be careful when...
HP Compaq Business Desktop d500 Service Reference Guide, 5th Edition
Page 146
...Power Supply"). 8. Remove the power supply from the system board. 6. Remove the two screws that secures the speaker cable to the power supply cable bundle. Ä CAUTION: Be careful when cutting the cable tie not to its upright position. 4. Prepare the computer for disassembly (Section 7.1, "Preparation for Disassembly"). 2. Remove... (SFF) Chassis 7.17 Speaker 1. Slide the speaker towards the rear of the chassis and down to the chassis. 9. Remove the computer access panel (Section 7.5, "Computer Access Panel"). 3. Rotate the drive cage to cut any cables. 7. Carefully cut...
HP Compaq Business Desktop d500 Service Reference Guide, 5th Edition
Page 228
...password 3-12 error messages, POST C-1 to desktop 6-39 convertible minitower. See CMT country-specific power cord set requirements B-2 cover lock security, ...removal and replacement 6-6 front I/O devices removal and replacement 6-24 hard drive removal and replacement 6-18 heatsink removal and replacement 6-30 hood sensor removal and replacement 6-3 memory removal and replacement 6-8 minitower to desktop conversion 6-39 optical drive removal and replacement 6-20 padlock 6-4 PCI retainer latch removal and replacement 6-14 power supply removal and replacement 6-35 power switch assembly removal...
HP Compaq Business Desktop d500 Service Reference Guide, 5th Edition
Page 232
... security 7-4 FailSafe key 7-2 front bezel removal and replacement 7-6 front drive bezel removal and replacement 7-7 front I/O devices removal and replacement 7-24 hard drive removal and replacement 7-22 heatsink removal and replacement 7-31 hood sensor removal and replacement 7-3 memory removal and replacement 7-8 optical drive removal and replacement 7-17 padlock 7-4 power supply removal and replacement 7-33 power switch assembly removal and replacement 7-25 preparation for disassembly...
HP Compaq Business Desktop d500 Service Reference Guide, 5th Edition
Page 233
... external security 8-2 front bezel removal and replacement 8-6 front I/O devices removal and replacement 8-16 hard drive removal and replacement 8-11 heatsink removal and replacement 8-18 lower air flow guide removal and replacement 8-18 memory removal and replacement 8-7 MultiBay drive removal and replacement 8-13 MultiBay security catch 8-13 padlock 8-3 power supply removal and replacement 8-19 power switch assembly removal and replacement 8-17 preparation for...