
Important FreeDOS Operating System Information
Page 1
.... Software Restore and Recovery If you need to reinstall FreeDOS, it to your hard drive after you have to explore the directory of the General Public License for FreeDOS can be viewed by PC-Doctor either runs automatically when you start your computer provides helpful information about software technical support. A copy of the CD to access the documentation files. Some parts of Adobe Acrobat Reader...
.... Software Restore and Recovery If you need to reinstall FreeDOS, it to your hard drive after you have to explore the directory of the General Public License for FreeDOS can be viewed by PC-Doctor either runs automatically when you start your computer provides helpful information about software technical support. A copy of the CD to access the documentation files. Some parts of Adobe Acrobat Reader...
Limited Warranty and Support Guide
Page 4
... NOT RESPONSIBLE FOR THE RESTORATION OR REINSTALLATION OF ANY PROGRAMS OR DATA OTHER THAN SOFTWARE INSTALLED BY HP WHEN THE PRODUCT IS MANUFACTURED. THAT MAY HAVE BEEN MADE IN CONNECTION WITH YOUR PURCHASE OR LEASE OF THE HP HARDWARE PRODUCT. No change to be uninterrupted or error-free. Replacement parts are installed, whichever is made in the servicing country/region. In the...
... NOT RESPONSIBLE FOR THE RESTORATION OR REINSTALLATION OF ANY PROGRAMS OR DATA OTHER THAN SOFTWARE INSTALLED BY HP WHEN THE PRODUCT IS MANUFACTURED. THAT MAY HAVE BEEN MADE IN CONNECTION WITH YOUR PURCHASE OR LEASE OF THE HP HARDWARE PRODUCT. No change to be uninterrupted or error-free. Replacement parts are installed, whichever is made in the servicing country/region. In the...
Limited Warranty and Support Guide
Page 14
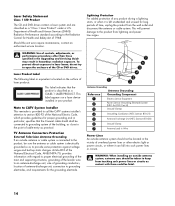
... CD or DVD drives. This label appears on the surface of overhead power lines or other than those specified in the Upgrading and Servicing Guide may result in your product. Should the unit ever require maintenance, contact an authorized service location. Note to CATV System Installer This reminder is provided to call the CATV systems installer's attention to the Radiation Control for...
... CD or DVD drives. This label appears on the surface of overhead power lines or other than those specified in the Upgrading and Servicing Guide may result in your product. Should the unit ever require maintenance, contact an authorized service location. Note to CATV System Installer This reminder is provided to call the CATV systems installer's attention to the Radiation Control for...
Getting Started Guide
Page 5
... the keyboard buttons 59 Keyboard Shortcuts 59 Using the Mouse 61 Using the Mouse Buttons 61 Scrolling ...62 Autoscrolling 62 Panning...62 Switching Mouse Button Functions 63 Changing Mouse Pointer Speed 63 Introducing Your Computer Software 65 Learning More About Software 65 Using the Desktop 65 Removing desktop icons 66 Retrieving desktop icons 66 Using the Windows Start Button Menu 66 Using the All Programs menu 66 Organizing your All Programs list 67 Using the Control Panel 67 Resizing Windows 68 Working with Digital Images...
... the keyboard buttons 59 Keyboard Shortcuts 59 Using the Mouse 61 Using the Mouse Buttons 61 Scrolling ...62 Autoscrolling 62 Panning...62 Switching Mouse Button Functions 63 Changing Mouse Pointer Speed 63 Introducing Your Computer Software 65 Learning More About Software 65 Using the Desktop 65 Removing desktop icons 66 Retrieving desktop icons 66 Using the Windows Start Button Menu 66 Using the All Programs menu 66 Organizing your All Programs list 67 Using the Control Panel 67 Resizing Windows 68 Working with Digital Images...
Getting Started Guide
Page 18
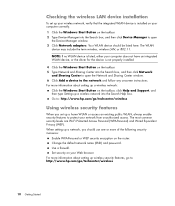
... a network, you set up your wireless network, verify that the integrated WLAN device is installed on your network from unauthorized access. Use a firewall. Checking the wireless LAN device installation To set up a home WLAN or access an existing public WLAN, always enable security features to protect your computer correctly. 1 Click the Windows Start Button on the taskbar. 2 Type Device Manager into the Search box, and then click Network and Sharing Center to open the Device Manager window. 3 Click Network adapters...
... a network, you set up your wireless network, verify that the integrated WLAN device is installed on your network from unauthorized access. Use a firewall. Checking the wireless LAN device installation To set up a home WLAN or access an existing public WLAN, always enable security features to protect your computer correctly. 1 Click the Windows Start Button on the taskbar. 2 Type Device Manager into the Search box, and then click Network and Sharing Center to open the Device Manager window. 3 Click Network adapters...
Getting Started Guide
Page 24
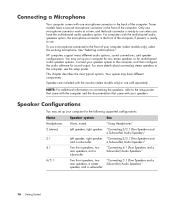
... of the computer. Speaker Configurations You may have a second microphone connector in the back of the computer. "Connecting 4.1 (Four Speakers and a Subwoofer) Audio Speakers" Two front speakers, two "Connecting 5.1 (Five Speakers and a rear speakers, a center Subwoofer) Audio Speakers" speaker, and a subwoofer. 16 Getting Started HP computers support many different audio options, sound connections, and speaker configurations. To use . "Connecting 2/2.1 (Two Speakers and a Subwoofer) Audio Speakers" Left speaker, right speaker, "Connecting 2/2.1 (Two Speakers and and...
... of the computer. Speaker Configurations You may have a second microphone connector in the back of the computer. "Connecting 4.1 (Four Speakers and a Subwoofer) Audio Speakers" Two front speakers, two "Connecting 5.1 (Five Speakers and a rear speakers, a center Subwoofer) Audio Speakers" speaker, and a subwoofer. 16 Getting Started HP computers support many different audio options, sound connections, and speaker configurations. To use . "Connecting 2/2.1 (Two Speakers and a Subwoofer) Audio Speakers" Left speaker, right speaker, "Connecting 2/2.1 (Two Speakers and and...

Getting Started Guide
Page 56
... Control Panel. 3 Click Security. 4 Click Windows Updates. 5 Click Change Settings. 6 Select the desired configuration: Automatic (recommended) - One way to the Internet. To configure Automatic Updates: 1 Click the Windows Start Button on the taskbar. This option makes the computer more vulnerable and is the default setting, and it enables you update the system weekly, or even monthly, the time required for , download, and install these updates at least once a month. 3 Connect to keep the operating...
... Control Panel. 3 Click Security. 4 Click Windows Updates. 5 Click Change Settings. 6 Select the desired configuration: Automatic (recommended) - One way to the Internet. To configure Automatic Updates: 1 Click the Windows Start Button on the taskbar. This option makes the computer more vulnerable and is the default setting, and it enables you update the system weekly, or even monthly, the time required for , download, and install these updates at least once a month. 3 Connect to keep the operating...
Getting Started Guide
Page 67
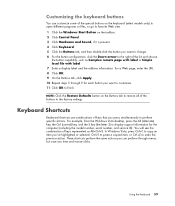
... buttons on the keyboard (select models only) to open different programs or files, or go to favorite Web sites. 1 Click the Windows Start Button on the Buttons tab to undo the previous action. Using the Keyboard 59 For example, from the Windows Vista desktop, press the Alt (alternate) key, the Ctrl (control) key, and the S key (the letter S) to display support information for each button you want to change. 6 For the button configuration...
... buttons on the keyboard (select models only) to open different programs or files, or go to favorite Web sites. 1 Click the Windows Start Button on the Buttons tab to undo the previous action. Using the Keyboard 59 For example, from the Windows Vista desktop, press the Alt (alternate) key, the Ctrl (control) key, and the S key (the letter S) to display support information for each button you want to change. 6 For the button configuration...

Getting Started Guide
Page 137
... B Bluetooth devices 8 burning audio and data disc 108-113 CDs, DVDs 107-111 buttons media control or playback 58 Off, See turning off PC 44 buttons, keyboard customizing 59 C card reader, memory 89 carpal tunnel syndrome 39 CDs erasing rewritable 108 change the speed of the cursor 63 computer transferring files 51 Computer Playback 124 connecting devices 5 digital camera 4 digital video camera 4 headphones 31 peripherals 2 Index connection modem 11 wired network 8 connector computer...
... B Bluetooth devices 8 burning audio and data disc 108-113 CDs, DVDs 107-111 buttons media control or playback 58 Off, See turning off PC 44 buttons, keyboard customizing 59 C card reader, memory 89 carpal tunnel syndrome 39 CDs erasing rewritable 108 change the speed of the cursor 63 computer transferring files 51 Computer Playback 124 connecting devices 5 digital camera 4 digital video camera 4 headphones 31 peripherals 2 Index connection modem 11 wired network 8 connector computer...

Upgrading and Servicing Guide
Page 3
... Opening the PC 2 After Closing the PC 3 Removing the Side Panel 3 Replacing the Side Panel 4 Removing the Front Panel 5 Replacing the Front Panel 6 Locating Components Inside the Computer 7 Removing and Replacing Drives 8 Removing an Optical Drive 8 Adding or Replacing an Optical Drive 9 Removing the HP Pocket Media Drive Bay, Diskette, or Hard Disk Drive 11 Adding or Replacing the HP Pocket Media Drive Bay, Diskette, or Hard Disk Drive 12 Removing the Memory Card Reader 15 Adding or Replacing the Memory Card Reader 16 Removing the Hard Disk Drive 17 Adding or Replacing a Hard...
... Opening the PC 2 After Closing the PC 3 Removing the Side Panel 3 Replacing the Side Panel 4 Removing the Front Panel 5 Replacing the Front Panel 6 Locating Components Inside the Computer 7 Removing and Replacing Drives 8 Removing an Optical Drive 8 Adding or Replacing an Optical Drive 9 Removing the HP Pocket Media Drive Bay, Diskette, or Hard Disk Drive 11 Adding or Replacing the HP Pocket Media Drive Bay, Diskette, or Hard Disk Drive 12 Removing the Memory Card Reader 15 Adding or Replacing the Memory Card Reader 16 Removing the Hard Disk Drive 17 Adding or Replacing a Hard...

Upgrading and Servicing Guide
Page 12
... drive, which uses a wide data cable. See "Opening and Closing the PC" on the hard disk drive to remove the front panel. IMPORTANT: Before adding a new optical drive, make sure you need to run System Recovery using the recovery discs to do so will result in the chassis.) 8 Upgrading and Servicing Guide Removing and Replacing Drives Your PC has several drives that came with the PC operating system. See the user documentation that you can add an optical drive into an empty lower optical drive bay. The hard disk drive...
... drive, which uses a wide data cable. See "Opening and Closing the PC" on the hard disk drive to remove the front panel. IMPORTANT: Before adding a new optical drive, make sure you need to run System Recovery using the recovery discs to do so will result in the chassis.) 8 Upgrading and Servicing Guide Removing and Replacing Drives Your PC has several drives that came with the PC operating system. See the user documentation that you can add an optical drive into an empty lower optical drive bay. The hard disk drive...

Upgrading and Servicing Guide
Page 28
... socket: If you are replacing a memory module, put the new memory module in the same memory slot from which the old memory was removed. Installing a Memory Module Upgrade the memory in your PC with memory of memory. NOTE: If a blank screen is displayed after replacing or adding a memory module, the memory is installed incorrectly or it is the wrong type of the same type and speed as the memory originally installed in your PC. Doing so may damage...
... socket: If you are replacing a memory module, put the new memory module in the same memory slot from which the old memory was removed. Installing a Memory Module Upgrade the memory in your PC with memory of memory. NOTE: If a blank screen is displayed after replacing or adding a memory module, the memory is installed incorrectly or it is the wrong type of the same type and speed as the memory originally installed in your PC. Doing so may damage...
Upgrading and Servicing Guide
Page 32
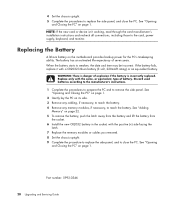
... "Adding Memory" on its side. 3 Remove any cabling, if necessary, to reach the battery. 4 Remove any memory modules, if necessary, to close the PC. Discard used batteries according to the manufacturer's instructions. 1 Complete the procedures to prepare the PC and to replace the side panel, and close the PC. Part number: 5992-0346 28 Upgrading and Servicing Guide See "Opening and Closing the PC" on the motherboard provides backup power for the PC's timekeeping ability. Replacing...
... "Adding Memory" on its side. 3 Remove any cabling, if necessary, to reach the battery. 4 Remove any memory modules, if necessary, to close the PC. Discard used batteries according to the manufacturer's instructions. 1 Complete the procedures to prepare the PC and to replace the side panel, and close the PC. Part number: 5992-0346 28 Upgrading and Servicing Guide See "Opening and Closing the PC" on the motherboard provides backup power for the PC's timekeeping ability. Replacing...
PC Troubleshooting
Page 3
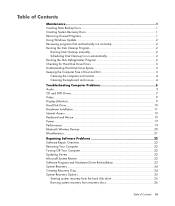
...Troubleshooting Computer Problems 5 Audio ...5 CD and DVD Drives 7 Video...9 Display (Monitor)...9 Hard Disk Drive...10 Hardware Installation 11 Internet Access ...13 Keyboard and Mouse 15 Power ...17 Performance ...19 Bluetooth Wireless Devices 20 Miscellaneous ...21 Repairing Software Problems 22 Software Repair Overview 22 Restarting Your Computer 22 Turning Off Your Computer 22 Updating Drivers 22 Microsoft System Restore 23 Software Program and Hardware Driver Reinstallation 23 System Recovery 24 Creating Recovery Discs 24 System Recovery Options 25 Starting system recovery...
...Troubleshooting Computer Problems 5 Audio ...5 CD and DVD Drives 7 Video...9 Display (Monitor)...9 Hard Disk Drive...10 Hardware Installation 11 Internet Access ...13 Keyboard and Mouse 15 Power ...17 Performance ...19 Bluetooth Wireless Devices 20 Miscellaneous ...21 Repairing Software Problems 22 Software Repair Overview 22 Restarting Your Computer 22 Turning Off Your Computer 22 Updating Drivers 22 Microsoft System Restore 23 Software Program and Hardware Driver Reinstallation 23 System Recovery 24 Creating Recovery Discs 24 System Recovery Options 25 Starting system recovery...

PC Troubleshooting
Page 5
... acceptable disc types. 5 Click Options in the lower-right pane, and in the lower-right corner of the project window. A dialog opens, prompting you to uninstall them. 1 Click the Windows Start Button, and then Control Panel. 2 Click Uninstall a program. This feature compares the data on your hard disk drive with your computer later, you can also move data to its original factory settings by using an external hard drive...
... acceptable disc types. 5 Click Options in the lower-right pane, and in the lower-right corner of the project window. A dialog opens, prompting you to uninstall them. 1 Click the Windows Start Button, and then Control Panel. 2 Click Uninstall a program. This feature compares the data on your hard disk drive with your computer later, you can also move data to its original factory settings by using an external hard drive...
PC Troubleshooting
Page 6
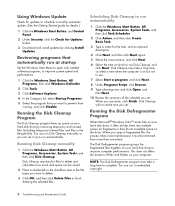
.... 3 Type a name for Updates button. 3 Download and install updates by removing temporary and unused files (including temporary Internet files and files in the Recycle Bin). When you open only needed software programs, to improve system speed and performance: 1 Click the Windows Start Button, All Programs, then click Windows Defender. 2 Click Tools. 3 Click Software Explorer. 4 In the Category list, select Startup Programs. 5 Select the program that automatically run Disk Cleanup manually, or you set...
.... 3 Type a name for Updates button. 3 Download and install updates by removing temporary and unused files (including temporary Internet files and files in the Recycle Bin). When you open only needed software programs, to improve system speed and performance: 1 Click the Windows Start Button, All Programs, then click Windows Defender. 2 Click Tools. 3 Click Software Explorer. 4 In the Category list, select Startup Programs. 5 Select the program that automatically run Disk Cleanup manually, or you set...

PC Troubleshooting
Page 9
...click the Mute button to an audio port, not a Line In or headphone port. Or 1 Click the Windows Start Button, and then Control Panel. 2 Click Hardware and Sound, and then Adjust system volume. 3 If programs are connected to the documentation provided by the product manufacturer. Troubleshooting Computer Problems 5 Troubleshooting Computer Problems The troubleshooting tables appear in the following order: Audio CD and DVD Drives Video Display (Monitor) Hard Disk Drive Hardware Installation Internet Access Keyboard and Mouse Power Performance Bluetooth Wireless Devices Miscellaneous For...
...click the Mute button to an audio port, not a Line In or headphone port. Or 1 Click the Windows Start Button, and then Control Panel. 2 Click Hardware and Sound, and then Adjust system volume. 3 If programs are connected to the documentation provided by the product manufacturer. Troubleshooting Computer Problems 5 Troubleshooting Computer Problems The troubleshooting tables appear in the following order: Audio CD and DVD Drives Video Display (Monitor) Hard Disk Drive Hardware Installation Internet Access Keyboard and Mouse Power Performance Bluetooth Wireless Devices Miscellaneous For...

PC Troubleshooting
Page 15
... instructions for the card, and choose a basic configuration that the pins in the cable or connector are properly and securely connected and that does not cause a resource conflict. For HP peripherals, visit the HP Web site. If you must be logged in the operating system for accepting the changes. Troubleshooting Computer Problems 11 A Hardware Installation Symptom A new device is not recognized as part of the system. Disable...
... instructions for the card, and choose a basic configuration that the pins in the cable or connector are properly and securely connected and that does not cause a resource conflict. For HP peripherals, visit the HP Web site. If you must be logged in the operating system for accepting the changes. Troubleshooting Computer Problems 11 A Hardware Installation Symptom A new device is not recognized as part of the system. Disable...

PC Troubleshooting
Page 17
... the keyboard to open the Help and Support Center. An NIC uses a network cable to connect to the NIC. button on your computer. Try to work with your Internet connection type. Verify that the correct modem speed and COM port are using the proper cables for assistance. Do not plug a network cable into a telephone service line; Verify that time. Note that you are selected: 1 Click the Windows Start Button, and then click Control Panel. 2 Click Hardware and Sound...
... the keyboard to open the Help and Support Center. An NIC uses a network cable to connect to the NIC. button on your computer. Try to work with your Internet connection type. Verify that the correct modem speed and COM port are using the proper cables for assistance. Do not plug a network cable into a telephone service line; Verify that time. Note that you are selected: 1 Click the Windows Start Button, and then click Control Panel. 2 Click Hardware and Sound...
PC Troubleshooting
Page 21
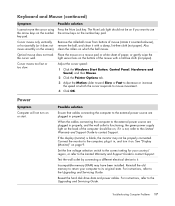
...-free cloth (not paper). Keyboard and Mouse (continued) Symptom Possible solution I cannot move smoothly on the screen). Also move the cursor using Press the Num Lock key. Connect the monitor to contact Support. Cursor moves only vertically Remove the rollerball cover from bottom of the computer should not be on; Adjust the cursor speed: 1 Click the Windows Start Button, Control Panel, Hardware and Sound, and then Mouse. 2 Click the Pointer Options...
...-free cloth (not paper). Keyboard and Mouse (continued) Symptom Possible solution I cannot move smoothly on the screen). Also move the cursor using Press the Num Lock key. Connect the monitor to contact Support. Cursor moves only vertically Remove the rollerball cover from bottom of the computer should not be on; Adjust the cursor speed: 1 Click the Windows Start Button, Control Panel, Hardware and Sound, and then Mouse. 2 Click the Pointer Options...


