
Important FreeDOS Operating System Information
Page 1
.... Hardware Diagnostic Tools powered by entering on this computer may not be supported under the FreeDOS operating system, nor will HP be responsible for providing driver support for FreeDOS can be obtained from the FreeDOS Web site: http://www.freedos.org Microsoft and Windows are responsible for obtaining the license for technical or editorial errors or omissions contained herein. Software Restore and Recovery If...
.... Hardware Diagnostic Tools powered by entering on this computer may not be supported under the FreeDOS operating system, nor will HP be responsible for providing driver support for FreeDOS can be obtained from the FreeDOS Web site: http://www.freedos.org Microsoft and Windows are responsible for obtaining the license for technical or editorial errors or omissions contained herein. Software Restore and Recovery If...
Limited Warranty and Support Guide
Page 4
... THE PRODUCT OR THE COST OF REPAIR OR REPLACEMENT OF ANY HARDWARE COMPONENTS THAT MALFUNCTION IN CONDITIONS OF NORMAL USE. Replacement parts are warranted to be uninterrupted or error-free. No change to the conditions of this Limited Warranty become the property of HP. In the unlikely event that your failure to follow the instructions intended for damage that has been...
... THE PRODUCT OR THE COST OF REPAIR OR REPLACEMENT OF ANY HARDWARE COMPONENTS THAT MALFUNCTION IN CONDITIONS OF NORMAL USE. Replacement parts are warranted to be uninterrupted or error-free. No change to the conditions of this Limited Warranty become the property of HP. In the unlikely event that your failure to follow the instructions intended for damage that has been...

Limited Warranty and Support Guide
Page 12
... problems, you should be required to be used with a PBX which approval was granted. Users of notice has expired. Ringer Equivalence Number The Ringer Equivalence Number (REN) of this modem is to be simultaneously connected to external software ...working in PSTN networks that can be used with or connected to one telephone line. In a domestic environment, this modem is 1. If this modem is to the maximum number of an appropriate socket. Some network operators require that the approval is not approved for the installation of apparatuses that only support...
... problems, you should be required to be used with a PBX which approval was granted. Users of notice has expired. Ringer Equivalence Number The Ringer Equivalence Number (REN) of this modem is to be simultaneously connected to external software ...working in PSTN networks that can be used with or connected to one telephone line. In a domestic environment, this modem is 1. If this modem is to the maximum number of an appropriate socket. Some network operators require that the approval is not approved for the installation of apparatuses that only support...
Limited Warranty and Support Guide
Page 14
... in the Upgrading and Servicing Guide may result in your product. Department of Health and Human Services (DHHS) Radiation Performance standard according to open the enclosure of any product during a lightning storm, or when it can fall into such power lines or circuits. Lightning Protection For added protection of the CD or DVD drives. Laser Safety Statement Class 1 LED Product...
... in the Upgrading and Servicing Guide may result in your product. Department of Health and Human Services (DHHS) Radiation Performance standard according to open the enclosure of any product during a lightning storm, or when it can fall into such power lines or circuits. Lightning Protection For added protection of the CD or DVD drives. Laser Safety Statement Class 1 LED Product...
Getting Started Guide
Page 5
... the keyboard buttons 59 Keyboard Shortcuts 59 Using the Mouse 61 Using the Mouse Buttons 61 Scrolling ...62 Autoscrolling 62 Panning...62 Switching Mouse Button Functions 63 Changing Mouse Pointer Speed 63 Introducing Your Computer Software 65 Learning More About Software 65 Using the Desktop 65 Removing desktop icons 66 Retrieving desktop icons 66 Using the Windows Start Button Menu 66 Using the All Programs menu 66 Organizing your All Programs list 67 Using the Control Panel 67 Resizing Windows 68 Working with Digital Images...
... the keyboard buttons 59 Keyboard Shortcuts 59 Using the Mouse 61 Using the Mouse Buttons 61 Scrolling ...62 Autoscrolling 62 Panning...62 Switching Mouse Button Functions 63 Changing Mouse Pointer Speed 63 Introducing Your Computer Software 65 Learning More About Software 65 Using the Desktop 65 Removing desktop icons 66 Retrieving desktop icons 66 Using the Windows Start Button Menu 66 Using the All Programs menu 66 Organizing your All Programs list 67 Using the Control Panel 67 Resizing Windows 68 Working with Digital Images...
Getting Started Guide
Page 18
... properly installed. 4 Click the Windows Start Button on the taskbar. 5 Type Network and Sharing Center into the Search box, and then click Network and Sharing Center to open the Device Manager window. 3 Click Network adapters. Use a firewall. For more information about setting up wireless security features, go to: http://www.hp.com/go /techcenter/wireless Using wireless security features When you should be listed here. Checking the wireless LAN device installation To set up a home WLAN or access...
... properly installed. 4 Click the Windows Start Button on the taskbar. 5 Type Network and Sharing Center into the Search box, and then click Network and Sharing Center to open the Device Manager window. 3 Click Network adapters. Use a firewall. For more information about setting up wireless security features, go to: http://www.hp.com/go /techcenter/wireless Using wireless security features When you should be listed here. Checking the wireless LAN device installation To set up a home WLAN or access...
Getting Started Guide
Page 24
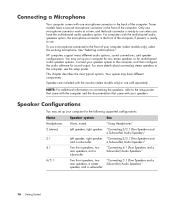
... models only), select the working microphone. See "Selecting a Microphone." a Subwoofer) Audio Speakers" Two front speakers, two rear speakers, and a subwoofer. Only one microphone connector in the back of the computer. Speakers are sold separately. For computers with one microphone connector works at a time, and the back connector is ready to use. HP computers support many different audio options, sound connections, and speaker configurations. Connecting a Microphone Your computer comes with the multichannel audio speakers option...
... models only), select the working microphone. See "Selecting a Microphone." a Subwoofer) Audio Speakers" Two front speakers, two rear speakers, and a subwoofer. Only one microphone connector in the back of the computer. Speakers are sold separately. For computers with one microphone connector works at a time, and the back connector is ready to use. HP computers support many different audio options, sound connections, and speaker configurations. Connecting a Microphone Your computer comes with the multichannel audio speakers option...

Getting Started Guide
Page 56
... open Internet Explore: a Click the Windows Start Button on the taskbar. 2 Click Control Panel. 3 Click Security. 4 Click Windows Updates. 5 Click Change Settings. 6 Select the desired configuration: Automatic (recommended) - To configure Automatic Updates: 1 Click the Windows Start Button on the taskbar. 3 Connect to your system. When you update the system weekly, or even monthly, the time required for , download, and install these updates at least once a month. One way to automatically download and install recommended updates...
... open Internet Explore: a Click the Windows Start Button on the taskbar. 2 Click Control Panel. 3 Click Security. 4 Click Windows Updates. 5 Click Change Settings. 6 Select the desired configuration: Automatic (recommended) - To configure Automatic Updates: 1 Click the Windows Start Button on the taskbar. 3 Connect to your system. When you update the system weekly, or even monthly, the time required for , download, and install these updates at least once a month. One way to automatically download and install recommended updates...
Getting Started Guide
Page 67
... the Windows Start Button on the Buttons tab to restore all of the buttons to perform specific actions. These shortcuts perform the same actions you can customize some of keys that you time and mouse clicks. For example, from the Windows Vista desktop, press the Alt (alternate) key, the Ctrl (control) key, and the S key (the letter S) to display support information for each button you want to change. 6 For the button configuration...
... the Windows Start Button on the Buttons tab to restore all of the buttons to perform specific actions. These shortcuts perform the same actions you can customize some of keys that you time and mouse clicks. For example, from the Windows Vista desktop, press the Alt (alternate) key, the Ctrl (control) key, and the S key (the letter S) to display support information for each button you want to change. 6 For the button configuration...

Getting Started Guide
Page 137
... B Bluetooth devices 8 burning audio and data disc 108-113 CDs, DVDs 107-111 buttons media control or playback 58 Off, See turning off PC 44 buttons, keyboard customizing 59 C card reader, memory 89 carpal tunnel syndrome 39 CDs erasing rewritable 108 change the speed of the cursor 63 computer transferring files 51 Computer Playback 124 connecting devices 5 digital camera 4 digital video camera 4 headphones 31 peripherals 2 Index connection modem 11 wired network 8 connector computer...
... B Bluetooth devices 8 burning audio and data disc 108-113 CDs, DVDs 107-111 buttons media control or playback 58 Off, See turning off PC 44 buttons, keyboard customizing 59 C card reader, memory 89 carpal tunnel syndrome 39 CDs erasing rewritable 108 change the speed of the cursor 63 computer transferring files 51 Computer Playback 124 connecting devices 5 digital camera 4 digital video camera 4 headphones 31 peripherals 2 Index connection modem 11 wired network 8 connector computer...

Upgrading and Servicing Guide
Page 3
... Opening the PC 2 After Closing the PC 3 Removing the Side Panel 3 Replacing the Side Panel 4 Removing the Front Panel 5 Replacing the Front Panel 6 Locating Components Inside the Computer 7 Removing and Replacing Drives 8 Removing an Optical Drive 8 Adding or Replacing an Optical Drive 9 Removing the HP Pocket Media Drive Bay, Diskette, or Hard Disk Drive 11 Adding or Replacing the HP Pocket Media Drive Bay, Diskette, or Hard Disk Drive 12 Removing the Memory Card Reader 15 Adding or Replacing the Memory Card Reader 16 Removing the Hard Disk Drive 17 Adding or Replacing a Hard...
... Opening the PC 2 After Closing the PC 3 Removing the Side Panel 3 Replacing the Side Panel 4 Removing the Front Panel 5 Replacing the Front Panel 6 Locating Components Inside the Computer 7 Removing and Replacing Drives 8 Removing an Optical Drive 8 Adding or Replacing an Optical Drive 9 Removing the HP Pocket Media Drive Bay, Diskette, or Hard Disk Drive 11 Adding or Replacing the HP Pocket Media Drive Bay, Diskette, or Hard Disk Drive 12 Removing the Memory Card Reader 15 Adding or Replacing the Memory Card Reader 16 Removing the Hard Disk Drive 17 Adding or Replacing a Hard...

Upgrading and Servicing Guide
Page 12
After replacing the hard disk drive, you need to run System Recovery using the recovery discs to remove the front panel. See the user documentation that came with the PC operating system. Removing an Optical Drive 1 Complete the procedures to prepare the PC to remove the side panel and to load the factory-installed files. The hard disk drive is compatible with your personal files on page 1. 2 Release the drive by pulling the latch out away from the...
After replacing the hard disk drive, you need to run System Recovery using the recovery discs to remove the front panel. See the user documentation that came with the PC operating system. Removing an Optical Drive 1 Complete the procedures to prepare the PC to remove the side panel and to load the factory-installed files. The hard disk drive is compatible with your personal files on page 1. 2 Release the drive by pulling the latch out away from the...

Upgrading and Servicing Guide
Page 28
... are replacing a memory module, put the new memory module in your PC with memory of memory. NOTE: If a blank screen is displayed after replacing or adding a memory module, the memory is installed incorrectly or it is the wrong type of the same type and speed as the memory originally installed in the same memory slot from which the old memory was removed. CAUTION: When handling a memory module, be careful not to replace the side panel, and...
... are replacing a memory module, put the new memory module in your PC with memory of memory. NOTE: If a blank screen is displayed after replacing or adding a memory module, the memory is installed incorrectly or it is the wrong type of the same type and speed as the memory originally installed in the same memory slot from which the old memory was removed. CAUTION: When handling a memory module, be careful not to replace the side panel, and...
Upgrading and Servicing Guide
Page 32
... equivalent, type of battery. Part number: 5992-0346 28 Upgrading and Servicing Guide See "Adding Memory" on page 22. 5 To remove the battery, push the latch away from the battery and lift the battery from the socket. 6 Install the new CR2032 battery in the socket, with the positive (+) side facing the latch. 7 Replace the memory modules or cables you removed. 8 Set the chassis upright. 9 Complete the procedure to replace the side panel, and...
... equivalent, type of battery. Part number: 5992-0346 28 Upgrading and Servicing Guide See "Adding Memory" on page 22. 5 To remove the battery, push the latch away from the battery and lift the battery from the socket. 6 Install the new CR2032 battery in the socket, with the positive (+) side facing the latch. 7 Replace the memory modules or cables you removed. 8 Set the chassis upright. 9 Complete the procedure to replace the side panel, and...

Troubleshooting and Maintenance Guide
Page 4
Repairing Software Problems 23 Software Repair Overview 23 Restarting Your Computer 24 Turning Off Your Computer 24 Updating Drivers 24 Microsoft System Restore 25 Software Program and Hardware Driver Reinstallation 26 System Recovery 27 Creating Recovery Discs 27 Choosing Recovery Disc Media 28 System Recovery Options 28 Running System Recovery from the Hard Disk Drive 29 Starting System Recovery from the Windows Vista Start Menu 29 Starting System Recovery from System Startup 29 iv Troubleshooting and Maintenance Guide
Repairing Software Problems 23 Software Repair Overview 23 Restarting Your Computer 24 Turning Off Your Computer 24 Updating Drivers 24 Microsoft System Restore 25 Software Program and Hardware Driver Reinstallation 26 System Recovery 27 Creating Recovery Discs 27 Choosing Recovery Disc Media 28 System Recovery Options 28 Running System Recovery from the Hard Disk Drive 29 Starting System Recovery from the Windows Vista Start Menu 29 Starting System Recovery from System Startup 29 iv Troubleshooting and Maintenance Guide
Troubleshooting and Maintenance Guide
Page 6
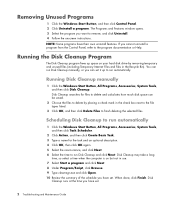
... set . Running Disk Cleanup manually 1 Click the Windows Start Button, All Programs, Accessories, System Tools, and then click Disk Cleanup. Running the Disk Cleanup Program The Disk Cleanup program frees up to remove, and click Uninstall. 4 Follow the onscreen instructions. Disk Cleanup searches for the task and an optional description. 4 Click OK, then click OK again. 5 Select the reoccurrence, and click Next. 6 Select the time to run Disk...
... set . Running Disk Cleanup manually 1 Click the Windows Start Button, All Programs, Accessories, System Tools, and then click Disk Cleanup. Running the Disk Cleanup Program The Disk Cleanup program frees up to remove, and click Uninstall. 4 Follow the onscreen instructions. Disk Cleanup searches for the task and an optional description. 4 Click OK, then click OK again. 5 Select the reoccurrence, and click Next. 6 Select the time to run Disk...

Troubleshooting and Maintenance Guide
Page 13
... open the tray. Select a slower write speed for the recording drive, if it is blank when recording music, and is installed in the CD or DVD recording software. use a different disc. Use the correct type of disc for the drive. If you suspect a problem with the actual Eject button: 1 Click the Windows Start Button and then Computer. 2 Right-click the CD or DVD drive you are using the correct disc type when making...
... open the tray. Select a slower write speed for the recording drive, if it is blank when recording music, and is installed in the CD or DVD recording software. use a different disc. Use the correct type of disc for the drive. If you suspect a problem with the actual Eject button: 1 Click the Windows Start Button and then Computer. 2 Right-click the CD or DVD drive you are using the correct disc type when making...
Troubleshooting and Maintenance Guide
Page 15
... pins are bent, reconnect the monitor connector cable to update the driver. 7 If prompted, restart the computer. Press the On button to resume from sleep mode. Troubleshooting Computer Problems 11 Possible solution 1 Click the Windows Start Button, right-click Computer, and then select Properties. 2 Under Tasks, click Device Manager. 3 Click the plus sign (+) next to Sound, video and game controllers. 4 Right-click TV tuner (select models only) and then select Update Driver Software...
... pins are bent, reconnect the monitor connector cable to update the driver. 7 If prompted, restart the computer. Press the On button to resume from sleep mode. Troubleshooting Computer Problems 11 Possible solution 1 Click the Windows Start Button, right-click Computer, and then select Properties. 2 Under Tasks, click Device Manager. 3 Click the plus sign (+) next to Sound, video and game controllers. 4 Right-click TV tuner (select models only) and then select Update Driver Software...
Troubleshooting and Maintenance Guide
Page 16
... or disable devices to turn off the computer, turn on the external device, and then turn on the keyboard at the same time. Hard disk drive error message Press the Help ? Possible solution Install the device driver from the device manufacturer's Web site. Ensure that all cables are properly and securely connected and that the pins in the operating system for Windows Vista. button on the keyboard at the same time. 2 Click Start Task Manager. 3 Select...
... or disable devices to turn off the computer, turn on the external device, and then turn on the keyboard at the same time. Hard disk drive error message Press the Help ? Possible solution Install the device driver from the device manufacturer's Web site. Ensure that all cables are properly and securely connected and that the pins in the operating system for Windows Vista. button on the keyboard at the same time. 2 Click Start Task Manager. 3 Select...

Troubleshooting and Maintenance Guide
Page 18
... correct modem speed and COM port are using the proper cables for assistance. For more information about connecting to a local area network (LAN). NOTE: Removing the AOL program will not cancel your account with your Internet connection type. Try to your Internet Service Provider (ISP) for the Web site at that you are selected: 1 Click the Windows Start Button, and then click Control Panel. 2 Click Hardware and Sound. 3 Double-click...
... correct modem speed and COM port are using the proper cables for assistance. For more information about connecting to a local area network (LAN). NOTE: Removing the AOL program will not cancel your account with your Internet connection type. Try to your Internet Service Provider (ISP) for the Web site at that you are selected: 1 Click the Windows Start Button, and then click Control Panel. 2 Click Hardware and Sound. 3 Double-click...


