Compaq 6520s Memory - Notebook PC
Compaq 6520s Memory
Related Manual Pages


Similar Questions

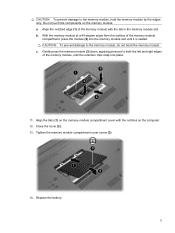
Where Are The Memory Slots
Ican find 1 memory slot underneath a smill cover in the base. where is the second one
Ican find 1 memory slot underneath a smill cover in the base. where is the second one
(Posted by irvinedouglas 11 years ago)

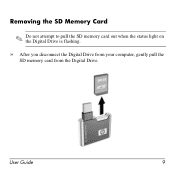
Purchase Hp Portable Usb Digital Drive With Memory Chip
Where can you purchase the hp portable USB digital drive with memory chip. It's a small black
Where can you purchase the hp portable USB digital drive with memory chip. It's a small black
(Posted by prote 11 years ago)

Number 2 Memory Slot On Compaq Presario X1400 Notebook.
I have found and upgraded one memory slot. but can't find the other slot to upgrade. where do I find...
I have found and upgraded one memory slot. but can't find the other slot to upgrade. where do I find...
(Posted by petermorris 13 years ago)