

User Manual
Page 2
English ÂÂ Table of Contents Thank You...5 Package Contents...5 Features...5 Camcorder at a Glance...7 Getting Started...15 Inserting a Memory Card...15 Charging the Camcorder...16 Turning the Camcorder On...16 Function Modes...17 Camcorder Mode...18 Camcorder Screen at a Glance 18 Recording a Video...19 Camcorder Controls ...20 Camcorder Options Menu...21 Page 2 Table Of Contents
English ÂÂ Table of Contents Thank You...5 Package Contents...5 Features...5 Camcorder at a Glance...7 Getting Started...15 Inserting a Memory Card...15 Charging the Camcorder...16 Turning the Camcorder On...16 Function Modes...17 Camcorder Mode...18 Camcorder Screen at a Glance 18 Recording a Video...19 Camcorder Controls ...20 Camcorder Options Menu...21 Page 2 Table Of Contents
User Manual
Page 3
English Camera Mode...22 Camera Screen at a Glance...22 Taking a Photo...23 Camera Controls ...24 Camera Options Menu...25 Review Mode...27 Review Screen at a Glance...27 Review Mode Controls...28 Review Options Menu...29 Connecting to a TV...32 Managing Files on the Camcorder 33 Transferring Video and Photo Files 33 Deleting Files on the Camcorder 35 Setting the System Options...36 Using the Included Software 39 Installing muvee™ autoProducer 40 Using muvee™ autoProducer...45 Making a muvee™...46 Table Of Contents Page 3
English Camera Mode...22 Camera Screen at a Glance...22 Taking a Photo...23 Camera Controls ...24 Camera Options Menu...25 Review Mode...27 Review Screen at a Glance...27 Review Mode Controls...28 Review Options Menu...29 Connecting to a TV...32 Managing Files on the Camcorder 33 Transferring Video and Photo Files 33 Deleting Files on the Camcorder 35 Setting the System Options...36 Using the Included Software 39 Installing muvee™ autoProducer 40 Using muvee™ autoProducer...45 Making a muvee™...46 Table Of Contents Page 3
User Manual
Page 6
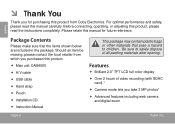
... to safely dispose of video recording (with SDHC card) † Camera mode lets you for future reference. Be sure to children. Before connecting, operating, or adjusting this product, please read this product. Main unit: CAM4505 A/V cable USB cable Hand strap Pouch Installation CD Instruction Manual This package may...
... to safely dispose of video recording (with SDHC card) † Camera mode lets you for future reference. Be sure to children. Before connecting, operating, or adjusting this product, please read this product. Main unit: CAM4505 A/V cable USB cable Hand strap Pouch Installation CD Instruction Manual This package may...

User Manual
Page 7
... included A/V cable Edit video and upload to YouTube™ with included software from muvee™‡ Supports SD/SDHC cards up to 16 GB in Windows only. * 5MP interpolated resolution; 3MP optical resolution. Thank You Page 7 English SDHC card not included. Actual record time may vary. ‡ Function available in size Integrated Hi-speed USB 2.0 plug for fast file transfers ...
... included A/V cable Edit video and upload to YouTube™ with included software from muvee™‡ Supports SD/SDHC cards up to 16 GB in Windows only. * 5MP interpolated resolution; 3MP optical resolution. Thank You Page 7 English SDHC card not included. Actual record time may vary. ‡ Function available in size Integrated Hi-speed USB 2.0 plug for fast file transfers ...

User Manual
Page 8
Use with the included USB cable. Load SD or SDHC memory cards here. Review Press and hold to turn the camcorder on a TV. Connection to charge/transfer files to view your photos and videos on or off. Page 8 Camcorder At A Glance Use with the included A/V cable. English ÂÂ Camcorder at a Glance Part Name 1 Strap mount 2 SD card slot 3 [Power] 4 A/V output connector 5 USB connector Function Mode/Description Camcorder Camera Attach the included hand strap here. Connection to a computer.
Use with the included USB cable. Load SD or SDHC memory cards here. Review Press and hold to turn the camcorder on a TV. Connection to charge/transfer files to view your photos and videos on or off. Page 8 Camcorder At A Glance Use with the included A/V cable. English ÂÂ Camcorder at a Glance Part Name 1 Strap mount 2 SD card slot 3 [Power] 4 A/V output connector 5 USB connector Function Mode/Description Camcorder Camera Attach the included hand strap here. Connection to a computer.

User Manual
Page 10
Lights red when the camcorder is fully charged. ing size. Change the display mode (fullscreen, thumbnail). Access the option menu. -- -- -- -- Delete the selected file. Page 10 Camcorder At A Glance English Part Name 6 Display 7 Charge indicator 8 [MODE] 9 [DISP] 10 [MENU] 11 [DELETE] Function Mode/Description Camcorder Camera LCD screen. tion. During video review only: Toggle the on-screen display. Change the connection mode when connected to a computer (camcorder, MSDC disk, PC web cam) Change the movie record- Change the photo resolu- Review Lights green...
Lights red when the camcorder is fully charged. ing size. Change the display mode (fullscreen, thumbnail). Access the option menu. -- -- -- -- Delete the selected file. Page 10 Camcorder At A Glance English Part Name 6 Display 7 Charge indicator 8 [MODE] 9 [DISP] 10 [MENU] 11 [DELETE] Function Mode/Description Camcorder Camera LCD screen. tion. During video review only: Toggle the on-screen display. Change the connection mode when connected to a computer (camcorder, MSDC disk, PC web cam) Change the movie record- Change the photo resolu- Review Lights green...

User Manual
Page 12
... zoom level. View the previous file. Page 12 Camcorder At A Glance Photo review only: Increase the zoom level. View the next file. Toggle "pan" mode when the zoom level is active, use the direction keys to pan around the magnified photo. Decrease the zoom level. Menu: Return to the next option screen. Take a photo. Increase the zoom level. Menu: Browse the menu list. Start or stop recording a video. English Part Name [UP] [DOWN] 12 [LEFT] [RIGHT] 13 [RECORD/OK] Function Mode/Description Camcorder Camera Review Increase the zoom level. Photo review...
... zoom level. View the previous file. Page 12 Camcorder At A Glance Photo review only: Increase the zoom level. View the next file. Toggle "pan" mode when the zoom level is active, use the direction keys to pan around the magnified photo. Decrease the zoom level. Menu: Return to the next option screen. Take a photo. Increase the zoom level. Menu: Browse the menu list. Start or stop recording a video. English Part Name [UP] [DOWN] 12 [LEFT] [RIGHT] 13 [RECORD/OK] Function Mode/Description Camcorder Camera Review Increase the zoom level. Photo review...

User Manual
Page 14
Shoot video and photos. Gently press this button with a paper clip should the unit freeze or otherwise behave abnormally. Page 14 Camcorder At A Glance Avoid touching or scratching the lens surface. Reinitializes the unit. English Part Name 14 Speakers 15 Lens 16 [RESET] Function Mode/Description Camcorder Camera Review Sound output.
Shoot video and photos. Gently press this button with a paper clip should the unit freeze or otherwise behave abnormally. Page 14 Camcorder At A Glance Avoid touching or scratching the lens surface. Reinitializes the unit. English Part Name 14 Speakers 15 Lens 16 [RESET] Function Mode/Description Camcorder Camera Review Sound output.
User Manual
Page 16
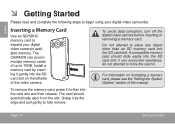
... the video camera. Page 16 Getting Started English ÂÂ Getting Started Please read and complete the following steps to begin using your digital video camera's available memory. The CAM4505 can accommodate memory cards of this manual. Inserting a Memory Card Use an SD/SDHC memory card to fully remove. Install a memory card by the edge and pull gently to expand your digital video camcorder. The card should slide easily into the SD card slot on formatting a memory card...
... the video camera. Page 16 Getting Started English ÂÂ Getting Started Please read and complete the following steps to begin using your digital video camera's available memory. The CAM4505 can accommodate memory cards of this manual. Inserting a Memory Card Use an SD/SDHC memory card to fully remove. Install a memory card by the edge and pull gently to expand your digital video camcorder. The card should slide easily into the SD card slot on formatting a memory card...

User Manual
Page 18
Camera Mode. Page 18 Getting Started Select to change the function mode. The mode icon displayed at the top of the screen indicates the current function mode. Select to play/view video and photo files. Press the button to take photos. Select to record video clips. Review Mode. Icon Function Mode Camcorder Mode. English Function Modes Your camcorder has three function modes.
Camera Mode. Page 18 Getting Started Select to change the function mode. The mode icon displayed at the top of the screen indicates the current function mode. Select to play/view video and photo files. Press the button to take photos. Select to record video clips. Review Mode. Icon Function Mode Camcorder Mode. English Function Modes Your camcorder has three function modes.

User Manual
Page 20
... corner. When the camcorder is recording, the total elapsed recording time is displayed in the upper right hand corner of recording time remaining when recording is not recording, the estimated available recording time will stop and save the recording. When the camcorder is stopped. Indicates that an SD memory card has been loaded. Page 20 Camcorder Mode Displays the elapsed recording time when recording. -- Displays the amount of the LCD screen. Recording will be displayed in Camcorder mode: Press...
... corner. When the camcorder is recording, the total elapsed recording time is displayed in the upper right hand corner of recording time remaining when recording is not recording, the estimated available recording time will stop and save the recording. When the camcorder is stopped. Indicates that an SD memory card has been loaded. Page 20 Camcorder Mode Displays the elapsed recording time when recording. -- Displays the amount of the LCD screen. Recording will be displayed in Camcorder mode: Press...

User Manual
Page 21
... Increase the zoom level. Decrease the zoom level. The zoom level will appear on the top of the screen. [640] = 640 x 480 [320] = 320 x 240 Note: A larger video size will appear in larger file sizes. The zoom level will result in the bottom right corner of the screen. Decrease the zoom level quickly. Start or stop recording a video. Increase the zoom level quickly. Access the options menu. English Camcorder Controls Key Press Press Action Change the function mode. The size indicator appears...
... Increase the zoom level. Decrease the zoom level. The zoom level will appear on the top of the screen. [640] = 640 x 480 [320] = 320 x 240 Note: A larger video size will appear in larger file sizes. The zoom level will result in the bottom right corner of the screen. Decrease the zoom level quickly. Start or stop recording a video. Increase the zoom level quickly. Access the options menu. English Camcorder Controls Key Press Press Action Change the function mode. The size indicator appears...

User Manual
Page 25
... image will decrease as the zoom level increases. Decrease the zoom level quickly. English Camera Controls Key Press Press Action Change the function mode. The size indicator appears on the bottom right corner of the screen. • [5M] = 2592 x 1944 • [3M] = 2048 x 1536 • [1M] = 1280 x 960 • [VGA] = 640 x 480 Note: The [5M] setting uses soft- Note: The quality of the photo. Decrease the zoom level. The zoom level...
... image will decrease as the zoom level increases. Decrease the zoom level quickly. English Camera Controls Key Press Press Action Change the function mode. The size indicator appears on the bottom right corner of the screen. • [5M] = 2592 x 1944 • [3M] = 2048 x 1536 • [1M] = 1280 x 960 • [VGA] = 640 x 480 Note: The [5M] setting uses soft- Note: The quality of the photo. Decrease the zoom level. The zoom level...
User Manual
Page 33
... cable's white RCA plug to play videos or view photos on the TV. 1. Turn the camera on the TV. Set the TV's input source mode to be changed in North America (NTSC format, 60 Hz refresh rate). By default, the camcorder is set to display the composite video signal. For more information, please refer to the A/V output jack located on the bottom of the camcorder can be used in the System Settings menu. Connect the cable's mini plug...
... cable's white RCA plug to play videos or view photos on the TV. 1. Turn the camera on the TV. Set the TV's input source mode to be changed in North America (NTSC format, 60 Hz refresh rate). By default, the camcorder is set to display the composite video signal. For more information, please refer to the A/V output jack located on the bottom of the camcorder can be used in the System Settings menu. Connect the cable's mini plug...

User Manual
Page 34
... to transfer files from the camcorder to the section "Web Camera (PC CAM)" for more information. This is normal and will not appear once the PC CAM connection is the first time you may see the message "Device driver software was not successfully installed". The computer will automatically recognize the camcorder as a removable disk. —— If this connection, your computer will display a USB icon labeled "MSDC". Turn the camcorder on...
... to transfer files from the camcorder to the section "Web Camera (PC CAM)" for more information. This is normal and will not appear once the PC CAM connection is the first time you may see the message "Device driver software was not successfully installed". The computer will automatically recognize the camcorder as a removable disk. —— If this connection, your computer will display a USB icon labeled "MSDC". Turn the camcorder on...

User Manual
Page 35
... connected to a USB 2.0 Hi-speed computer port. Page 35 English The camcorder will not work with low-power USB ports designed for use the operating system commands to browse, delete, and move files on the camcorder. Use your computer's operating system commands to transfer files from the camcorder to recognize and install the appropriate drivers for the computer to your computer has an SD card reader, you can also use with any external disk...
... connected to a USB 2.0 Hi-speed computer port. Page 35 English The camcorder will not work with low-power USB ports designed for use the operating system commands to browse, delete, and move files on the camcorder. Use your computer's operating system commands to transfer files from the camcorder to recognize and install the appropriate drivers for the computer to your computer has an SD card reader, you can also use with any external disk...

User Manual
Page 39
... NTSC. • Refresh Rate: Change between 50Hz and 60Hz. FORMATTING WILL ERASE AND DESTROY ALL FILES/DATA. Note: You can change between NTSC and PAL formats. The standard refresh rate used in North America is connected to their factory-default state. Make a backup copy of all of the camcorder's options to a computer. • MSDC: USB disk mode. Page 39 English Use this mode to charge/power the camcorder. Option USB Video Out Description Set the default USB mode...
... NTSC. • Refresh Rate: Change between 50Hz and 60Hz. FORMATTING WILL ERASE AND DESTROY ALL FILES/DATA. Note: You can change between NTSC and PAL formats. The standard refresh rate used in North America is connected to their factory-default state. Make a backup copy of all of the camcorder's options to a computer. • MSDC: USB disk mode. Page 39 English Use this mode to charge/power the camcorder. Option USB Video Out Description Set the default USB mode...
User Manual
Page 57
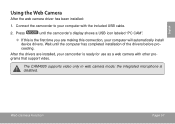
... installed, your camcorder is disabled. Wait until the camcorder's display shows a USB icon labeled "PC CAM". —— If this connection, your computer with other programs that support video. Web Camera Function Page 57 Connect the camcorder to your computer will automatically install device drivers. the integrated microphone is ready for use as a web camera with the included USB cable. 2. Press until the computer has completed installation of the drivers before proceeding. English Using the Web Camera...
... installed, your camcorder is disabled. Wait until the camcorder's display shows a USB icon labeled "PC CAM". —— If this connection, your computer with other programs that support video. Web Camera Function Page 57 Connect the camcorder to your computer will automatically install device drivers. the integrated microphone is ready for use as a web camera with the included USB cable. 2. Press until the computer has completed installation of the drivers before proceeding. English Using the Web Camera...
User Manual
Page 60
... images or video may not be low. Make sure that you are using a FATformatted card. English Camera does not power on the subject. Connect the camera to a computer to save if the camera is not held steady during recording. Be sure to allow adequate time for the image to charge. Make sure that you are not saved in memory. Images will not save completely before turning off before data...
... images or video may not be low. Make sure that you are using a FATformatted card. English Camera does not power on the subject. Connect the camera to a computer to save if the camera is not held steady during recording. Be sure to allow adequate time for the image to charge. Make sure that you are not saved in memory. Images will not save completely before turning off before data...
User Manual
Page 65
...;C (32°F-104°F). This digital video camera is a registered trademark of COBY Electronics Corporation. Snapp and the Snapp logo used is suitable for cleaning lenses/ optical devices. muvee and the muvee logo are trademarks of Google, Inc. USB is a registered trademark of the lens. Never touch the lens. 5. The YouTube logo used are trademarks of the USB Implementers Forum, Inc. SDHC...
...;C (32°F-104°F). This digital video camera is a registered trademark of COBY Electronics Corporation. Snapp and the Snapp logo used is suitable for cleaning lenses/ optical devices. muvee and the muvee logo are trademarks of Google, Inc. USB is a registered trademark of the lens. Never touch the lens. 5. The YouTube logo used are trademarks of the USB Implementers Forum, Inc. SDHC...


