Hardware Installation Guide
Page 2
..., Cisco Nurse Connect, Cisco Pulse, Cisco SensorBase, Cisco StackPower, Cisco StadiumVision, Cisco TelePresence, Cisco TrustSec, Cisco Unified Computing System, Cisco WebEx, DCE, Flip Channels, Flip for a Class B digital device, pursuant to provide reasonable protection against harmful interference in a residential installation. The use of actual IP addresses in illustrative content is an adaptation of a program developed by the University of California, Berkeley (UCB) as part of UCB's public domain version...
..., Cisco Nurse Connect, Cisco Pulse, Cisco SensorBase, Cisco StackPower, Cisco StadiumVision, Cisco TelePresence, Cisco TrustSec, Cisco Unified Computing System, Cisco WebEx, DCE, Flip Channels, Flip for a Class B digital device, pursuant to provide reasonable protection against harmful interference in a residential installation. The use of actual IP addresses in illustrative content is an adaptation of a program developed by the University of California, Berkeley (UCB) as part of UCB's public domain version...

Hardware Installation Guide
Page 4
... to Connect to a Network 3-3 Ethernet Connections 3-3 Serial Connections 3-3 About Serial Connections 3-4 Configuring Serial Connections 3-4 Serial DTE or DCE Devices 3-4 Signaling Standards Supported 3-4 Transmission Speeds and Distance Limitations 3-5 Asynchronous/Synchronous Serial Module Baud Rates 3-5 ISDN BRI Connections 3-6 CSU/DSU Connections 3-6 4 C H A P T E R Installing and Connecting the Router 4-1 About Modules 4-1 Internal Modules 4-1 Plug-In Modules 4-2 Safety Warnings 4-2 Safety Warnings for Finland, Norway and Sweden 4-3 Setting Up the Chassis 4-3 Cisco 1900 Series Hardware...
... to Connect to a Network 3-3 Ethernet Connections 3-3 Serial Connections 3-3 About Serial Connections 3-4 Configuring Serial Connections 3-4 Serial DTE or DCE Devices 3-4 Signaling Standards Supported 3-4 Transmission Speeds and Distance Limitations 3-5 Asynchronous/Synchronous Serial Module Baud Rates 3-5 ISDN BRI Connections 3-6 CSU/DSU Connections 3-6 4 C H A P T E R Installing and Connecting the Router 4-1 About Modules 4-1 Internal Modules 4-1 Plug-In Modules 4-2 Safety Warnings 4-2 Safety Warnings for Finland, Norway and Sweden 4-3 Setting Up the Chassis 4-3 Cisco 1900 Series Hardware...

Hardware Installation Guide
Page 5
...Connecting to a Console Terminal or Modem 4-14 Connecting to the Console Port with Microsoft Windows 4-14 Connecting to the Console Port with Mac OS X 4-16 Connecting to the Console Port with Linux 4-16 Installing the Cisco Microsoft Windows USB Device Driver 4-17 Installing the Cisco Microsoft Windows XP USB Driver 4-17 Installing the Cisco Microsoft Windows 2000 USB Driver 4-17 Installing the Cisco Microsoft Windows Vista USB Driver 4-18 Uninstalling the Cisco USB Driver 4-18 Uninstalling the Cisco Microsoft Windows XP and 2000 USB Driver 4-18 Using the Add Remove Programs Utility 4-18 Using...
...Connecting to a Console Terminal or Modem 4-14 Connecting to the Console Port with Microsoft Windows 4-14 Connecting to the Console Port with Mac OS X 4-16 Connecting to the Console Port with Linux 4-16 Installing the Cisco Microsoft Windows USB Device Driver 4-17 Installing the Cisco Microsoft Windows XP USB Driver 4-17 Installing the Cisco Microsoft Windows 2000 USB Driver 4-17 Installing the Cisco Microsoft Windows Vista USB Driver 4-18 Uninstalling the Cisco USB Driver 4-18 Uninstalling the Cisco Microsoft Windows XP and 2000 USB Driver 4-18 Using the Add Remove Programs Utility 4-18 Using...

Hardware Installation Guide
Page 24
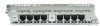
... Cisco 1900 Series Routers Interface Gigabit Ethernet (GE) RJ-45 Console Auxiliary USB console USB Description Two GE ports (RJ-45 connectors). The WLAN card is factory installed. • CompactFlash memory and enhanced high-speed WAN interface cards (EHWICs) fit into connectors inside the Cisco 1941W chassis accommodates an optional factory installed wireless LAN card. The WLAN is permanently installed in the ISM connector. • Cisco 1940 series ISRs feature an optional upgrade to the internal power supply providing in-line power...
... Cisco 1900 Series Routers Interface Gigabit Ethernet (GE) RJ-45 Console Auxiliary USB console USB Description Two GE ports (RJ-45 connectors). The WLAN card is factory installed. • CompactFlash memory and enhanced high-speed WAN interface cards (EHWICs) fit into connectors inside the Cisco 1941W chassis accommodates an optional factory installed wireless LAN card. The WLAN is permanently installed in the ISM connector. • Cisco 1940 series ISRs feature an optional upgrade to the internal power supply providing in-line power...
Hardware Installation Guide
Page 28
.... console port) 1. Although the battery is active. Real-Time Clock An internal real-time clock with battery backup provides the system software with a KensingtonTM security slot on the back panel. EN (USB serial Green The USB console port is not intended to be field-replaceable, the following warning must be returned to the router. The Cisco 1900 series routers support both autonomous and unified features and network configurations. 1-12 Cisco 1900 Series Hardware Installation...
.... console port) 1. Although the battery is active. Real-Time Clock An internal real-time clock with battery backup provides the system software with a KensingtonTM security slot on the back panel. EN (USB serial Green The USB console port is not intended to be field-replaceable, the following warning must be returned to the router. The Cisco 1900 series routers support both autonomous and unified features and network configurations. 1-12 Cisco 1900 Series Hardware Installation...

Hardware Installation Guide
Page 29
The antennas require some minor installation. If the baud reset button is interface-type 0/slot-number/interface-number. The numbering format for the slots is pressed for longer than 30 seconds, the router defaults to the default console port configuration. They must use the Cisco IOS command-line interface (CLI) to identify the slot numbers. The Cisco 1900 series routers contains the following document on the back panel. Table 1-6 summarizes the interface numbering. The Cisco 1905 comes with a factory installed EHWIC in which...
The antennas require some minor installation. If the baud reset button is interface-type 0/slot-number/interface-number. The numbering format for the slots is pressed for longer than 30 seconds, the router defaults to the default console port configuration. They must use the Cisco IOS command-line interface (CLI) to identify the slot numbers. The Cisco 1900 series routers contains the following document on the back panel. Table 1-6 summarizes the interface numbering. The Cisco 1905 comes with a factory installed EHWIC in which...

Hardware Installation Guide
Page 37
... unusually high errors with any equipment that your router. General Site Requirements This section describes the requirements that is disconnected from a power source, but is available, ground yourself by touching a metal part of failures and prevent future problems. • Power Supply Considerations, page 2-4 • Site Environment, page 2-4 • Site Configuration, page 2-4 • Wireless LAN Considerations, page 2-5 OL-19084-02 Cisco 1900 Series Hardware Installation 2-3 If...
... unusually high errors with any equipment that your router. General Site Requirements This section describes the requirements that is disconnected from a power source, but is available, ground yourself by touching a metal part of failures and prevent future problems. • Power Supply Considerations, page 2-4 • Site Environment, page 2-4 • Site Configuration, page 2-4 • Wireless LAN Considerations, page 2-5 OL-19084-02 Cisco 1900 Series Hardware Installation 2-3 If...

Hardware Installation Guide
Page 39
... problems installing or configuring your Site Log (described in your router, contact customer service. When you are ready to the router. Make a copy of antenna used with three different antenna types-swivel-mount dipole antennas that shipped with your wireless router and its shipping container to install the router, proceed with unpacking it . Installation Checklist for some time, keep the chassis in the quick start guide that mounts on page 2-6). The type of this . Installation...
... problems installing or configuring your Site Log (described in your router, contact customer service. When you are ready to the router. Make a copy of antenna used with three different antenna types-swivel-mount dipole antennas that shipped with your wireless router and its shipping container to install the router, proceed with unpacking it . Installation Checklist for some time, keep the chassis in the quick start guide that mounts on page 2-6). The type of this . Installation...

Hardware Installation Guide
Page 50
... the installation instructions before you need to remove or upgrade the Compact Flash memory card (1940 series only), follow the procedures in the Installing Cisco Interface Cards in Cisco 1900 Series ISRs. Plug-In Modules The following components plug into the router chassis: • WAN interface cards (WICs) • Voice/WAN interface cards (VWICs), data mode only • High-speed WICs (HWICs) • Enhanced High-speed WICs (EHWICs) • Compact Flash memory card If you connect the system to remove or install...
... the installation instructions before you need to remove or upgrade the Compact Flash memory card (1940 series only), follow the procedures in the Installing Cisco Interface Cards in Cisco 1900 Series ISRs. Plug-In Modules The following components plug into the router chassis: • WAN interface cards (WICs) • Voice/WAN interface cards (VWICs), data mode only • High-speed WICs (HWICs) • Enhanced High-speed WICs (EHWICs) • Compact Flash memory card If you connect the system to remove or install...

Hardware Installation Guide
Page 59
... not use this emergency number is restored, you have to reset or reconfigure equipment to regain access to Cisco Modular Access Router Cable Specifications. Safety Messages Warning Do not work on the system, or connect or disconnect cables during an electrical storm. There may be aware of electric shock from Cisco. Statement 1039 OL-19084-02 Cisco 1900 Series Hardware Installation 4-11 For ordering information, contact Cisco customer service. After power...
... not use this emergency number is restored, you have to reset or reconfigure equipment to regain access to Cisco Modular Access Router Cable Specifications. Safety Messages Warning Do not work on the system, or connect or disconnect cables during an electrical storm. There may be aware of electric shock from Cisco. Statement 1039 OL-19084-02 Cisco 1900 Series Hardware Installation 4-11 For ordering information, contact Cisco customer service. After power...

Hardware Installation Guide
Page 62
... your router either locally (with a console terminal or PC) or remotely (with Linux, page 4-16 Connecting to your site requirements. For cable pinouts, refer to the Cisco 3900 Series, 2900 Series, and 1900 Series Software Configuration Guide for detailed information about using Cisco IOS software for port details and the "Specifications" section on page 1-14. • Console cable- See the "USB Serial Console" section on page 3-2 for configuring the router. 4-14 Cisco 1900 Series Hardware Installation OL-19084-02 A Microsoft Windows...
... your router either locally (with a console terminal or PC) or remotely (with Linux, page 4-16 Connecting to your site requirements. For cable pinouts, refer to the Cisco 3900 Series, 2900 Series, and 1900 Series Software Configuration Guide for detailed information about using Cisco IOS software for port details and the "Specifications" section on page 1-14. • Console cable- See the "USB Serial Console" section on page 3-2 for configuring the router. 4-14 Cisco 1900 Series Hardware Installation OL-19084-02 A Microsoft Windows...

Hardware Installation Guide
Page 64
Procedure Step 1 Step 2 Step 3 Step 4 Step 5 Use the Finder to go to the router. Connect the OS X USB port to Applications > Utilities > Terminal. Connecting to the Console Port with the following command followed by Ctrl-\. Procedure Step 1 Step 2 Step 3 Step 4 Open the Linux Terminal window. Enter the following commands to find the OS X USB port number: macbook:user$ cd /dev macbook:user$ ls -ltr /dev/*usb* crw-rw-rw- 1 root wheel 9, 66 Apr 1 16:46 tty.usbmodem1a21 DT-ullals-macbook...
Procedure Step 1 Step 2 Step 3 Step 4 Step 5 Use the Finder to go to the router. Connect the OS X USB port to Applications > Utilities > Terminal. Connecting to the Console Port with the following command followed by Ctrl-\. Procedure Step 1 Step 2 Step 3 Step 4 Open the Linux Terminal window. Enter the following commands to find the OS X USB port number: macbook:user$ cd /dev macbook:user$ ls -ltr /dev/*usb* crw-rw-rw- 1 root wheel 9, 66 Apr 1 16:46 tty.usbmodem1a21 DT-ullals-macbook...

Hardware Installation Guide
Page 67
... and Connecting the Router Uninstalling the Cisco USB Driver Procedure Step 1 Step 2 Step 3 Step 4 Click Start > Control Panel > Add or Remove Programs. Scroll to proceed. Note If a User Account Control warning appears, click "Allow - Click Next. When the Program Maintenance window appears, select the Remove radio button. Procedure Step 1 Step 2 Step 3 Step 4 Step 5 Run the setup.exe program. Step 6 When the InstallShield Wizard Completed window appears click Finish. Uninstalling the Cisco Microsoft Windows Vista USB Driver Before You Begin Disconnect the router console...
... and Connecting the Router Uninstalling the Cisco USB Driver Procedure Step 1 Step 2 Step 3 Step 4 Click Start > Control Panel > Add or Remove Programs. Scroll to proceed. Note If a User Account Control warning appears, click "Allow - Click Next. When the Program Maintenance window appears, select the Remove radio button. Procedure Step 1 Step 2 Step 3 Step 4 Step 5 Run the setup.exe program. Step 6 When the InstallShield Wizard Completed window appears click Finish. Uninstalling the Cisco Microsoft Windows Vista USB Driver Before You Begin Disconnect the router console...

Hardware Installation Guide
Page 77
... using the setup command facility. --- See the "Using Cisco Configuration Professional Express" section on the router prior to perform the initial configuration on your router model, the installed interface modules, and the software image. The facility steps you to abort configuration dialog at any point you configure the initial router settings through a initial configuration, including LAN and WAN interfaces. The following messages, the router has booted and is needed to configure the router. If you see Cisco IOS Configuration Fundamentals Configuration Guide...
... using the setup command facility. --- See the "Using Cisco Configuration Professional Express" section on the router prior to perform the initial configuration on your router model, the installed interface modules, and the software image. The facility steps you to abort configuration dialog at any point you configure the initial router settings through a initial configuration, including LAN and WAN interfaces. The following messages, the router has booted and is needed to configure the router. If you see Cisco IOS Configuration Fundamentals Configuration Guide...

Hardware Installation Guide
Page 79
... management network from the above interface summary: gigabitethernet0/1 Step 10 Respond to the user EXEC prompt (Router>). interface GigabitEthernet0/2 shutdown no shutdown ip address 10.10.10.12 255.255.255.0 ! Press RETURN to modify this configuration. Method Status Protocol YES NVRAM administratively down down YES DHCP up up YES NVRAM administratively down down NO unset up Any interface listed with OK? no ip address ! Use the enabled mode 'configure' command...
... management network from the above interface summary: gigabitethernet0/1 Step 10 Respond to the user EXEC prompt (Router>). interface GigabitEthernet0/2 shutdown no shutdown ip address 10.10.10.12 255.255.255.0 ! Press RETURN to modify this configuration. Method Status Protocol YES NVRAM administratively down down YES DHCP up up YES NVRAM administratively down down NO unset up Any interface listed with OK? no ip address ! Use the enabled mode 'configure' command...
Hardware Installation Guide
Page 80
... port: %AT-6-ONLYROUTER: Ethernet0/0: AppleTalk port enabled; See Cisco Configuration Professional Express User Guide for detailed instructions. For information on the ROM monitor, see the "Interface Numbering" section on the network attached to get the Router> prompt. Using the Cisco CLI-Manual Configuration This section shows you see the following message, it means that you are now at the CLI and you have just completed the initial router configuration. Cisco 1900 Series Hardware Installation...
... port: %AT-6-ONLYROUTER: Ethernet0/0: AppleTalk port enabled; See Cisco Configuration Professional Express User Guide for detailed instructions. For information on the ROM monitor, see the "Interface Numbering" section on the network attached to get the Router> prompt. Using the Cisco CLI-Manual Configuration This section shows you see the following message, it means that you are now at the CLI and you have just completed the initial router configuration. Cisco 1900 Series Hardware Installation...

Hardware Installation Guide
Page 86
... status of the interfaces that are configured for your password if prompted. end 9. Enters global configuration mode. 5-12 Cisco 1900 Series Hardware Installation OL-19084-02 no shutdown 8. For comprehensive configuration information on Gigabit Ethernet interfaces, see the software configuration guide for IP. • Learn which type of the Cisco IOS Interface and Hardware Component Configuration Guide. show ip interface brief configure terminal Example: Router# configure terminal Purpose Enables privileged EXEC mode. • Enter your router. ip address ip-address mask...
... status of the interfaces that are configured for your password if prompted. end 9. Enters global configuration mode. 5-12 Cisco 1900 Series Hardware Installation OL-19084-02 no shutdown 8. For comprehensive configuration information on Gigabit Ethernet interfaces, see the software configuration guide for IP. • Learn which type of the Cisco IOS Interface and Hardware Component Configuration Guide. show ip interface brief configure terminal Example: Router# configure terminal Purpose Enables privileged EXEC mode. • Enter your router. ip address ip-address mask...

Hardware Installation Guide
Page 91
...-02 Cisco 1900 Series Hardware Installation 5-17 Enters global configuration mode. enable 2. The router has five virtual terminal lines by default. Chapter 5 Configuring the Router Performing the Initial Configuration on Networking Devices section. Line passwords and password encryption is described in the Cisco IOS Terminal Services Configuration Guide, Release 12.4. From another network device, attempt to open a Telnet session to the router. This section shows you how to configure the virtual terminal lines with Passwords, Privilege Levels, and Login Usernames for CLI...
...-02 Cisco 1900 Series Hardware Installation 5-17 Enters global configuration mode. enable 2. The router has five virtual terminal lines by default. Chapter 5 Configuring the Router Performing the Initial Configuration on Networking Devices section. Line passwords and password encryption is described in the Cisco IOS Terminal Services Configuration Guide, Release 12.4. From another network device, attempt to open a Telnet session to the router. This section shows you how to configure the virtual terminal lines with Passwords, Privilege Levels, and Login Usernames for CLI...

Hardware Installation Guide
Page 93
enable 2. Step 3 Step 4 Example: Router# configure terminal line aux 0 Example: Router(config)# line aux 0 See the tech notes and sample configurations to configure the line for your router. See the tech notes and sample configurations to verify network connectivity for the auxiliary line. - Starts the line configuration command collection mode for your particular implementation of the auxiliary port. line aux 0 4. SUMMARY STEPS 1. telnet {ip-address | hostname} OL-19084-02 Cisco 1900 Series Hardware Installation 5-19 DETAILED STEPS Command or Action Step 1 enable ...
enable 2. Step 3 Step 4 Example: Router# configure terminal line aux 0 Example: Router(config)# line aux 0 See the tech notes and sample configurations to configure the line for your router. See the tech notes and sample configurations to verify network connectivity for the auxiliary line. - Starts the line configuration command collection mode for your particular implementation of the auxiliary port. line aux 0 4. SUMMARY STEPS 1. telnet {ip-address | hostname} OL-19084-02 Cisco 1900 Series Hardware Installation 5-19 DETAILED STEPS Command or Action Step 1 enable ...

Hardware Installation Guide
Page 95
... STEPS 1. Success rate is 2 seconds: !!!!! Saving Backup Copies of Configuration and System Image To aid file recovery and minimize downtime in NVRAM. copy nvram:startup-config {ftp: | rcp: | tftp:} 3. copy running-config startup-config DETAILED STEPS Command or Action Step 1 enable Step 2 Example: Router> enable copy running-config startup-config Example: Router# copy running configuration to the startup configuration in case of file corruption, we recommend that you ping the IP hostname donald: Router# ping donald Type...
... STEPS 1. Success rate is 2 seconds: !!!!! Saving Backup Copies of Configuration and System Image To aid file recovery and minimize downtime in NVRAM. copy nvram:startup-config {ftp: | rcp: | tftp:} 3. copy running-config startup-config DETAILED STEPS Command or Action Step 1 enable Step 2 Example: Router> enable copy running-config startup-config Example: Router# copy running configuration to the startup configuration in case of file corruption, we recommend that you ping the IP hostname donald: Router# ping donald Type...


