
Hardware Installation Guide
Page 7
...A P P E N D I X C A P P E N D I X 78-13342-03 Determining the Configuration Register Value 3-2 Resetting the Router 3-4 Resetting the Password 3-6 Resetting the Configuration Register Value 3-6 Problem-Solving 3-7 OK LED Diagnostics 3-7 Troubleshooting WICs and VICs 3-8 Troubleshooting the Power System 3-...B-5 Installing and Upgrading Memory and Packet Voice Data Modules C-1 Safety Information C-1 Opening the Chassis C-3 Locating Modules C-4 Installing a DIMM C-4 Installing a SIMM C-6 Installing a PVDM C-7 Closing the Chassis C-10 Cisco 1760 Modular Access Router Hardware Installation Guide ix
...A P P E N D I X C A P P E N D I X 78-13342-03 Determining the Configuration Register Value 3-2 Resetting the Router 3-4 Resetting the Password 3-6 Resetting the Configuration Register Value 3-6 Problem-Solving 3-7 OK LED Diagnostics 3-7 Troubleshooting WICs and VICs 3-8 Troubleshooting the Power System 3-...B-5 Installing and Upgrading Memory and Packet Voice Data Modules C-1 Safety Information C-1 Opening the Chassis C-3 Locating Modules C-4 Installing a DIMM C-4 Installing a SIMM C-6 Installing a PVDM C-7 Closing the Chassis C-10 Cisco 1760 Modular Access Router Hardware Installation Guide ix
Hardware Installation Guide
Page 8
Contents D A P P E N D I X E A P P E N D I X INDEX Installing the Virtual Private Network Module D-1 Before You Begin D-1 VPN Module Parts D-1 Safety Warnings D-2 Preventing Electrostatic Discharge Damage D-3 Installing the VPN Module in a Cisco 1760 Router D-4 Opening the Cisco 1760 Chassis D-4 Installing the VPN Module D-6 Closing the Cisco 1760 Chassis D-9 Installing the Echo Canceler Expansion Modules on Cisco Interface Cards E-1 Multiflex Trunk Interface Cards E-1 Echo E-2 Echo Canceler Expansion Modules E-2 Installing and Configuring...
Contents D A P P E N D I X E A P P E N D I X INDEX Installing the Virtual Private Network Module D-1 Before You Begin D-1 VPN Module Parts D-1 Safety Warnings D-2 Preventing Electrostatic Discharge Damage D-3 Installing the VPN Module in a Cisco 1760 Router D-4 Opening the Cisco 1760 Chassis D-4 Installing the VPN Module D-6 Closing the Cisco 1760 Chassis D-9 Installing the Echo Canceler Expansion Modules on Cisco Interface Cards E-1 Multiflex Trunk Interface Cards E-1 Echo E-2 Echo Canceler Expansion Modules E-2 Installing and Configuring...

Hardware Installation Guide
Page 47
...guide to prevent the cables from obscuring the front panel of the chassis are not blocked. Caution Make sure that the fans on the side of the router and the other devices installed in the rack. Chapter 2 Installation Mounting the Router in a Rack Attaching Brackets to the Rack After you attach ... If the router is in a 19-inch or 24-inch rack, use the four supplied number-12 Phillips machine screws to securely attach the brackets to the rack, as shown in Figure 2-4, to attach the cable guide to the left or right bracket. 78-13342-03 Cisco 1760 Modular Access Router Hardware Installation...
...guide to prevent the cables from obscuring the front panel of the chassis are not blocked. Caution Make sure that the fans on the side of the router and the other devices installed in the rack. Chapter 2 Installation Mounting the Router in a Rack Attaching Brackets to the Rack After you attach ... If the router is in a 19-inch or 24-inch rack, use the four supplied number-12 Phillips machine screws to securely attach the brackets to the rack, as shown in Figure 2-4, to attach the cable guide to the left or right bracket. 78-13342-03 Cisco 1760 Modular Access Router Hardware Installation...

Hardware Installation Guide
Page 51
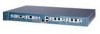
Chapter 2 Installation Installing WICs and VICs Warning Before opening the chassis, disconnect the telephone-network cables (from the card) to remove or ...1 SLOT1 0 OK 1 CONSOLE ACT COL FDX 100 LINK 10/100 ETHERNET AUX SLOT2 0 OK 1 SLOT3 0 OK 1 Cisco 1700 Series 78-13342-03 You should be disconnected from power. however, if the screws are pushed into or pulled out of...WICs or VICs are very tight, you have completed the installation procedure. Cisco 1760 Modular Access Router Hardware Installation Guide 2-9 Warning Do not work on the WIC or VIC slot cover, as shown in the...
Chapter 2 Installation Installing WICs and VICs Warning Before opening the chassis, disconnect the telephone-network cables (from the card) to remove or ...1 SLOT1 0 OK 1 CONSOLE ACT COL FDX 100 LINK 10/100 ETHERNET AUX SLOT2 0 OK 1 SLOT3 0 OK 1 Cisco 1700 Series 78-13342-03 You should be disconnected from power. however, if the screws are pushed into or pulled out of...WICs or VICs are very tight, you have completed the installation procedure. Cisco 1760 Modular Access Router Hardware Installation Guide 2-9 Warning Do not work on the WIC or VIC slot cover, as shown in the...

Hardware Installation Guide
Page 59
...Chassis type and serial number • Maintenance agreement or warranty information • Cisco IOS release installed on your local reseller for advice. Before you call, you should have the following sections: • Contacting Your Cisco Reseller • Recovering a Lost Password • Problem-Solving Contacting Your Cisco...03 Cisco 1760 Modular Access Router Hardware Installation Guide 3-1 CH A P T E R 3 Troubleshooting Use the information in this chapter to help isolate problems with the router or to rule out the router as the source of the steps you received the router &#...
...Chassis type and serial number • Maintenance agreement or warranty information • Cisco IOS release installed on your local reseller for advice. Before you call, you should have the following sections: • Contacting Your Cisco Reseller • Recovering a Lost Password • Problem-Solving Contacting Your Cisco...03 Cisco 1760 Modular Access Router Hardware Installation Guide 3-1 CH A P T E R 3 Troubleshooting Use the information in this chapter to help isolate problems with the router or to rule out the router as the source of the steps you received the router &#...

Hardware Installation Guide
Page 83
...; Safety Information • Opening the Chassis • Locating Modules • Installing a DIMM • Installing a SIMM • Installing a PVDM • Closing the Chassis Safety Information This section contains safety information that has an on/off switch, turn off the power and unplug the power cord. 78-13342-03 Cisco 1760 Modular Access Router Hardware Installation Guide C-1
...; Safety Information • Opening the Chassis • Locating Modules • Installing a DIMM • Installing a SIMM • Installing a PVDM • Closing the Chassis Safety Information This section contains safety information that has an on/off switch, turn off the power and unplug the power cord. 78-13342-03 Cisco 1760 Modular Access Router Hardware Installation Guide C-1
Hardware Installation Guide
Page 84
...Appendix C Installing and Upgrading Memory and Packet Voice Data Modules Warning Before opening the chassis, disconnect the telephone-network cables to the router is OFF or ON. Do not directly touch the backplane with telephone-network voltages...when connected to power and ground and can cause serious burns or weld the metal object to the router. Warning Before working near WAN ports. To avoid electric shock, use caution when working on the ... wrist straps to avoid ESD damage to the terminals. Cisco 1760 Modular Access Router Hardware Installation Guide C-2 78-13342-03
...Appendix C Installing and Upgrading Memory and Packet Voice Data Modules Warning Before opening the chassis, disconnect the telephone-network cables to the router is OFF or ON. Do not directly touch the backplane with telephone-network voltages...when connected to power and ground and can cause serious burns or weld the metal object to the router. Warning Before working near WAN ports. To avoid electric shock, use caution when working on the ... wrist straps to avoid ESD damage to the terminals. Cisco 1760 Modular Access Router Hardware Installation Guide C-2 78-13342-03

Hardware Installation Guide
Page 85
...in this direction. 78-13342-03 Cisco 1760 Modular Access Router Hardware Installation Guide C-3 Appendix C Installing and Upgrading Memory and Packet Voice Data Modules Opening the Chassis Opening the Chassis Follow these steps to remove the screws that the router is turned off in the rear ...C-2. Figure C-2 Removing the Top Cover of the router toward you, as shown in Figure C-1. Figure C-1 Removing the Cisco 1760 Chassis Screws 1.5 M150A00X--6/2104.50HAVz~MAX 60956 Step 3 Chassis screw Gently slide the top cover of the Router 60957 1.5 M150A00X--6/2104.50HAVz~MAX Pull the top ...
...in this direction. 78-13342-03 Cisco 1760 Modular Access Router Hardware Installation Guide C-3 Appendix C Installing and Upgrading Memory and Packet Voice Data Modules Opening the Chassis Opening the Chassis Follow these steps to remove the screws that the router is turned off in the rear ...C-2. Figure C-2 Removing the Top Cover of the router toward you, as shown in Figure C-1. Figure C-1 Removing the Cisco 1760 Chassis Screws 1.5 M150A00X--6/2104.50HAVz~MAX 60956 Step 3 Chassis screw Gently slide the top cover of the Router 60957 1.5 M150A00X--6/2104.50HAVz~MAX Pull the top ...

Hardware Installation Guide
Page 92
... Modules Closing the Chassis After installing memory or data modules on the motherboard, close the chassis by following these steps: Step 1 Step 2 Slide the top cover of the router back on the bottom of the Router," on page C-3.) C-10 Cisco 1760 Modular Access Router Hardware Installation Guide ...78-13342-03 Replace the screws that shown in Figure C-2, "Removing the Top Cover of the chassis by pushing it in the opposite direction...
... Modules Closing the Chassis After installing memory or data modules on the motherboard, close the chassis by following these steps: Step 1 Step 2 Slide the top cover of the router back on the bottom of the Router," on page C-3.) C-10 Cisco 1760 Modular Access Router Hardware Installation Guide ...78-13342-03 Replace the screws that shown in Figure C-2, "Removing the Top Cover of the chassis by pushing it in the opposite direction...

Hardware Installation Guide
Page 94
For systems with telephone-network voltages. Warning Before working on a system that is connected. Cisco 1760 Modular Access Router Hardware Installation Guide D-2 78-13342-03 For systems without a power switch, line voltages are present within the power supply when the power cord... connect the system to the terminals. Warning Do not touch the power supply when the power cord is connected. Warning Before opening the chassis, disconnect the telephone-network cables to all national laws and regulations. Metal objects will heat up when connected to power and ground and ...
For systems with telephone-network voltages. Warning Before working on a system that is connected. Cisco 1760 Modular Access Router Hardware Installation Guide D-2 78-13342-03 For systems without a power switch, line voltages are present within the power supply when the power cord... connect the system to the terminals. Warning Do not touch the power supply when the power cord is connected. Warning Before opening the chassis, disconnect the telephone-network cables to all national laws and regulations. Metal objects will heat up when connected to power and ground and ...

Hardware Installation Guide
Page 95
...Before opening the chassis, turn the router power switch to off ( O ). • Disconnect the power cable to the router is a discharge of whether power to the router. • ... or ankle strap until after you complete the installation. 78-13342-03 Cisco 1760 Modular Access Router Hardware Installation Guide D-3 When detaching cables, detach the end away from... ESD voltages on an antistatic surface or in complete or intermittent failures. Preventing Electrostatic Discharge Damage Before installing a VPN...
...Before opening the chassis, turn the router power switch to off ( O ). • Disconnect the power cable to the router is a discharge of whether power to the router. • ... or ankle strap until after you complete the installation. 78-13342-03 Cisco 1760 Modular Access Router Hardware Installation Guide D-3 When detaching cables, detach the end away from... ESD voltages on an antistatic surface or in complete or intermittent failures. Preventing Electrostatic Discharge Damage Before installing a VPN...

Hardware Installation Guide
Page 96
... contains these sections: • Opening the Cisco 1760 Chassis • Installing the VPN Module • Closing the Cisco 1760 Chassis Opening the Cisco 1760 Chassis Follow these steps to install the VPN module in the rear assembly. Use a flat-head screwdriver to the router. The measurement should be between 1 and 10 megohms (Mohms). Cisco 1760 Modular Access Router Hardware Installation Guide D-4 78-13342-03 Warning...
... contains these sections: • Opening the Cisco 1760 Chassis • Installing the VPN Module • Closing the Cisco 1760 Chassis Opening the Cisco 1760 Chassis Follow these steps to install the VPN module in the rear assembly. Use a flat-head screwdriver to the router. The measurement should be between 1 and 10 megohms (Mohms). Cisco 1760 Modular Access Router Hardware Installation Guide D-4 78-13342-03 Warning...

Hardware Installation Guide
Page 97
... antistatic mat, and begin installing the VPN module. 78-13342-03 Cisco 1760 Modular Access Router Hardware Installation Guide D-5 Appendix D Installing the Virtual Private Network Module Installing the VPN Module in a Cisco 1760 Router Figure D-1 Removing the Cisco 1760 Chassis Screws 1.5 M150A00X--6/2104.50HAVz~MAX 60956 Chassis screw Step 3 Gently slide the top cover of the Router 60957 1.5 M150A00X--6/2104.50HAVz~MAX Pull...
... antistatic mat, and begin installing the VPN module. 78-13342-03 Cisco 1760 Modular Access Router Hardware Installation Guide D-5 Appendix D Installing the Virtual Private Network Module Installing the VPN Module in a Cisco 1760 Router Figure D-1 Removing the Cisco 1760 Chassis Screws 1.5 M150A00X--6/2104.50HAVz~MAX 60956 Chassis screw Step 3 Gently slide the top cover of the Router 60957 1.5 M150A00X--6/2104.50HAVz~MAX Pull...

Hardware Installation Guide
Page 100
Installing the VPN Module in Figure D-6. Figure D-6 Securing the Standoff to it by using the screws provided, as shown in a Cisco 1760 Router Appendix D Installing the Virtual Private Network Module Step 4 Turn the chassis over, and attach the standoffs to the Router Motherboard Standoff screws Bottom of the board 45919 Cisco 1760 Modular Access Router Hardware Installation Guide D-8 78-13342-03
Installing the VPN Module in Figure D-6. Figure D-6 Securing the Standoff to it by using the screws provided, as shown in a Cisco 1760 Router Appendix D Installing the Virtual Private Network Module Step 4 Turn the chassis over, and attach the standoffs to the Router Motherboard Standoff screws Bottom of the board 45919 Cisco 1760 Modular Access Router Hardware Installation Guide D-8 78-13342-03

Hardware Installation Guide
Page 101
Appendix D Installing the Virtual Private Network Module Installing the VPN Module in a Cisco 1760 Router Closing the Cisco 1760 Chassis After installing the VPN module on the motherboard, close the chassis by following these steps: Step 1 Step 2 Slide the top cover of the router back on the bottom of the chassis by pushing it in the opposite direction from that you removed...
Appendix D Installing the Virtual Private Network Module Installing the VPN Module in a Cisco 1760 Router Closing the Cisco 1760 Chassis After installing the VPN module on the motherboard, close the chassis by following these steps: Step 1 Step 2 Slide the top cover of the router back on the bottom of the chassis by pushing it in the opposite direction from that you removed...

Hardware Installation Guide
Page 107
..., definition xiii chassis closing C-10, D-9 dimensions A-1 opening C-3, D-4 to D-5 clear controller command 3-13 clear interface command 3-13 command conventions xxii commands clear controller 3-13 clear interface 3-13 config-register 3-6 configure terminal 3-6 copy 3-5, 3-6 dialer map 3-15 dialer string 3-15 enable 3-5 enable secret 3-6 isdn switch-type 3-15 78-13342-03 Cisco 1760 Modular Access Router Hardware Installation...
..., definition xiii chassis closing C-10, D-9 dimensions A-1 opening C-3, D-4 to D-5 clear controller command 3-13 clear interface command 3-13 command conventions xxii commands clear controller 3-13 clear interface 3-13 config-register 3-6 configure terminal 3-6 copy 3-5, 3-6 dialer map 3-15 dialer string 3-15 enable 3-5 enable secret 3-6 isdn switch-type 3-15 78-13342-03 Cisco 1760 Modular Access Router Hardware Installation...

Hardware Installation Guide
Page 110
... chassis C-3, D-4 to D-5 operating specifications A-1 P password, recovering 3-2 PC connecting to router 2-13 to 2-14 terminal emulation settings 2-13 pinouts console cable B-3 E&M VIC connectors B-5 Ethernet cable B-1 to B-2 FXS and FXO VIC connectors B-4 ports auxiliary 1-3, 2-14, A-1 console 1-2, 1-3, 2-13, A-1 Ethernet 1-2, 1-3, 2-7, A-1 front panel 1-3 power cable 2-11 to 2-12 connecting 2-11 to 2-12 problem solving 3-7 specifications A-1 IN-4 Cisco 1760 Modular...
... chassis C-3, D-4 to D-5 operating specifications A-1 P password, recovering 3-2 PC connecting to router 2-13 to 2-14 terminal emulation settings 2-13 pinouts console cable B-3 E&M VIC connectors B-5 Ethernet cable B-1 to B-2 FXS and FXO VIC connectors B-4 ports auxiliary 1-3, 2-14, A-1 console 1-2, 1-3, 2-13, A-1 Ethernet 1-2, 1-3, 2-7, A-1 front panel 1-3 power cable 2-11 to 2-12 connecting 2-11 to 2-12 problem solving 3-7 specifications A-1 IN-4 Cisco 1760 Modular...
