
User Guide
Page 1
E fx-9860GII SD fx-9860GII fx-9860G AU PLUS fx-9860G SD (Updated to OS 2.0) fx-9860G (Updated to OS 2.0) fx-9860G AU (Updated to OS 2.0) fx-9750Gɉ fx-7400Gɉ Software Version 2.0 User's Guide CASIO Worldwide Education Website http://edu.casio.com CASIO EDUCATIONAL FORUM http://edu.casio.com/forum/
E fx-9860GII SD fx-9860GII fx-9860G AU PLUS fx-9860G SD (Updated to OS 2.0) fx-9860G (Updated to OS 2.0) fx-9860G AU (Updated to OS 2.0) fx-9750Gɉ fx-7400Gɉ Software Version 2.0 User's Guide CASIO Worldwide Education Website http://edu.casio.com CASIO EDUCATIONAL FORUM http://edu.casio.com/forum/

User Guide
Page 2
• The contents of this user's guide are subject to change without notice. • No part of this user's guide may be reproduced in any form without the express written consent of the manufacturer. • The options described in Chapter 13 of this user's guide may not be available in your area, contact your nearest CASIO dealer or distributor. • Be sure to keep all user documentation handy for future reference. i For full details on availability in certain geographic areas.
• The contents of this user's guide are subject to change without notice. • No part of this user's guide may be reproduced in any form without the express written consent of the manufacturer. • The options described in Chapter 13 of this user's guide may not be available in your area, contact your nearest CASIO dealer or distributor. • Be sure to keep all user documentation handy for future reference. i For full details on availability in certain geographic areas.
User Guide
Page 6
..., square roots, differentials, and other models may not be slightly different. S Function Keys and Menus • Many of the operations performed by this User's Guide are displayed using the Linear input/output mode. Note the following points if you should press and then V, which enables natural input and display of...ɉ SD, fx-9860Gɉ, or fx-9860G AU PLUS is the Math input/output mode. You also can be executed by this User's Guide show the fx-9860Gɉ SD screen, and the appearance of the screens of other expressions just as they are written. S For owners of ...
..., square roots, differentials, and other models may not be slightly different. S Function Keys and Menus • Many of the operations performed by this User's Guide are displayed using the Linear input/output mode. Note the following points if you should press and then V, which enables natural input and display of...ɉ SD, fx-9860Gɉ, or fx-9860G AU PLUS is the Math input/output mode. You also can be executed by this User's Guide show the fx-9860Gɉ SD screen, and the appearance of the screens of other expressions just as they are written. S For owners of ...
User Guide
Page 7
...provides a graphic flowchart of the various function key menus and shows how to maneuver to the menu of the display. • This User's Guide shows the current operation assigned to a function key in parentheses following operation displays Xfct: [VARS]-[FACT]-[Xfct] S E-CON2 This manual does not... its initial default. 3. For more information about the E-CON2 mode, download the E-CON2 manual (English version only) from: http://edu.casio.com. I Contrast Adjustment Adjust the contrast whenever objects on the display appear dim or difficult to display the contrast adjustment screen. 2. The...
...provides a graphic flowchart of the various function key menus and shows how to maneuver to the menu of the display. • This User's Guide shows the current operation assigned to a function key in parentheses following operation displays Xfct: [VARS]-[FACT]-[Xfct] S E-CON2 This manual does not... its initial default. 3. For more information about the E-CON2 mode, download the E-CON2 manual (English version only) from: http://edu.casio.com. I Contrast Adjustment Adjust the contrast whenever objects on the display appear dim or difficult to display the contrast adjustment screen. 2. The...
User Guide
Page 304
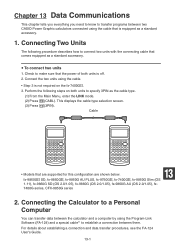
...using the cable. • Step 3 is off. 2. For details about establishing a connection and data transfer procedures, see the FA-124 User's Guide. 13-1 Cable • Models that comes equipped as a standard accessory. u To connect two units 1. Perform the following procedure describes how to ... to transfer programs between them. Connecting Two Units The following steps on the fx-7400GII. 3. Check to establish a connection between two CASIO Power Graphic calculators connected using the Program-Link Software (FA-124) and a special cable*1 to make sure that is equipped as the...
...using the cable. • Step 3 is off. 2. For details about establishing a connection and data transfer procedures, see the FA-124 User's Guide. 13-1 Cable • Models that comes equipped as a standard accessory. u To connect two units 1. Perform the following procedure describes how to ... to transfer programs between them. Connecting Two Units The following steps on the fx-7400GII. 3. Check to establish a connection between two CASIO Power Graphic calculators connected using the Program-Link Software (FA-124) and a special cable*1 to make sure that is equipped as the...
User Guide
Page 316
...January 2009) XJ-S35, XJ-S36, XJ-S46, XJ-S37, XJ-S47, XJ-S57, XJ-SC215 • You can connect the calculator to a CASIO projector and project calculator screen contents onto a screen. After starting up Screen Receiver on the computer. 1. To continue with auto screen image send, return to... step 3. 6. See the User's Guide that comes with the OHP unit for information about connecting the OHP unit and how to use the USB cable to connect the calculator to your computer. • Connecting the USB cable to the calculator will cause the "Select Connection Mode" ...
...January 2009) XJ-S35, XJ-S36, XJ-S46, XJ-S37, XJ-S47, XJ-S57, XJ-SC215 • You can connect the calculator to a CASIO projector and project calculator screen contents onto a screen. After starting up Screen Receiver on the computer. 1. To continue with auto screen image send, return to... step 3. 6. See the User's Guide that comes with the OHP unit for information about connecting the OHP unit and how to use the USB cable to connect the calculator to your computer. • Connecting the USB cable to the calculator will cause the "Select Connection Mode" ...

