i900D Quick Start Guide
Page 3
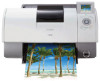
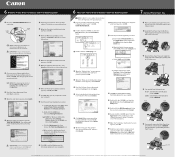
...in any form whatsoever without the express written permission. 1 and other trademarks and registered trademarks appearing in the box. No part of this publication may be observed for safe operation. Introduction This Quick Start Guide uses the following items are in this ...could result in death or serious personal injury caused by incorrect operation of Canon Inc. • Microsoft® and Windows® are exactly the same with i900D. For details on cable specifications, refer to your Canon Authorized Dealer or Sales Representative. ‰ Printer ‰ Direct Printing ...
...in any form whatsoever without the express written permission. 1 and other trademarks and registered trademarks appearing in the box. No part of this publication may be observed for safe operation. Introduction This Quick Start Guide uses the following items are in this ...could result in death or serious personal injury caused by incorrect operation of Canon Inc. • Microsoft® and Windows® are exactly the same with i900D. For details on cable specifications, refer to your Canon Authorized Dealer or Sales Representative. ‰ Printer ‰ Direct Printing ...
i900D Quick Start Guide
Page 7
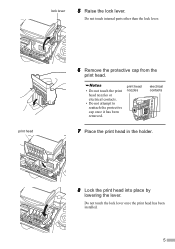
lock lever 5 Raise the lock lever. Do not touch internal parts other than the lock lever. print head nozzles electrical contacts 7 Place the print head in the holder. 8 Lock the print head into place by lowering the lever. Do not touch the lock lever once the print head has been installed. 5 print head 6 Remove the protective cap from the print head. • Do not touch the print head nozzles or electrical contacts. • Do not attempt to reattach the protective cap once it has been removed.
lock lever 5 Raise the lock lever. Do not touch internal parts other than the lock lever. print head nozzles electrical contacts 7 Place the print head in the holder. 8 Lock the print head into place by lowering the lever. Do not touch the lock lever once the print head has been installed. 5 print head 6 Remove the protective cap from the print head. • Do not touch the print head nozzles or electrical contacts. • Do not attempt to reattach the protective cap once it has been removed.
i900D Quick Start Guide
Page 25
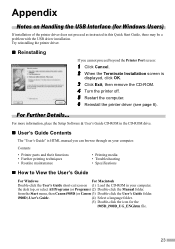
i900D)-User's Guide. (4) Select a language folder. (5) Double-click the icon for Windows Users) If installation of the printer driver does not proceed as instructed in this Quick Start Guide, there may be a problem with the USB driver installation. Contents • Printer parts and their functions •... information, place the Setup Software & User's Guide CD-ROM in your computer. For Further Details... from the Start menu, then Canon i905D (or Canon (3) Double-click the User's Guide folder. the desk top, or select All Programs (or Programs) (2) Double-click the Manual ...
i900D)-User's Guide. (4) Select a language folder. (5) Double-click the icon for Windows Users) If installation of the printer driver does not proceed as instructed in this Quick Start Guide, there may be a problem with the USB driver installation. Contents • Printer parts and their functions •... information, place the Setup Software & User's Guide CD-ROM in your computer. For Further Details... from the Start menu, then Canon i905D (or Canon (3) Double-click the User's Guide folder. the desk top, or select All Programs (or Programs) (2) Double-click the Manual ...
i900D Easy Setup Instructions
Page 2
... CD-ROM. NOTE: For Windows 98/Me click Start, then select Settings, Printers. Print head alignment is now complete. Close the cover. Part no. POWER Button POWER Lamp 7 When the Terminate Installation window appears, click OK. 8 When the Memory Card Utility screen appears, click Install..., click Continue Installation. 9 When the message "The software was successfully installed" appears, click Restart. QA7-2784-V01 © 2003 Canon U.S.A., Inc. P-i900D-ESI-0503 Printed in the Mac OS X folder. NOTE: For Windows® XP or Windows 2000, log on the Print Head Alignment...
... CD-ROM. NOTE: For Windows 98/Me click Start, then select Settings, Printers. Print head alignment is now complete. Close the cover. Part no. POWER Button POWER Lamp 7 When the Terminate Installation window appears, click OK. 8 When the Memory Card Utility screen appears, click Install..., click Continue Installation. 9 When the message "The software was successfully installed" appears, click Restart. QA7-2784-V01 © 2003 Canon U.S.A., Inc. P-i900D-ESI-0503 Printed in the Mac OS X folder. NOTE: For Windows® XP or Windows 2000, log on the Print Head Alignment...

i900D Direct Printing Guide
Page 37
Important z Do not squeeze the side of ink tanks as this may not be ejected correctly. 36 If there remains a part of the orange tape, ink may cause the ink to the local laws and regulations regarding disposal of consumables. 3 Prepare a replacement tank. (1) Unpack the new ...
Important z Do not squeeze the side of ink tanks as this may not be ejected correctly. 36 If there remains a part of the orange tape, ink may cause the ink to the local laws and regulations regarding disposal of consumables. 3 Prepare a replacement tank. (1) Unpack the new ...
i900D Direct Printing Guide
Page 46
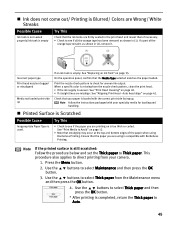
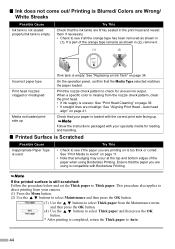
... paper from your paper is empty: See "Replacing an Ink Tank" on is empty Check that the Media Type selected matches the paper loaded. If a part of the paper when using is uneven: See "Print Head Cleaning" on page 42. Use the buttons to select Maintenance and then press the OK 3.
... paper from your paper is empty: See "Replacing an Ink Tank" on is empty Check that the Media Type selected matches the paper loaded. If a part of the paper when using is uneven: See "Print Head Cleaning" on page 42. Use the buttons to select Maintenance and then press the OK 3.
i900D Direct Printing Guide
Page 45
... the operation panel, confirm that smudging may occur at the top and bottom edges of the orange tape remains as shown in (2), remove it. If a part of the paper when using is used. Check that the ink tanks are firmly seated in the print head and reseat them if necessary. •...
... the operation panel, confirm that smudging may occur at the top and bottom edges of the orange tape remains as shown in (2), remove it. If a part of the paper when using is used. Check that the ink tanks are firmly seated in the print head and reseat them if necessary. •...


