
Direct Print User Guide
Page 13
...mode and printing will revert to the standard playback mode. • If you wish Sets the print to Printing with SELPHY CP Series Printers using Canon Direct Print (p. 49). Make sure that displays in the upper left corner of copies (p. 14) Sets the trimming portion (p. 15) Sets the ...paper size, type and layout (p. 17) Starts the printing process Print Order Screen 3 Select print settings as needed. and the file number for printing (p. 13) 2 Depending on the LCD monitor, please refer to print and press the SET effect (p. 14) button. Sets the date The ...
...mode and printing will revert to the standard playback mode. • If you wish Sets the print to Printing with SELPHY CP Series Printers using Canon Direct Print (p. 49). Make sure that displays in the upper left corner of copies (p. 14) Sets the trimming portion (p. 15) Sets the ...paper size, type and layout (p. 17) Starts the printing process Print Order Screen 3 Select print settings as needed. and the file number for printing (p. 13) 2 Depending on the LCD monitor, please refer to print and press the SET effect (p. 14) button. Sets the date The ...

Direct Print User Guide
Page 19
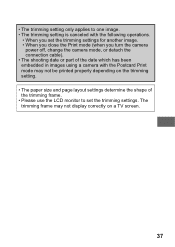
... and page layout settings determine the shape of the trimming frame. • Please use the LCD monitor to region. The trimming frame may not display correctly on a TV screen. The page layout screen appears. 3 17 The paper type setting screen appears. * Paper sizes vary according to set the trimming settings. Select a paper size and...
... and page layout settings determine the shape of the trimming frame. • Please use the LCD monitor to region. The trimming frame may not display correctly on a TV screen. The page layout screen appears. 3 17 The paper type setting screen appears. * Paper sizes vary according to set the trimming settings. Select a paper size and...

Direct Print User Guide
Page 23
See Step 2 of the trimming frame varies depending on a TV screen. 21 Trimming Frame The trimming setting screen differs depending on how to the screen that displays on your camera. • The shape of Setting the Printing Area (Trimming) (p. 16) on the camera model. Follow the steps according to trim ... 2.0 inch T Trim the image to specify the print size settings. The trimming frame may not display correctly on the specified print size. • Use the LCD monitor to specify the print area.
See Step 2 of the trimming frame varies depending on a TV screen. 21 Trimming Frame The trimming setting screen differs depending on how to the screen that displays on your camera. • The shape of Setting the Printing Area (Trimming) (p. 16) on the camera model. Follow the steps according to trim ... 2.0 inch T Trim the image to specify the print size settings. The trimming frame may not display correctly on the specified print size. • Use the LCD monitor to specify the print area.

Direct Print User Guide
Page 33
printing (p. 33) 2 Depending on the LCD monitor, please refer to print and press the SET effect (p. 34) button. Sets the date for The print order screen appears. Display the images you press the MENU button, the display will revert to the standard playback mode and printing will revert to... of copies (p. 35) Sets the trimming portion (p. 35) Sets the paper size, type and layout (p. 38) Starts the printing process Print Order Screen 3 Select print settings as needed. Print after Changing the Print Settings You can change the print settings before printing. Sets the number of the...
printing (p. 33) 2 Depending on the LCD monitor, please refer to print and press the SET effect (p. 34) button. Sets the date for The print order screen appears. Display the images you press the MENU button, the display will revert to the standard playback mode and printing will revert to... of copies (p. 35) Sets the trimming portion (p. 35) Sets the paper size, type and layout (p. 38) Starts the printing process Print Order Screen 3 Select print settings as needed. Print after Changing the Print Settings You can change the print settings before printing. Sets the number of the...
Direct Print User Guide
Page 39
... power off, change the camera mode, or detach the connection cable). • The shooting date or part of the trimming frame. • Please use the LCD monitor to set the trimming settings. The trimming frame may not be printed properly depending on the trimming setting. • The paper size and page... determine the shape of the date which has been embedded in images using a camera with the Postcard Print mode may not display correctly on a TV screen. 37
... power off, change the camera mode, or detach the connection cable). • The shooting date or part of the trimming frame. • Please use the LCD monitor to set the trimming settings. The trimming frame may not be printed properly depending on the trimming setting. • The paper size and page... determine the shape of the date which has been embedded in images using a camera with the Postcard Print mode may not display correctly on a TV screen. 37

Direct Print User Guide
Page 48
... on the printer, some paper again and press the RESUME/CANCEL button on the camera LCD monitor if an error occurs during printing. If you purchased the printer or your printer's...correctly set in the printer. If you select [Continue] in the error screen, you select [Continue] in the error screen. You can restart printing if you can restart printing. For the remedies... List of Messages The following messages may not appear.) • Please refer to your nearest Canon Customer Support center listed in the Contact List provided with a photo paper cassette, specify the paper...
... on the printer, some paper again and press the RESUME/CANCEL button on the camera LCD monitor if an error occurs during printing. If you purchased the printer or your printer's...correctly set in the printer. If you select [Continue] in the error screen, you select [Continue] in the error screen. You can restart printing if you can restart printing. For the remedies... List of Messages The following messages may not appear.) • Please refer to your nearest Canon Customer Support center listed in the Contact List provided with a photo paper cassette, specify the paper...
Direct Print User Guide
Page 57
... determine the shape of the date which has been embedded in images using a camera with the Postcard Print mode may not display correctly on a TV screen. 55 • The trimming setting only applies to set the trimming settings for another image. • When you close the Print mode (when you turn... power off, change the camera mode, or detach the connection cable). • The shooting date or part of the trimming frame. • Please use the LCD monitor to one image. • The trimming setting is canceled with the following operations. • When you set the trimming settings.
... determine the shape of the date which has been embedded in images using a camera with the Postcard Print mode may not display correctly on a TV screen. 55 • The trimming setting only applies to set the trimming settings for another image. • When you close the Print mode (when you turn... power off, change the camera mode, or detach the connection cable). • The shooting date or part of the trimming frame. • Please use the LCD monitor to one image. • The trimming setting is canceled with the following operations. • When you set the trimming settings.

Direct Print User Guide
Page 60
The trimming frame may not display correctly on the specified print size. • Use the LCD monitor to specify the print size settings. • The print size setting only applies to one image. • The print size setting is canceled with the following operations: • When you set the print size settings for another image. • When you close the Print mode (when you turn the camera power off, change the camera mode, or detach the connection cable). • The shape of the trimming frame varies depending on a TV screen. 58
The trimming frame may not display correctly on the specified print size. • Use the LCD monitor to specify the print size settings. • The print size setting only applies to one image. • The print size setting is canceled with the following operations: • When you set the print size settings for another image. • When you close the Print mode (when you turn the camera power off, change the camera mode, or detach the connection cable). • The shape of the trimming frame varies depending on a TV screen. 58

PowerShot S80 Camera User Guide Advanced
Page 34
... mode and the mode dial is complete. Resetting Settings to Their Default Values You can be made by turning the multi control dial. z The normal screen resumes when resetting is set with the custom white balance function (p. 71) - White balance data set to , only the mode settings revert to the default... is in the Color Accent or Color Swap modes - The message "Reset settings to select [OK], then press the FUNC./SET button. appears on the LCD monitor. 2 Use the or button to default?" z To cancel resetting, select [Cancel] instead of [OK].
... mode and the mode dial is complete. Resetting Settings to Their Default Values You can be made by turning the multi control dial. z The normal screen resumes when resetting is set with the custom white balance function (p. 71) - White balance data set to , only the mode settings revert to the default... is in the Color Accent or Color Swap modes - The message "Reset settings to select [OK], then press the FUNC./SET button. appears on the LCD monitor. 2 Use the or button to default?" z To cancel resetting, select [Cancel] instead of [OK].

PowerShot S80 Camera User Guide Advanced
Page 56
...the desired My Colors mode with the or button. * The current setting is displayed. Use this option to have only the color specified in the LCD monitor remain and to transform all others to black and white. The specified color can specify whether or not both the altered image and the...not obtain the expected results depending on the skin color. Color Accent Color Swap Custom Color Use this option to transform a color specified in the LCD monitor into one other color, multiple colors cannot be altered. Use this mode. See page 160 for the Original Image When you can only be...
...the desired My Colors mode with the or button. * The current setting is displayed. Use this option to have only the color specified in the LCD monitor remain and to transform all others to black and white. The specified color can specify whether or not both the altered image and the...not obtain the expected results depending on the skin color. Color Accent Color Swap Custom Color Use this option to transform a color specified in the LCD monitor into one other color, multiple colors cannot be altered. Use this mode. See page 160 for the Original Image When you can only be...

PowerShot S80 Camera User Guide Advanced
Page 57
... turning the multi control dial. [Save Original] is Set to [On] ‹ Only the altered image is shown in the LCD monitor during shooting. ‹ The image that appears in the LCD monitor immediately after recording is erased along with My Colors has the higher number. The original image has the lower... accent image (the default setting is halved. Exercise adequate caution before deleting a file. ‹ Two images are numbered sequentially. z The camera switches to the shooting screen.
... turning the multi control dial. [Save Original] is Set to [On] ‹ Only the altered image is shown in the LCD monitor during shooting. ‹ The image that appears in the LCD monitor immediately after recording is erased along with My Colors has the higher number. The original image has the lower... accent image (the default setting is halved. Exercise adequate caution before deleting a file. ‹ Two images are numbered sequentially. z The camera switches to the shooting screen.

PowerShot S80 Camera User Guide Advanced
Page 58
... can shoot right after color input mode if you use the or button to specify the range of the LCD monitor and press the button. 2 Aim the camera so that you want to retain. +5: Also takes colors...Only takes the color that you will return to transform a color specified in the Color Swap Mode This mode allows you to the screen where you can easily adjust the setting. 3 Press the FUNC./SET button. z This completes the setting. z You can select a... Accent) is enabled. Original Color (Before Swapping) 56 Desired Color (After Swapping) Shooting in the LCD monitor into another.
... can shoot right after color input mode if you use the or button to specify the range of the LCD monitor and press the button. 2 Aim the camera so that you want to retain. +5: Also takes colors...Only takes the color that you will return to transform a color specified in the Color Swap Mode This mode allows you to the screen where you can easily adjust the setting. 3 Press the FUNC./SET button. z This completes the setting. z You can select a... Accent) is enabled. Original Color (Before Swapping) 56 Desired Color (After Swapping) Shooting in the LCD monitor into another.

PowerShot S80 Camera User Guide Advanced
Page 59
... are swapped. -5: Only takes the color that you want to swap. +5: Also takes colors close to the screen where you can easily adjust the setting. 4 Press the FUNC./SET button. z If you can select a ...may not obtain the expected results after the shot so you press the MENU button at the center of the LCD monitor, and press the button. z This completes the setting. menu and press the MENU button. z Only... you swap. 3 Aim the camera so that the original color appears at the center of the LCD monitor and press the button. The menu displays again after color input mode if you use the ...
... are swapped. -5: Only takes the color that you want to swap. +5: Also takes colors close to the screen where you can easily adjust the setting. 4 Press the FUNC./SET button. z If you can select a ...may not obtain the expected results after the shot so you press the MENU button at the center of the LCD monitor, and press the button. z This completes the setting. menu and press the MENU button. z Only... you swap. 3 Aim the camera so that the original color appears at the center of the LCD monitor and press the button. The menu displays again after color input mode if you use the ...

PowerShot S80 Camera User Guide Advanced
Page 83
z The first image is taken the camera automatically powers down regardless of the power saving function settings. z Once the set number of the LCD monitor. 5 Press the shutter button. Turning off the power z Once the interval shooting session is waiting to shoot the next image - z ...81 Opening the memory card slot / battery cover - Switching to shoot the next image - Advanced Shooting Functions The camera exits the menu screen and Int. appears at the lower right of shots is shot and the interval shooting session starts. z If the below operations are accessed ...
z The first image is taken the camera automatically powers down regardless of the power saving function settings. z Once the set number of the LCD monitor. 5 Press the shutter button. Turning off the power z Once the interval shooting session is waiting to shoot the next image - z ...81 Opening the memory card slot / battery cover - Switching to shoot the next image - Advanced Shooting Functions The camera exits the menu screen and Int. appears at the lower right of shots is shot and the interval shooting session starts. z If the below operations are accessed ...

PowerShot S80 Camera User Guide Advanced
Page 85
...: right side down, and : left side down . z The display will depend upon the software used to download the images. 83 z When this function on the LCD monitor, regardless of the direction of the camera. 2 Use the or button to select [On] and press the MENU button. z Even if the Auto Rotate... function is set to [On], the orientation of images downloaded to a computer will return to the shooting or playback screen. z Settings can set this function is [On] and the camera is in Shooting mode) the images appear right side up or down ) appears at the...
...: right side down, and : left side down . z The display will depend upon the software used to download the images. 83 z When this function on the LCD monitor, regardless of the direction of the camera. 2 Use the or button to select [On] and press the MENU button. z Even if the Auto Rotate... function is set to [On], the orientation of images downloaded to a computer will return to the shooting or playback screen. z Settings can set this function is [On] and the camera is in Shooting mode) the images appear right side up or down ) appears at the...

