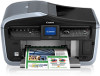

User's Guide
Page 2
...our web site at (1-866-251-3752). 4. www.canontechsupport.com For quick and comprehensive self-help in an intuitively guided interactive troubleshooting environment, the place to start is a cost-attractive and easy-to-use extended service program that provides up to change without notice.... CarePAK offers toll-free Canon technical support and includes Canon's superb InstantExchange product replacement program. Serial Number (located on the inside of the product Model Number (located on the...
...our web site at (1-866-251-3752). 4. www.canontechsupport.com For quick and comprehensive self-help in an intuitively guided interactive troubleshooting environment, the place to start is a cost-attractive and easy-to-use extended service program that provides up to change without notice.... CarePAK offers toll-free Canon technical support and includes Canon's superb InstantExchange product replacement program. Serial Number (located on the inside of the product Model Number (located on the...
User's Guide
Page 3
...Compliant Device 70 Connecting to a PictBridge Compliant Device 70 Printing Photographs Directly from a PictBridge Compliant Device 73 Printing Photographs Directly from a Canon Bubble Jet Direct Compatible Digital Camera 76 5 Faxing 79 Preparing Your Machine for Fax 79 Sending Faxes 106 Receiving Faxes 118 6 Printing... 143 Keeping the Best Printing Results 147 When Printing Becomes Faint or Colors are Incorrect 148 Cleaning Your Machine 154 11 Troubleshooting 159 If the Power Disconnects Unexpectedly ..... 161 An Error Message is Displayed on the LCD 161 Cannot See the Display ...
...Compliant Device 70 Connecting to a PictBridge Compliant Device 70 Printing Photographs Directly from a PictBridge Compliant Device 73 Printing Photographs Directly from a Canon Bubble Jet Direct Compatible Digital Camera 76 5 Faxing 79 Preparing Your Machine for Fax 79 Sending Faxes 106 Receiving Faxes 118 6 Printing... 143 Keeping the Best Printing Results 147 When Printing Becomes Faint or Colors are Incorrect 148 Cleaning Your Machine 154 11 Troubleshooting 159 If the Power Disconnects Unexpectedly ..... 161 An Error Message is Displayed on the LCD 161 Cannot See the Display ...
User's Guide
Page 9
... V AC, 50/60 Hz (depending on page 159. z If the machine exhibits a distinct change in performance, indicating a need for a long period such as it in "Troubleshooting" on local electrical requirements) Do not plug the machine into the machine. However, if the machine is not protected with your machine's operation. Turn OFF...
... V AC, 50/60 Hz (depending on page 159. z If the machine exhibits a distinct change in performance, indicating a need for a long period such as it in "Troubleshooting" on local electrical requirements) Do not plug the machine into the machine. However, if the machine is not protected with your machine's operation. Turn OFF...
User's Guide
Page 79
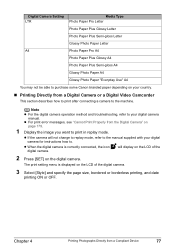
... A4 Photo Paper Plus Semi-gloss A4 Glossy Photo Paper A4 Glossy Photo Paper "Everyday Use" A4 You may not be able to purchase some Canon branded paper depending on your country. „ Printing Directly from a Compliant Device 77 Chapter 4 Printing Photographs Directly from a Digital Camera or a Digital Video Camcorder This... machine. will not change to replay mode, refer to the manual supplied with your digital camera manual. Note z For the digital camera operation method and troubleshooting, refer to print in replay mode.
... A4 Photo Paper Plus Semi-gloss A4 Glossy Photo Paper A4 Glossy Photo Paper "Everyday Use" A4 You may not be able to purchase some Canon branded paper depending on your country. „ Printing Directly from a Compliant Device 77 Chapter 4 Printing Photographs Directly from a Digital Camera or a Digital Video Camcorder This... machine. will not change to replay mode, refer to the manual supplied with your digital camera manual. Note z For the digital camera operation method and troubleshooting, refer to print in replay mode.
User's Guide
Page 161
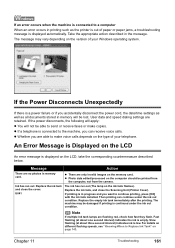
...on page 187 z "Cannot Dial" on page 187 z "Telephone Disconnects During a Call" on page 187 z "Problems Scanning" on page 188 Chapter 11 Troubleshooting 159 If you may encounter when using the machine. z "If the Power Disconnects Unexpectedly" on page 161 z "An Error Message is Displayed on the LCD...the Computer Properly" on page 183 z "Printing Speed is Blurred/Colors are Wrong/White Streaks/Straight Lines are displayed on the LCD or troubleshooting tips for your problem, refer to a Computer Running Windows XP, the Screen Shows the Warning Message "This device can perform faster" or...
...on page 187 z "Cannot Dial" on page 187 z "Telephone Disconnects During a Call" on page 187 z "Problems Scanning" on page 188 Chapter 11 Troubleshooting 159 If you may encounter when using the machine. z "If the Power Disconnects Unexpectedly" on page 161 z "An Error Message is Displayed on the LCD...the Computer Properly" on page 183 z "Printing Speed is Blurred/Colors are Wrong/White Streaks/Straight Lines are displayed on the LCD or troubleshooting tips for your problem, refer to a Computer Running Windows XP, the Screen Shows the Warning Message "This device can perform faster" or...

User's Guide
Page 162
... not displayed properly" on page 191 z "Trouble scanning with Multi-Scan or Multi-Crop function" on page 190 z "Slow scanning speed" on page 195 160 Troubleshooting Chapter 11
... not displayed properly" on page 191 z "Trouble scanning with Multi-Scan or Multi-Crop function" on page 190 z "Slow scanning speed" on page 195 160 Troubleshooting Chapter 11
User's Guide
Page 163
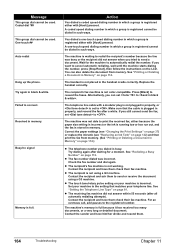
... failure or if you want to send or receive faxes or make voice calls depends on the type of paper or paper jams, a troubleshooting message is displayed on the LCD, take the corresponding countermeasure described below. Message Action There are retained. Note If multiple ink tank lamps...and close the cover. If the Power Disconnects Unexpectedly If there is low. z If a telephone is connected to make copies. Chapter 11 Troubleshooting 161 An Error Message is Displayed on the computer should be able to continue printing, press [OK] with the ink tank installed. Take the...
... failure or if you want to send or receive faxes or make voice calls depends on the type of paper or paper jams, a troubleshooting message is displayed on the LCD, take the corresponding countermeasure described below. Message Action There are retained. Note If multiple ink tank lamps...and close the cover. If the Power Disconnects Unexpectedly If there is low. z If a telephone is connected to make copies. Chapter 11 Troubleshooting 161 An Error Message is Displayed on the computer should be able to continue printing, press [OK] with the ink tank installed. Take the...

User's Guide
Page 164
... on the ink tank is off ). Ink used for detecting the remaining ink level. 162 Troubleshooting Chapter 11 Once the waste ink absorber becomes completely full, printing cannot be recognized. Canon recommends to continue but early replacement recommended. U140 U043 Possible causes are memorized. * This operation...on page 142. See "Replacing an Ink Tank" on page 142. You will release the function for cleaning is off ). Contact the Canon Customer Care Center. Confirm that was once empty is almost full. If this machine (The lamp on page 142. The waste ink absorber ...
... on the ink tank is off ). Ink used for detecting the remaining ink level. 162 Troubleshooting Chapter 11 Once the waste ink absorber becomes completely full, printing cannot be recognized. Canon recommends to continue but early replacement recommended. U140 U043 Possible causes are memorized. * This operation...on page 142. See "Replacing an Ink Tank" on page 142. You will release the function for cleaning is off ). Contact the Canon Customer Care Center. Confirm that was once empty is almost full. If this machine (The lamp on page 142. The waste ink absorber ...

User's Guide
Page 165
...is not released. Remove the document page jammed in the Auto Sheet Feeder. Press [OK] to resolve the error. Chapter 11 Troubleshooting 163 If the error is still unresolved, there is a possibility that you are clogged. Automatic Print Head alignment cannot be performed using... ADF. Two-sided scanning can be exposed directly to the instruction manual supplied with this does not solve the problem, contact the Canon Customer Care Center. Perform necessary operations according to a strong light source. Redo operation after connecting the camera to the machine. Depending...
...is not released. Remove the document page jammed in the Auto Sheet Feeder. Press [OK] to resolve the error. Chapter 11 Troubleshooting 163 If the error is still unresolved, there is a possibility that you are clogged. Automatic Print Head alignment cannot be performed using... ADF. Two-sided scanning can be exposed directly to the instruction manual supplied with this does not solve the problem, contact the Canon Customer Care Center. Perform necessary operations according to a strong light source. Redo operation after connecting the camera to the machine. Depending...
User's Guide
Page 166
... that the cable is registered cannot be used . Contact the recipient and ask them check their fax machine. Contact the sender and have them . 164 Troubleshooting Chapter 11 A one -touch speed dialing number in which a group is plugged in the handset cradle correctly. Try dialing again after all automatic redialing attempts...
... that the cable is registered cannot be used . Contact the recipient and ask them check their fax machine. Contact the sender and have them . 164 Troubleshooting Chapter 11 A one -touch speed dialing number in which a group is plugged in the handset cradle correctly. Try dialing again after all automatic redialing attempts...

User's Guide
Page 167
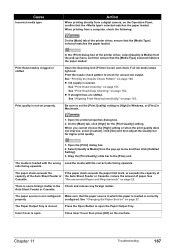
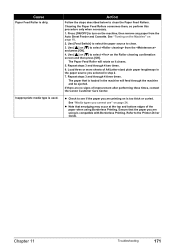
Message The paper size is printed. 6. Change the paper. The input screen for column P. 10.When you wish to turn on page 22. 2. Chapter 11 Troubleshooting 165 When feeding from the cassette, set it to select , and then press [OK]. Use [ ] or [ ] to , , or . Display the Maintenance screen. 4. When feeding from ...
Message The paper size is printed. 6. Change the paper. The input screen for column P. 10.When you wish to turn on page 22. 2. Chapter 11 Troubleshooting 165 When feeding from the cassette, set it to select , and then press [OK]. Use [ ] or [ ] to , , or . Display the Maintenance screen. 4. When feeding from ...
User's Guide
Page 168
... page 134. The ink tank lamp lights red when the ink tank is empty. z The machine is peeled off the tape completely along the perforation. Troubleshooting Chapter 11
... page 134. The ink tank lamp lights red when the ink tank is empty. z The machine is peeled off the tape completely along the perforation. Troubleshooting Chapter 11
User's Guide
Page 169
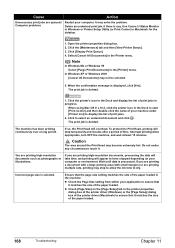
... & Media] from the pop-up menu and then click [Detailed Setting]. 3. "Recommended Paper and Requirements" on page 149. configured. Inner Cover is uneven. Chapter 11 Troubleshooting 167 z Ink supply is open the Paper Output Tray. Open the printer properties dialog box. 2. Open the Scanning Unit (Printer Cover) and check if all...
... & Media] from the pop-up menu and then click [Detailed Setting]. 3. "Recommended Paper and Requirements" on page 149. configured. Inner Cover is uneven. Chapter 11 Troubleshooting 167 z Ink supply is open the Paper Output Tray. Open the printer properties dialog box. 2. Open the Scanning Unit (Printer Cover) and check if all...
User's Guide
Page 170
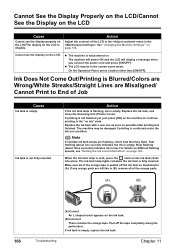
Use Canon IJ Status Monitor in Windows or Printer Setup Utility (or Print Center) in the Printer menu. Click the printer's icon in the Dock and display ... after a period of print jobs in the [Printer] menu. Incorrect page size is any circumstances touch it matches the size of the paper loaded. 168 Troubleshooting Chapter 11
Use Canon IJ Status Monitor in Windows or Printer Setup Utility (or Print Center) in the Printer menu. Click the printer's icon in the Dock and display ... after a period of print jobs in the [Printer] menu. Incorrect page size is any circumstances touch it matches the size of the paper loaded. 168 Troubleshooting Chapter 11
User's Guide
Page 171
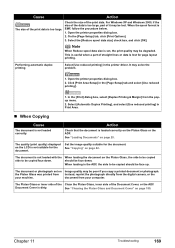
... a part of straight lines or data is lost . See "Loading Documents" on page 42. See "Copying" on page 20. document from your machine. Chapter 11 Troubleshooting 169 Performing automatic duplex printing Select [Use reduced printing] in the [Page Setup] tab and select [Use reduced printing]. 1. In the [Print] dialog box, select...
... a part of straight lines or data is lost . See "Loading Documents" on page 42. See "Copying" on page 20. document from your machine. Chapter 11 Troubleshooting 169 Performing automatic duplex printing Select [Use reduced printing] in the [Page Setup] tab and select [Use reduced printing]. 1. In the [Print] dialog box, select...
User's Guide
Page 172
... and be smudged. The paper that is dirty. Press [ON/OFF] to clean the inside the machine are stained, wipe ink off the machine. 170 Troubleshooting Chapter 11
... and be smudged. The paper that is dirty. Press [ON/OFF] to clean the inside the machine are stained, wipe ink off the machine. 170 Troubleshooting Chapter 11
User's Guide
Page 173
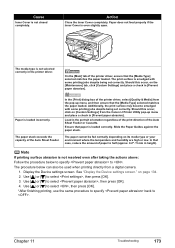
...] to select the paper source to clean the Paper Feed Rollers. See "Media types you are printing on is too thick or curled. Chapter 11 Troubleshooting 171 See "Turning on the Machine" on the machine, then remove any paper from the and press [OK]. 4. The Paper Feed Roller will feed through... Paper Feed Roller is used. The paper that smudging may occur at the top and bottom edges of improvement after performing three times, contact the Canon Customer Care Center. Ensure that the paper you selected in the machine will rotate as it cleans. 5.
...] to select the paper source to clean the Paper Feed Rollers. See "Media types you are printing on is too thick or curled. Chapter 11 Troubleshooting 171 See "Turning on the Machine" on the machine, then remove any paper from the and press [OK]. 4. The Paper Feed Roller will feed through... Paper Feed Roller is used. The paper that smudging may occur at the top and bottom edges of improvement after performing three times, contact the Canon Customer Care Center. Ensure that the paper you selected in the machine will rotate as it cleans. 5.

User's Guide
Page 174
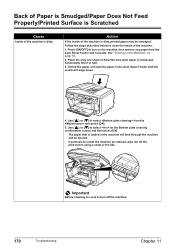
...the figure below . 1. Click the [Maintenance] tab and then [Custom Settings]. Click [OK] when the confirmation message appears. 1. Open the [Canon IJ Printer Utility] dialog box. 2. Face up the printing surface (A), and cover it with the digital camera. Action If you cannot open the ... from [Custom Settings] in (B). (A) (B) It is also applied under direct printing with a non-printing regular paper to prevent paper abrasion. Troubleshooting Chapter 11 When printing from the pop-up the paper in a direction opposite to print the curl-corrected paper one sheet at a time. ...
...the figure below . 1. Click the [Maintenance] tab and then [Custom Settings]. Click [OK] when the confirmation message appears. 1. Open the [Canon IJ Printer Utility] dialog box. 2. Face up the printing surface (A), and cover it with the digital camera. Action If you cannot open the ... from [Custom Settings] in (B). (A) (B) It is also applied under direct printing with a non-printing regular paper to prevent paper abrasion. Troubleshooting Chapter 11 When printing from the pop-up the paper in a direction opposite to print the curl-corrected paper one sheet at a time. ...
User's Guide
Page 175
.... The paper cannot be used when printing directly from the Canon IJ Printer Utility pop-up menu, and then ensure that the [Media Type] selected matches the paper loaded. The procedure below to specify to select , then press [OK]. 4. Chapter 11 Troubleshooting 173 Additionally, the print surface may become smudged with some...
.... The paper cannot be used when printing directly from the Canon IJ Printer Utility pop-up menu, and then ensure that the [Media Type] selected matches the paper loaded. The procedure below to specify to select , then press [OK]. 4. Chapter 11 Troubleshooting 173 Additionally, the print surface may become smudged with some...
User's Guide
Page 176
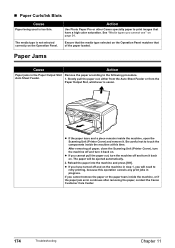
Action Use Photo Paper Pro or other Canon specialty paper to touch the components inside the machine at this operation cancels any print jobs in progress. Be careful not to print images that ...]. z If the paper tears and a piece remains inside the machine, or if the paper jam error continues after removing the paper, contact the Canon Customer Care Center. 174 Troubleshooting Chapter 11 After removing all paper, close the Scanning Unit (Printer Cover), turn the machine off and turn it back on the Operation...
Action Use Photo Paper Pro or other Canon specialty paper to touch the components inside the machine at this operation cancels any print jobs in progress. Be careful not to print images that ...]. z If the paper tears and a piece remains inside the machine, or if the paper jam error continues after removing the paper, contact the Canon Customer Care Center. 174 Troubleshooting Chapter 11 After removing all paper, close the Scanning Unit (Printer Cover), turn the machine off and turn it back on the Operation...


