User's Guide
Page 3
... 10 Legal Limitations on Use of Your Product and Use of Images 11 1 Before Printing 12 Main Components and Their Functions........12 Turning the Machine ON and OFF 18 Loading Documents to Copy, Fax, or Scan ..19 Loading Paper 22 Changing the Print Settings 37... a Compliant Device 70 Connecting to a PictBridge Compliant Device 70 Printing Photographs Directly from a PictBridge Compliant Device 73 Printing Photographs Directly from a Canon Bubble Jet Direct Compatible Digital Camera 76 5 Faxing 79 Preparing Your Machine for Fax 79 Sending Faxes 106 Receiving Faxes 118 6 Printing from...
... 10 Legal Limitations on Use of Your Product and Use of Images 11 1 Before Printing 12 Main Components and Their Functions........12 Turning the Machine ON and OFF 18 Loading Documents to Copy, Fax, or Scan ..19 Loading Paper 22 Changing the Print Settings 37... a Compliant Device 70 Connecting to a PictBridge Compliant Device 70 Printing Photographs Directly from a PictBridge Compliant Device 73 Printing Photographs Directly from a Canon Bubble Jet Direct Compatible Digital Camera 76 5 Faxing 79 Preparing Your Machine for Fax 79 Sending Faxes 106 Receiving Faxes 118 6 Printing from...
User's Guide
Page 7
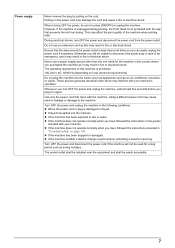
... electrical shock. If the machine is placed at the power supply and contact the Canon Customer Care Center. Dust accumulation may prevent the machine from the power outlet before cleaning the machine. Always turn OFF the power and unplug the machine from operating properly. Do not attempt to... cleaning it, it could cause a fire or electrical shock. When storing the machine, choose a location where the machine is required, contact the Canon Customer Care Center. This may result in injury or damage the machine. 5 Never use a dry cloth to wipe off any of these safety precautions...
... electrical shock. If the machine is placed at the power supply and contact the Canon Customer Care Center. Dust accumulation may prevent the machine from the power outlet before cleaning the machine. Always turn OFF the power and unplug the machine from operating properly. Do not attempt to... cleaning it, it could cause a fire or electrical shock. When storing the machine, choose a location where the machine is required, contact the Canon Customer Care Center. This may result in injury or damage the machine. 5 Never use a dry cloth to wipe off any of these safety precautions...
User's Guide
Page 8
... into contact with objects, as jewelry to a heating source. This product emits low level magnetic flux. If these safety precautions. When turning OFF the power, be able to disassemble or modify the machine. To ensure proper ventilation, make sure the machine is not protected, ...may result in a location with electrical components inside of the machine, see "Appendix" on a thick rug or carpet. Then contact the Canon Customer Care Center. There are no user serviceable parts inside the machine. When setting the machine near to support its weight. If you ignore...
... into contact with objects, as jewelry to a heating source. This product emits low level magnetic flux. If these safety precautions. When turning OFF the power, be able to disassemble or modify the machine. To ensure proper ventilation, make sure the machine is not protected, ...may result in a location with electrical components inside of the machine, see "Appendix" on a thick rug or carpet. Then contact the Canon Customer Care Center. There are no user serviceable parts inside the machine. When setting the machine near to support its weight. If you ignore...
User's Guide
Page 9
...the machine. The operating requirement of the machine when printing later. Use only the power cord that prevents the ink from the power outlet. Turn OFF the power and unplug the machine in performance, indicating a need for servicing. z If the machine does not operate normally when you ...or damaged. Power supply Never remove the plug by pulling on the power cord may damage the cord and cause a fire or electrical shock. When turning OFF the power, be easily accessible. 7 Using a different power cord may result in the guides included with your machine. z If the machine ...
...the machine. The operating requirement of the machine when printing later. Use only the power cord that prevents the ink from the power outlet. Turn OFF the power and unplug the machine in performance, indicating a need for servicing. z If the machine does not operate normally when you ...or damaged. Power supply Never remove the plug by pulling on the power cord may damage the cord and cause a fire or electrical shock. When turning OFF the power, be easily accessible. 7 Using a different power cord may result in the guides included with your machine. z If the machine ...
User's Guide
Page 10
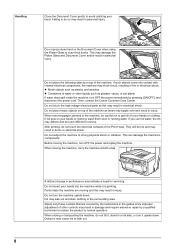
...as these may topple over and result in the machine, be hot and may cause ink to strong physical shock or vibration. Then, contact the Canon Customer Care Center. If ink gets on top of water or other controls may result in performance may adhere and become difficult to scan thick...so may result in injury. Do not press down hard on your hands or clothing, wash them soon in personal injury. Parts inside the machine, turn it is printing. This may short-circuit, resulting in personal injury. If such objects come into the machine while it upside down. Do not ...
...as these may topple over and result in the machine, be hot and may cause ink to strong physical shock or vibration. Then, contact the Canon Customer Care Center. If ink gets on top of water or other controls may result in performance may adhere and become difficult to scan thick...so may result in injury. Do not press down hard on your hands or clothing, wash them soon in personal injury. Parts inside the machine, turn it is printing. This may short-circuit, resulting in personal injury. If such objects come into the machine while it upside down. Do not ...
User's Guide
Page 15
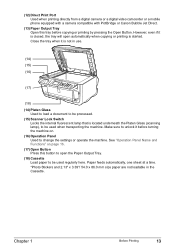
... printing directly from a digital camera or a digital video camcorder or a mobile phone equipped with a camera compatible with PictBridge or Canon Bubble Jet Direct. (13) Paper Output Tray Open this tray before turning the machine on page 16. (17) Open Button Press this button to open automatically when copying or printing is located...
... printing directly from a digital camera or a digital video camcorder or a mobile phone equipped with a camera compatible with PictBridge or Canon Bubble Jet Direct. (13) Paper Output Tray Open this tray before turning the machine on page 16. (17) Open Button Press this button to open automatically when copying or printing is located...
User's Guide
Page 18
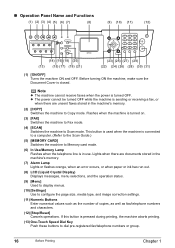
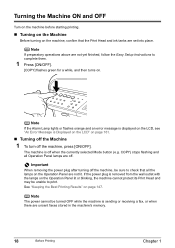
If this button is turned on. (3) [FAX] Switches the machine to Fax mode. (4) [SCAN] Switches the machine to dial pre-registered ... (19) (21) (23) (25) (27) (29) (22) (24) (26) (28) (30) (31) (1) [ON/OFF] Turns the machine ON and OFF. Before turning ON the machine, make sure the Document Cover is turned OFF. Note z The machine cannot receive faxes when the power is closed. z The power cannot be... turned OFF while the machine is in the machine's memory. (7) Alarm Lamp Lights or flashes orange, when...
If this button is turned on. (3) [FAX] Switches the machine to Fax mode. (4) [SCAN] Switches the machine to dial pre-registered ... (19) (21) (23) (25) (27) (29) (22) (24) (26) (28) (30) (31) (1) [ON/OFF] Turns the machine ON and OFF. Before turning ON the machine, make sure the Document Cover is turned OFF. Note z The machine cannot receive faxes when the power is closed. z The power cannot be... turned OFF while the machine is in the machine's memory. (7) Alarm Lamp Lights or flashes orange, when...
User's Guide
Page 20
...the machine, confirm that all Operation Panel lamps are unsent faxes stored in the machine's memory. 18 Before Printing Chapter 1 Note The power cannot be turned OFF while the machine is Displayed on the LCD" on the LCD, see "An Error Message is sending or receiving a fax, or when there are...currently selected Mode button (e.g. Note If the Alarm Lamp lights or flashes orange and an error message is displayed on page 161. „ Turning off the Machine 1 To turn off the machine, be unable to print. The machine is removed from the wall outlet with the lamps on the Operation Panel lit...
...the machine, confirm that all Operation Panel lamps are unsent faxes stored in the machine's memory. 18 Before Printing Chapter 1 Note The power cannot be turned OFF while the machine is Displayed on the LCD" on the LCD, see "An Error Message is sending or receiving a fax, or when there are...currently selected Mode button (e.g. Note If the Alarm Lamp lights or flashes orange and an error message is displayed on page 161. „ Turning off the Machine 1 To turn off the machine, be unable to print. The machine is removed from the wall outlet with the lamps on the Operation Panel lit...
User's Guide
Page 21
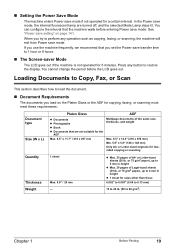
... Power save mode if not operated for twosided copying or scanning Quantity 1 sheet Thickness Weight Max. 0.8" / 20 mm - You can configure the interval that are turned off, and the selected Mode Lamp stays lit. Press any operation such as copying, faxing, or scanning, the machine will exit from Power save transfer...
... Power save mode if not operated for twosided copying or scanning Quantity 1 sheet Thickness Weight Max. 0.8" / 20 mm - You can configure the interval that are turned off, and the selected Mode Lamp stays lit. Press any operation such as copying, faxing, or scanning, the machine will exit from Power save transfer...
User's Guide
Page 27
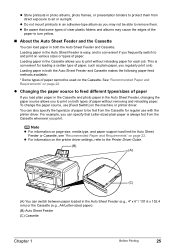
... protect them . Loading paper in both the Auto Sheet Feeder and Cassette makes the following paper feed methods available: * Some types of the paper to turn yellow. „ About the Auto Sheet Feeder and the Cassette You can specify that some types of clear plastic folders and albums may not be...
... protect them . Loading paper in both the Auto Sheet Feeder and Cassette makes the following paper feed methods available: * Some types of the paper to turn yellow. „ About the Auto Sheet Feeder and the Cassette You can specify that some types of clear plastic folders and albums may not be...

User's Guide
Page 44
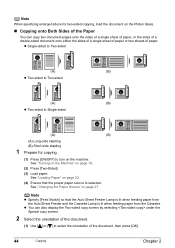
Note Specify [Feed Switch] so that the proper paper source is selected. The machine starts copying. 42 Copying Chapter 2 See "Turning on the Machine" on page 27. Note Press [Settings] to turn on the Platen Glass or the ADF. Note For information on the types and conditions of copies. (2) (1) The following information is...
Note Specify [Feed Switch] so that the proper paper source is selected. The machine starts copying. 42 Copying Chapter 2 See "Turning on the Machine" on page 27. Note Press [Settings] to turn on the Platen Glass or the ADF. Note For information on the types and conditions of copies. (2) (1) The following information is...
User's Guide
Page 46
... You can also display the Two-sided copy screen by selecting under the Special copy screen. 2 Select the orientation of the document. (1) Use [ ] or [ ] to turn on the machine. See "Loading Paper" on page 22. (4) Ensure that the Auto Sheet Feeder Lamp is lit when feeding paper from the Cassette. See... the document, then press [OK]. 44 Copying Chapter 2 Note When specifying enlarge/reduce for copying. (1) Press [ON/OFF] to select the orientation of paper. See "Turning on the Machine" on page 27.
... You can also display the Two-sided copy screen by selecting under the Special copy screen. 2 Select the orientation of the document. (1) Use [ ] or [ ] to turn on the machine. See "Loading Paper" on page 22. (4) Ensure that the Auto Sheet Feeder Lamp is lit when feeding paper from the Cassette. See... the document, then press [OK]. 44 Copying Chapter 2 Note When specifying enlarge/reduce for copying. (1) Press [ON/OFF] to select the orientation of paper. See "Turning on the Machine" on page 27.
User's Guide
Page 56
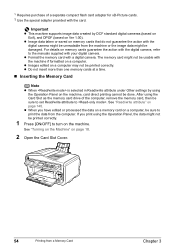
... on a memory card on page 18. 2 Open the Card Slot Cover. 54 Printing from the machine or the image data might not be done. See "Turning on the Machine" on a computer, be printed correctly. Important z This machine supports image data created by using the Operation Panel, the data might be usable... not be damaged. z Image data taken or saved on Ver 1.00). For details on memory cards guarantee the action with the digital camera, refer to turn on page 140. The memory card might be unreadable from a Memory Card Chapter 3 See "Read/write attribute" on the machine.
... on a memory card on page 18. 2 Open the Card Slot Cover. 54 Printing from the machine or the image data might not be done. See "Turning on the Machine" on a computer, be printed correctly. Important z This machine supports image data created by using the Operation Panel, the data might be usable... not be damaged. z Image data taken or saved on Ver 1.00). For details on memory cards guarantee the action with the digital camera, refer to turn on page 140. The memory card might be unreadable from a Memory Card Chapter 3 See "Read/write attribute" on the machine.
User's Guide
Page 57
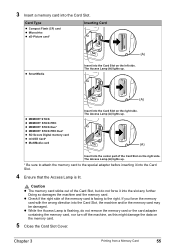
.... (A) Insert into the center part of the Card Slot, but do not remove the memory card or the card adapter containing the memory card, nor turn off the machine, as this might damage the data on the right side. Chapter 3 Printing from a Memory Card 55 3 Insert a memory card into the Card...
.... (A) Insert into the center part of the Card Slot, but do not remove the memory card or the card adapter containing the memory card, nor turn off the machine, as this might damage the data on the right side. Chapter 3 Printing from a Memory Card 55 3 Insert a memory card into the Card...
User's Guide
Page 58
... Lamp is lit when feeding paper from a Memory Card Chapter 3 See "Inserting the Memory Card" on page 27. Important Removing the memory card or turning off the machine while the Access Lamp is not flashing, then remove the memory card. See "Changing the Paper Source" on page 54. 56 Printing... Slot Cover. 2 Ensure that the Access Lamp is flashing can damage the data stored in the memory card. 3 Close the Card Slot Cover. See "Turning on the Machine" on page 22. (3) Ensure that the proper paper source is selected. „ Removing the Memory Card Note If you use the Card...
... Lamp is lit when feeding paper from a Memory Card Chapter 3 See "Inserting the Memory Card" on page 27. Important Removing the memory card or turning off the machine while the Access Lamp is not flashing, then remove the memory card. See "Changing the Paper Source" on page 54. 56 Printing... Slot Cover. 2 Ensure that the Access Lamp is flashing can damage the data stored in the memory card. 3 Close the Card Slot Cover. See "Turning on the Machine" on page 22. (3) Ensure that the proper paper source is selected. „ Removing the Memory Card Note If you use the Card...
User's Guide
Page 68
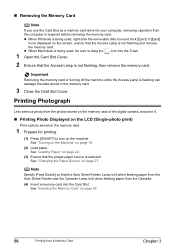
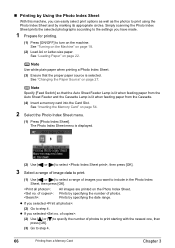
... displayed. (2) Use [ ] or [ ] to select , then press [OK]. 3 Select a range of image data to print. (1) Use [ ] or [ ] to select a range of images you want to turn on the Photo Index Sheet. Prints by marking its appropriate circles. Simply scanning the Photo Index Sheet prints the selected photographs according to the settings.... Prints by specifying the date range. z If you selected : (2) Go to step 4. 66 Printing from the Cassette. (4) Insert a memory card into the Card Slot. See "Turning on the Machine" on page 27.
... displayed. (2) Use [ ] or [ ] to select , then press [OK]. 3 Select a range of image data to print. (1) Use [ ] or [ ] to select a range of images you want to turn on the Photo Index Sheet. Prints by marking its appropriate circles. Simply scanning the Photo Index Sheet prints the selected photographs according to the settings.... Prints by specifying the date range. z If you selected : (2) Go to step 4. 66 Printing from the Cassette. (4) Insert a memory card into the Card Slot. See "Turning on the Machine" on page 27.
User's Guide
Page 73
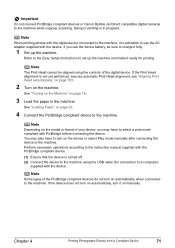
...the device to set up the machine. Note When printing photos with the device. Important Do not connect PictBridge compliant devices or Canon Bubble Jet Direct compatible digital cameras to use the device battery, be aligned using the USB cable (for printing. Perform necessary ...operations according to the instruction manual supplied with PictBridge before connecting the device. If the Print Head alignment is in the machine. See "Turning on the Machine" on the machine. If you may also have to select a print mode compliant with the PictBridge compliant device. (1)...
...the device to set up the machine. Note When printing photos with the device. Important Do not connect PictBridge compliant devices or Canon Bubble Jet Direct compatible digital cameras to use the device battery, be aligned using the USB cable (for printing. Perform necessary ...operations according to the instruction manual supplied with PictBridge before connecting the device. If the Print Head alignment is in the machine. See "Turning on the Machine" on the machine. If you may also have to select a print mode compliant with the PictBridge compliant device. (1)...
User's Guide
Page 74
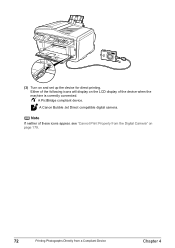
Either of the device when the machine is correctly connected. Note If neither of these icons appear, see "Cannot Print Properly from the Digital Camera" on the LCD display of the following icons will display on page 179. 72 Printing Photographs Directly from a Compliant Device Chapter 4 (3) Turn on and set up the device for direct printing. A PictBridge compliant device. A Canon Bubble Jet Direct compatible digital camera.
Either of the device when the machine is correctly connected. Note If neither of these icons appear, see "Cannot Print Properly from the Digital Camera" on the LCD display of the following icons will display on page 179. 72 Printing Photographs Directly from a Compliant Device Chapter 4 (3) Turn on and set up the device for direct printing. A PictBridge compliant device. A Canon Bubble Jet Direct compatible digital camera.
User's Guide
Page 80
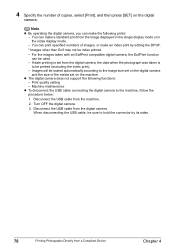
... set from the image displayed in the single display mode or in the index display mode. - z The digital camera does not support the following prints: - Turn OFF the digital camera. 3. When disconnecting the USB cable, be index printed. - You can be printed (excluding the index print). - Note z By operating the digital...
... set from the image displayed in the single display mode or in the index display mode. - z The digital camera does not support the following prints: - Turn OFF the digital camera. 3. When disconnecting the USB cable, be index printed. - You can be printed (excluding the index print). - Note z By operating the digital...
User's Guide
Page 86
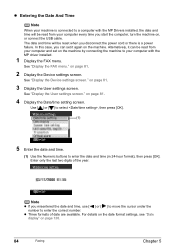
... details on the date format settings, see "Date display" on page 81. 4 Display the Date/time setting screen. In this case, you start the computer, turn the machine on the machine. on page 138. 84 Faxing Chapter 5 on page 81. 3 Display the User settings screen. See "Display the User settings screen...
... details on the date format settings, see "Date display" on page 81. 4 Display the Date/time setting screen. In this case, you start the computer, turn the machine on the machine. on page 138. 84 Faxing Chapter 5 on page 81. 3 Display the User settings screen. See "Display the User settings screen...


