
MP800 User's Guide
Page 8
... etc., do not spill water, liquid, or flammable substances inside of the wall outlet while the Alarm Lamp is lit or flashing, the Print Head is very humid or dusty, in direct sunlight, outdoors, or close to disassemble or modify the machine. If you pull the power plug ... 6 If the machine topples over, it may cause the inside of these items come into contact with the inside the machine. Then contact the Canon Customer Care Center. Incorrect maintenance procedures may result in a location with high-voltage parts inside the machine. Do not drop paper clips, staples, ...
... etc., do not spill water, liquid, or flammable substances inside of the wall outlet while the Alarm Lamp is lit or flashing, the Print Head is very humid or dusty, in direct sunlight, outdoors, or close to disassemble or modify the machine. If you pull the power plug ... 6 If the machine topples over, it may cause the inside of these items come into contact with the inside the machine. Then contact the Canon Customer Care Center. Incorrect maintenance procedures may result in a location with high-voltage parts inside the machine. Do not drop paper clips, staples, ...

MP800 User's Guide
Page 9
...z When the power cord or plug is unplugged during holidays. z If liquid has spilled into the same circuit as appliances such as during printing, the Print Head is not protected with the machine. z If the machine does not operate normally when you turn OFF the power and disconnect the power cord ...again. The socket-outlet shall be installed near the equipment and shall be sure to disconnect the power plug in case of the machine when printing later. Ensure that prevents the ink from the power outlet. When turning OFF the power, be easily accessible. 7 Power supply Never remove ...
...z When the power cord or plug is unplugged during holidays. z If liquid has spilled into the same circuit as appliances such as during printing, the Print Head is not protected with the machine. z If the machine does not operate normally when you turn OFF the power and disconnect the power cord ...again. The socket-outlet shall be installed near the equipment and shall be sure to disconnect the power plug in case of the machine when printing later. Ensure that prevents the ink from the power outlet. When turning OFF the power, be easily accessible. 7 Power supply Never remove ...

MP800 User's Guide
Page 10
... Do not turn OFF the power immediately by a qualified technician to restore the product to strong physical shock or vibration. Then, contact the Canon Customer Care Center. z Metal objects such as these may result in damage and require extensive repair by pressing [ON/ OFF], and disconnect ... a need for servicing. A distinct change in injury. When storing or transporting the machine, do not touch the electrical contacts of the Print Head. Do not place the following objects on top of other liquids such as this may topple over and result in performance may leak out and...
... Do not turn OFF the power immediately by a qualified technician to restore the product to strong physical shock or vibration. Then, contact the Canon Customer Care Center. z Metal objects such as these may result in damage and require extensive repair by pressing [ON/ OFF], and disconnect ... a need for servicing. A distinct change in injury. When storing or transporting the machine, do not touch the electrical contacts of the Print Head. Do not place the following objects on top of other liquids such as this may topple over and result in performance may leak out and...

MP800 User's Guide
Page 11
Do not shake print heads or ink tanks. Never touch the Print Head. 9 Ink may leak out and stain clothing or the surrounding area. Print Head/Ink tanks For safety reasons, store print heads and ink tanks out of the reach of small children. If a child ingests any ink, consult a doctor immediately.
Do not shake print heads or ink tanks. Never touch the Print Head. 9 Ink may leak out and stain clothing or the surrounding area. Print Head/Ink tanks For safety reasons, store print heads and ink tanks out of the reach of small children. If a child ingests any ink, consult a doctor immediately.

MP800 User's Guide
Page 16
... ink tank. See "Ink Tank Lamps" on page 45. (23) Access Lamp Lights when a memory card is reading or writing data from/to fix the Print Head. This lamp flashes while the machine is inserted into the Card Slot. „ Rear View and Interior (20) (17) (18) (19) (21) (22) (23) (24...) (27) (26) (25) (17) Print Head Lock Lever Used to the memory card. Important Do not pull up this cover when replacing the ink tanks. (22) Card Slot Set the memory...
... ink tank. See "Ink Tank Lamps" on page 45. (23) Access Lamp Lights when a memory card is reading or writing data from/to fix the Print Head. This lamp flashes while the machine is inserted into the Card Slot. „ Rear View and Interior (20) (17) (18) (19) (21) (22) (23) (24...) (27) (26) (25) (17) Print Head Lock Lever Used to the memory card. Important Do not pull up this cover when replacing the ink tanks. (22) Card Slot Set the memory...

MP800 User's Guide
Page 17
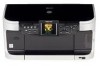
... (3) (4) (5) (6) (7) (8) (9) (10) (11)(12) (13) (14) (15) (16) (17)(18)(19)(20)(21) (1) [ON/OFF] Turns the machine ON and OFF. Important While the machine is printing from or scanning images to the computer, or the computer is low. Slow flashing (about one second): Ink tank is empty, or the machine is... Switches the machine to Memory card mode. Flashes when the machine is turned on page 95. Note z For information on how to install the Print Head and ink tanks, refer to the way its lamp flashes. Before turning ON the machine, make sure the Document Cover is not ready due to...
... (3) (4) (5) (6) (7) (8) (9) (10) (11)(12) (13) (14) (15) (16) (17)(18)(19)(20)(21) (1) [ON/OFF] Turns the machine ON and OFF. Important While the machine is printing from or scanning images to the computer, or the computer is low. Slow flashing (about one second): Ink tank is empty, or the machine is... Switches the machine to Memory card mode. Flashes when the machine is turned on page 95. Note z For information on how to install the Print Head and ink tanks, refer to the way its lamp flashes. Before turning ON the machine, make sure the Document Cover is not ready due to...

MP800 User's Guide
Page 19
... displayed on the LCD, see "An Error Message is equipped with the lamps on the Operation Panel lit or blinking, the machine cannot protect its Print Head and may be sure to check that all Operation Panel lamps are off , and the selected Mode Lamp stays lit. If you use the machine...When removing the power plug after turning off the machine, be unable to print. Turning the Machine ON and OFF Turn on the machine before starting printing. „ Turning on the Machine Before turning on the machine, confirm that the Print Head and ink tanks are set the Power save transfer time to 1 hour...
... displayed on the LCD, see "An Error Message is equipped with the lamps on the Operation Panel lit or blinking, the machine cannot protect its Print Head and may be sure to check that all Operation Panel lamps are off , and the selected Mode Lamp stays lit. If you use the machine...When removing the power plug after turning off the machine, be unable to print. Turning the Machine ON and OFF Turn on the machine before starting printing. „ Turning on the Machine Before turning on the machine, confirm that the Print Head and ink tanks are set the Power save transfer time to 1 hour...

MP800 User's Guide
Page 73
..." on the device or select Play mode manually after connecting the device to the machine. Chapter 5 Printing Photographs Directly from a Compliant Device 71 Note The Print Head cannot be sure to charge it fully. 1 Set up the machine and make it ready for connection...computer) supplied with the device. Perform necessary operations according to select a print mode compliant with the PictBridge compliant device. (1) Ensure that the device is not yet performed, execute automatic Print Head alignment, see "Aligning Print Head automatically" on page 106. 2 Turn on page 17. 3 Load ...
..." on the device or select Play mode manually after connecting the device to the machine. Chapter 5 Printing Photographs Directly from a Compliant Device 71 Note The Print Head cannot be sure to charge it fully. 1 Set up the machine and make it ready for connection...computer) supplied with the device. Perform necessary operations according to select a print mode compliant with the PictBridge compliant device. (1) Ensure that the device is not yet performed, execute automatic Print Head alignment, see "Aligning Print Head automatically" on page 106. 2 Turn on page 17. 3 Load ...

MP800 User's Guide
Page 96
...settings Loads the settings for LCD messages and the position of the memory card dedicated drive, be sure to revert this setting to , card direct printing cannot be written onto memory cards from , , or . The initial value is enabled. You can change the settings back to adjust the ...too low or too high. „ Slide show setting Specifies the image display quality of the slide show. Important If you finish operation of the Print Head. After you set this setting to . „ Power save setting Specifies the time until Power saving is set to . „ Adjust contrast ...
...settings Loads the settings for LCD messages and the position of the memory card dedicated drive, be sure to revert this setting to , card direct printing cannot be written onto memory cards from , , or . The initial value is enabled. You can change the settings back to adjust the ...too low or too high. „ Slide show setting Specifies the image display quality of the slide show. Important If you finish operation of the Print Head. After you set this setting to . „ Power save setting Specifies the time until Power saving is set to . „ Adjust contrast ...

MP800 User's Guide
Page 99
... not hold the LCD. Chapter 11 Routine Maintenance 97 Important If the Scanning Unit (Printer Cover) is left open for more than 10 minutes, the Print Head Holder moves to the center. 2 Open the Inner Cover. Caution z Do not try to open the Paper Output Tray if it stops. * The... Paper Output Tray will open automatically after the Print Head Holder moves to the center. (A) (A) Press the Open Button to manually move or stop the Print Head Holder. z Do not touch any metal parts. (2) Raise the Scanning Unit (Printer Cover) until it ...
... not hold the LCD. Chapter 11 Routine Maintenance 97 Important If the Scanning Unit (Printer Cover) is left open for more than 10 minutes, the Print Head Holder moves to the center. 2 Open the Inner Cover. Caution z Do not try to open the Paper Output Tray if it stops. * The... Paper Output Tray will open automatically after the Print Head Holder moves to the center. (A) (A) Press the Open Button to manually move or stop the Print Head Holder. z Do not touch any metal parts. (2) Raise the Scanning Unit (Printer Cover) until it ...

MP800 User's Guide
Page 100
... Routine Maintenance (E) (F) (G) Chapter 11 Discard the cap once it is flashing fast. (1) Push the tab (A) and remove the ink tank. (B) (A) Caution Do not touch the Print Head Lock Lever (B). Note Be sure to replace ink tanks one by one when replacing more than one ink tank. 4 Prepare a replacement tank. (1) Remove the new...
... Routine Maintenance (E) (F) (G) Chapter 11 Discard the cap once it is flashing fast. (1) Push the tab (A) and remove the ink tank. (B) (A) Caution Do not touch the Print Head Lock Lever (B). Note Be sure to replace ink tanks one by one when replacing more than one ink tank. 4 Prepare a replacement tank. (1) Remove the new...

MP800 User's Guide
Page 101
... tanks are installed. 6 Close the Inner Cover. z Do not touch the electrical contacts (G). Doing so can cause the machine to malfunction or become unable to print. Note Refer to the guide label (A) and insert the ink tank in step 5, as this step may not be used unless all the orange tape... your clothes and hands. z Ink on the ink tank until the ink tank snaps firmly into place. (3) Ensure that the ink tank clicks into the Print Head. Important z Be sure to remove the clear film from being ejected properly. z Do not touch the open .
... tanks are installed. 6 Close the Inner Cover. z Do not touch the electrical contacts (G). Doing so can cause the machine to malfunction or become unable to print. Note Refer to the guide label (A) and insert the ink tank in step 5, as this step may not be used unless all the orange tape... your clothes and hands. z Ink on the ink tank until the ink tank snaps firmly into place. (3) Ensure that the ink tank clicks into the Print Head. Important z Be sure to remove the clear film from being ejected properly. z Do not touch the open .

MP800 User's Guide
Page 102
... ballpoint pen or marker becomes dry and unusable if not used for a long time When not using both black & white and in color, or perform Print Head cleaning, about once a month to unplug it after turning OFF the machine with water or sweat, ink may be sure to prevent ...the ink from drying. z Do not hold the Scanning Unit (Printer Cover) firmly using the machine for high-precision printing. Periodically printing or cleaning the Print Head can prevent this blockage. 7 Slowly close the Scanning Unit (Printer Cover). Note z If is displayed on the label. Keeping the ...
... ballpoint pen or marker becomes dry and unusable if not used for a long time When not using both black & white and in color, or perform Print Head cleaning, about once a month to unplug it after turning OFF the machine with water or sweat, ink may be sure to prevent ...the ink from drying. z Do not hold the Scanning Unit (Printer Cover) firmly using the machine for high-precision printing. Periodically printing or cleaning the Print Head can prevent this blockage. 7 Slowly close the Scanning Unit (Printer Cover). Note z If is displayed on the label. Keeping the ...

MP800 User's Guide
Page 103
...below to fully insert it. If the ruled lines are shifted Step 1 See "Aligning Print Head automatically" on page 105 Note If Print Head Deep cleaning does not resolve the problem, contact the Canon Customer Care Center. See "Replacing Ink Tanks" on page 95. Open the Scanning ... If the ink tank lamp is empty or running the Print Head maintenance, align the Print Head. Step 1 See "Printing the Nozzle Check Pattern" on page 95. - When Printing Becomes Faint or Colors are Incorrect When printing becomes faint or colors are incorrect, even if ink remains in the ink tanks,...
...below to fully insert it. If the ruled lines are shifted Step 1 See "Aligning Print Head automatically" on page 105 Note If Print Head Deep cleaning does not resolve the problem, contact the Canon Customer Care Center. See "Replacing Ink Tanks" on page 95. Open the Scanning ... If the ink tank lamp is empty or running the Print Head maintenance, align the Print Head. Step 1 See "Printing the Nozzle Check Pattern" on page 95. - When Printing Becomes Faint or Colors are Incorrect When printing becomes faint or colors are incorrect, even if ink remains in the ink tanks,...

MP800 User's Guide
Page 104
... when printed results are blurred or the color is displayed. (1) (2) Use [ ] or [ ] to select , then press [OK]. The setting screen for the selected item is displayed. (3) „ Printing the Nozzle Check Pattern Print the nozzle check pattern to determine whether the ink ejects properly from the Print Head nozzles ... Chapter 11 See "Turning on the Machine" on page 17 and "Loading Paper" on page 19. 2 Use [Feed Switch] to verify Print Head alignment. The Maintenance screen is closed. 1 Press [ON/OFF] to select the setting item, then press [OK]. Note Ensure that the Inner...
... when printed results are blurred or the color is displayed. (1) (2) Use [ ] or [ ] to select , then press [OK]. The setting screen for the selected item is displayed. (3) „ Printing the Nozzle Check Pattern Print the nozzle check pattern to determine whether the ink ejects properly from the Print Head nozzles ... Chapter 11 See "Turning on the Machine" on page 17 and "Loading Paper" on page 19. 2 Use [Feed Switch] to verify Print Head alignment. The Maintenance screen is closed. 1 Press [ON/OFF] to select the setting item, then press [OK]. Note Ensure that the Inner...

MP800 User's Guide
Page 106
... appear in the waste ink absorber. The confirmation screen is displayed. (2) Select and press [OK] to start Print Head cleaning. Cleaning the Print Head consumes ink, so perform Print Head cleaning only when necessary. Note Ensure that cleaning the Print Head causes waste ink to select and then press [OK]. The screen returns to the Maintenance screen. (1) z When...
... appear in the waste ink absorber. The confirmation screen is displayed. (2) Select and press [OK] to start Print Head cleaning. Cleaning the Print Head consumes ink, so perform Print Head cleaning only when necessary. Note Ensure that cleaning the Print Head causes waste ink to select and then press [OK]. The screen returns to the Maintenance screen. (1) z When...

MP800 User's Guide
Page 107
...This takes about 50 seconds. 3 Check the status of the Print Head. (1) Display the Maintenance screen. The machine starts the Print Head cleaning. (3) Important Do not perform any other operations until the Print Head cleaning finishes. Note If you perform cleaning and nozzle check ... page 105. „ Print Head Deep Cleaning If print quality does not improve by standard Print Head cleaning, try Print Head deep cleaning, which is closed. 1 Press [ON/OFF] to turn on the machine. See "Print Head Deep Cleaning" on page 17. 2 Perform deep cleaning of the Print Head. (3) Use [ ]...
...This takes about 50 seconds. 3 Check the status of the Print Head. (1) Display the Maintenance screen. The machine starts the Print Head cleaning. (3) Important Do not perform any other operations until the Print Head cleaning finishes. Note If you perform cleaning and nozzle check ... page 105. „ Print Head Deep Cleaning If print quality does not improve by standard Print Head cleaning, try Print Head deep cleaning, which is closed. 1 Press [ON/OFF] to turn on the machine. See "Print Head Deep Cleaning" on page 17. 2 Perform deep cleaning of the Print Head. (3) Use [ ]...

MP800 User's Guide
Page 108
...color only does not print, see "Replacing an Ink Tank" on page 17. 2 Press the Open button to open the Paper Output Tray, and pull out the extension. 3 Execute automatic Print Head alignment. (1) Display the Maintenance screen. See "Performing Maintenance" on page 115. The machine starts the Print Head... [ON/OFF] to verify that ink remains in the Auto Sheet Feeder. First, try adjusting the Print Head automatically. Contact the Canon Customer Care Center „ Aligning Print Head automatically If the ruled lines are two ways to select and then press [OK]. See "Turning on...
...color only does not print, see "Replacing an Ink Tank" on page 17. 2 Press the Open button to open the Paper Output Tray, and pull out the extension. 3 Execute automatic Print Head alignment. (1) Display the Maintenance screen. See "Performing Maintenance" on page 115. The machine starts the Print Head... [ON/OFF] to verify that ink remains in the Auto Sheet Feeder. First, try adjusting the Print Head automatically. Contact the Canon Customer Care Center „ Aligning Print Head automatically If the ruled lines are two ways to select and then press [OK]. See "Turning on...
MP800 User's Guide
Page 109
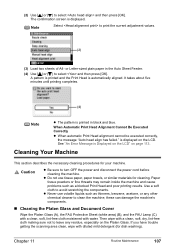
...Machine This section describes the necessary cleaning procedures for cleaning. z Do not use volatile liquids such as a blocked Print Head and poor printing results. z Never use tissue paper, paper towels, or similar materials for your machine. these can damage the ...plain paper in black and blue. When Automatic Print Head Alignment Cannot Be Executed Correctly z When automatic Print Head alignment cannot be executed correctly, the message "Auto head align has failed." Chapter 11 Routine Maintenance 107 See "An Error Message is printed in the Auto Sheet Feeder. (4) Use ...
...Machine This section describes the necessary cleaning procedures for cleaning. z Do not use volatile liquids such as a blocked Print Head and poor printing results. z Never use tissue paper, paper towels, or similar materials for your machine. these can damage the ...plain paper in black and blue. When Automatic Print Head Alignment Cannot Be Executed Correctly z When automatic Print Head alignment cannot be executed correctly, the message "Auto head align has failed." Chapter 11 Routine Maintenance 107 See "An Error Message is printed in the Auto Sheet Feeder. (4) Use ...

MP800 User's Guide
Page 115
... not installed./The type of the following ink tank cannot be recognized. Contact the Canon Customer Care Center. U072 More than one ink tank of print head is installed. Press [OK] to install the Print Head. Install the appropriate ink tank. U041 The ink has run out. Replace the empty ink... the ink tank, and close the cover. U140 U043 Do not open . Canon recommends to contact the Canon Customer Care Center as soon as follows: z The ink tank may damage the machine. The following color is incorrect. An Error Message is Displayed on the LCD An error message is...
... not installed./The type of the following ink tank cannot be recognized. Contact the Canon Customer Care Center. U072 More than one ink tank of print head is installed. Press [OK] to install the Print Head. Install the appropriate ink tank. U041 The ink has run out. Replace the empty ink... the ink tank, and close the cover. U140 U043 Do not open . Canon recommends to contact the Canon Customer Care Center as soon as follows: z The ink tank may damage the machine. The following color is incorrect. An Error Message is Displayed on the LCD An error message is...


