Instruction Manual
Page 5
Recording 41 Recording Video and Photos 41 Recording 41 Onscreen Displays 43 Reviewing a Recording 47 Adjusting Camera and Recording Settings 49 Performing Basic Settings with Direct Touch Control 49 Direct Setting Mode (FUNC Button) 50 Video Recording Configuration: ...
Recording 41 Recording Video and Photos 41 Recording 41 Onscreen Displays 43 Reviewing a Recording 47 Adjusting Camera and Recording Settings 49 Performing Basic Settings with Direct Touch Control 49 Direct Setting Mode (FUNC Button) 50 Video Recording Configuration: ...
Instruction Manual
Page 42
... to assignable button Camera 4 and use it to start recording respectively. While recording a clip, or when slow & fast motion recording is activated. - Canon shall not be liable for any loss or corruption of the last clip recorded without having to switch to stop and start /stop recording. •...and recording will continue on a separate clip. • You can set > [B System Setup] > [Onscreen REC/STBY Button] to [On] to use the review function (A 47) to play back part or all of data. 42 NOTES • If you can be split approximately every 4 GB. Playback with the (XF...
... to assignable button Camera 4 and use it to start recording respectively. While recording a clip, or when slow & fast motion recording is activated. - Canon shall not be liable for any loss or corruption of the last clip recorded without having to switch to stop and start /stop recording. •...and recording will continue on a separate clip. • You can set > [B System Setup] > [Onscreen REC/STBY Button] to [On] to use the review function (A 47) to play back part or all of data. 42 NOTES • If you can be split approximately every 4 GB. Playback with the (XF...

Instruction Manual
Page 47
Full-screen display Peripheral border display Onscreen Displays in Portrait Mode When shooting in advance, you can review all display levels. Select > [¢ Monitoring Setup] > [OSD Orientation: LCD] > [90 degrees] or [270 degrees]. NOTES •...peripheral border is linked with the camera set an assignable button to [Review Recording] (A 105). 2 Select > [B System Setup] > [Review Recording] > Desired option. Reviewing a Recording If you set to CAMERA mode. 1 Set an assignable button to [Review Recording] in portrait mode, you can change the transparency level of ...
Full-screen display Peripheral border display Onscreen Displays in Portrait Mode When shooting in advance, you can review all display levels. Select > [¢ Monitoring Setup] > [OSD Orientation: LCD] > [90 degrees] or [270 degrees]. NOTES •...peripheral border is linked with the camera set an assignable button to [Review Recording] (A 105). 2 Select > [B System Setup] > [Review Recording] > Desired option. Reviewing a Recording If you set to CAMERA mode. 1 Set an assignable button to [Review Recording] in portrait mode, you can change the transparency level of ...
Instruction Manual
Page 48
... Allows you finish recording a clip, press the assignable button. • The last clip that was recorded is played back for the selected duration. [Ð REVIEW] appears on the screen. 48 • There will be no sound from the built-in speaker but the audio will play back the clip on...the onscreen progress bar to move to a different position in the video (A 122). • Press CANCEL or flick down on . • You cannot review clips when continuous recording is activated. You can use the joystick to jump back/forward within the clip. Recording Video and Photos 3 After you to...
... Allows you finish recording a clip, press the assignable button. • The last clip that was recorded is played back for the selected duration. [Ð REVIEW] appears on the screen. 48 • There will be no sound from the built-in speaker but the audio will play back the clip on...the onscreen progress bar to move to a different position in the video (A 122). • Press CANCEL or flick down on . • You cannot review clips when continuous recording is activated. You can use the joystick to jump back/forward within the clip. Recording Video and Photos 3 After you to...

Instruction Manual
Page 107
... [Markers: All], [Markers: LCD], [Markers: HDMI] Turns onscreen markers on/off. Ü - 80 [Color Bars] Turns color bars on/off. Ü - 94 [IP Streaming] [Photo]1 [Review Recording]1 Turns the IP streaming function on /off . Records a photo.
... [Markers: All], [Markers: LCD], [Markers: HDMI] Turns onscreen markers on/off. Ü - 80 [Color Bars] Turns color bars on/off. Ü - 94 [IP Streaming] [Photo]1 [Review Recording]1 Turns the IP streaming function on /off . Records a photo.
Instruction Manual
Page 145
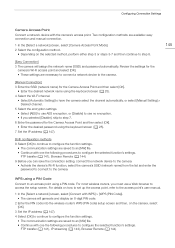
... [NW] file. • Continue with one the following procedures to the camera. WPS using a PIN code. FTP transfer (A 141), IP streaming (A 143), Browser Remote (A 144) Review the settings for the Camera Access Point and then select [OK]. • Enter the desired network name using the keyboard screen (A 25). 4 Select the Wi...
... [NW] file. • Continue with one the following procedures to the camera. WPS using a PIN code. FTP transfer (A 141), IP streaming (A 143), Browser Remote (A 144) Review the settings for the Camera Access Point and then select [OK]. • Enter the desired network name using the keyboard screen (A 25). 4 Select the Wi...
Instruction Manual
Page 148
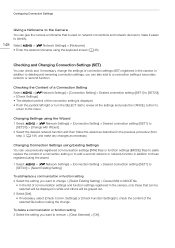
... add a second network or network function in addition to those that is displayed. • Push the joystick left/right or turn the SELECT dial to review all the settings and press the CANCEL button to return to the menu. Settings] or [Check Function Settings] to check the content of the selected...
... add a second network or network function in addition to those that is displayed. • Push the joystick left/right or turn the SELECT dial to review all the settings and press the CANCEL button to return to the menu. Settings] or [Check Function Settings] to check the content of the selected...
Instruction Manual
Page 149
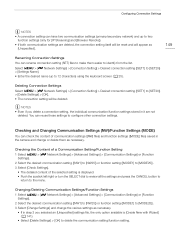
... if you selected an [Unspecified] settings file, the only option available is displayed. • Push the joystick left/right or turn the SELECT dial to review all the settings and press the CANCEL button to return to the menu. Configuring Connection Settings NOTES • A connection setting can have two communication settings...
... if you selected an [Unspecified] settings file, the only option available is displayed. • Push the joystick left/right or turn the SELECT dial to review all the settings and press the CANCEL button to return to the menu. Configuring Connection Settings NOTES • A connection setting can have two communication settings...
Instruction Manual
Page 172
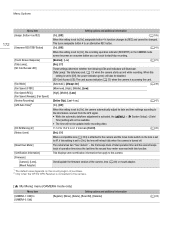
... REC/STBY Button] [Touch Screen Response] [Tally Lamp], [SD Card Access LED] [Fan Mode] [Fan Speed (STBY)] [Fan Speed (REC)], [Fan Speed (Always)], [Fan Speed] [Review Recording] [GPS Auto Time]2 [DC IN Warning (V)] [Retract Lens] [Reset Hour Meter] [Certification Information] [Firmware] [Camera], [Lens], [Mount Adapter] Setting options and additional information [On...
... REC/STBY Button] [Touch Screen Response] [Tally Lamp], [SD Card Access LED] [Fan Mode] [Fan Speed (STBY)] [Fan Speed (REC)], [Fan Speed (Always)], [Fan Speed] [Review Recording] [GPS Auto Time]2 [DC IN Warning (V)] [Retract Lens] [Reset Hour Meter] [Certification Information] [Firmware] [Camera], [Lens], [Mount Adapter] Setting options and additional information [On...
Instruction Manual
Page 210
... Plug-in power (microphone 89 Portrait orientation (vertical video 47 Power indicator 13 Power supply 17 AC adapter (DC IN 19, 201 Canon battery packs 17 Checking power levels/remaining battery charge 19, 45, 178 Power level warnings 172 POWER switch 15 Pre-recording 101 Progress ... times 205 Relay recording 35 Remote controller 104 Remote operation 104, 156 REMOTE terminal 104 Resetting all camera settings 171 Resolution (frame size 53 Reviewing a clip 47 Root certificate (FTPS 147 Router 138 Running mode (time code 83 S Safe area 80 Saving recordings to a computer 134 ...
... Plug-in power (microphone 89 Portrait orientation (vertical video 47 Power indicator 13 Power supply 17 AC adapter (DC IN 19, 201 Canon battery packs 17 Checking power levels/remaining battery charge 19, 45, 178 Power level warnings 172 POWER switch 15 Pre-recording 101 Progress ... times 205 Relay recording 35 Remote controller 104 Remote operation 104, 156 REMOTE terminal 104 Resetting all camera settings 171 Resolution (frame size 53 Reviewing a clip 47 Root certificate (FTPS 147 Router 138 Running mode (time code 83 S Safe area 80 Saving recordings to a computer 134 ...


