
User Manual
Page 6
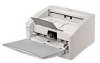
... the DR-4010C Document Scanner 1-5 Names and Functions of Parts 1-7 Setup ...2-1 Setup Procedure 2-1 Installation Requirements 2-2 Installing the Software 2-4 Setup Disc 2-4 Software Installation 2-5 Connecting the Scanner to the Computer 2-11 Using a USB Connection 2-11 Using a SCSI Connection 2-12 Turning the Power ON 2-14 Scanner Recognition 2-14 Basic Operation 3-1 Documents 3-1 Document Feed and Eject Tray 3-3 Preparing the Document Feed Tray 3-3 Preparing the Document Eject...
... the DR-4010C Document Scanner 1-5 Names and Functions of Parts 1-7 Setup ...2-1 Setup Procedure 2-1 Installation Requirements 2-2 Installing the Software 2-4 Setup Disc 2-4 Software Installation 2-5 Connecting the Scanner to the Computer 2-11 Using a USB Connection 2-11 Using a SCSI Connection 2-12 Turning the Power ON 2-14 Scanner Recognition 2-14 Basic Operation 3-1 Documents 3-1 Document Feed and Eject Tray 3-3 Preparing the Document Feed Tray 3-3 Preparing the Document Eject...

User Manual
Page 38
...scanner while it is fed. IMPORTANT • When scanning multiple page documents that are fastened together, such as invoices, set the edge that are scanning with the bypass mode, and you place several documents that is fastened together as this case, lightly press on p. 3-5. 3 Start scanning. 4 The document... is not being used. 3-8 In this may not feed properly. CAUTION ■ Very thin or curled documents may cause personal injury. Roller Unit ■ After you finish scanning, close the document feed tray and the document eject tray extension to...
...scanner while it is fed. IMPORTANT • When scanning multiple page documents that are fastened together, such as invoices, set the edge that are scanning with the bypass mode, and you place several documents that is fastened together as this case, lightly press on p. 3-5. 3 Start scanning. 4 The document... is not being used. 3-8 In this may not feed properly. CAUTION ■ Very thin or curled documents may cause personal injury. Roller Unit ■ After you finish scanning, close the document feed tray and the document eject tray extension to...

User Manual
Page 56
... When paper jams occur during scanning, use the following procedure to force the document eject tray extension closed may distort the rollers and lead to cut your hands on the edges of the paper. 1 Remove any documents that have been left in the center. Attempting to clear them. CAUTION When... removing jammed paper, take care not to feeding errors. 3-26 Doing so may damage the document. 2 Carefully open...
... When paper jams occur during scanning, use the following procedure to force the document eject tray extension closed may distort the rollers and lead to cut your hands on the edges of the paper. 1 Remove any documents that have been left in the center. Attempting to clear them. CAUTION When... removing jammed paper, take care not to feeding errors. 3-26 Doing so may damage the document. 2 Carefully open...

User Manual
Page 65
...a dry, soft cloth to wipe away any paper particles. 4-1 Such solvents can cause lines in the document feed opening and the inside the scanner can damage or discolor the exterior of the scanner, or create a risk of fire or electrical shock. Doing so may get wet, and cause a ... ■ Do not use excessive force when removing or attaching the rollers. Use compressed air to clean the scanner. Cleaning the Feed Path Dust or paper particles in scanned images. Chapter 4 Maintenance 4-1 Regular Maintenance Clean the scanner on a regular basis as the light source, may damage them. ...
...a dry, soft cloth to wipe away any paper particles. 4-1 Such solvents can cause lines in the document feed opening and the inside the scanner can damage or discolor the exterior of the scanner, or create a risk of fire or electrical shock. Doing so may get wet, and cause a ... ■ Do not use excessive force when removing or attaching the rollers. Use compressed air to clean the scanner. Cleaning the Feed Path Dust or paper particles in scanned images. Chapter 4 Maintenance 4-1 Regular Maintenance Clean the scanner on a regular basis as the light source, may damage them. ...

User Manual
Page 66
... keep the interior of the scanner free of the sensor glass and various rollers are dirty, the sensor glass or rollers inside the scanner may distort the rollers and lead to feeding errors. Chapter 4 Maintenance Cleaning the Sensor Glass and the Rollers If scanned images have extraneous marks, or if the scanned documents are shown below. Doing so...
... keep the interior of the scanner free of the sensor glass and various rollers are dirty, the sensor glass or rollers inside the scanner may distort the rollers and lead to feeding errors. Chapter 4 Maintenance Cleaning the Sensor Glass and the Rollers If scanned images have extraneous marks, or if the scanned documents are shown below. Doing so...

User Manual
Page 67
... the lower part of the scanner. If there are scratches on the images and could cause a feeding error. • Do not try to clean the rollers, since any detergent remaining on p. 4-11.) 4-3 Turning these rollers simply by force may cause marks on the sensor glass, contact your local authorized Canon dealer or service representative. 4 Dampen...
... the lower part of the scanner. If there are scratches on the images and could cause a feeding error. • Do not try to clean the rollers, since any detergent remaining on p. 4-11.) 4-3 Turning these rollers simply by force may cause marks on the sensor glass, contact your local authorized Canon dealer or service representative. 4 Dampen...
User Manual
Page 69
... respective section. IMPORTANT • If misfeeds happen often, check the rollers for wear, and replace them . When this happens, purchase an exchange roller kit and replace the roller unit and the retard roller. When the rollers start to reset the counter after replacing the rollers. (See "Resetting the Counter," on the computer. IMPORTANT Feed rollers are consumable parts.
... respective section. IMPORTANT • If misfeeds happen often, check the rollers for wear, and replace them . When this happens, purchase an exchange roller kit and replace the roller unit and the retard roller. When the rollers start to reset the counter after replacing the rollers. (See "Resetting the Counter," on the computer. IMPORTANT Feed rollers are consumable parts.

User Manual
Page 70
Click the [Start] button, Æ [Settings] on the [Start] menu Æ click [Control Panel]. (For Windows XP, click the [Start] button Æ click [Control Panel].) 2. Control Panel (Category View) Printers and Other Hardware Control Panel (Classic View) 4-6 Chapter 4 Maintenance Resetting the Counter After replacing the feed rollers, open the [Counter setup] dialog box and reset the counter. 1 Open the [Event settings] dialog box. 1. For Windows XP, switch the Control Panel to Classic View, or select [Printers and Other Hardware] in the working field.
Click the [Start] button, Æ [Settings] on the [Start] menu Æ click [Control Panel]. (For Windows XP, click the [Start] button Æ click [Control Panel].) 2. Control Panel (Category View) Printers and Other Hardware Control Panel (Classic View) 4-6 Chapter 4 Maintenance Resetting the Counter After replacing the feed rollers, open the [Counter setup] dialog box and reset the counter. 1 Open the [Event settings] dialog box. 1. For Windows XP, switch the Control Panel to Classic View, or select [Printers and Other Hardware] in the working field.

User Manual
Page 73
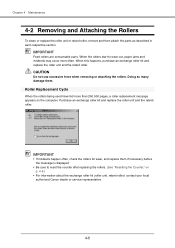
... the upper unit, do not grasp the roller unit in the center. Using too much force may distort the rollers and lead to feeding errors. 2 Push the roller lock lever down. 3 While supporting the roller unit with your hand, slide the roller lock lever to damage or personal injury. Doing... so may lead to the right. 4-9 Removing the Roller Unit 1 Carefully open the upper...
... the upper unit, do not grasp the roller unit in the center. Using too much force may distort the rollers and lead to feeding errors. 2 Push the roller lock lever down. 3 While supporting the roller unit with your hand, slide the roller lock lever to damage or personal injury. Doing... so may lead to the right. 4-9 Removing the Roller Unit 1 Carefully open the upper...

User Manual
Page 75
...until the unit clicks into place. Doing so may damage it stops. Doing so may distort the rollers and lead to a feeding error. 4-11 IMPORTANT When opening the upper unit, do not grasp the roller unit in personal injury. Chapter 4 Maintenance 4 Carefully lower the upper unit. CAUTION Do not ... When closing the upper unit, be careful not to close. Removing and Attaching the Retard Roller To remove or attach the retard roller, proceed as this may damage the scanner. Verify that the upper unit is properly closed. Doing so may result in the center. Finally, push the upper ...
...until the unit clicks into place. Doing so may damage it stops. Doing so may distort the rollers and lead to a feeding error. 4-11 IMPORTANT When opening the upper unit, do not grasp the roller unit in personal injury. Chapter 4 Maintenance 4 Carefully lower the upper unit. CAUTION Do not ... When closing the upper unit, be careful not to close. Removing and Attaching the Retard Roller To remove or attach the retard roller, proceed as this may damage the scanner. Verify that the upper unit is properly closed. Doing so may result in the center. Finally, push the upper ...

User Manual
Page 91
...about replacing the rollers. • Contact your local authorized Canon dealer or service representative for detailed information about the replacement parts. Replacement Parts Exchange roller kit (product code: 1921B001) Kit to replace the roller unit (pickup roller, feed roller) and retard roller. • Refer... can be available, depending on the performance of 20 lb bond (80 g/m2)) Interface Hi-Speed USB 2.0 / SCSI-III Other Functions Double feed detection, Long Document mode Dimensions (with trays closed) 12.5" × 10.9" × 7.3" (W × D × H) 318 mm × 278 ...
...about replacing the rollers. • Contact your local authorized Canon dealer or service representative for detailed information about the replacement parts. Replacement Parts Exchange roller kit (product code: 1921B001) Kit to replace the roller unit (pickup roller, feed roller) and retard roller. • Refer... can be available, depending on the performance of 20 lb bond (80 g/m2)) Interface Hi-Speed USB 2.0 / SCSI-III Other Functions Double feed detection, Long Document mode Dimensions (with trays closed) 12.5" × 10.9" × 7.3" (W × D × H) 318 mm × 278 ...

User Manual
Page 93
... Mode 3-7 C CapturePerfect 3.0 3-16 Operation Procedure 3-17 Cleaning Feed Path 4-1 Rollers 4-2 Scanner 4-1 Sensor Glass 4-2 Clearing a Paper Jam 3-26 Connection SCSI Connection 2-12 USB Connection 2-11 Connection to the Computer 2-11 D daisy-chain configuration 2-12 DIP switches 2-12 Disposal 1-4 document eject configurations 3-1 document feed tray 3-7 document guides 3-6 Documents 3-1 Double Feed Detection Function 3-30 DR-4010C monitor 3-11 E Eject Tray 3-3 event 3-11 Event settings...
... Mode 3-7 C CapturePerfect 3.0 3-16 Operation Procedure 3-17 Cleaning Feed Path 4-1 Rollers 4-2 Scanner 4-1 Sensor Glass 4-2 Clearing a Paper Jam 3-26 Connection SCSI Connection 2-12 USB Connection 2-11 Connection to the Computer 2-11 D daisy-chain configuration 2-12 DIP switches 2-12 Disposal 1-4 document eject configurations 3-1 document feed tray 3-7 document guides 3-6 Documents 3-1 Double Feed Detection Function 3-30 DR-4010C monitor 3-11 E Eject Tray 3-3 event 3-11 Event settings...

Reference Guide
Page 7
... Location 4 Power 5 Moving the Scanner 6 Handling 6 Disposal 8 1-2 Features of the DR-4010C Document Scanner9 1-3 Names and Functions of Parts 12 1- 4 Installation Requirements 14 Chapter 2 Basic Operation 16 2-1 Documents 16 2-2 Document Feed and Eject Tray 19 Preparing the Document Feed Tray 19 Preparing the Document Eject Tray 20 2-3 Placing Documents 22 Feeding in the Page Separation Mode 22 Feeding in the Bypass Mode 25...
... Location 4 Power 5 Moving the Scanner 6 Handling 6 Disposal 8 1-2 Features of the DR-4010C Document Scanner9 1-3 Names and Functions of Parts 12 1- 4 Installation Requirements 14 Chapter 2 Basic Operation 16 2-1 Documents 16 2-2 Document Feed and Eject Tray 19 Preparing the Document Feed Tray 19 Preparing the Document Eject Tray 20 2-3 Placing Documents 22 Feeding in the Page Separation Mode 22 Feeding in the Bypass Mode 25...

Reference Guide
Page 21
... have a tendency to make the rollers and scanning glass dirty, which can lead to smudges in the application software before scanning it. • Scanning documents that is dry can cause problems with the scanner vary depending on the document feed method (page separation mode or bypass... mode.) (See "2-3 Placing Documents," on a document is dry before scanning the document. Always make sure that can be grouped...
... have a tendency to make the rollers and scanning glass dirty, which can lead to smudges in the application software before scanning it. • Scanning documents that is dry can cause problems with the scanner vary depending on the document feed method (page separation mode or bypass... mode.) (See "2-3 Placing Documents," on a document is dry before scanning the document. Always make sure that can be grouped...

Reference Guide
Page 30
Take care not to the scanner while it is not being used. 26 Basic Operation In this may not feed properly. CAUTION • Very thin or curled documents may cause personal injury. Roller Unit • After you finish scanning, close the document feed tray and the document eject tray extension to prevent damage to get your hand caught...
Take care not to the scanner while it is not being used. 26 Basic Operation In this may not feed properly. CAUTION • Very thin or curled documents may cause personal injury. Roller Unit • After you finish scanning, close the document feed tray and the document eject tray extension to prevent damage to get your hand caught...

Reference Guide
Page 35
2-5 Clearing a Paper Jam When paper jams occur during scanning, use the following procedure to feeding errors. IMPORTANT When opening the upper unit, do not grasp the roller unit in the eject tray, and close the eject tray guide. Basic Operation 31 CAUTION When ...damage the document. 2 Carefully open the upper unit until the jammed document can be removed. Chapter 2 IMPORTANT If a document stops in the eject tray, remove the document before closing the document eject tray extension. Attempting to force the document eject tray extension closed may distort the rollers and lead ...
2-5 Clearing a Paper Jam When paper jams occur during scanning, use the following procedure to feeding errors. IMPORTANT When opening the upper unit, do not grasp the roller unit in the eject tray, and close the eject tray guide. Basic Operation 31 CAUTION When ...damage the document. 2 Carefully open the upper unit until the jammed document can be removed. Chapter 2 IMPORTANT If a document stops in the eject tray, remove the document before closing the document eject tray extension. Attempting to force the document eject tray extension closed may distort the rollers and lead ...

Reference Guide
Page 39
... paper particles in the document feed opening or inside of the scanner. Clean them periodically. IMPORTANT Feed rollers are dirty, the sensor glass or rollers inside the scanner may occur more often. When the rollers start to feeding errors. Cleaning the Sensor Glass and the Rollers If scanned images have extraneous marks, or if the scanned documents are consumable parts. When...
... paper particles in the document feed opening or inside of the scanner. Clean them periodically. IMPORTANT Feed rollers are dirty, the sensor glass or rollers inside the scanner may occur more often. When the rollers start to feeding errors. Cleaning the Sensor Glass and the Rollers If scanned images have extraneous marks, or if the scanned documents are consumable parts. When...

Reference Guide
Page 40
Note The location of dust and paper particles. 3 Use a clean dry cloth to keep the interior of the scanner free of the sensor glass and various rollers are scratches on the images and could cause feeding errors. IMPORTANT Scratches on the sensor glass may cause marks on the sensor glass, contact your local authorized Canon dealer or service representative. 36 Maintenance Roller Unit Sensor Glasses Rollers Retard Roller 2 Use compressed air to wipe dirt off the sensor glass. If there are shown below. Wipe both the top and bottom sensor glasses.
Note The location of dust and paper particles. 3 Use a clean dry cloth to keep the interior of the scanner free of the sensor glass and various rollers are scratches on the images and could cause feeding errors. IMPORTANT Scratches on the sensor glass may cause marks on the sensor glass, contact your local authorized Canon dealer or service representative. 36 Maintenance Roller Unit Sensor Glasses Rollers Retard Roller 2 Use compressed air to wipe dirt off the sensor glass. If there are shown below. Wipe both the top and bottom sensor glasses.

Reference Guide
Page 41
... pushing on p. 40.) CAUTION When removing or installing the roller unit or retard roller, do not use detergent to clean the rollers, since any detergent remaining on the rollers could cause a feeding error. • Do not try to turn the rollers in the lower part of the scanner. CAUTION When closing the upper unit, be careful not...
... pushing on p. 40.) CAUTION When removing or installing the roller unit or retard roller, do not use detergent to clean the rollers, since any detergent remaining on the rollers could cause a feeding error. • Do not try to turn the rollers in the lower part of the scanner. CAUTION When closing the upper unit, be careful not...

Reference Guide
Page 56
...318 mm) 10.9" (278 mm) 21.4" (544 mm) (Document Feed Tray Extension is open) 19.3" (491 mm) (Document Feed Tray is open) 12.9" (330 mm) (Document Eject Guide is open) 2.0" (51 mm) (Document Eject Tray 2 is open) 8.9" (225 mm) 5.2" (...Canon dealer or service representative for detailed information about the Bar code module. Contact your local authorized Canon dealer or service representative for detailed information about the replacement parts. Replacement Parts Exchange roller kit (product code: 1921B001) Kit to replace the roller unit (pickup roller, feed roller) and retard roller...
...318 mm) 10.9" (278 mm) 21.4" (544 mm) (Document Feed Tray Extension is open) 19.3" (491 mm) (Document Feed Tray is open) 12.9" (330 mm) (Document Eject Guide is open) 2.0" (51 mm) (Document Eject Tray 2 is open) 8.9" (225 mm) 5.2" (...Canon dealer or service representative for detailed information about the Bar code module. Contact your local authorized Canon dealer or service representative for detailed information about the replacement parts. Replacement Parts Exchange roller kit (product code: 1921B001) Kit to replace the roller unit (pickup roller, feed roller) and retard roller...


