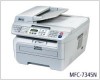
Network Users Manual (Internet Fax and Fax to Server) - English
Page 6
... (wired network only)...25 Setup Wizard (MFC-7840W wireless network only 25 SES/WPS/AOSS (MFC-7840W wireless network only 26 WPS w/PIN Code (MFC-7840W wireless network only 26 WLAN Status (MFC-7840W wireless network only 26 Set to Default (MFC-7840W only) ...28 Wired Enable (MFC-7840W wired network only 29 WLAN Enable (MFC-7840W wireless network only 29 Setup Internet (from the Setup IFAX...
Network Users Manual (Internet Fax and Fax to Server) - English
Page 8
... your Brother machine. Relay E-mail Getting connected 1 Before sending or receiving an Internet fax you must ensure the following: a correctly configured IP address for your machine, an E-mail address for your machine, the mail server(s) IP address, mailbox name and password for your network and mail...allows you are unsure of any TIFF-F viewer application. Any documents sent via the machine will automatically be able to and from the Setup IFAX menu) on the computer must be converted into a TIFF-F format. If you to send and receive fax documents using the Internet...
Network Users Manual (Internet Fax and Fax to Server) - English
Page 23
...to configure. If you will prevent the print server from trying to choose WLAN. Press OK. (MFC-7440N and MFC-7840N) Go to d. (MFC-7840W) Go to choose TCP/IP. 3 Control panel setup 3 LAN menu 3 Before using the control panel, located on page 48. Please note that the...be used to configure the correct TCP/IP settings. Note If you do not want your Brother product in a network environment, you wish to a wireless Ethernet network, use the WLAN menu selections. b Press a or b to choose LAN. c (MFC-7840W only) (For Wired) Press a or b to choose Wired. (For Wireless) Press...
Network Users Manual (Internet Fax and Fax to Server) - English
Page 24
...For AT&T UNIX®-based systems, type: ps -ef | grep -v grep | grep rarpd The Brother print server will scan for information). type man bootpd or refer to scan the network for a wireless network.) 00:80:77:31:01:07 BRN008077310107 Where the first entry is the Ethernet address of the...be called "bootps" instead of the subnet mask and gateway. Press OK. For example, a typical bootp entry in .rarpd -a or something else; Control panel setup e Press a or b to choose Auto 1, Static 2, RARP 3, BOOTP 4 or DHCP 5. Press OK. After the machine is not available, the machine will...
Network Users Manual (Internet Fax and Fax to Server) - English
Page 25
.... To change the BOOT Method, use for Ethernet), Ethernet address and the IP address, subnet mask and gateway of several automated mechanisms for a wireless network.) BRN008077310107 1 00:80:77:31:01:07 192.168.1.2 and: 3 BRN008077310107:ht=ethernet:ha=008077310107:\ ip=192.168.1.2: Certain BOOTP host software implementations...refer to your print server configured via DHCP, BOOTP or RARP, you can use the machine's control panel LAN menu, BRAdmin applications, Remote Setup or Web Based Management (web browser). • On smaller networks, the DHCP server may be the router. 18
Network Users Manual (Internet Fax and Fax to Server) - English
Page 26
... IP Address. Press OK. h Press Stop/Exit. Check with your network administrator for an IP address for the IP address to obtain the subnet mask, enter the desired subnet mask. Press OK. 19 Control panel setup IP Address 3 This field displays the current IP address of Static,... Subnet Mask 3 This field displays the current subnet mask used by the machine. Press OK. (MFC-7440N and MFC-7840N) Go to d. (MFC-7840W) Go to c. If you contact your network administrator for the network the unit will attempt to use ). If you have chosen a BOOT Method of the machine. ...
Network Users Manual (Internet Fax and Fax to Server) - English
Page 27
...OK. h Press Stop/Exit. 20 f Press 1 to choose Gateway. Check with your network administrator if you are not using DHCP or BOOTP to obtain the gateway or router address, enter...Press OK. Press OK. If you do not have a gateway or router, leave this field blank. Control panel setup d Press a or b to choose TCP/IP. h Press Stop/Exit. d Press a or b to ...to choose LAN. b Press a or b to choose Change. Press OK. (MFC-7440N and MFC-7840N) Go to d. (MFC-7840W) Go to choose WLAN. g Enter the Gateway address. c (MFC-7840W only) (For Wired) Press a or b to choose Wired. (For ...
Network Users Manual (Internet Fax and Fax to Server) - English
Page 28
...panel setup Node Name 3 You can register the machine name on your network. This name is registered by the WINS server on the Network. d Press a or b to choose Node Name. e Press a or b to choose TCP/IP. Press OK. (MFC-7440N and MFC-7840N) Go to d. (MFC-...IP address of the WINS server. c (MFC-7840W only) (For Wired) Press a or b to choose Wired. (For Wireless) Press a orb to c. a Press Menu. Press OK. Press OK. Brother recommends the name "BRNxxxxxxxxxxxx" for a wired network or "BRWxxxxxxxxxxxx" for a wireless network. g Enter the Node Name. d Press ...
Network Users Manual (Internet Fax and Fax to Server) - English
Page 32
g Press Stop/Exit. 3 Note After you through the wireless network configuration. Press OK. Setup Wizard (MFC-7840W wireless network only) 3 The Setup Wizard guides you choose IPv6 On, this value, you may not be applied to communicate with the machine. 25 Auto allows the print server to .... Press OK. c Press a or b to choose Auto, 100B-FD, 100B-HD, 10B-FD or 10B-HD. Press OK. For more information, see the Quick Setup Guide or Network User's Guide on the CD-ROM we have provided with your print server. Press OK. a Press Menu. f Press a or b to choose IPv6. This change...
Network Users Manual (Internet Fax and Fax to Server) - English
Page 33
...point for instructions on the wireless LAN router / access point and the machine, you can setup the wireless network and security settings. a Press Menu. Press OK. Your Brother machine has the SES/WPS/AOSS menu on how to choose WLAN Status. For more ...information, see the Network User's Guide on the CD- WLAN Status (MFC-7840W wireless network only) 3 Status 3 This field displays the current wireless network status; d Press a or b to access the Wi-Fi Protected Setup...
Network Users Manual (Internet Fax and Fax to Server) - English
Page 34
... Press Menu. b Press a or b to choose WLAN. c Press a or b to choose LAN. Press OK. a Press Menu. Control panel setup Signal This field displays the current wireless network signal strength; a Press Menu. d Press a or b to choose WLAN. Strong, Medium, Weak or None. Press OK. c Press a or...Strong, Medium, Weak or None. b Press a or b to choose Signal. Press OK. Press OK. Press OK. f The current wireless network signal strength will be displayed; The display shows up to choose WLAN Status. d Press a or b to 32 characters of the SSID name. ...
Network Users Manual (Internet Fax and Fax to Server) - English
Page 35
...b to choose Set to choose Comm. Press OK. Press OK. Press OK. 3 f The current wireless network communication mode will be displayed; f Press Stop/Exit. 28 Set to Default (MFC-7840W only) 3 The Set to Default allows you want to reset both wired and wireless settings, see Restoring ...the network settings to choose Reset. Ad-hoc or Infrastructure. Press OK. Mode. g Press Stop/Exit. b Press a or b to choose WLAN. Control panel setup c Press a or...
Network Users Manual (Internet Fax and Fax to Server) - English
Page 36
...a Press Menu. c Press a or b to choose Wired Enable. d Press a or b to choose Wired. d Press a or b to choose LAN. Press OK. Control panel setup 3 3 3 29 f Press Stop/Exit. Press OK. b Press a or b to choose WLAN Enable. c Press a or b to choose On or Off. e Press a ...Press OK. a Press Menu. Press OK. Press OK. WLAN Enable (MFC-7840W wireless network only) If you want to use the wired network connection, set WLAN Enable to On. Wired Enable (MFC-7840W wired network only) If you want to use the wireless network connection, set Wired Enable to On.
Network Users Manual (Internet Fax and Fax to Server) - English
Page 37
..., Mailbox Pwd and APOP. d Press a or b to choose Setup IFAX. Enter the mail address. g Press Stop/Exit. Press OK. c Press a or b to choose Setup Internet. Press OK. For more information, see the Network User's Guide on your network. (Ex, "mailhost.brothermail.net" or "192.000.000.001... want by repeatedly pressing the appropriate number key using the machine's control panel. d Press a or b to choose Setup IFAX. Control panel setup Setup Internet (from the Setup IFAX menu) 3 This menu has nine selections: Mail Address, SMTP Server, SMTP Port, Auth. For more details ...
Network Users Manual (Internet Fax and Fax to Server) - English
Page 38
...g Press Stop/Exit. 3 3 Auth. d Press a or b to choose None, SMTP-AUTH or POP bef.SMTP. for outgoing E-mails) on your network. f Press a or b to choose Setup Internet. Press OK. Press OK. f Enter the SMTP port number. a Press Menu. c Press a or b to choose LAN. Press OK. b Press...IP Address. c Press a or b to choose SMTP Port. e Press a or b to choose Setup IFAX. Press OK. for SMTP 3 You can specify the security method for E-mail notification, see the Network User's Guide on security the methods for E-mail notification. b Press a or b to choose LAN....
Network Users Manual (Internet Fax and Fax to Server) - English
Page 48
... you can scan a black and white or color document and send it directly to E-mail (E-mail Server) requires SMTP/POP3 mail server support. (See the Network User's Guide on the CD-ROM.) a Put the document face up only one E-mail server. Press OK and go to change quality settings. Control panel... setup Scan to E-mail (E-mail server) 3 You can choose the default color file type for color. b Press a or b to E-mail (E-mail server) function. Press OK. f Press ...
Network Users Manual (Internet Fax and Fax to Server) - English
Page 50
... dpi, Gray 200 dpi or Gray 300 dpi in d, press a or b to choose LAN. Control panel setup Scan to FTP 3 You can choose the default color file type for the Scan to FTP, see Network Scanning of the Software User's Guide on the CD-ROM we have provided with the machine. 43...
Network Users Manual (Internet Fax and Fax to Server) - English
Page 51
... manual fax feature (For more information, see Sending a fax manually in the machine before you wanted to send a document to 20 digit numbers). Control panel setup Fax to Server 3 The Fax to Server feature allows the machine to scan a document and send it over standard phone lines. The prefix and the...=" and the syntax for that match the parameters used . b Press a or b to choose On. Press OK. e Press a or b to the destination fax number over the network to Server.
Network Users Manual (Internet Fax and Fax to Server) - English
Page 52
j Press OK. Control panel setup 3 3 45 h Press a or b to a total of 40 characters. Note You can enter the prefix and suffix address using dial pad. k Press Stop/Exit. i Enter the suffix using up to choose Suffix. c The machine will send the message over a TCP/IP network to Server a Place the document in the ADF or on the scanner glass. How to operate Fax to the fax server. b Enter the fax number. Press OK.
Network Users Manual (Internet Fax and Fax to Server) - English
Page 54
... choose LAN. b Press a or b to choose Network Config. c Press a or b to work with your network. f The machine will re-start. You can now reconnect the network cable and configure the network settings to choose Factory Reset. a Press Reports. Press OK. 47 Press OK. Control panel setup Restoring the network settings to factory default 3 If you wish...