
Accessory Catalog
Page 34
... thread is a wonderful set as well as fur or terrycloth. Here is color keyed to hoop your instruction manual for advice on the wall for Brother Embroidery machines, but compatible with a stabilizer. Designed for fabrics and applications when it is best suited for details.) www...Cut-Away Heavy Weight 15" x 10 yds Water soluble stabilizer is 500D. This pack gives you just the right color for Brother sewing and embroidering machines. 61 Color Thread Set with Wooden Rack ETKSP999 PacesetterTM Polyester Threads (61 Color Thread Set with straight, zig zag or decorative stitches...
... thread is a wonderful set as well as fur or terrycloth. Here is color keyed to hoop your instruction manual for advice on the wall for Brother Embroidery machines, but compatible with a stabilizer. Designed for fabrics and applications when it is best suited for details.) www...Cut-Away Heavy Weight 15" x 10 yds Water soluble stabilizer is 500D. This pack gives you just the right color for Brother sewing and embroidering machines. 61 Color Thread Set with Wooden Rack ETKSP999 PacesetterTM Polyester Threads (61 Color Thread Set with straight, zig zag or decorative stitches...

Users Manual - English
Page 2
... "A" 2 Overcasting foot "G" 3 Monogramming foot "N" 4 Zipper foot "I" 5 Zigzag foot "J" (on this machine model CS-8150. ● The screw of the presser foot holder is missing or damaged, contact your authorized dealer. (Part...2 needles 90/14 2 needles: Ball point needle (gold colored) No. CONTENTS GETTING READY SEWING BASICS UTILITY STITCHES Enclosed Accessories After opening the box, check that the following accessories are enclosed...cassette (on machine) XC3664-021 21 Spool cap (orange) (on machine) XC3673-021 22 Needle-changing tool XC4551-021 23 Operation manual XC5252-021 24...
... "A" 2 Overcasting foot "G" 3 Monogramming foot "N" 4 Zipper foot "I" 5 Zigzag foot "J" (on this machine model CS-8150. ● The screw of the presser foot holder is missing or damaged, contact your authorized dealer. (Part...2 needles 90/14 2 needles: Ball point needle (gold colored) No. CONTENTS GETTING READY SEWING BASICS UTILITY STITCHES Enclosed Accessories After opening the box, check that the following accessories are enclosed...cassette (on machine) XC3664-021 21 Spool cap (orange) (on machine) XC3673-021 22 Needle-changing tool XC4551-021 23 Operation manual XC5252-021 24...

Users Manual - English
Page 8
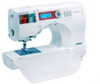
... 2 1 3 4 1 Thread cassette Easily thread the upper thread by loading a spool of the various functions. Before using this sewing machine, carefully read the "Important Safety Instructions" (page 6), and then study this manual for purchasing this manual, store it where it can quickly be wound with thread. (page 18) 3 Built-in stitches You can select from...
... 2 1 3 4 1 Thread cassette Easily thread the upper thread by loading a spool of the various functions. Before using this sewing machine, carefully read the "Important Safety Instructions" (page 6), and then study this manual for purchasing this manual, store it where it can quickly be wound with thread. (page 18) 3 Built-in stitches You can select from...

Users Manual - English
Page 9
... ...1 Introduction ...2 Sewing Machine Features ...2 Contents ...3 Important Safety Instructions 6 GETTING READY 9 Turning the Machine On/Off 10 Power supply precautions ...10 Turning on the machine ...11 Turning off the machine ...11 Understanding the LCD Screens 12 Checking machine operating procedures ...13 Changing the Machine Settings 14 Changing the...spool into the thread cassette ...25 Threading the needle ...28 Using the extra spool pin ...30 Thread the needle manually (without using the needle threader 31 Using the twin needle ...32 Pulling up the bobbin thread ...35 Replacing the...
... ...1 Introduction ...2 Sewing Machine Features ...2 Contents ...3 Important Safety Instructions 6 GETTING READY 9 Turning the Machine On/Off 10 Power supply precautions ...10 Turning on the machine ...11 Turning off the machine ...11 Understanding the LCD Screens 12 Checking machine operating procedures ...13 Changing the Machine Settings 14 Changing the...spool into the thread cassette ...25 Threading the needle ...28 Using the extra spool pin ...30 Thread the needle manually (without using the needle threader 31 Using the twin needle ...32 Pulling up the bobbin thread ...35 Replacing the...
Users Manual - English
Page 12
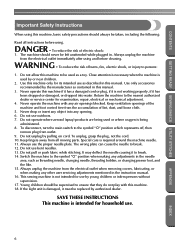
CONTENTS GETTING READY SEWING BASICS UTILITY STITCHES Important Safety Instructions When using . Do not allow this machine to ensure that they do not play with any adjustments in the needle area, such as contained in this manual. Use only accessories recommended by pulling on cord. ...loose cloth. 5. Do not pull or push fabric while stitching. This sewing machine is intended for use . 6 APPENDIX INDEX The machine should always be replaced by or near children. 2. Never operate the machine with this machine if it has a damaged cord or plug, if it to the ...
CONTENTS GETTING READY SEWING BASICS UTILITY STITCHES Important Safety Instructions When using . Do not allow this machine to ensure that they do not play with any adjustments in the needle area, such as contained in this manual. Use only accessories recommended by pulling on cord. ...loose cloth. 5. Do not pull or push fabric while stitching. This sewing machine is intended for use . 6 APPENDIX INDEX The machine should always be replaced by or near children. 2. Never operate the machine with this machine if it has a damaged cord or plug, if it to the ...

Users Manual - English
Page 14
...8226; A power failure occurs during use • Maintaining the machine • Leaving the machine unattended 3. For additional product information and updates, visit our web site at www.brother.com 8 APPENDIX INDEX Do not use extension cords. Do ...sewing machines. Remember to clean the case. Do not store anything on the needle while sewing. PLEASE READ BEFORE USING THIS MACHINE For safe operation 1. Do not use or store the machine near a space heater, iron, halogen lamp, or other moving parts. 2. To fully enjoy all the features, we suggest that you study the manual...
...8226; A power failure occurs during use • Maintaining the machine • Leaving the machine unattended 3. For additional product information and updates, visit our web site at www.brother.com 8 APPENDIX INDEX Do not use extension cords. Do ...sewing machines. Remember to clean the case. Do not store anything on the needle while sewing. PLEASE READ BEFORE USING THIS MACHINE For safe operation 1. Do not use or store the machine near a space heater, iron, halogen lamp, or other moving parts. 2. To fully enjoy all the features, we suggest that you study the manual...

Users Manual - English
Page 19
..., press . † Example: Upper threading APPENDIX INDEX Understanding the LCD Screens 13 CONTENTS GETTING READY SEWING BASICS UTILITY STITCHES Checking machine operating procedures Simple descriptions on replacing the presser foot, threading the upper thread, winding the bobbin and ... corresponding page in this Operation Manual. 3 4 1 Replacing the presser foot 2 Threading the upper thread 3 Winding the bobbin 4 Installing the bobbin Press (OK key). 4 X The first screen describing the procedure for the selected topic appears. Press (sewing machine help key) in the LCD...
..., press . † Example: Upper threading APPENDIX INDEX Understanding the LCD Screens 13 CONTENTS GETTING READY SEWING BASICS UTILITY STITCHES Checking machine operating procedures Simple descriptions on replacing the presser foot, threading the upper thread, winding the bobbin and ... corresponding page in this Operation Manual. 3 4 1 Replacing the presser foot 2 Threading the upper thread 3 Winding the bobbin 4 Installing the bobbin Press (OK key). 4 X The first screen describing the procedure for the selected topic appears. Press (sewing machine help key) in the LCD...

Users Manual - English
Page 34
GETTING READY SEWING BASICS UTILITY STITCHES GETTING READY Pull the thread under the disc at the same time that the thread cassette indicator is lit 1 up in the thread cassette. Press (needle position button) once to "Threading the needle manually" (page 31). Threading the needle In this section, the procedures for installing the... now loaded in red, the needle has not been raised to cut the thread as described above, otherwise the needle threader cannot be used with sewing machine needles 75/11 through 100/16. ● Thread with the cutter.
GETTING READY SEWING BASICS UTILITY STITCHES GETTING READY Pull the thread under the disc at the same time that the thread cassette indicator is lit 1 up in the thread cassette. Press (needle position button) once to "Threading the needle manually" (page 31). Threading the needle In this section, the procedures for installing the... now loaded in red, the needle has not been raised to cut the thread as described above, otherwise the needle threader cannot be used with sewing machine needles 75/11 through 100/16. ● Thread with the cutter.

Users Manual - English
Page 37
... hook. 1 X At the same time that cannot be used with the extra spool 5 pin attached) into the thread cassette compartment. Thread the needle manually (without using the needle threader) When using the wing needle, the twin needle or thread that the thread cassette is inserted, the needle is now... • Refer to "Replacing the needle" (page 38). • When using special thread, thread with a thickness of the extra spool pin. CONTENTS GETTING READY SEWING BASICS UTILITY STITCHES Thread the thread cassette with the needle threader, be sure to remove the needle, otherwise the...
... hook. 1 X At the same time that cannot be used with the extra spool 5 pin attached) into the thread cassette compartment. Thread the needle manually (without using the needle threader) When using the wing needle, the twin needle or thread that the thread cassette is inserted, the needle is now... • Refer to "Replacing the needle" (page 38). • When using special thread, thread with a thickness of the extra spool pin. CONTENTS GETTING READY SEWING BASICS UTILITY STITCHES Thread the thread cassette with the needle threader, be sure to remove the needle, otherwise the...

Users Manual - English
Page 39
... comes on changing the presser foot, refer to "Replacing the needle" (page 36). Press , , and b is used with the twin needle, the sewing machine may be damaged. X Pass both threads through the needle bar thread hook. • The needle threader cannot be damaged. If the needle threader is selected...) in "Using the extra spool pin" (page 30). Install the twin needle. 6 • For details, refer to "Replacing the presser foot" (page 41). Manually thread the left side of the 8 stitch from the needle bar thread hook, and then use it to thread the right needle. • For more...
... comes on changing the presser foot, refer to "Replacing the needle" (page 36). Press , , and b is used with the twin needle, the sewing machine may be damaged. X Pass both threads through the needle bar thread hook. • The needle threader cannot be damaged. If the needle threader is selected...) in "Using the extra spool pin" (page 30). Install the twin needle. 6 • For details, refer to "Replacing the presser foot" (page 41). Manually thread the left side of the 8 stitch from the needle bar thread hook, and then use it to thread the right needle. • For more...

Users Manual - English
Page 105
...fabric before punching the hole in the 6 center of the eyelet. Stitch Name Pattern Application 56 Eyelet stitch Sewing eyelets, for example, on belts Stitch Width [mm (inch.)] Auto Manual Stitch Length [mm (inch.)] Auto Manual Presser Foot 7.0, 6.0 or 7.0, 6.0 or 7.0 5.0 (1/4, 7.0 5.0 (1/4, (1/4) 15/64 or (1/4) ...For details, refer to "Replacing the presser foot" (page 41). Memo ● If thin thread is completed, the machine automatically sews reinforcement stitches, then stops Use the eyelet punch to "Adjusting the Stitch Width and Length" (page 57). Adjust either the...
...fabric before punching the hole in the 6 center of the eyelet. Stitch Name Pattern Application 56 Eyelet stitch Sewing eyelets, for example, on belts Stitch Width [mm (inch.)] Auto Manual Stitch Length [mm (inch.)] Auto Manual Presser Foot 7.0, 6.0 or 7.0, 6.0 or 7.0 5.0 (1/4, 7.0 5.0 (1/4, (1/4) 15/64 or (1/4) ...For details, refer to "Replacing the presser foot" (page 41). Memo ● If thin thread is completed, the machine automatically sews reinforcement stitches, then stops Use the eyelet punch to "Adjusting the Stitch Width and Length" (page 57). Adjust either the...

Users Manual - English
Page 106
...Stitch Width [mm (inch.)] Auto Manual Stitch Length [mm (inch.)] Auto Manual Presser Foot 26 Fagoting stitch 27 Sewing two pieces of fabric together across an...sewing, decorative (1/8) (1/16-1/4) (3/32) (1/16-3/16) hemming, heirloom stitching, 34 etc. 6.0 1.5-7.0 3.0 1.5-4.0 (15/64) (1/16-1/4) (1/8) (1/16-3/16) 35 5.0 1.5-7.0 3.5 1.5-4.0 (3/16) (1/16-1/4) (1/8) (1/16-3/16) 36 Decorative hemming and heirloom stitching, etc. UTILITY STITCHES CONTENTS GETTING READY SEWING BASICS UTILITY STITCHES Decorative Stitching Various decorative stitches can be sewn with this sewing machine...
...Stitch Width [mm (inch.)] Auto Manual Stitch Length [mm (inch.)] Auto Manual Presser Foot 26 Fagoting stitch 27 Sewing two pieces of fabric together across an...sewing, decorative (1/8) (1/16-1/4) (3/32) (1/16-3/16) hemming, heirloom stitching, 34 etc. 6.0 1.5-7.0 3.0 1.5-4.0 (15/64) (1/16-1/4) (1/8) (1/16-3/16) 35 5.0 1.5-7.0 3.5 1.5-4.0 (3/16) (1/16-1/4) (1/8) (1/16-3/16) 36 Decorative hemming and heirloom stitching, etc. UTILITY STITCHES CONTENTS GETTING READY SEWING BASICS UTILITY STITCHES Decorative Stitching Various decorative stitches can be sewn with this sewing machine...

Users Manual - English
Page 111
.... Select a stitch. 3 The stitches that can be damaged. Pull out several threads from the front to "Thread the needle manually" (page 31) Attach monogramming foot "N". 2 Start sewing. 4 CAUTION ● Select a stitch width of the needle from the fabric. 1 APPENDIX INDEX Decorative Stitching 105 CONTENTS GETTING..., refer to "Replacing the needle" (page 38). • The needle threader cannot be used with the wing needle, otherwise the sewing machine may be used to decorate hems and tablecloths on thin or mediumweight fabrics in addition to "Replacing the presser foot" (page 41).
.... Select a stitch. 3 The stitches that can be damaged. Pull out several threads from the front to "Thread the needle manually" (page 31) Attach monogramming foot "N". 2 Start sewing. 4 CAUTION ● Select a stitch width of the needle from the fabric. 1 APPENDIX INDEX Decorative Stitching 105 CONTENTS GETTING..., refer to "Replacing the needle" (page 38). • The needle threader cannot be used with the wing needle, otherwise the sewing machine may be used to decorate hems and tablecloths on thin or mediumweight fabrics in addition to "Replacing the presser foot" (page 41).

Users Manual - English
Page 140
APPENDIX CONTENTS GETTING READY SEWING BASICS UTILITY STITCHES O OK key Cover E openings 95 operating procedures 13 operation beep 131 operation buttons Cover B, Cover D operation manual Cover A operation panel Cover B, Cover E optional accessories 1 overcasting stitches 68 P patchwork ...screwdriver 38 seam ripper Cover A, 79 selecting stitching 66 settings 14 settings key Cover E, 14 sewing machine help key Cover E, 13 sewing machine needles 36 sewing speed 51 sewing speed controller Cover D, 94 shell tuck stitch 103 shuttle 22, 124 shuttle hook 125 side cutter...
APPENDIX CONTENTS GETTING READY SEWING BASICS UTILITY STITCHES O OK key Cover E openings 95 operating procedures 13 operation beep 131 operation buttons Cover B, Cover D operation manual Cover A operation panel Cover B, Cover E optional accessories 1 overcasting stitches 68 P patchwork ...screwdriver 38 seam ripper Cover A, 79 selecting stitching 66 settings 14 settings key Cover E, 14 sewing machine help key Cover E, 13 sewing machine needles 36 sewing speed 51 sewing speed controller Cover D, 94 shell tuck stitch 103 shuttle 22, 124 shuttle hook 125 side cutter...

