Users Manual - English
Page 4
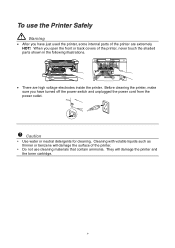
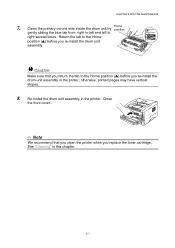
When you have just used the printer, some internal parts of the printer are high voltage electrodes inside the printer. y Do not use the Printer Safely Warning • After you have turned off the power switch and unplugged the power cord from the power outlet. ! Before cleaning the printer, make sure you open the front or back covers...
When you have just used the printer, some internal parts of the printer are high voltage electrodes inside the printer. y Do not use the Printer Safely Warning • After you have turned off the power switch and unplugged the power cord from the power outlet. ! Before cleaning the printer, make sure you open the front or back covers...
Users Manual - English
Page 16
... or corrosive gasses. • Do not place objects on a flat, horizontal surface. • Keep the printer clean. Do not place the printer in a well-ventilated room. • Place the printer on top of the printer. • Do not place the printer near a power outlet that contain magnets or generate magnetic fields. • Do not subject the...
... or corrosive gasses. • Do not place objects on a flat, horizontal surface. • Keep the printer clean. Do not place the printer in a well-ventilated room. • Place the printer on top of the printer. • Do not place the printer near a power outlet that contain magnets or generate magnetic fields. • Do not subject the...
Users Manual - English
Page 73
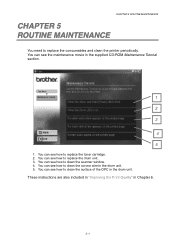
...in "Improving the Print Quality" in the drum unit. 5. You can see the maintenance movie in the drum unit. You can see how to clean the surface of the OPC in the supplied CD-ROM Maintenance Tutorial section. 1 2 3 4 5 1. You can see how to replace the toner... cartridge. 2. You can see how to clean the corona wire in Chapter 6. 5-1 You can see how to replace the consumables and clean the printer periodically. CHAPTER 5 ROUTINE MAINTENANCE CHAPTER 5 5 ROUTINE MAINTENANCE You need to replace the drum unit. 3.
...in "Improving the Print Quality" in the drum unit. 5. You can see the maintenance movie in the drum unit. You can see how to clean the surface of the OPC in the supplied CD-ROM Maintenance Tutorial section. 1 2 3 4 5 1. You can see how to replace the toner... cartridge. 2. You can see how to clean the corona wire in Chapter 6. 5-1 You can see how to replace the consumables and clean the printer periodically. CHAPTER 5 ROUTINE MAINTENANCE CHAPTER 5 5 ROUTINE MAINTENANCE You need to replace the drum unit. 3.
Users Manual - English
Page 79
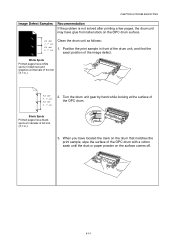
Re-install the drum unit assembly in the printer; Caution Make sure that you clean the printer when you replace the toner cartridge. 2 See "Cleaning" in this chapter. 5-7 otherwise, printed pages may have vertical stripes. 8. CHAPTER 5 ROUTINE MAINTENANCE 7. Home Clean the primary corona wire inside the drum unit ...by position gently sliding the blue tab from right to left and left to the Home position (L) before you re-install the drum unit assembly in the printer. Return the tab to the Home...
Re-install the drum unit assembly in the printer; Caution Make sure that you clean the printer when you replace the toner cartridge. 2 See "Cleaning" in this chapter. 5-7 otherwise, printed pages may have vertical stripes. 8. CHAPTER 5 ROUTINE MAINTENANCE 7. Home Clean the primary corona wire inside the drum unit ...by position gently sliding the blue tab from right to left and left to the Home position (L) before you re-install the drum unit assembly in the printer. Return the tab to the Home...
Users Manual - English
Page 80
... drum. The actual number of printed pages may reduce not only the print quality but also the quality and life of toner used only in a clean, dust-free environment with one drum unit. *1 At 5% print coverage (A4-Letter size). The actual number of pages that determine the actual drum...ventilation. Under ideal conditions, the average drum life is estimated at approximately 20,000 pages. The printer should be used , number of pages that will print may be printed by the use only genuine Brother toner. y Printing with a 3rd party drum unit may vary depending on the average type of...
... drum. The actual number of printed pages may reduce not only the print quality but also the quality and life of toner used only in a clean, dust-free environment with one drum unit. *1 At 5% print coverage (A4-Letter size). The actual number of pages that determine the actual drum...ventilation. Under ideal conditions, the average drum life is estimated at approximately 20,000 pages. The printer should be used , number of pages that will print may be printed by the use only genuine Brother toner. y Printing with a 3rd party drum unit may vary depending on the average type of...

Users Manual - English
Page 81
See "Cleaning" in the print quality. We recommend that you replace the drum unit. Drum Ready Paper Alarm Toner Data ! ™ Change Drum Message CHAPTER 5 ROUTINE MAINTENANCE If the Drum LED is on, it may contain toner. • You should clean the printer when you replace the drum unit with a new one before there is near the end of its life. Caution • While removing the drum unit, handle it carefully because it means the drum unit is a noticeable deterioration in this chapter. 5-9
See "Cleaning" in the print quality. We recommend that you replace the drum unit. Drum Ready Paper Alarm Toner Data ! ™ Change Drum Message CHAPTER 5 ROUTINE MAINTENANCE If the Drum LED is on, it may contain toner. • You should clean the printer when you replace the drum unit with a new one before there is near the end of its life. Caution • While removing the drum unit, handle it carefully because it means the drum unit is a noticeable deterioration in this chapter. 5-9
Users Manual - English
Page 84
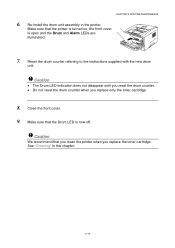
... indication does not disappear until you reset the drum counter. • Do not reset the drum counter when you replace the toner cartridge. See "Cleaning" in the printer. Reset the drum counter referring to the instructions supplied with the new drum unit. ! Make sure that the Drum LED is open and the... Drum and Alarm LEDs are illuminated. 7. Re-install the drum unit assembly in this chapter. 5-12 Close the front cover. 9. Make sure that the printer is turned on, the front cover is now off. ! CHAPTER 5 ROUTINE MAINTENANCE 6.
... indication does not disappear until you reset the drum counter. • Do not reset the drum counter when you replace the toner cartridge. See "Cleaning" in the printer. Reset the drum counter referring to the instructions supplied with the new drum unit. ! Make sure that the Drum LED is open and the... Drum and Alarm LEDs are illuminated. 7. Re-install the drum unit assembly in this chapter. 5-12 Close the front cover. 9. Make sure that the printer is turned on, the front cover is now off. ! CHAPTER 5 ROUTINE MAINTENANCE 6.
Users Manual - English
Page 85
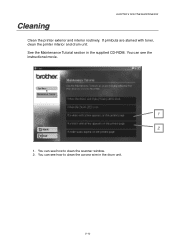
You can see how to clean the corona wire in the supplied CD-ROM. See the Maintenance Tutorial section in the drum unit. 5-13 You can see how to clean the scanner window. 2. Cleaning CHAPTER 5 ROUTINE MAINTENANCE Clean the printer exterior and interior routinely. If printouts are stained with toner, clean the printer interior and drum unit. You can see the instructional movie. 1 2 1.
You can see how to clean the corona wire in the supplied CD-ROM. See the Maintenance Tutorial section in the drum unit. 5-13 You can see how to clean the scanner window. 2. Cleaning CHAPTER 5 ROUTINE MAINTENANCE Clean the printer exterior and interior routinely. If printouts are stained with toner, clean the printer interior and drum unit. You can see the instructional movie. 1 2 1.
Users Manual - English
Page 99
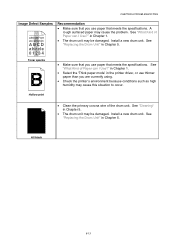
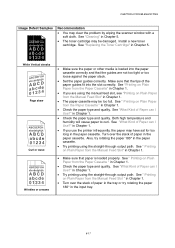
...of Paper can I Use?" Install a new drum unit. See "Replacing the Drum Unit" in the printer driver, or use thinner paper than you are currently using. • Check the printer's environment because conditions such as high humidity may be damaged. All black 6-13 in Chapter 1. &#... See "Replacing the Drum Unit" in Chapter 1. • The drum unit may cause this situation to occur. Hollow print • Clean the primary corona wire of Paper can I Use?" CHAPTER 6 TROUBLESHOOTING Image Defect Samples ABCDEFGH abcdefghijk ABCD abcde 01234 Recommendation • Make sure...
...of Paper can I Use?" Install a new drum unit. See "Replacing the Drum Unit" in the printer driver, or use thinner paper than you are currently using. • Check the printer's environment because conditions such as high humidity may be damaged. All black 6-13 in Chapter 1. &#... See "Replacing the Drum Unit" in Chapter 1. • The drum unit may cause this situation to occur. Hollow print • Clean the primary corona wire of Paper can I Use?" CHAPTER 6 TROUBLESHOOTING Image Defect Samples ABCDEFGH abcdefghijk ABCD abcde 01234 Recommendation • Make sure...
Users Manual - English
Page 100
... intervals of the OPC drum with a cotton swab until the dust or paper powder on the OPC drum surface. 94 mm 3.7 in. 94 mm 3.7 in. Clean the drum unit as follows: 1. CHAPTER 6 TROUBLESHOOTING Image Defect Samples Recommendation If the problem is not solved after printing a few pages, the drum unit may...
... intervals of the OPC drum with a cotton swab until the dust or paper powder on the OPC drum surface. 94 mm 3.7 in. 94 mm 3.7 in. Clean the drum unit as follows: 1. CHAPTER 6 TROUBLESHOOTING Image Defect Samples Recommendation If the problem is not solved after printing a few pages, the drum unit may...
Users Manual - English
Page 101
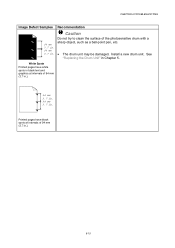
See "Replacing the Drum Unit" in . CHAPTER 6 TROUBLESHOOTING Image Defect Samples 94 mm 3.7 in. 94 mm 3.7 in Chapter 5. Caution Do not try to clean the surface of 94 mm (3.7 in.). 94 mm 3.7 in. 94 mm 3.7 in .). 6-15 Recommendation ! Printed pages have white spots in black text and graphics at intervals of 94 mm (3.7 in . White Spots Printed pages have black spots at intervals of the photosensitive drum with a sharp object, such as a ball-point pen, etc. • The drum unit may be damaged. Install a new drum unit.
See "Replacing the Drum Unit" in . CHAPTER 6 TROUBLESHOOTING Image Defect Samples 94 mm 3.7 in. 94 mm 3.7 in Chapter 5. Caution Do not try to clean the surface of 94 mm (3.7 in.). 94 mm 3.7 in. 94 mm 3.7 in .). 6-15 Recommendation ! Printed pages have white spots in black text and graphics at intervals of 94 mm (3.7 in . White Spots Printed pages have black spots at intervals of the photosensitive drum with a sharp object, such as a ball-point pen, etc. • The drum unit may be damaged. Install a new drum unit.
Users Manual - English
Page 102
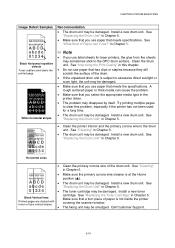
...in Chapter 5. Install a new drum unit. See "Replacing the Drum Unit" in this problem, especially if the printer has not been used for laser printers, the glue from the sheets may disappear by itself. CHAPTER 6 TROUBLESHOOTING Image Defect Samples ABCDEFGH abcdefghijk ABCD abcde 01234...unit. Install a new drum unit. Try printing multiple pages to the OPC drum surface. See "Replacing the Drum Unit" in Chapter 5. See "Cleaning" in Chapter 5. A rough surfaced paper or thick media can I Use?" See "Replacing the Toner Cartridge" in Chapter 5. See "Replacing the Drum...
...in Chapter 5. Install a new drum unit. See "Replacing the Drum Unit" in this problem, especially if the printer has not been used for laser printers, the glue from the sheets may disappear by itself. CHAPTER 6 TROUBLESHOOTING Image Defect Samples ABCDEFGH abcdefghijk ABCD abcde 01234...unit. Install a new drum unit. Try printing multiple pages to the OPC drum surface. See "Replacing the Drum Unit" in Chapter 5. See "Cleaning" in Chapter 5. A rough surfaced paper or thick media can I Use?" See "Replacing the Toner Cartridge" in Chapter 5. See "Replacing the Drum...
Users Manual - English
Page 103
...• Check the paper type and quality. CHAPTER 6 TROUBLESHOOTING Image Defect Samples ABCDEFGH abcdefghijk ABCD abcde 01234 Recommendation • You may be damaged. See "Cleaning" in Chapter 1. See "What Kind of paper in Chapter 5. See " Printing on Plain Paper from the Paper Cassette " in the input tray. 6-...properly. See "What Kind of paper in the tray or try rotating the paper 180° in Chapter 1. • If you use the printer infrequently, the paper may be too full. See " Printing on Plain Paper from the Manual Feed Slot " in Chapter 1. • Turn ...
...• Check the paper type and quality. CHAPTER 6 TROUBLESHOOTING Image Defect Samples ABCDEFGH abcdefghijk ABCD abcde 01234 Recommendation • You may be damaged. See "Cleaning" in Chapter 1. See "What Kind of paper in Chapter 5. See " Printing on Plain Paper from the Paper Cassette " in the input tray. 6-...properly. See "What Kind of paper in the tray or try rotating the paper 180° in Chapter 1. • If you use the printer infrequently, the paper may be too full. See " Printing on Plain Paper from the Manual Feed Slot " in Chapter 1. • Turn ...


