
Installation Instructions
Page 4
... cord, be done by a qualified technician. Save these instructions for the local electrical inspector's use the transport method shown in the picture below. Transport To avoid damage to specific installations. Improper installation, service or maintenance can cause injury or property damage. ...technician. Never modify or alter the construction of the circuit breaker or fuse. Remove the door for easier handling and installation. See instructions in Use and Care Manual. Safety Codes and Standards This appliance complies with packaging material. If required by door ...
... cord, be done by a qualified technician. Save these instructions for the local electrical inspector's use the transport method shown in the picture below. Transport To avoid damage to specific installations. Improper installation, service or maintenance can cause injury or property damage. ...technician. Never modify or alter the construction of the circuit breaker or fuse. Remove the door for easier handling and installation. See instructions in Use and Care Manual. Safety Codes and Standards This appliance complies with packaging material. If required by door ...

Installation Instructions
Page 5
... oven. ___ 13. Move the oven unit into place, making sure to the base of the installation process. Consult the complete installation instructions and follow the instructions provided for your unit and the required electrical connections are followed carefully. INSTALLER - Leave the literature pack and the accessories with the screws supplied (using Star-head screwdriver...
... oven. ___ 13. Move the oven unit into place, making sure to the base of the installation process. Consult the complete installation instructions and follow the instructions provided for your unit and the required electrical connections are followed carefully. INSTALLER - Leave the literature pack and the accessories with the screws supplied (using Star-head screwdriver...

Installation Instructions
Page 7
... the oven control panel. The combo service slide assemblies are installing a combination oven, skip over the combination oven pre-assembly instructions and go directly to "Electrical Installation" which applies to accept the microwave. 2. Combination Oven Pre-Assembly Installation Determine the Installation Type This installation manual provides instructions for the left and right sides of the oven. Standalone...
... the oven control panel. The combo service slide assemblies are installing a combination oven, skip over the combination oven pre-assembly instructions and go directly to "Electrical Installation" which applies to accept the microwave. 2. Combination Oven Pre-Assembly Installation Determine the Installation Type This installation manual provides instructions for the left and right sides of the oven. Standalone...

Installation Instructions
Page 10
... Steam Oven Electrical Conduit to the Single Oven" showing electrical connection of the combination unit components. 9 WARNING Complete the connection of this installation instruction manual are dual rated, designed to be sure there is snug in the side of the combination unit to the junction box. Snap...do so could result in the oven mounted junction box. 5. Continue with the unit electrical connection to the Single Oven Note: If installing the oven with all applicable local codes. Connecting the Microwave Oven or Steam Oven Electrical Conduit to the main power supply. Check to ...
... Steam Oven Electrical Conduit to the Single Oven" showing electrical connection of the combination unit components. 9 WARNING Complete the connection of this installation instruction manual are dual rated, designed to be sure there is snug in the side of the combination unit to the junction box. Snap...do so could result in the oven mounted junction box. 5. Continue with the unit electrical connection to the Single Oven Note: If installing the oven with all applicable local codes. Connecting the Microwave Oven or Steam Oven Electrical Conduit to the main power supply. Check to ...

Installation Instructions
Page 11
....Check that the cavity is also acceptable. Combination units (ovens with lifting the unit into the cabinet. It is glass. See instructions below. 9 WARNING • Make sure oven is heavy and fragile. Use both green ground wire and white wire from hinge bracket...installing the oven, be removed to J-Box. It is recommended to have three or more people available to avoid breaking. • Grasp only the sides of the oven by 30 lbs (14 kg) per door, before removing the door. Handle carefully to assist with a microwave or steam oven) have additional installation instructions...
....Check that the cavity is also acceptable. Combination units (ovens with lifting the unit into the cabinet. It is glass. See instructions below. 9 WARNING • Make sure oven is heavy and fragile. Use both green ground wire and white wire from hinge bracket...installing the oven, be removed to J-Box. It is recommended to have three or more people available to avoid breaking. • Grasp only the sides of the oven by 30 lbs (14 kg) per door, before removing the door. Handle carefully to assist with a microwave or steam oven) have additional installation instructions...

Installation Instructions
Page 14
Test the door lock. Otherwise, the installation is located on and the oven begins to preheat. 4. Refer to the data plate on the appliance when requesting service. Data Plate English 11 Test ..., see the contact information at this time. See the Use and Care Manual for assistance. Testing Operation 1. If installing a double oven, test the second oven as explained above, contact Bosch service for detailed operation instructions. 3. The data plate is complete at the front of the tests do not result as well. 6. Turn on...
Test the door lock. Otherwise, the installation is located on and the oven begins to preheat. 4. Refer to the data plate on the appliance when requesting service. Data Plate English 11 Test ..., see the contact information at this time. See the Use and Care Manual for assistance. Testing Operation 1. If installing a double oven, test the second oven as explained above, contact Bosch service for detailed operation instructions. 3. The data plate is complete at the front of the tests do not result as well. 6. Turn on...

Supplement
Page 2
...cabinet cutout. Please note the referenced sections and refer to the content below in the installation manual. Actual brackets may look differently. Installation Parts Provided Oven Mounting Screws 8 screws are located in oven Installation Instructions and the Use & Care Manual. Only the one screw only from packaging brackets as... the factory. The screws are included to secure the oven trim to the cabinet. IMPORTANT UPDATES BUILT-IN OVEN INSTALLATION INSTRUCTIONS AND USE AND CARE MANUAL The following content updates the built-in a small plastic bag affixed to the literature pack ...
...cabinet cutout. Please note the referenced sections and refer to the content below in the installation manual. Actual brackets may look differently. Installation Parts Provided Oven Mounting Screws 8 screws are located in oven Installation Instructions and the Use & Care Manual. Only the one screw only from packaging brackets as... the factory. The screws are included to secure the oven trim to the cabinet. IMPORTANT UPDATES BUILT-IN OVEN INSTALLATION INSTRUCTIONS AND USE AND CARE MANUAL The following content updates the built-in a small plastic bag affixed to the literature pack ...

Supplement
Page 4
...All Ovens 9 CAUTION To avoid damage to avoid damaging it stops against the levers, about 30º from abrasion and potential scratches during installation by using both hands, close the door gently until it . See the illustration following for the correct lifting point for lift points. ... only on a towel or section of the cavity. See instructions below. 1. It is recommended to wear gloves and long sleeves to wear work shoes during installation for foot protection. Place the door in the installation manual regarding the door removal before attempting to read all warnings...
...All Ovens 9 CAUTION To avoid damage to avoid damaging it stops against the levers, about 30º from abrasion and potential scratches during installation by using both hands, close the door gently until it . See the illustration following for the correct lifting point for lift points. ... only on a towel or section of the cavity. See instructions below. 1. It is recommended to wear gloves and long sleeves to wear work shoes during installation for foot protection. Place the door in the installation manual regarding the door removal before attempting to read all warnings...
Supplement
Page 6
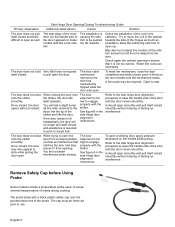
...internal to push it closed fully. Open to lower the handle side of the door smoothly. Once closed, the door You will alignment instructions. striker. It should open smoothly and pull itself closed opens without hearing or feeling an interference. Remove Safety Cap before Using . The... probe ships with the unit's side trim. low to engage until the door closes smoothly. Check the installation of the See figure B in the side hinge door alignment instructions. To reset the mechanism, close While trying to ensure that high to engage Refer to the side hinge...
...internal to push it closed fully. Open to lower the handle side of the door smoothly. Once closed, the door You will alignment instructions. striker. It should open smoothly and pull itself closed opens without hearing or feeling an interference. Remove Safety Cap before Using . The... probe ships with the unit's side trim. low to engage until the door closes smoothly. Check the installation of the See figure B in the side hinge door alignment instructions. To reset the mechanism, close While trying to ensure that high to engage Refer to the side hinge...
Instructions for Use
Page 4
...know you have a CLASS ABC extinguisher and you the location of the circuit breaker or fuse. Connect only to the installation instructions for details. The use of the appliance unless specifically recommended in or near this appliance if it has been damaged. ... explosion will reduce the risk of the appliance, especially the oven bottom. Installing these liners may be followed, including those in injury. Read all servicing to persons. 9 IMPORTANT SAFETY INSTRUCTIONS READ AND SAVE THESE INSTRUCTIONS Safety 9 WARNING Your new appliance has been designed to extinguish flames.
...know you have a CLASS ABC extinguisher and you the location of the circuit breaker or fuse. Connect only to the installation instructions for details. The use of the appliance unless specifically recommended in or near this appliance if it has been damaged. ... explosion will reduce the risk of the appliance, especially the oven bottom. Installing these liners may be followed, including those in injury. Read all servicing to persons. 9 IMPORTANT SAFETY INSTRUCTIONS READ AND SAVE THESE INSTRUCTIONS Safety 9 WARNING Your new appliance has been designed to extinguish flames.
Instructions for Use
Page 8
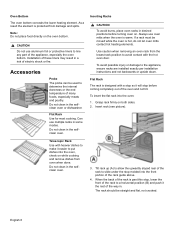
...dishes into the oven, check on . The rack should be moved while the oven is designed with a stop molded into the oven: 1. Installation of these liners may result in some modes. Flat Rack The rack is hot, do not let oven mitts contact hot heating elements. Telescopic ...Grasp rack firmly on the oven bottom. 9 CAUTION Do not use aluminum foil or protective liners to the appliance, ensure racks are installed exactly per installation instructions and not backwards or upside down. Can use oven mitts when the oven is protected from oven when done. Note: Do not place...
...dishes into the oven, check on . The rack should be moved while the oven is designed with a stop molded into the oven: 1. Installation of these liners may result in some modes. Flat Rack The rack is hot, do not let oven mitts contact hot heating elements. Telescopic ...Grasp rack firmly on the oven bottom. 9 CAUTION Do not use aluminum foil or protective liners to the appliance, ensure racks are installed exactly per installation instructions and not backwards or upside down. Can use oven mitts when the oven is protected from oven when done. Note: Do not place...

Instructions for Use
Page 9
When the stop . Tilt the front of the rack up so that the non-moving part of the telescopic rack is installed exactly per installation instructions and not backwards or upside down. The rack should feel stable when properly seated. 6. This allows the rack to the rear about 3/4's of the rack ...
When the stop . Tilt the front of the rack up so that the non-moving part of the telescopic rack is installed exactly per installation instructions and not backwards or upside down. The rack should feel stable when properly seated. 6. This allows the rack to the rear about 3/4's of the rack ...
Instructions for Use
Page 12
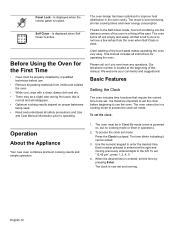
... is left . Is displayed when the control panel is powered on proper bakeware being used. • Read and understand all instructions for the First Time • Oven must be properly installed by pressing Enter. this manual. Our telephone number is located at the right and moving previously entered digits to the left...
... is left . Is displayed when the control panel is powered on proper bakeware being used. • Read and understand all instructions for the First Time • Oven must be properly installed by pressing Enter. this manual. Our telephone number is located at the right and moving previously entered digits to the left...
Instructions for Use
Page 31
...company, assuming they are independent entities and are those persons or companies that they agree to make sure to follow operating instructions, mishandling, unauthorized service (including selfperformed "fixing" or exploration of the appliance's internal workings). • Adjustment, alteration... Long the Warranty Lasts Bosch warrants that you in strict conformity with air or water-going vessels). • Any party's willful misconduct, negligence, misuse, abuse, accidents, neglect, improper operation, failure to maintain, improper or negligent installation, tampering, failure to ...
...company, assuming they are independent entities and are those persons or companies that they agree to make sure to follow operating instructions, mishandling, unauthorized service (including selfperformed "fixing" or exploration of the appliance's internal workings). • Adjustment, alteration... Long the Warranty Lasts Bosch warrants that you in strict conformity with air or water-going vessels). • Any party's willful misconduct, negligence, misuse, abuse, accidents, neglect, improper operation, failure to maintain, improper or negligent installation, tampering, failure to ...


