Setup Manual
Page 13
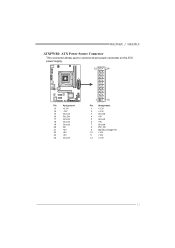
H61MGC / H61MLC ATXPWR1: ATX Power Source Connector This connector allows user to connect 24-pin power connector on the ATX power supply. 12 24 Pin Assignment 13 +3.3V 14 -12V 15 Ground 16 PS_ON 17 Ground 18 Ground 19 Ground 20 NC 21 +5V 22 +5V 23 +5V 24 Ground 1 13 Pin Assignment 1 +3.3V 2 +3.3V 3 Ground 4 +5V 5 Ground 6 +5V 7 Ground 8 PW_OK 9 Standby Voltage+5V 10 +12V 11 +12V 12 +3.3V 11
H61MGC / H61MLC ATXPWR1: ATX Power Source Connector This connector allows user to connect 24-pin power connector on the ATX power supply. 12 24 Pin Assignment 13 +3.3V 14 -12V 15 Ground 16 PS_ON 17 Ground 18 Ground 19 Ground 20 NC 21 +5V 22 +5V 23 +5V 24 Ground 1 13 Pin Assignment 1 +3.3V 2 +3.3V 3 Ground 4 +5V 5 Ground 6 +5V 7 Ground 8 PW_OK 9 Standby Voltage+5V 10 +12V 11 +12V 12 +3.3V 11
Setup Manual
Page 24
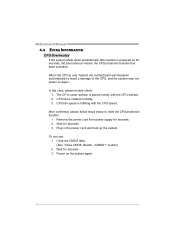
...fan is fulfilling with the CPU surface. 2. Remove the power cord from power supply for seconds. 3. Clear the CMOS data. (See "Close CMOS Header: JCMOS1" section) 2. In this case, please double check: 1. Plug in the power cord and boot up the system. Power on the system again. 22 Wait for seconds. 2....placed evenly with the CPU speed. After confirmed, please follow steps below to avoid a damage of the CPU, and the system may not power on again. Or you can: 1. Wait for seconds, the phenomenon means the CPU protection function has been activated. Motherboard Manual 4.3 EXTRA ...
...fan is fulfilling with the CPU surface. 2. Remove the power cord from power supply for seconds. 3. Clear the CMOS data. (See "Close CMOS Header: JCMOS1" section) 2. In this case, please double check: 1. Plug in the power cord and boot up the system. Power on the system again. 22 Wait for seconds. 2....placed evenly with the CPU speed. After confirmed, please follow steps below to avoid a damage of the CPU, and the system may not power on again. Or you can: 1. Wait for seconds, the phenomenon means the CPU protection function has been activated. Motherboard Manual 4.3 EXTRA ...
Setup Manual
Page 26
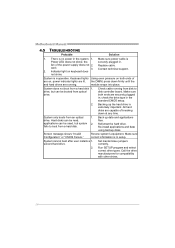
...System cannot boot after user installs a 1. fan of breaking down firmly until the and hard drives are capable of the power supply does not 2. System is Power LED does not shine; check the drive type in the system. 1. There is extremely important. Hard disks can be ...the securely plugged in. System only boots from optical drive. Check cable running . work 3. Indicator light on , power indicator lights are securely plugged in setup. Motherboard Manual 4.5 TROUBLESHOOTING Probable Solution 1. Reformat the hard drive. second hard drive. 2.
...System cannot boot after user installs a 1. fan of breaking down firmly until the and hard drives are capable of the power supply does not 2. System is Power LED does not shine; check the drive type in the system. 1. There is extremely important. Hard disks can be ...the securely plugged in. System only boots from optical drive. Check cable running . work 3. Indicator light on , power indicator lights are securely plugged in setup. Motherboard Manual 4.5 TROUBLESHOOTING Probable Solution 1. Reformat the hard drive. second hard drive. 2.


