Quick Guide
Page 1
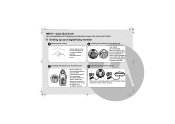
...MBP15 - Quick Start Guide For a full explanation of the same type. - + • Insert the batteries as shown, replace the battery cover and turn + - Use only AAA rechargeable batteries of all features and instructions, please refer to the User's Guide. 1 Setting up your digital baby monitor... A Removing the covers B Installing the batteries for the Baby unit 90° MAX • Turn the battery cover screws 90 degrees in a clockwise direction. rechargeable...
...MBP15 - Quick Start Guide For a full explanation of the same type. - + • Insert the batteries as shown, replace the battery cover and turn + - Use only AAA rechargeable batteries of all features and instructions, please refer to the User's Guide. 1 Setting up your digital baby monitor... A Removing the covers B Installing the batteries for the Baby unit 90° MAX • Turn the battery cover screws 90 degrees in a clockwise direction. rechargeable...
User Manual
Page 1
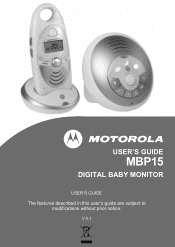
USER'S GUIDE MBP15 DIGITAL BABY MONITOR USER'S GUIDE The features described in this user's guide are subject to modifications without prior notice. V 0.1
USER'S GUIDE MBP15 DIGITAL BABY MONITOR USER'S GUIDE The features described in this user's guide are subject to modifications without prior notice. V 0.1
User Manual
Page 2
...Parent unit • 1 x Power adapter for the Baby unit IMPORTANT The non-rechargeable batteries for purchasing the MBP15. For warranty service of your Motorola product, you need to insert and fully charge the battery on page 6 before use the baby monitor, you can use , so that you 'll ... the information you will need to get the most from your new Motorola Digital Baby Monitor! Before you can hear your product. We recommend the batteries to confirm warranty status. This baby monitor uses digital communication which ensures that the unit continues to work in the UK ...
...Parent unit • 1 x Power adapter for the Baby unit IMPORTANT The non-rechargeable batteries for purchasing the MBP15. For warranty service of your Motorola product, you need to insert and fully charge the battery on page 6 before use the baby monitor, you can use , so that you 'll ... the information you will need to get the most from your new Motorola Digital Baby Monitor! Before you can hear your product. We recommend the batteries to confirm warranty status. This baby monitor uses digital communication which ensures that the unit continues to work in the UK ...
User Manual
Page 6
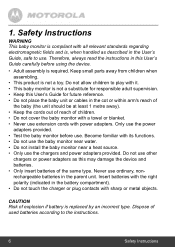
... standards regarding electromagnetic fields and is replaced by an incorrect type. CAUTION Risk of the same type. Safety Instructions WARNING This baby monitor is compliant with power adapters. Keep small parts away from children when assembling. • This product is required. Become familiar... provided. 1. Insert batteries with sharp or metal objects. Never use . Only use the power adapters provided. • Test the baby monitor before using the device. • Adult assembly is not a toy. Therefore, always read the instructions in the battery compartment). •...
... standards regarding electromagnetic fields and is replaced by an incorrect type. CAUTION Risk of the same type. Safety Instructions WARNING This baby monitor is compliant with power adapters. Keep small parts away from children when assembling. • This product is required. Become familiar... provided. 1. Insert batteries with sharp or metal objects. Never use . Only use the power adapters provided. • Test the baby monitor before using the device. • Adult assembly is not a toy. Therefore, always read the instructions in the battery compartment). •...
User Manual
Page 10
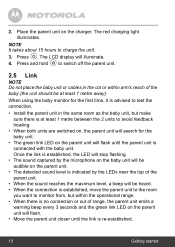
... illuminates. The LCD display will flash. • Move the parent unit closer until the parent unit is re-established. 10 Getting started When using the baby monitor for the first time, it is advised to avoid feedback howling. • When both units are switched on, the parent unit will search for the.... • The green link LED on the charger. NOTE It takes about 15 hours to monitor from, but make sure there is no connection or out of the baby (the unit should be at least 1 metre between the 2 units to test the connection. • Install the parent unit in the same room...
... illuminates. The LCD display will flash. • Move the parent unit closer until the parent unit is re-established. 10 Getting started When using the baby monitor for the first time, it is advised to avoid feedback howling. • When both units are switched on, the parent unit will search for the.... • The green link LED on the charger. NOTE It takes about 15 hours to monitor from, but make sure there is no connection or out of the baby (the unit should be at least 1 metre between the 2 units to test the connection. • Install the parent unit in the same room...
User Manual
Page 11
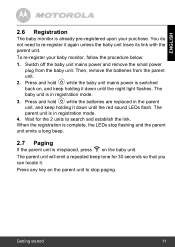
... When the registration is complete, the LEDs stop paging. To re-register your purchase. Then, remove the batteries from the baby unit. Switch off the baby unit mains power and remove the small power plug from the parent unit. 2. Press and hold P while the batteries are...unit emits a long beep. 2.7 Paging If the parent unit is already pre-registered upon your baby monitor, follow the procedure below: 1. ENGLISH 2.6 Registration The baby monitor is misplaced, press 3 on the baby unit. The baby unit is in registration mode. 3. Wait for 30 seconds so that you can locate it ...
... When the registration is complete, the LEDs stop paging. To re-register your purchase. Then, remove the batteries from the baby unit. Switch off the baby unit mains power and remove the small power plug from the parent unit. 2. Press and hold P while the batteries are...unit emits a long beep. 2.7 Paging If the parent unit is already pre-registered upon your baby monitor, follow the procedure below: 1. ENGLISH 2.6 Registration The baby monitor is misplaced, press 3 on the baby unit. The baby unit is in registration mode. 3. Wait for 30 seconds so that you can locate it ...
User Manual
Page 12
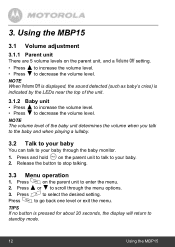
...) is pressed for about 20 seconds, the display will return to scroll through the baby monitor. 1. decrease the volume level. Using the MBP15 3.1 Volume adjustment 3.1.1 Parent unit There are 5 volume levels on the parent unit to talk to stop talking. 3.3 Menu operation... 1. 2. decrease the volume level. 3. NOTE The volume level of the unit. 3.1.2 Baby unit • • Press Press ( ) to to increase ...
...) is pressed for about 20 seconds, the display will return to scroll through the baby monitor. 1. decrease the volume level. Using the MBP15 3.1 Volume adjustment 3.1.1 Parent unit There are 5 volume levels on the parent unit to talk to stop talking. 3.3 Menu operation... 1. 2. decrease the volume level. 3. NOTE The volume level of the unit. 3.1.2 Baby unit • • Press Press ( ) to to increase ...
User Manual
Page 15
...until Sound unit, Alert Night Light is displayed. Press M to change lullaby. layed. Using the MBP15 15 Press Press 2 4 to to exit the menu. 3.7 Sound alert The level of the Baby Monitor can be detected and transmitted to exit the menu. Press O to alert you that minor disturbances... can be emitted to confirm. If the baby is indicated by the number of volume indicator LEDs on top of...
...until Sound unit, Alert Night Light is displayed. Press M to change lullaby. layed. Using the MBP15 15 Press Press 2 4 to to exit the menu. 3.7 Sound alert The level of the Baby Monitor can be detected and transmitted to exit the menu. Press O to alert you that minor disturbances... can be emitted to confirm. If the baby is indicated by the number of volume indicator LEDs on top of...
User Manual
Page 19
... Time When setting the interval time, please include the time it takes to nurse your baby's nursing is to begin. Using the MBP15 19 ENGLISH 3.10 Feed Time If your baby follows a regular nursing routine, you may wish to set your baby monitor to alert you have set the date and time on your... baby's next nursing time and the subsequent nursing times based on the interval time between them. terval...
... Time When setting the interval time, please include the time it takes to nurse your baby's nursing is to begin. Using the MBP15 19 ENGLISH 3.10 Feed Time If your baby follows a regular nursing routine, you may wish to set your baby monitor to alert you have set the date and time on your... baby's next nursing time and the subsequent nursing times based on the interval time between them. terval...

