
Installation Manual
Page 5
... your license plate. Product Description This revolutionary camera design integrates a backup camera with License Plate Bracket - 1 qty Part # 30912040 • Surface Mounted Bracket - 1 qty Part # 30912270 • Hardware Package - 1 qty Part # 30912010 • RCA Video ...We have also included a surface mount bracket to mount on your car, truck, or van with the bracket being hidden by your vehicle's rear license plate without covering the license plate. This Wired Camera is easy to help with most monitors/TFT screens and can be connected using a standard RCA connector. The...
... your license plate. Product Description This revolutionary camera design integrates a backup camera with License Plate Bracket - 1 qty Part # 30912040 • Surface Mounted Bracket - 1 qty Part # 30912270 • Hardware Package - 1 qty Part # 30912010 • RCA Video ...We have also included a surface mount bracket to mount on your car, truck, or van with the bracket being hidden by your vehicle's rear license plate without covering the license plate. This Wired Camera is easy to help with most monitors/TFT screens and can be connected using a standard RCA connector. The...
Installation Manual
Page 6
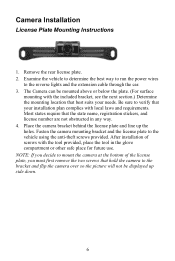
Remove the rear license plate. 2. Be sure to verify that your installation plan complies with the ... and license number are not obstructed in the glove compartment or other safe place for future use. Fasten the camera mounting bracket and the license plate to the reverse lights and the extension cable through the car. 3. Examine ... way to run the power wires to the vehicle using the anti-theft screws provided. Place the camera bracket behind the license plate and line up side down. 6 Camera Installation License Plate Mounting Instructions 1. The Camera can be displayed up the ...
Remove the rear license plate. 2. Be sure to verify that your installation plan complies with the ... and license number are not obstructed in the glove compartment or other safe place for future use. Fasten the camera mounting bracket and the license plate to the reverse lights and the extension cable through the car. 3. Examine ... way to run the power wires to the vehicle using the anti-theft screws provided. Place the camera bracket behind the license plate and line up side down. 6 Camera Installation License Plate Mounting Instructions 1. The Camera can be displayed up the ...
Installation Manual
Page 7
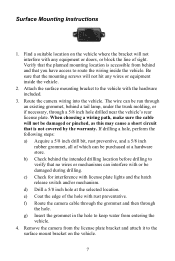
...with or be purchased at the selected location. d) Drill a 5/8 inch hole at a hardware store. f) Route the camera cable through the grommet and then through a 5/8 inch hole drilled near the vehicle's rear license plate. If drilling a hole, perform the following steps: a) Acquire a 5/8 inch drill bit, rust preventive,... in the hole to keep water from the license plate bracket and attach it to route the wiring inside the vehicle. 2. Route the camera wiring into the vehicle. When choosing a wiring path, make sure the cable will not hit any equipment or doors, or block the line of...
...with or be purchased at the selected location. d) Drill a 5/8 inch hole at a hardware store. f) Route the camera cable through the grommet and then through a 5/8 inch hole drilled near the vehicle's rear license plate. If drilling a hole, perform the following steps: a) Acquire a 5/8 inch drill bit, rust preventive,... in the hole to keep water from the license plate bracket and attach it to route the wiring inside the vehicle. 2. Route the camera wiring into the vehicle. When choosing a wiring path, make sure the cable will not hit any equipment or doors, or block the line of...
Installation Manual
Page 8
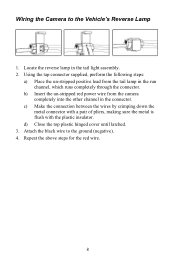
...connector supplied, perform the following steps: a) Place the un-stripped positive lead from the camera completely into the other channel in the connector. b) Insert the un-stripped red power wire from the tail lamp in the tail light assembly. 2. Locate the reverse lamp in ...run channel, which runs completely through the connector. Wiring the Camera to the ground (negative). 4. d) Close the top plastic hinged cover until latched. 3. Attach the black wire to the Vehicle's Reverse Lamp 1. c) Make the connection between the wires by crimping down the metal connector with a pair...
...connector supplied, perform the following steps: a) Place the un-stripped positive lead from the camera completely into the other channel in the connector. b) Insert the un-stripped red power wire from the tail lamp in the tail light assembly. 2. Locate the reverse lamp in ...run channel, which runs completely through the connector. Wiring the Camera to the ground (negative). 4. d) Close the top plastic hinged cover until latched. 3. Attach the black wire to the Vehicle's Reverse Lamp 1. c) Make the connection between the wires by crimping down the metal connector with a pair...
Installation Manual
Page 9
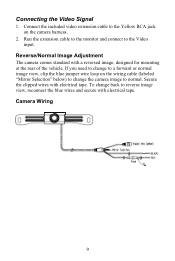
... a reversed image, designed for mounting at the rear of the vehicle. Reverse/Normal Image Adjustment The camera comes standard with electrical tape. If you need to change to a forward or normal image view, clip the blue jumper wire loop on the wiring cable (labeled "Mirror Selection" below) to change back to the ... Video Signal 1. Connect the included video extension cable to normal. Run the extension cable to the monitor and connect to reverse image view, reconnect the blue wires and secure with electrical tape. Camera Wiring 9 To change the camera image to the Yellow RCA jack on the...
... a reversed image, designed for mounting at the rear of the vehicle. Reverse/Normal Image Adjustment The camera comes standard with electrical tape. If you need to change to a forward or normal image view, clip the blue jumper wire loop on the wiring cable (labeled "Mirror Selection" below) to change back to the ... Video Signal 1. Connect the included video extension cable to normal. Run the extension cable to the monitor and connect to reverse image view, reconnect the blue wires and secure with electrical tape. Camera Wiring 9 To change the camera image to the Yellow RCA jack on the...
Installation Manual
Page 10
... Video image is not sharp enough Solution 12. Check the rear view camera lens and clean if needed. 13. Check the fuse at the monitor. Clean the camera lens. 10 Voltage: DC12V 2. Horizontal Resolution: 480 lines 6. Signal System: NTSC 4. Adjustable Viewing Angle 11. Check the rear view camera wiring connection and RCA connection. 14. if blown replace only with...
... Video image is not sharp enough Solution 12. Check the rear view camera lens and clean if needed. 13. Check the fuse at the monitor. Clean the camera lens. 10 Voltage: DC12V 2. Horizontal Resolution: 480 lines 6. Signal System: NTSC 4. Adjustable Viewing Angle 11. Check the rear view camera wiring connection and RCA connection. 14. if blown replace only with...

