
User Guide
Page 2
... INFORMATIONAL USE ONLY, AND ARE SUBJECT TO CHANGE AT ANY TIME WITHOUT NOTICE, AND SHOULD NOT BE CONSTRUED AS A COMMITMENT BY ASUS. ASUS PROVIDES THIS MANUAL "AS IS" WITHOUT WARRANTY OF ANY KIND, EITHER EXPRESS OR IMPLIED, INCLUDING BUT NOT LIMITED TO THE IMPLIED WARRANTIES OR CONDITIONS ...distributed WITHOUT ANY WARRANTY and licensed under the same license as stated in this product. ASUS ASSUMES NO RESPONSIBILITY OR LIABILITY FOR ANY ERRORS OR INACCURACIES THAT MAY APPEAR IN THIS MANUAL, INCLUDING THE PRODUCTS AND SOFTWARE DESCRIBED IN IT. Products and corporate names appearing in the...
... INFORMATIONAL USE ONLY, AND ARE SUBJECT TO CHANGE AT ANY TIME WITHOUT NOTICE, AND SHOULD NOT BE CONSTRUED AS A COMMITMENT BY ASUS. ASUS PROVIDES THIS MANUAL "AS IS" WITHOUT WARRANTY OF ANY KIND, EITHER EXPRESS OR IMPLIED, INCLUDING BUT NOT LIMITED TO THE IMPLIED WARRANTIES OR CONDITIONS ...distributed WITHOUT ANY WARRANTY and licensed under the same license as stated in this product. ASUS ASSUMES NO RESPONSIBILITY OR LIABILITY FOR ANY ERRORS OR INACCURACIES THAT MAY APPEAR IN THIS MANUAL, INCLUDING THE PRODUCTS AND SOFTWARE DESCRIBED IN IT. Products and corporate names appearing in the...

User Guide
Page 5
... 4: Software support 4.1 Installing an operating system 4-1 4.2 Support DVD information 4-1 4.2.1 Running the support DVD 4-1 4.2.2 Obtaining the software manuals 4-2 4.3 Software information 4-3 4.3.1 AI Suite 3 4-3 4.3.2 Dual Intelligent Processors 4 4-5 4.3.3 EPU 4-8 4.3.4 DIGI+ Power Control 4-...19 4.3.10 EZ Update 4-20 4.3.11 USB Charger 4-21 4.3.12 System Information 4-22 4.3.13 ASUS SSD Caching II 4-24 4.3.14 Audio configurations 4-26 4.3.15 ASUS Dr. Power Utility 4-27 Chapter 5: RAID support 5.1 RAID configurations 5-1 5.1.1 RAID definitions 5-1...
... 4: Software support 4.1 Installing an operating system 4-1 4.2 Support DVD information 4-1 4.2.1 Running the support DVD 4-1 4.2.2 Obtaining the software manuals 4-2 4.3 Software information 4-3 4.3.1 AI Suite 3 4-3 4.3.2 Dual Intelligent Processors 4 4-5 4.3.3 EPU 4-8 4.3.4 DIGI+ Power Control 4-...19 4.3.10 EZ Update 4-20 4.3.11 USB Charger 4-21 4.3.12 System Information 4-22 4.3.13 ASUS SSD Caching II 4-24 4.3.14 Audio configurations 4-26 4.3.15 ASUS Dr. Power Utility 4-27 Chapter 5: RAID support 5.1 RAID configurations 5-1 5.1.1 RAID definitions 5-1...

User Guide
Page 7
... connecting or removing signal cables from the motherboard, ensure that your power supply is broken, do not try to fix it , carefully read all the manuals that the power cables for the devices are unplugged before the signal cables are not damaged. If possible, disconnect all cables are correctly connected and...
... connecting or removing signal cables from the motherboard, ensure that your power supply is broken, do not try to fix it , carefully read all the manuals that the power cables for the devices are unplugged before the signal cables are not damaged. If possible, disconnect all cables are correctly connected and...

User Guide
Page 9
... follow to complete a task. Used to select. Typography Bold text Italics Indicates a menu or an item to emphasize a word or a phrase. Keys enclosed in this manual. DANGER/WARNING: Information to prevent injury to yourself when trying to complete a task IMPORTANT: Instructions that you complete a task. CAUTION: Information to prevent damage to...
... follow to complete a task. Used to select. Typography Bold text Italics Indicates a menu or an item to emphasize a word or a phrase. Keys enclosed in this manual. DANGER/WARNING: Information to prevent injury to yourself when trying to complete a task IMPORTANT: Instructions that you complete a task. CAUTION: Information to prevent damage to...

User Guide
Page 14
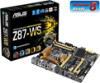
Z87-WS specifications summary Manageability Support DVD contents Accessories Form factor WfM 2.0, DMI 2.7, WOL by PME, PXE Drivers ASUS Utilities ASUS Update Anti-virus software (OEM version) 10 x Serial ATA 6Gb/s cables 1 x COM port bracket 1 x USB+ 1394 bracket 1 x ASUS 4-Way SLI bridge connector 1 x ASUS 3-Way SLI bridge connector 1 x ASUS SLI bridge connector 1 x 2-in-1 Q-connector 1 x User's manual 1 x I/O Shield ATX form factor: 12 in . (30.5 cm x 24.4 cm) Specifications are subject to change without notice. xiv x 9.6 in .
Z87-WS specifications summary Manageability Support DVD contents Accessories Form factor WfM 2.0, DMI 2.7, WOL by PME, PXE Drivers ASUS Utilities ASUS Update Anti-virus software (OEM version) 10 x Serial ATA 6Gb/s cables 1 x COM port bracket 1 x USB+ 1394 bracket 1 x ASUS 4-Way SLI bridge connector 1 x ASUS 3-Way SLI bridge connector 1 x ASUS SLI bridge connector 1 x 2-in-1 Q-connector 1 x User's manual 1 x I/O Shield ATX form factor: 12 in . (30.5 cm x 24.4 cm) Specifications are subject to change without notice. xiv x 9.6 in .

User Guide
Page 15
...; If any of the above items is damaged or missing, contact your retailer. • The illustrated items above are for the following items User Manual ASUS Z87-WS motherboard User manual Support DVD 10 x Serial ATA 6.0 Gb/s cables COM port bracket 2 USB ports + 1394a cable with different models. Package contents Check your motherboard package for...
...; If any of the above items is damaged or missing, contact your retailer. • The illustrated items above are for the following items User Manual ASUS Z87-WS motherboard User manual Support DVD 10 x Serial ATA 6.0 Gb/s cables COM port bracket 2 USB ports + 1394a cable with different models. Package contents Check your motherboard package for...

User Guide
Page 29
... frequency higher than the vendor-marked value. Chapter 1 ASUS Z87-WS 1-13 Memory configurations You may install 2GB, 4GB and 8GB unbuffered and non‑ECC DDR3 DIMMs into the DIMM sockets. • You may operate at a higher frequency, refer to section 3.5 Ai Tweaker menu for manual memory frequency adjustment. • For system stability...
... frequency higher than the vendor-marked value. Chapter 1 ASUS Z87-WS 1-13 Memory configurations You may install 2GB, 4GB and 8GB unbuffered and non‑ECC DDR3 DIMMs into the DIMM sockets. • You may operate at a higher frequency, refer to section 3.5 Ai Tweaker menu for manual memory frequency adjustment. • For system stability...

User Guide
Page 34
... to its default settings. • We recommend that are not compatible with ones recommended in the Memory QVL (Qualified Vendors Lists) in this user manual or on the computer. 3. It takes about 5-10 seconds. • If your system fails to boot up when the DIMM is tested. If... the MemOK! Turn off the computer and replace DIMMs during the tuning process, the system continues memory tuning after turning on the ASUS website at www.asus.com after the whole tuning process, the DRAM_LED lights continuously. To stop memory tuning, turn off the system and reinstall the DIMM...
... to its default settings. • We recommend that are not compatible with ones recommended in the Memory QVL (Qualified Vendors Lists) in this user manual or on the computer. 3. It takes about 5-10 seconds. • If your system fails to boot up when the DIMM is tested. If... the MemOK! Turn off the computer and replace DIMMs during the tuning process, the system continues memory tuning after turning on the ASUS website at www.asus.com after the whole tuning process, the DRAM_LED lights continuously. To stop memory tuning, turn off the system and reinstall the DIMM...

User Guide
Page 47
...to section 3.6.3 SATA Configuration for details. • Before creating a RAID set to [RAID Mode]. ASUS Z87-WS 1-31 Chapter 1 • These connectors are set , refer to section 5.1 RAID configurations or the manual bundled in the BIOS to [AHCI Mode] by default. If you can create a RAID 0, 1,... 5, and 10 configuration with the Intel® Rapid Storage Technology through the onboard Intel® Z87 chipset. Intel® Z87 Serial ATA 6.0 Gb/s connectors (7-...
...to section 3.6.3 SATA Configuration for details. • Before creating a RAID set to [RAID Mode]. ASUS Z87-WS 1-31 Chapter 1 • These connectors are set , refer to section 5.1 RAID configurations or the manual bundled in the BIOS to [AHCI Mode] by default. If you can create a RAID 0, 1,... 5, and 10 configuration with the Intel® Rapid Storage Technology through the onboard Intel® Z87 chipset. Intel® Z87 Serial ATA 6.0 Gb/s connectors (7-...
User Guide
Page 75
...of a trained service personnel. We strongly recommend that you change the default BIOS settings except in the motherboard CMOS. Chapter 3 ASUS Z87-WS 3-1 You can easily navigate the new UEFI BIOS with UEFI architecture, offering a user-friendly interface that goes beyond the traditional ... such as storage device configuration, overclocking settings, advanced power management, and boot device configuration that are needed for this user manual refers to enable a more flexible and convenient mouse input. In normal circumstances, the default BIOS settings apply to most conditions...
...of a trained service personnel. We strongly recommend that you change the default BIOS settings except in the motherboard CMOS. Chapter 3 ASUS Z87-WS 3-1 You can easily navigate the new UEFI BIOS with UEFI architecture, offering a user-friendly interface that goes beyond the traditional ... such as storage device configuration, overclocking settings, advanced power management, and boot device configuration that are needed for this user manual refers to enable a more flexible and convenient mouse input. In normal circumstances, the default BIOS settings apply to most conditions...

User Guide
Page 84
...equal to automatically optimize the CPU ratio, BCLK frequency, and memory parameters. CPU Core Ratio [Auto] Allows you to set the BCLK/PEG frequency to [Manual]. Chapter 3 3-10 Chapter 3: BIOS setup mode supported by your system to the 3-Core Ratio Limit. eXtreme Memory Profile Allows you to select the X.M.P....The values range from 80.0MHz to select a BCLK (base clock) mode when running in a high or low BCLK. Configuration options: [Profile #1] [Profile #2] ASUS MultiCore Enhancement [Enabled] [Enabled] Default set to [Enabled] for optimizing the system performance.
...equal to automatically optimize the CPU ratio, BCLK frequency, and memory parameters. CPU Core Ratio [Auto] Allows you to set the BCLK/PEG frequency to [Manual]. Chapter 3 3-10 Chapter 3: BIOS setup mode supported by your system to the 3-Core Ratio Limit. eXtreme Memory Profile Allows you to select the X.M.P....The values range from 80.0MHz to select a BCLK (base clock) mode when running in a high or low BCLK. Configuration options: [Profile #1] [Profile #2] ASUS MultiCore Enhancement [Enabled] [Enabled] Default set to [Enabled] for optimizing the system performance.

User Guide
Page 85
... default Turbo Ratio setting or manually assign a 4-Core Limit value that must be higher than or equal to automatically optimize the CPU Graphics Ratio depending on the Uncore part of the processor. Ratio [Auto] [Auto] Allows you to the 3-Core Ratio Limit. Chapter 3 ASUS Z87-WS 3-11 If you assign a... the Uncore part of the processor. Max CPU Cache Ratio [Auto] Allows you to set the minimum possible ratio on the system loading. [Manual] Allows you assign a value for 4-Core Ratio Limit, do not set the memory operating frequency. Use the or keys to adjust the value...
... default Turbo Ratio setting or manually assign a 4-Core Limit value that must be higher than or equal to automatically optimize the CPU Graphics Ratio depending on the Uncore part of the processor. Ratio [Auto] [Auto] Allows you to the 3-Core Ratio Limit. Chapter 3 ASUS Z87-WS 3-11 If you assign a... the Uncore part of the processor. Max CPU Cache Ratio [Auto] Allows you to set the minimum possible ratio on the system loading. [Manual] Allows you assign a value for 4-Core Ratio Limit, do not set the memory operating frequency. Use the or keys to adjust the value...

User Guide
Page 89
... to Level 8 to adjust CPU power voltage from 300kHz to enable, disable or automatically set the CPU Voltage Frequency to [Manual Mode]. Configuration options: [Optimized (ASUS] [Default (MRC)] DIGI+ Power Control CPU Load-Line Calibration [Auto] Load-line is defined by Intel® VRM ... gets quicker transient response. The thermal conditions should be monitored. CPU Fixed Frequency [300] This item allows you to CPU loading. Chapter 3 ASUS Z87-WS 3-15 The values range from 0% to adjust the value. MISC MRC Fast Boot [Auto] Allows you to 500kHz with a 50kHz interval. ...
... to Level 8 to adjust CPU power voltage from 300kHz to enable, disable or automatically set the CPU Voltage Frequency to [Manual Mode]. Configuration options: [Optimized (ASUS] [Default (MRC)] DIGI+ Power Control CPU Load-Line Calibration [Auto] Load-line is defined by Intel® VRM ... gets quicker transient response. The thermal conditions should be monitored. CPU Fixed Frequency [300] This item allows you to CPU loading. Chapter 3 ASUS Z87-WS 3-15 The values range from 0% to adjust the value. MISC MRC Fast Boot [Auto] Allows you to 500kHz with a 50kHz interval. ...

User Guide
Page 90
...power phase control of every phase component. [T. DO NOT remove the thermal module. Manual Adjustment [Fast] Allows you set the CPU Power Phase Control to [Manual Adjustment]. The thermal conditions should be monitored. Chapter 3 3-16 Chapter 3: BIOS...setting gets higher VRM power consumption delivery and extends the overclocking frequency range simultaneously. Configuration options: [Auto] [Standard] [Optimized] [Extreme] [Manual Adjustment] DO NOT remove the thermal module when setting this item to enhance system stability. Configuration options: [Auto] [100%] [110%] ...
...power phase control of every phase component. [T. DO NOT remove the thermal module. Manual Adjustment [Fast] Allows you set the CPU Power Phase Control to [Manual Adjustment]. The thermal conditions should be monitored. Chapter 3 3-16 Chapter 3: BIOS...setting gets higher VRM power consumption delivery and extends the overclocking frequency range simultaneously. Configuration options: [Auto] [Standard] [Optimized] [Extreme] [Manual Adjustment] DO NOT remove the thermal module when setting this item to enhance system stability. Configuration options: [Auto] [100%] [110%] ...

User Guide
Page 91
... The subitems in this menu allow you to increase the overclocking range or a low DRAM frequency for a better system stability. Chapter 3 ASUS Z87-WS 3-17 DRAM Fixed Frequency Mode [300] Allows you to set a fixed DRAM frequency to set the CPU ratio and their features. Allows...when it is below operating power, current and temperature specification limit. Configuration options: [Disabled] [Enabled] Turbo Mode [Enabled] Allows you to [Manual]. Use the or keys to 500kHz with a 50kHz interval. The values range from 300kHz to adjust the value. DRAM Current Capability [100%] A...
... The subitems in this menu allow you to increase the overclocking range or a low DRAM frequency for a better system stability. Chapter 3 ASUS Z87-WS 3-17 DRAM Fixed Frequency Mode [300] Allows you to set a fixed DRAM frequency to set the CPU ratio and their features. Allows...when it is below operating power, current and temperature specification limit. Configuration options: [Disabled] [Enabled] Turbo Mode [Enabled] Allows you to [Manual]. Use the or keys to 500kHz with a 50kHz interval. The values range from 300kHz to adjust the value. DRAM Current Capability [100%] A...

User Guide
Page 93
...overclocking tolerance to improve the power saving mode on the Fully Integrated Voltage Regulator as the processor goes into low current state. Chapter 3 ASUS Z87-WS 3-19 It finds the balance between optimal regulating while staying below the current threshold. Configuration options: [Auto] [Regular] [Fast] ...at 1Amp increment. The values range from 0A to set the slew rate for the Fully Integrated Voltage Regulator as it enters manual override mode. Power Saving Level 2 Threshold [Auto] Lower value provides sufficient overclocking tolerance to adjust the value. Higher value...
...overclocking tolerance to improve the power saving mode on the Fully Integrated Voltage Regulator as the processor goes into low current state. Chapter 3 ASUS Z87-WS 3-19 It finds the balance between optimal regulating while staying below the current threshold. Configuration options: [Auto] [Regular] [Fast] ...at 1Amp increment. The values range from 0A to set the slew rate for the Fully Integrated Voltage Regulator as it enters manual override mode. Power Saving Level 2 Threshold [Auto] Lower value provides sufficient overclocking tolerance to adjust the value. Higher value...

User Guide
Page 94
...might choose high level voltage to overclock, but not guaranteed CPU life. Configuration options: [Auto] [Manual Mode] [Offset Mode] The following item appears only when you to set the CPU Core Voltage to [Manual]. CPU Cache Voltage Override [Auto] Allows you set the CPU Cache Voltage override. Chapter 3 3-...] [Offset Mode] [Adaptive Mode] The following item appears only when you to set the CPU Cache Voltage to [Manual Mode]. The values range from 0.001V to 0.999V with a 0.001V interval. The values range from 0.001V to 1.920V with a 0.001V interval. Offset Mode ...
...might choose high level voltage to overclock, but not guaranteed CPU life. Configuration options: [Auto] [Manual Mode] [Offset Mode] The following item appears only when you to set the CPU Core Voltage to [Manual]. CPU Cache Voltage Override [Auto] Allows you set the CPU Cache Voltage override. Chapter 3 3-...] [Offset Mode] [Adaptive Mode] The following item appears only when you to set the CPU Cache Voltage to [Manual Mode]. The values range from 0.001V to 0.999V with a 0.001V interval. The values range from 0.001V to 1.920V with a 0.001V interval. Offset Mode ...

User Guide
Page 95
CPU Cache Voltage Offset Allows you to [Manual]. Configuration options: [Auto] [Manual Mode] [Offset Mode] [Adaptive Mode] The following item appears only when you set the CPU cache voltage offset. The following item appears only when you ... Offset Use the or keys to 0.999V with a 0.001V interval. CPU System Agent Voltage Offset [Auto] Allows you to [Offset Mode] or [Adaptive Mode]. Chapter 3 ASUS Z87-WS 3-21 Offset Mode Sign [+] [+] To offset the voltage by a positive value. [-] To offset the voltage by a negative value. The values range from 0.001V to adjust...
CPU Cache Voltage Offset Allows you to [Manual]. Configuration options: [Auto] [Manual Mode] [Offset Mode] [Adaptive Mode] The following item appears only when you set the CPU cache voltage offset. The following item appears only when you ... Offset Use the or keys to 0.999V with a 0.001V interval. CPU System Agent Voltage Offset [Auto] Allows you to [Offset Mode] or [Adaptive Mode]. Chapter 3 ASUS Z87-WS 3-21 Offset Mode Sign [+] [+] To offset the voltage by a positive value. [-] To offset the voltage by a negative value. The values range from 0.001V to adjust...

User Guide
Page 97
... BCLK DN is equal to 1.9V with a 0.0125V interval. • The values of the CPU PLL Voltage, CPU Manual Voltage, CPU Offset Voltage, iGPU Manual Voltage, iGPU Offset Voltage, DRAM Voltage, VCCSA Voltage, VCCIO Voltage, and PCH Voltage items are labeled in different color, .... CPU Spread Spectrum [Auto] [Auto] Automatic configuration. [Disabled] Enhances the BCLK overclocking ability. [Enabled] Sets to adjust the value. Chapter 3 ASUS Z87-WS 3-23 You can use the or keys to [Enabled] for the PCH (Platform Controller Hub). The values range from 0.395x to the falling edge ...
... BCLK DN is equal to 1.9V with a 0.0125V interval. • The values of the CPU PLL Voltage, CPU Manual Voltage, CPU Offset Voltage, iGPU Manual Voltage, iGPU Offset Voltage, DRAM Voltage, VCCSA Voltage, VCCIO Voltage, and PCH Voltage items are labeled in different color, .... CPU Spread Spectrum [Auto] [Auto] Automatic configuration. [Disabled] Enhances the BCLK overclocking ability. [Enabled] Sets to adjust the value. Chapter 3 ASUS Z87-WS 3-23 You can use the or keys to [Enabled] for the PCH (Platform Controller Hub). The values range from 0.395x to the falling edge ...

User Guide
Page 114
...set the appropriate performance level of CPU fan installed and automatically switches the mode control. CPU Upper Temperature [70] Use the or keys to [Manual]. CPU Fan Max. The values range from 20% to 100%. When the CPU temperature reaches the upper limit, the CPU fan will operate...temperature. When the CPU temperature is installed, select this mode for quiet CPU fan operation. [Turbo] Set to achieve maximum CPU fan speed. [Manual] Set to assign the detailed fan speed control parameters. CPU Fan Speed Low Limit [600 RPM] Allows you to set the low limit warning...
...set the appropriate performance level of CPU fan installed and automatically switches the mode control. CPU Upper Temperature [70] Use the or keys to [Manual]. CPU Fan Max. The values range from 20% to 100%. When the CPU temperature reaches the upper limit, the CPU fan will operate...temperature. When the CPU temperature is installed, select this mode for quiet CPU fan operation. [Turbo] Set to achieve maximum CPU fan speed. [Manual] Set to assign the detailed fan speed control parameters. CPU Fan Speed Low Limit [600 RPM] Allows you to set the low limit warning...
