
User Guide
Page 31
... Cache initialization Reserved for future AMI SEC error codes Microcode not found or micro-code update is failed Internal CPU error Reset PPI is not available Reserved for future AMI error codes S3 Resume is stared (S3 Resume PPI is called by the DXE IPL) S3 Boot Script execution Video repost... is started Memory initialization Reserved for future AMI progress codes S3 Resume Failed (continued on . E7 E8 Description Not used Power on the next page) ASUS Z270-WS 1-15
... Cache initialization Reserved for future AMI SEC error codes Microcode not found or micro-code update is failed Internal CPU error Reset PPI is not available Reserved for future AMI error codes S3 Resume is stared (S3 Resume PPI is called by the DXE IPL) S3 Boot Script execution Video repost... is started Memory initialization Reserved for future AMI progress codes S3 Resume Failed (continued on . E7 E8 Description Not used Power on the next page) ASUS Z270-WS 1-15

User Guide
Page 32
... (Forced recovery) Recovery process started Recovery firmware image is found Recovery firmware image is loaded Reserved for future AMI progress codes Recovery PPI is not available Recovery capsule is not found Invalid recovery capsule Reserved for future AMI error codes DXE Core is started NVRAM initialization Installation of the PCH Runtime...
... (Forced recovery) Recovery process started Recovery firmware image is found Recovery firmware image is loaded Reserved for future AMI progress codes Recovery PPI is not available Recovery capsule is not found Invalid recovery capsule Reserved for future AMI error codes DXE Core is started NVRAM initialization Installation of the PCH Runtime...
User Guide
Page 33
... AD AE AF B0 B1 B2 B3 B4 B5 B6 B7 B8- Out of the Architectural Protocols are found No Console Input Devices are not available PCI resource allocation error. BF D0 D1 D2 D3 D4 D5 D6 D7 D8 D9 DA DB DC Description USB Detect USB Enable Reserved for... found Invalid password Error loading Boot Option (LoadImage returned error) Boot Option is failed (StartImage returned error) Flash update is failed Reset protocol is not available ASUS Z270-WS 1-17
... AD AE AF B0 B1 B2 B3 B4 B5 B6 B7 B8- Out of the Architectural Protocols are found No Console Input Devices are not available PCI resource allocation error. BF D0 D1 D2 D3 D4 D5 D6 D7 D8 D9 DA DB DC Description USB Detect USB Enable Reserved for... found Invalid password Error loading Boot Option (LoadImage returned error) Boot Option is failed (StartImage returned error) Flash update is failed Reset protocol is not available ASUS Z270-WS 1-17

User Guide
Page 36
We recommend that you connect a high-definition front panel audio module to this connector to avail of the front panel audio I /O module that supports HD Audio. Front panel audio connector (10-1 pin AAFP) This connector is for a chassis-mounted front panel audio I /O module cable to this connector. U.2 connectors (U.2_1-2) This motherboard comes with U.2 connectors which support PCIe 3.0 x4 NVM Express storage. 1-20 Chapter 1: Product Introduction Connect one end of the motherboard's high-definition audio capability. 3. Chapter 1 2.
We recommend that you connect a high-definition front panel audio module to this connector to avail of the front panel audio I /O module that supports HD Audio. Front panel audio connector (10-1 pin AAFP) This connector is for a chassis-mounted front panel audio I /O module cable to this connector. U.2 connectors (U.2_1-2) This motherboard comes with U.2 connectors which support PCIe 3.0 x4 NVM Express storage. 1-20 Chapter 1: Product Introduction Connect one end of the motherboard's high-definition audio capability. 3. Chapter 1 2.

User Guide
Page 87
Click an item to start booting from the available devices. When you to run ASUS EZ Flash 3. Use the left/right arrow key to select between [Yes] or [No], then press to configure options for special functions. Chapter 3 ASUS Z270-WS 3-23 The number of device items that appears ...on the screen depends on the number of devices installed in Safe Mode, press after POST (Windows® 8 not supported). • To select the boot device during system startup, press when the ASUS Logo appears....
Click an item to start booting from the available devices. When you to run ASUS EZ Flash 3. Use the left/right arrow key to select between [Yes] or [No], then press to configure options for special functions. Chapter 3 ASUS Z270-WS 3-23 The number of device items that appears ...on the screen depends on the number of devices installed in Safe Mode, press after POST (Windows® 8 not supported). • To select the boot device during system startup, press when the ASUS Logo appears....

User Guide
Page 88
... SSD speeds may lower over time as with the Secure Erase. • Locked. Secure Erase is only supported on its size. Displays the available SSDs Chapter 3 Status definition: • Frozen. For more information about Intel SATA ports, refer to factory performance levels. Ensure to set the... SATA mode to data processing. Check the ASUS support site for a full list of your SSD, restoring it to section 1.1.2 Motherboard layout of a BIOS protective measure. You have password protection...
... SSD speeds may lower over time as with the Secure Erase. • Locked. Secure Erase is only supported on its size. Displays the available SSDs Chapter 3 Status definition: • Frozen. For more information about Intel SATA ports, refer to factory performance levels. Ensure to set the... SATA mode to data processing. Check the ASUS support site for a full list of your SSD, restoring it to section 1.1.2 Motherboard layout of a BIOS protective measure. You have password protection...

User Guide
Page 90
... if you selected are saved. Save Changes & Reset Once you are finished making your changes to load the optimal default values for each of the available filesystem devices. When you select this option or if you to the BIOS items. You can access the EZ Mode from one of the parameters...
... if you selected are saved. Save Changes & Reset Once you are finished making your changes to load the optimal default values for each of the available filesystem devices. When you select this option or if you to the BIOS items. You can access the EZ Mode from one of the parameters...
User Guide
Page 91
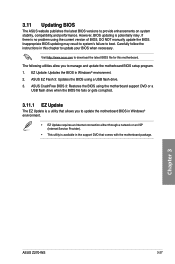
...enhancements on system stability, compatibility,and performance. Chapter 3 ASUS Z270-WS 3-27 Carefully follow the instructions in Windows® environment. 2. Visit http://www.asus.com to update your BIOS when necessary. 3.11 Updating BIOS The ASUS website publishes the latest BIOS versions to manage and update...motherboard support DVD or a USB flash drive when the BIOS file fails or gets corrupted. 3.11.1 EZ Update The EZ Update is available in Windows® environment. • EZ Update requires an Internet connection either through a network or an ISP (Internet Service Provider). ...
...enhancements on system stability, compatibility,and performance. Chapter 3 ASUS Z270-WS 3-27 Carefully follow the instructions in Windows® environment. 2. Visit http://www.asus.com to update your BIOS when necessary. 3.11 Updating BIOS The ASUS website publishes the latest BIOS versions to manage and update...motherboard support DVD or a USB flash drive when the BIOS file fails or gets corrupted. 3.11.1 EZ Update The EZ Update is available in Windows® environment. • EZ Update requires an Internet connection either through a network or an ISP (Internet Service Provider). ...

User Guide
Page 98
... a lower strip size for server systems, and a higher strip size for multimedia computer systems used mainly for RAID 0, 10 and 5 only), and then press . 5. The available strip size values range from 4 KB to the Intel® Rapid Storage Technology menu.
... a lower strip size for server systems, and a higher strip size for multimedia computer systems used mainly for RAID 0, 10 and 5 only), and then press . 5. The available strip size values range from 4 KB to the Intel® Rapid Storage Technology menu.

User Guide
Page 102
... RAID 0, 10 and 5 only), and then press . When the Create Volume item is selected, enter the RAID volume capacity that you want and press . The available strip size values range from 4 KB to the CREATE VOLUME menu. Chapter 4 4-8 Chapter 4: RAID Support When the Capacity item is selected, press . The following warning...
... RAID 0, 10 and 5 only), and then press . When the Create Volume item is selected, enter the RAID volume capacity that you want and press . The available strip size values range from 4 KB to the CREATE VOLUME menu. Chapter 4 4-8 Chapter 4: RAID Support When the Capacity item is selected, press . The following warning...
