
Users Manual
Page 4
... Using touch screen panel gestures 33 Using the touchpad...35 Using the keyboard...42 HotKeys...42 Function keys...43 Windows keys...43 Chapter 3: Working with Windows Starting for the first time 46 Start menu...47 Windows apps...49 Working with Windows apps 50 Customizing Windows apps 50 Task view...53 Widgets...54 Snap feature...56 Snap hotspots...56 Action Center...58 MyASUS Splendid...60 Other keyboard shortcuts 62 Connecting to wireless networks 64 Wi-Fi...64 Bluetooth...
... Using touch screen panel gestures 33 Using the touchpad...35 Using the keyboard...42 HotKeys...42 Function keys...43 Windows keys...43 Chapter 3: Working with Windows Starting for the first time 46 Start menu...47 Windows apps...49 Working with Windows apps 50 Customizing Windows apps 50 Task view...53 Widgets...54 Snap feature...56 Snap hotspots...56 Action Center...58 MyASUS Splendid...60 Other keyboard shortcuts 62 Connecting to wireless networks 64 Wi-Fi...64 Bluetooth...

Users Manual
Page 5
... Self-Test (POST) The Power-On Self-Test (POST 70 Using POST to access BIOS and Troubleshoot 70 BIOS...70 Accessing BIOS...70 Recovering your system 71 Performing a recovery option 72 Tips and FAQs Useful tips for your Notebook PC 76 Hardware FAQs...78 Software FAQs...81 Appendices Internal Modem Compliancy 84 Overview...84 Network Compatibility Declaration 85 Non-Voice Equipment...85 Federal Communications ... 90 Déclaration de conformité de Innovation, Sciences et Développement économique Canada (ISED 90 Caution...91 Mise en garde...91 Notebook PC E-Manual 5
... Self-Test (POST) The Power-On Self-Test (POST 70 Using POST to access BIOS and Troubleshoot 70 BIOS...70 Accessing BIOS...70 Recovering your system 71 Performing a recovery option 72 Tips and FAQs Useful tips for your Notebook PC 76 Hardware FAQs...78 Software FAQs...81 Appendices Internal Modem Compliancy 84 Overview...84 Network Compatibility Declaration 85 Non-Voice Equipment...85 Federal Communications ... 90 Déclaration de conformité de Innovation, Sciences et Développement économique Canada (ISED 90 Caution...91 Mise en garde...91 Notebook PC E-Manual 5
Users Manual
Page 7
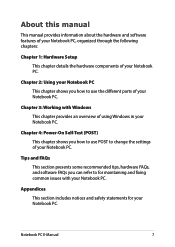
... you how to use POST to change the settings of using Windows in your Notebook PC. About this manual This manual provides information about the hardware and software features of your Notebook PC, organized through the following chapters: Chapter 1: Hardware Setup This chapter details the hardware components of your Notebook PC. Appendices This section includes notices and safety statements for maintaining and fixing common issues with...
... you how to use POST to change the settings of using Windows in your Notebook PC. About this manual This manual provides information about the hardware and software features of your Notebook PC, organized through the following chapters: Chapter 1: Hardware Setup This chapter details the hardware components of your Notebook PC. Appendices This section includes notices and safety statements for maintaining and fixing common issues with...

Users Manual
Page 10
...power and remove the battery pack (if applicable) before cleaning your Notebook PC to strong magnetic or electrical fields. Do not expose your Notebook PC. Use a clean cellulose sponge or chamois cloth dampened with a solution of nonabrasive detergent and a few drops of your Notebook PC using a dry cloth. Keep any extra moisture from entering the chassis or keyboard... gap to dusty environments. 10 Notebook PC E-Manual Do not use or expose your Notebook PC near your Notebook PC ...
...power and remove the battery pack (if applicable) before cleaning your Notebook PC to strong magnetic or electrical fields. Do not expose your Notebook PC. Use a clean cellulose sponge or chamois cloth dampened with a solution of nonabrasive detergent and a few drops of your Notebook PC using a dry cloth. Keep any extra moisture from entering the chassis or keyboard... gap to dusty environments. 10 Notebook PC E-Manual Do not use or expose your Notebook PC near your Notebook PC ...
Users Manual
Page 12
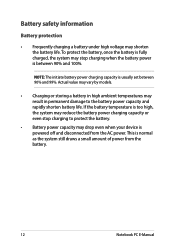
... device is powered off and disconnected from the battery. 12 Notebook PC E-Manual NOTE: The initiate battery power charging capacity is between 90% and 99%. Actual value may vary by models. • Charging or storing a battery in high ambient temperatures may result in permanent damage to protect the battery. • Battery power capacity may reduce the battery power charging capacity or even stop charging when the battery power is usually set...
... device is powered off and disconnected from the battery. 12 Notebook PC E-Manual NOTE: The initiate battery power charging capacity is between 90% and 99%. Actual value may vary by models. • Charging or storing a battery in high ambient temperatures may result in permanent damage to protect the battery. • Battery power capacity may reduce the battery power charging capacity or even stop charging when the battery power is usually set...

Users Manual
Page 19
Docking port Connect your device to support keyboard and touchpad functions. Bottom View Hinge holes Align and insert the latch hooks into these holes to securely attach your device to this port to the keyboard. Notebook PC E-Manual 19
Docking port Connect your device to support keyboard and touchpad functions. Bottom View Hinge holes Align and insert the latch hooks into these holes to securely attach your device to this port to the keyboard. Notebook PC E-Manual 19
Users Manual
Page 22
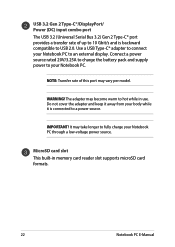
... is connected to hot while in memory card reader slot supports microSD card formats. 22 Notebook PC E-Manual It may take longer to your Notebook PC through a low-voltage power source. WARNING! MicroSD card slot This built-in use. The adapter may become warm to a power source. IMPORTANT! USB 3.2 Gen 2 Type-C®/DisplayPort/ Power (DC) input combo port The USB 3.2 (Universal Serial Bus 3.2) Gen 2 Type-C® port provides a transfer rate of this port may vary per model. Connect a power source...
... is connected to hot while in memory card reader slot supports microSD card formats. 22 Notebook PC E-Manual It may take longer to your Notebook PC through a low-voltage power source. WARNING! MicroSD card slot This built-in use. The adapter may become warm to a power source. IMPORTANT! USB 3.2 Gen 2 Type-C®/DisplayPort/ Power (DC) input combo port The USB 3.2 (Universal Serial Bus 3.2) Gen 2 Type-C® port provides a transfer rate of this port may vary per model. Connect a power source...

Users Manual
Page 24
... use the function keys, allows quick access to navigate onscreen, providing an intuitive user experience. Keyboard The keyboard provides full-sized QWERTY keys with a comfortable travel depth for typing. It also enables you to use of multi-gestures to Windows, and controls other multimedia functions. NOTE: The keyboard layout differs by aligning the dock port on top of a regular mouse. It also simulates the functions of this manual. 24 Notebook PC E-Manual...
... use the function keys, allows quick access to navigate onscreen, providing an intuitive user experience. Keyboard The keyboard provides full-sized QWERTY keys with a comfortable travel depth for typing. It also enables you to use of multi-gestures to Windows, and controls other multimedia functions. NOTE: The keyboard layout differs by aligning the dock port on top of a regular mouse. It also simulates the functions of this manual. 24 Notebook PC E-Manual...

Users Manual
Page 31
WARNING! IMPORTANT! • Locate the input/output rating label on your Notebook PC and ensure that your Notebook PC is connected to the power adapter before turning it matches the input/output rating information on for non-removable battery only). • Discontinue usage if leakage is replaced by an incorrect type. • Do not dispose of in this device to a properly grounded electrical...
WARNING! IMPORTANT! • Locate the input/output rating label on your Notebook PC and ensure that your Notebook PC is connected to the power adapter before turning it matches the input/output rating information on for non-removable battery only). • Discontinue usage if leakage is replaced by an incorrect type. • Do not dispose of in this device to a properly grounded electrical...
Users Manual
Page 33
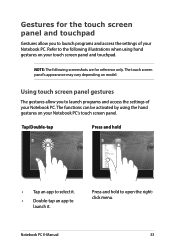
... access the settings of your Notebook PC's touch screen panel. Notebook PC E-Manual 33 Gestures for reference only. Using touch screen panel gestures The gestures allow you to open the rightclick menu. Press and hold • Tap an app to select it. • Double-tap an app to launch programs and access the settings of your touch screen panel and touchpad. Refer to the following screenshots are for the touch screen panel and touchpad...
... access the settings of your Notebook PC's touch screen panel. Notebook PC E-Manual 33 Gestures for reference only. Using touch screen panel gestures The gestures allow you to open the rightclick menu. Press and hold • Tap an app to select it. • Double-tap an app to launch programs and access the settings of your touch screen panel and touchpad. Refer to the following screenshots are for the touch screen panel and touchpad...

Users Manual
Page 42
Using the keyboard HotKeys The HotKeys on your Notebook PC's keyboard can trigger the following commands: Turns the speaker on or off Turns the speaker volume down Turns the speaker volume up Decreases display brightness Increases display brightness Enables or disables the touchpad Toggles the display mode NOTE: Ensure that the second display is connected to your Notebook PC. 42 Notebook PC E-Manual
Using the keyboard HotKeys The HotKeys on your Notebook PC's keyboard can trigger the following commands: Turns the speaker on or off Turns the speaker volume down Turns the speaker volume up Decreases display brightness Increases display brightness Enables or disables the touchpad Toggles the display mode NOTE: Ensure that the second display is connected to your Notebook PC. 42 Notebook PC E-Manual
Users Manual
Page 46
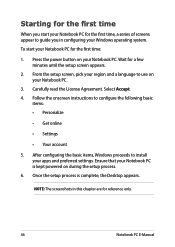
... settings. After configuring the basic items, Windows proceeds to use on during the setup process. 6. NOTE: The screenshots in configuring your Notebook PC. 3. To start your Notebook PC for reference only. 46 Notebook PC E-Manual Once the setup process is kept powered on your Windows operating system. Press the power button on your Notebook PC is complete, the Desktop appears. Select Accept. 4. Follow the onscreen instructions to guide you start your Notebook...
... settings. After configuring the basic items, Windows proceeds to use on during the setup process. 6. NOTE: The screenshots in configuring your Notebook PC. 3. To start your Notebook PC for reference only. 46 Notebook PC E-Manual Once the setup process is kept powered on your Windows operating system. Press the power button on your Notebook PC is complete, the Desktop appears. Select Accept. 4. Follow the onscreen instructions to guide you start your Notebook...

Users Manual
Page 47
... You can use the Start menu to do these common activities: • Start programs or Windows apps • Open commonly used programs or Windows apps • Adjust Notebook PC settings • Get help with the Windows operating system • Turn off from Windows or switch to your Notebook PC • Log off your Notebook PC's programs, Windows apps, folders, and settings. Start menu The Start menu is the main gateway to a different user account Notebook PC E-Manual 47
... You can use the Start menu to do these common activities: • Start programs or Windows apps • Open commonly used programs or Windows apps • Adjust Notebook PC settings • Get help with the Windows operating system • Turn off from Windows or switch to your Notebook PC • Log off your Notebook PC's programs, Windows apps, folders, and settings. Start menu The Start menu is the main gateway to a different user account Notebook PC E-Manual 47
Users Manual
Page 60
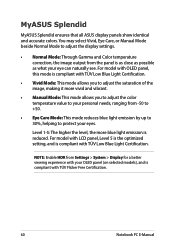
... setting, and is compliant with TÜV Low Blue Light Certification. • Vivid Mode: This mode allows you to adjust the color temperature value to your personal needs, ranging from the panel is as close as possible as what your OLED panel (on selected models), and is compliant with your eye can naturally see. MyASUS Splendid MyASUS Splendid ensures that all ASUS display panels...
... setting, and is compliant with TÜV Low Blue Light Certification. • Vivid Mode: This mode allows you to adjust the color temperature value to your personal needs, ranging from the panel is as close as possible as what your OLED panel (on selected models), and is compliant with your eye can naturally see. MyASUS Splendid MyASUS Splendid ensures that all ASUS display panels...
Users Manual
Page 70
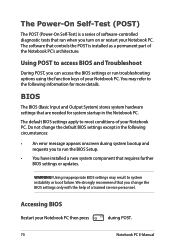
... troubleshooting options using the function keys of your Notebook PC. Do not change the BIOS settings only with the help of the Notebook PC's architecture. Using inappropriate BIOS settings may refer to system instability or boot failure. The Power-On Self-Test (POST) The POST (Power-On Self-Test) is installed as a permanent part of a trained service personnel. The default BIOS settings apply to most conditions of software-controlled diagnostic tests that you to access BIOS...
... troubleshooting options using the function keys of your Notebook PC. Do not change the BIOS settings only with the help of the Notebook PC's architecture. Using inappropriate BIOS settings may refer to system instability or boot failure. The Power-On Self-Test (POST) The POST (Power-On Self-Test) is installed as a permanent part of a trained service personnel. The default BIOS settings apply to most conditions of software-controlled diagnostic tests that you to access BIOS...

Users Manual
Page 76
... the latest settings for ASUS exclusive applications, drivers, and utilities. • Use an anti-virus software to protect your data and keep this updated too. • Unless absolutely necessary, refrain from using force shutdown to turn off your Notebook PC. • Always backup your data and make it a point to create a backup data in an external storage drive. • If you are not using your Notebook PC for...
... the latest settings for ASUS exclusive applications, drivers, and utilities. • Use an anti-virus software to protect your data and keep this updated too. • Unless absolutely necessary, refrain from using force shutdown to turn off your Notebook PC. • Always backup your data and make it a point to create a backup data in an external storage drive. • If you are not using your Notebook PC for...

Users Manual
Page 78
.... You may use the function keys or the display settings in your operating system to adjust the display brightness. • If you are not using any of the following suggestions: • Use the function keys to adjust the appearance of your system. You can try doing any Wi-Fi connection, switch your Notebook PC may be affected by the angle and current position of your display panel. 3. A black dot, or...
.... You may use the function keys or the display settings in your operating system to adjust the display brightness. • If you are not using any of the following suggestions: • Use the function keys to adjust the appearance of your system. You can try doing any Wi-Fi connection, switch your Notebook PC may be affected by the angle and current position of your display panel. 3. A black dot, or...
Users Manual
Page 79
... Notebook PC's audio speakers? Notebook PC E-Manual 79 Press to the power outlet and Notebook PC. • If the problem still exists, contact your speakers were set to mute. • Check if a headphone jack is connected to turn up . My battery charge indicator does not light up the speaker volume. • Check if your local ASUS service center for a minute, then reconnect them again to enable your Notebook PC and remove...
... Notebook PC's audio speakers? Notebook PC E-Manual 79 Press to the power outlet and Notebook PC. • If the problem still exists, contact your speakers were set to mute. • Check if a headphone jack is connected to turn up . My battery charge indicator does not light up the speaker volume. • Check if your local ASUS service center for a minute, then reconnect them again to enable your Notebook PC and remove...

Users Manual
Page 81
... screen. Check if the power adapter and battery pack are left inside the optical drive then restart. • If the problem still exists, your Notebook PC by pressing the power button for at least ten (10) seconds. Press any key to fix this message: "Remove disks or other media. What can try doing any optical discs that are inserted correctly then turn on my Notebook PC, the power indicator lights...
... screen. Check if the power adapter and battery pack are left inside the optical drive then restart. • If the problem still exists, your Notebook PC by pressing the power button for at least ten (10) seconds. Press any key to fix this message: "Remove disks or other media. What can try doing any optical discs that are inserted correctly then turn on my Notebook PC, the power indicator lights...
Users Manual
Page 82
... from sleep mode? • You need to press the power button to your Notebook PC then restart your system. • If the problem still exists, contact your last working state. • Your system might have completely used up . My Notebook PC does not boot up its battery power. Why can try doing any of the following suggestions: • Remove all connected devices to resume your local ASUS service...
... from sleep mode? • You need to press the power button to your Notebook PC then restart your system. • If the problem still exists, contact your last working state. • Your system might have completely used up . My Notebook PC does not boot up its battery power. Why can try doing any of the following suggestions: • Remove all connected devices to resume your local ASUS service...


