Warranty Card English/Thai/Turkish
Page 3
... or error-free operation of the hardware. ASUS will not restore or transfer any software provided with the software, we advise You to battery from defects in any statutory rights that an ASUS Service Center repaired or replaced will repair or replace the defective parts of this Warranty. ASUS will provide technical support for the period defined on . Software Support Any software delivered with a chargeable battery, 12 months warranty applies to review the user manuals, the ASUS support web...
... or error-free operation of the hardware. ASUS will not restore or transfer any software provided with the software, we advise You to battery from defects in any statutory rights that an ASUS Service Center repaired or replaced will repair or replace the defective parts of this Warranty. ASUS will provide technical support for the period defined on . Software Support Any software delivered with a chargeable battery, 12 months warranty applies to review the user manuals, the ASUS support web...
Warranty Card English/Thai/Turkish
Page 4
...; Restoring the Product's operating system, factory-installed drivers, and applications to the factory default settings. • Installing updates, patches or service packs. • Running diagnostic tools and programs on the Product. • Allowing the ASUS technical support agent to reset the embedded security chip pre-boot password. Please also be ready to the design of your repaired Product back in identifying or resolving the problems. • If the problem is not solved remotely...
...; Restoring the Product's operating system, factory-installed drivers, and applications to the factory default settings. • Installing updates, patches or service packs. • Running diagnostic tools and programs on the Product. • Allowing the ASUS technical support agent to reset the embedded security chip pre-boot password. Please also be ready to the design of your repaired Product back in identifying or resolving the problems. • If the problem is not solved remotely...

Warranty Card English/Thai/Turkish
Page 5
..., intentional or accidental misuse, abuse, neglect or improper maintenance, and use under abnormal conditions; (g) Damage to the Product caused by improper installation, improper connection or malfunction of a peripheral device such as memory cards, discs, flash drives, from the Product. RMA methods If RMA is blocked by passwords, then ASUS may not detect and repair all failures of money; loss of actual or anticipated profits...
..., intentional or accidental misuse, abuse, neglect or improper maintenance, and use under abnormal conditions; (g) Damage to the Product caused by improper installation, improper connection or malfunction of a peripheral device such as memory cards, discs, flash drives, from the Product. RMA methods If RMA is blocked by passwords, then ASUS may not detect and repair all failures of money; loss of actual or anticipated profits...
Warranty Card English/Thai/Turkish
Page 6
... the repair offer, ASUS will send You a notice at http://www.asus.com/support for the repair labor, spare parts and other costs stated in the Service Charge List. Please visit the ASUS Support site at the address You provided when requesting the service. Please access and read the ASUS Privacy Policy at http://www.asus.com/support/contact-ASUS for Warranty service. Out-of-Warranty cases Returning...
... the repair offer, ASUS will send You a notice at http://www.asus.com/support for the repair labor, spare parts and other costs stated in the Service Charge List. Please visit the ASUS Support site at the address You provided when requesting the service. Please access and read the ASUS Privacy Policy at http://www.asus.com/support/contact-ASUS for Warranty service. Out-of-Warranty cases Returning...

UN42 Users manual English
Page 2
... to the listed contract price of each product. ASUS ASSUMES NO RESPONSIBILITY OR LIABILITY FOR ANY ERRORS OR INACCURACIES THAT MAY APPEAR IN THIS MANUAL, INCLUDING THE PRODUCTS AND SOFTWARE DESCRIBED IN IT. SERVICE AND SUPPORT Visit our multi-language web site at http://support.asus.com E10312 Revised Edition V3 March 2015 COPYRIGHT INFORMATION No part of this manual, including...
... to the listed contract price of each product. ASUS ASSUMES NO RESPONSIBILITY OR LIABILITY FOR ANY ERRORS OR INACCURACIES THAT MAY APPEAR IN THIS MANUAL, INCLUDING THE PRODUCTS AND SOFTWARE DESCRIBED IN IT. SERVICE AND SUPPORT Visit our multi-language web site at http://support.asus.com E10312 Revised Edition V3 March 2015 COPYRIGHT INFORMATION No part of this manual, including...

UN42 Users manual English
Page 3
... panel...8 Left side ...9 Rear panel...10 Using your VivoMini 13 Getting started 14 Connecting the AC power adapter 14 Connecting a display panel 16 Connecting USB keyboard or mouse 17 Turning on your VivoMini 17 Turning off your VivoMini 18 Putting your VivoMini to sleep 18 Entering the BIOS Setup 18 Quickly enter the BIOS 18 Memory upgrade 19 Upgrading memory modules 20 Appendix 27 Safety information 28 Setting up your system 28 Care during use 28 Regulatory notices 30 ASUS contact information 36 VivoMini UN Series...
... panel...8 Left side ...9 Rear panel...10 Using your VivoMini 13 Getting started 14 Connecting the AC power adapter 14 Connecting a display panel 16 Connecting USB keyboard or mouse 17 Turning on your VivoMini 17 Turning off your VivoMini 18 Putting your VivoMini to sleep 18 Entering the BIOS Setup 18 Quickly enter the BIOS 18 Memory upgrade 19 Upgrading memory modules 20 Appendix 27 Safety information 28 Setting up your system 28 Care during use 28 Regulatory notices 30 ASUS contact information 36 VivoMini UN Series...

UN42 Users manual English
Page 11
... VivoMini to amplified speakers or headphones. DisplayPort port The DisplayPort sends high-performance digital output from your VivoMini to a display device such as an LCD TV or monitor to an external microphone. You can also use this port to connect your VivoMini to allow viewing on a larger external display. USB 3.0 ports These USB (Universal Serial Bus) 3.0 ports provide a transfer rate of up to a local network. LAN port The 8-pin RJ-45 LAN port supports a standard Ethernet cable for connection...
... VivoMini to amplified speakers or headphones. DisplayPort port The DisplayPort sends high-performance digital output from your VivoMini to a display device such as an LCD TV or monitor to an external microphone. You can also use this port to connect your VivoMini to allow viewing on a larger external display. USB 3.0 ports These USB (Universal Serial Bus) 3.0 ports provide a transfer rate of up to a local network. LAN port The 8-pin RJ-45 LAN port supports a standard Ethernet cable for connection...

UN42 Users manual English
Page 17
Turning on your VivoMini Press the power button to your VivoMini. VivoMini UN Series 17 NOTE: It is recommended that you use the USB ports identified in the above illustration when connecting a wired keyboard and mouse. To connect a keyboard and mouse to your VivoMini: Connect the USB cable from your keyboard and mouse to any USB keyboard and mouse to turn on your VivoMini. You can connect generally any of the USB ports of your VivoMini. Connecting USB keyboard or mouse You can also connect a USB dongle for a wireless keyboard and mouse set.
Turning on your VivoMini Press the power button to your VivoMini. VivoMini UN Series 17 NOTE: It is recommended that you use the USB ports identified in the above illustration when connecting a wired keyboard and mouse. To connect a keyboard and mouse to your VivoMini: Connect the USB cable from your keyboard and mouse to any USB keyboard and mouse to turn on your VivoMini. You can connect generally any of the USB ports of your VivoMini. Connecting USB keyboard or mouse You can also connect a USB dongle for a wireless keyboard and mouse set.

UN42 Users manual English
Page 18
... default BIOS settings apply to most conditions to instability or boot failure. Quickly enter the BIOS To quickly enter the BIOS: • Press the power button for at least four (4) seconds until your VivoMini turns off. Reconnect the power cable and press the power button to turn on the screen during POST. Do not change the BIOS settings only with the help of software controlled diagnostic tests that run when you to run the BIOS Setup. • You have installed a new system...
... default BIOS settings apply to most conditions to instability or boot failure. Quickly enter the BIOS To quickly enter the BIOS: • Press the power button for at least four (4) seconds until your VivoMini turns off. Reconnect the power cable and press the power button to turn on the screen during POST. Do not change the BIOS settings only with the help of software controlled diagnostic tests that run when you to run the BIOS Setup. • You have installed a new system...

UN42 Users manual English
Page 20
...-pin SO-DIMMs for the list of the installation process. • Before installing memory modules, use a grounded wrist strap or touch a safely grounded object or metal object to avoid damaging them due to the VivoMini's DIMM slots. Turn off...VivoMini on a flat stable surface, with its top side facing down. 20 VivoMini UN Series IMPORTANT! • It is recommended that your VivoMini then disconnect all cables and peripherals. 2. To install or upgrade the memory modules: 1. Upgrading memory modules Your VivoMini comes with two SO-DIMM memory slots that allow you replace the memory...
...-pin SO-DIMMs for the list of the installation process. • Before installing memory modules, use a grounded wrist strap or touch a safely grounded object or metal object to avoid damaging them due to the VivoMini's DIMM slots. Turn off...VivoMini on a flat stable surface, with its top side facing down. 20 VivoMini UN Series IMPORTANT! • It is recommended that your VivoMini then disconnect all cables and peripherals. 2. To install or upgrade the memory modules: 1. Upgrading memory modules Your VivoMini comes with two SO-DIMM memory slots that allow you replace the memory...

VivoMini memory wireless card and solid state driveSSD installation guide English & French
Page 1
... V DDR3 SO-DIMM to static electricity. Installing or upgrading memory modules Your VivoMini comes with two SO-DIMM memory slots that your VivoMini then disconnect all cables and peripherals. 2. To install or upgrade the memory modules: 1. CA9955 Revised Edition V2 December 2014 VivoMini memory, wireless card, and solid state drive (SSD) installation guide Your VivoMini comes with the following items. Please contact ASUS Service Center if you cannot find the following items...
... V DDR3 SO-DIMM to static electricity. Installing or upgrading memory modules Your VivoMini comes with two SO-DIMM memory slots that your VivoMini then disconnect all cables and peripherals. 2. To install or upgrade the memory modules: 1. CA9955 Revised Edition V2 December 2014 VivoMini memory, wireless card, and solid state drive (SSD) installation guide Your VivoMini comes with the following items. Please contact ASUS Service Center if you cannot find the following items...

VivoMini memory wireless card and solid state driveSSD installation guide English & French
Page 6
... the Installing or upgrading memory modules section of this guide to remove the bottom cover of this guide to replace the bottom cover back on your VivoMini. 6 Connect the black antenna to MAIN or and the white antenna to the illustration for the right installation procedure. NOTE: A soft clicking sound indicates that supports a full-size or a half-size mSATA SSD. Follow steps 1-5 on the wireless card. 5. Follow...
... the Installing or upgrading memory modules section of this guide to remove the bottom cover of this guide to replace the bottom cover back on your VivoMini. 6 Connect the black antenna to MAIN or and the white antenna to the illustration for the right installation procedure. NOTE: A soft clicking sound indicates that supports a full-size or a half-size mSATA SSD. Follow steps 1-5 on the wireless card. 5. Follow...

VivoMini memory wireless card and solid state driveSSD installation guide English & French
Page 7
To install or upgrade a half-size mSATA SSD: 1. Refer to remove the bottom cover of this guide to the illustration for its the upper slot inside the VivoMini. 2. Follow steps 1-5 on pages 3-4 under the Installing or upgrading memory modules section of your VivoMini. Align and insert the full-size mSATA SSD into its location. 3. Follow steps 7-9 on pages 1-2 under the Installing or upgrading memory modules section of...
To install or upgrade a half-size mSATA SSD: 1. Refer to remove the bottom cover of this guide to the illustration for its the upper slot inside the VivoMini. 2. Follow steps 1-5 on pages 3-4 under the Installing or upgrading memory modules section of your VivoMini. Align and insert the full-size mSATA SSD into its location. 3. Follow steps 7-9 on pages 1-2 under the Installing or upgrading memory modules section of...

VivoMini memory wireless card and solid state driveSSD installation guide English & French
Page 8
Gently push down the mSATA SSD on your VivoMini. 8 Refer to the illustration for the location of the 3mm round screw. 2. Refer to the illustration for its location. 4. Follow steps 7-9 on pages 3-4 under the Installing or upgrading memory modules section of this guide to replace the bottom cover back on top of the screw hole and fasten it using one of the screw hole. 5. Insert the hexagon screw into its corresponding hole, as illustrated. 3. Align and insert the half-size mSATA SSD into its upper slot inside the VivoMini.
Gently push down the mSATA SSD on your VivoMini. 8 Refer to the illustration for the location of the 3mm round screw. 2. Refer to the illustration for its location. 4. Follow steps 7-9 on pages 3-4 under the Installing or upgrading memory modules section of this guide to replace the bottom cover back on top of the screw hole and fasten it using one of the screw hole. 5. Insert the hexagon screw into its corresponding hole, as illustrated. 3. Align and insert the half-size mSATA SSD into its upper slot inside the VivoMini.

Vivo Mini Users Manual English
Page 2
... FROM ANY DEFECT OR ERROR IN THIS MANUAL OR PRODUCT. SPECIFICATIONS AND INFORMATION CONTAINED IN THIS MANUAL ARE FURNISHED FOR INFORMATIONAL USE ONLY, AND ARE SUBJECT TO CHANGE AT ANY TIME WITHOUT NOTICE, AND SHOULD NOT BE CONSTRUED AS A COMMITMENT BY ASUS. ASUS will only be responsible..., and are entitled to claim damages from omission or failure of performing legal duties under this Warranty Statement. E9802 Revised Edition V2 September 2014 COPYRIGHT INFORMATION No part of this manual, including the products and software described in it, may be reproduced, transmitted, transcribed,...
... FROM ANY DEFECT OR ERROR IN THIS MANUAL OR PRODUCT. SPECIFICATIONS AND INFORMATION CONTAINED IN THIS MANUAL ARE FURNISHED FOR INFORMATIONAL USE ONLY, AND ARE SUBJECT TO CHANGE AT ANY TIME WITHOUT NOTICE, AND SHOULD NOT BE CONSTRUED AS A COMMITMENT BY ASUS. ASUS will only be responsible..., and are entitled to claim damages from omission or failure of performing legal duties under this Warranty Statement. E9802 Revised Edition V2 September 2014 COPYRIGHT INFORMATION No part of this manual, including the products and software described in it, may be reproduced, transmitted, transcribed,...

Vivo Mini Users Manual English
Page 3
... panel...8 Left side ...9 Rear panel...10 Using your VivoMini 13 Getting started 14 Connecting the AC power adapter 14 Connecting a display panel 16 Connecting USB keyboard or mouse 17 Turning on your VivoMini 17 Turning off your VivoMini 18 Putting your VivoMini to sleep 18 Entering the BIOS Setup 18 Quickly enter the BIOS 18 Memory upgrade 19 Upgrading memory modules 20 Appendix 27 Safety information 28 Setting up your system 28 Care during use 28 Regulatory notices 30 ASUS contact information 36 VivoMini UN Series...
... panel...8 Left side ...9 Rear panel...10 Using your VivoMini 13 Getting started 14 Connecting the AC power adapter 14 Connecting a display panel 16 Connecting USB keyboard or mouse 17 Turning on your VivoMini 17 Turning off your VivoMini 18 Putting your VivoMini to sleep 18 Entering the BIOS Setup 18 Quickly enter the BIOS 18 Memory upgrade 19 Upgrading memory modules 20 Appendix 27 Safety information 28 Setting up your system 28 Care during use 28 Regulatory notices 30 ASUS contact information 36 VivoMini UN Series...

Vivo Mini Users Manual English
Page 11
... to a local network. You can also use this port to connect your VivoMini to amplified speakers or headphones. Headphone output/microphone input combo jack port This port allows you to connect your VivoMini to allow viewing on a larger external display. HDMI port The HDMI (High Definition Multimedia Interface) port supports a Full-HD device such as an LCD TV or HD monitor. LAN port The 8-pin RJ-45 LAN port supports a standard Ethernet cable for connection to 5Gbit/s and...
... to a local network. You can also use this port to connect your VivoMini to amplified speakers or headphones. Headphone output/microphone input combo jack port This port allows you to connect your VivoMini to allow viewing on a larger external display. HDMI port The HDMI (High Definition Multimedia Interface) port supports a Full-HD device such as an LCD TV or HD monitor. LAN port The 8-pin RJ-45 LAN port supports a standard Ethernet cable for connection to 5Gbit/s and...

Vivo Mini Users Manual English
Page 17
NOTE: It is recommended that you use the USB ports on your VivoMini Press the power button to your VivoMini. VivoMini UN Series 17 Turning on your VivoMini. You can connect generally any of the USB ports of the VivoMini when connecting a wired keyboard and mouse. To connect a keyboard and mouse to your VivoMini: Connect the USB cable from your keyboard and mouse to any USB keyboard and mouse to turn on the rear panel of your VivoMini. Connecting USB keyboard or mouse You can also connect a USB dongle for a wireless keyboard and mouse set.
NOTE: It is recommended that you use the USB ports on your VivoMini Press the power button to your VivoMini. VivoMini UN Series 17 Turning on your VivoMini. You can connect generally any of the USB ports of the VivoMini when connecting a wired keyboard and mouse. To connect a keyboard and mouse to your VivoMini: Connect the USB cable from your keyboard and mouse to any USB keyboard and mouse to turn on the rear panel of your VivoMini. Connecting USB keyboard or mouse You can also connect a USB dongle for a wireless keyboard and mouse set.
Vivo Mini Users Manual English
Page 18
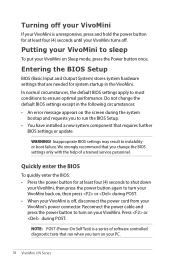
... default BIOS settings apply to most conditions to sleep To put your VivoMini on Sleep mode, press the Power button once. Reconnect the power cable and press the power button to run the BIOS Setup. • You have installed a new system component that run when you change the default BIOS settings except in the VivoMini. Press or during the system bootup and requests you to turn on the screen during POST. Turning off your VivoMini If your VivoMini is...
... default BIOS settings apply to most conditions to sleep To put your VivoMini on Sleep mode, press the Power button once. Reconnect the power cable and press the power button to run the BIOS Setup. • You have installed a new system component that run when you change the default BIOS settings except in the VivoMini. Press or during the system bootup and requests you to turn on the screen during POST. Turning off your VivoMini If your VivoMini is...

Vivo Mini Users Manual English
Page 20
... V DDR3 204-pin SO-DIMMs for the list of compatible DIMMs. You can only install 1.35 V DDR3 SO-DIMM to the VivoMini's DIMM slots. Visit an ASUS service center for further assistance. • Refer to http://www.asus.com for a maximum of 16 GB memory. IMPORTANT! • It is recommended that allow you replace the memory modules under professional supervision. Turn off your...
... V DDR3 204-pin SO-DIMMs for the list of compatible DIMMs. You can only install 1.35 V DDR3 SO-DIMM to the VivoMini's DIMM slots. Visit an ASUS service center for further assistance. • Refer to http://www.asus.com for a maximum of 16 GB memory. IMPORTANT! • It is recommended that allow you replace the memory modules under professional supervision. Turn off your...


