User Manual
Page 1
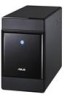
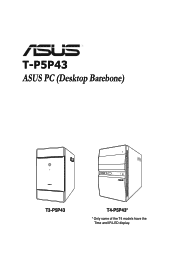
T-P5P43 ASUS PC (Desktop Barebone) T3-P5P43 T4-P5P43* * Only some of the T4 models have the Time and IR LED display.
T-P5P43 ASUS PC (Desktop Barebone) T3-P5P43 T4-P5P43* * Only some of the T4 models have the Time and IR LED display.

User Manual
Page 51
... clicking on its four corners. You can switch to force close it. Besides using the LaunchBar, you can also right-click anywhere on the desktop to file ASUS T-P5P43 3-9 Knowing the Express Gate hot-keys Here is already running. In the First Screen: Key PAUSE/BREAK ESC DEL F8 Function Power-off Continue...
... clicking on its four corners. You can switch to force close it. Besides using the LaunchBar, you can also right-click anywhere on the desktop to file ASUS T-P5P43 3-9 Knowing the Express Gate hot-keys Here is already running. In the First Screen: Key PAUSE/BREAK ESC DEL F8 Function Power-off Continue...
User Manual
Page 68
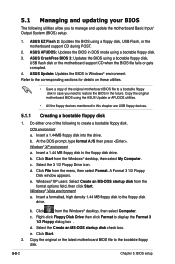
... floppy disk 1. Windows® XP environment a. A Format 3 1/2 Floppy Disk window appears. Click from the format options field, then click Start. ASUS EZ Flash 2: Updates the BIOS using a bootable floppy disk. 3. Refer to the corresponding sections for details on these utilities. • Save a copy... Insert a formatted, high density 1.44 MB floppy disk to display the Format 3 1/2 Floppy dialog box . Click File from the Windows® desktop, then select My Computer. Insert a 1.44MB floppy disk into the drive. Select the 3 1/2 Floppy Drive icon. Do either one of the ...
... floppy disk 1. Windows® XP environment a. A Format 3 1/2 Floppy Disk window appears. Click from the format options field, then click Start. ASUS EZ Flash 2: Updates the BIOS using a bootable floppy disk. 3. Refer to the corresponding sections for details on these utilities. • Save a copy... Insert a formatted, high density 1.44 MB floppy disk to display the Format 3 1/2 Floppy dialog box . Click File from the Windows® desktop, then select My Computer. Insert a 1.44MB floppy disk into the drive. Select the 3 1/2 Floppy Drive icon. Do either one of the ...

User Manual
Page 75
Select the ASUS FTP site nearest the Internet option from the Windows® desktop by clicking Start > Programs > ASUS > ASUSUpdate > ASUSUpdate. Launch the ASUS Update utility from the you to avoid network traffic, or drop‑down menu, then click Next. Click Next. click Auto Select. The ASUS Update main window appears. 2. Select Update BIOS from 3. ASUS T-P5P43 5-9 Updating the BIOS through the Internet To update the BIOS through the Internet: 1.
Select the ASUS FTP site nearest the Internet option from the Windows® desktop by clicking Start > Programs > ASUS > ASUSUpdate > ASUSUpdate. Launch the ASUS Update utility from the you to avoid network traffic, or drop‑down menu, then click Next. Click Next. click Auto Select. The ASUS Update main window appears. 2. Select Update BIOS from 3. ASUS T-P5P43 5-9 Updating the BIOS through the Internet To update the BIOS through the Internet: 1.

User Manual
Page 76
...screen instructions to download. From the FTP site, select the BIOS version that you wish to complete the update process. The ASUS Update utility is capable of updating itself through a BIOS file: 1. Follow the screen instructions to avail all its features....update the BIOS through the Internet. Launch the ASUS Update utility from the Open window, then click Open. 4. Locate the BIOS file from the Windows® desktop by clicking Start > Programs > ASUS > ASUSUpdate > ASUSUpdate. 4. Click Next. 5. T-P5P43 T-P5P43.ROM T-P5P43 5-10 Chapter 5: BIOS setup Select Update ...
...screen instructions to download. From the FTP site, select the BIOS version that you wish to complete the update process. The ASUS Update utility is capable of updating itself through a BIOS file: 1. Follow the screen instructions to avail all its features....update the BIOS through the Internet. Launch the ASUS Update utility from the Open window, then click Open. 4. Locate the BIOS file from the Windows® desktop by clicking Start > Programs > ASUS > ASUSUpdate > ASUSUpdate. 4. Click Next. 5. T-P5P43 T-P5P43.ROM T-P5P43 5-10 Chapter 5: BIOS setup Select Update ...


