User's Manual for English Edition
Page 3
... Card Reader 61 Hard Disk Drive 62 Memory (RAM 63 Connections...64 Network Connection 64 Wireless LAN Connection (on selected models 66 Windows Wireless Network Connection 68 Bluetooth Wireless Connection(on selected models 70 Appendix Optional Accessories A-2 Optional Connections A-2 Operating System and Software A-3 System BIOS Settings A-4 Common Problems and Solutions A-13 Recovering Your Notebook PC A-19 Using Recovery Partition A-19 Using Recovery DVD (on selected models A-20 DVD-ROM Drive Information A-22 Blu-ray ROM Drive Information(on selected models A-24 Internal...
... Card Reader 61 Hard Disk Drive 62 Memory (RAM 63 Connections...64 Network Connection 64 Wireless LAN Connection (on selected models 66 Windows Wireless Network Connection 68 Bluetooth Wireless Connection(on selected models 70 Appendix Optional Accessories A-2 Optional Connections A-2 Operating System and Software A-3 System BIOS Settings A-4 Common Problems and Solutions A-13 Recovering Your Notebook PC A-19 Using Recovery Partition A-19 Using Recovery DVD (on selected models A-20 DVD-ROM Drive Information A-22 Blu-ray ROM Drive Information(on selected models A-24 Internal...
User's Manual for English Edition
Page 6
... User's Manual: 1. TIP: Tips for special situations. 6 Notebook PC User Manual Appendix Introduces you information on the Notebook PC's components. 3. There may be followed for This Manual A few notes and warnings are used throughout this guide, allowing you to the Notebook PC and this User's Manual. 2. NOTE: Information for completing tasks. Knowing the Parts Gives you to complete certain tasks safely and effectively. Using the Notebook...
... User's Manual: 1. TIP: Tips for special situations. 6 Notebook PC User Manual Appendix Introduces you information on the Notebook PC's components. 3. There may be followed for This Manual A few notes and warnings are used throughout this guide, allowing you to the Notebook PC and this User's Manual. 2. NOTE: Information for completing tasks. Knowing the Parts Gives you to complete certain tasks safely and effectively. Using the Notebook...
User's Manual for English Edition
Page 7
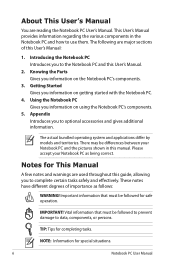
... warm water and remove any extra moisture with a dry cloth. Do not place together with a solution of nonabrasive detergent and a few drops of the Notebook PC. Notebook PC User Manual 7 DO NOT press or touch the display panel. DO NOT expose to dirty or dusty environments. DO NOT use near liquids, rain, or moisture. DO NOT disassemble the battery. DO NOT...
... warm water and remove any extra moisture with a dry cloth. Do not place together with a solution of nonabrasive detergent and a few drops of the Notebook PC. Notebook PC User Manual 7 DO NOT press or touch the display panel. DO NOT expose to dirty or dusty environments. DO NOT use near liquids, rain, or moisture. DO NOT disassemble the battery. DO NOT...
User's Manual for English Edition
Page 22
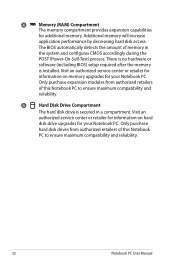
... purchase hard disk drives from authorized retailers of this Notebook PC to ensure maximum compatibility and reliability. 5 Hard Disk Drive Compartment The hard disk drive is installed. 4 Memory (RAM) Compartment The memory compartment provides expansion capabilities for your Notebook PC. Visit an authorized service center or retailer for information on memory upgrades for additional memory. There is no hardware or software (including BIOS) setup required after the memory is secured in the system and configures CMOS...
... purchase hard disk drives from authorized retailers of this Notebook PC to ensure maximum compatibility and reliability. 5 Hard Disk Drive Compartment The hard disk drive is installed. 4 Memory (RAM) Compartment The memory compartment provides expansion capabilities for your Notebook PC. Visit an authorized service center or retailer for information on memory upgrades for additional memory. There is no hardware or software (including BIOS) setup required after the memory is secured in the system and configures CMOS...
User's Manual for English Edition
Page 24
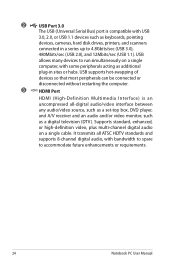
... (USB 1.1). Supports standard, enhanced, or high-definition video, plus multi-channel digital audio on a single computer, with bandwidth to spare to accommodate future enhancements or requirements. 24 Notebook PC User Manual USB supports hot-swapping of devices so that most peripherals can be connected or disconnected without restarting the computer. 3 HDMI HDMI Port HDMI (High-Definition Multimedia Interface) is compatible with USB 3.0, 2.0, or USB 1.1 devices such as keyboards, pointing devices, cameras, hard disk drives, printers...
... (USB 1.1). Supports standard, enhanced, or high-definition video, plus multi-channel digital audio on a single computer, with bandwidth to spare to accommodate future enhancements or requirements. 24 Notebook PC User Manual USB supports hot-swapping of devices so that most peripherals can be connected or disconnected without restarting the computer. 3 HDMI HDMI Port HDMI (High-Definition Multimedia Interface) is compatible with USB 3.0, 2.0, or USB 1.1 devices such as keyboards, pointing devices, cameras, hard disk drives, printers...
User's Manual for English Edition
Page 37
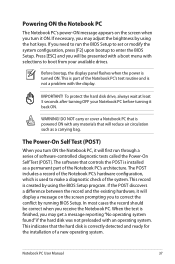
... the BIOS Setup to set or modify the system configuration, press [F2] upon bootup to enter the BIOS Setup. Notebook PC User Manual 37 This indicates that controls the POST is correctly detected and ready for the installation of a new operating system. WARNING! When the test is created by running BIOS Setup. Powering ON the Notebook PC The Notebook PC's power-ON message appears on the screen prompting you need to run through a series of software-controlled...
... the BIOS Setup to set or modify the system configuration, press [F2] upon bootup to enter the BIOS Setup. Notebook PC User Manual 37 This indicates that controls the POST is correctly detected and ready for the installation of a new operating system. WARNING! When the test is created by running BIOS Setup. Powering ON the Notebook PC The Notebook PC's power-ON message appears on the screen prompting you need to run through a series of software-controlled...
User's Manual for English Edition
Page 44
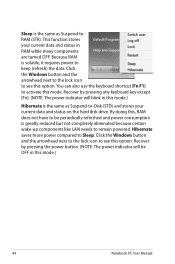
... Sleep. This function stores your current data and status on the hard disk drive. Recover by pressing the power button. (NOTE: The power indicator will blink in this , RAM does not have to be OFF in RAM while many components are turned OFF. Click the Windows button and the arrowhead next to the lock icon to see this mode.) 44 Notebook PC User Manual Recover by pressing any keyboard key except [Fn]. (NOTE: The power indicator...
... Sleep. This function stores your current data and status on the hard disk drive. Recover by pressing the power button. (NOTE: The power indicator will blink in this , RAM does not have to be OFF in RAM while many components are turned OFF. Click the Windows button and the arrowhead next to the lock icon to see this mode.) 44 Notebook PC User Manual Recover by pressing any keyboard key except [Fn]. (NOTE: The power indicator...

User's Manual for English Edition
Page 46
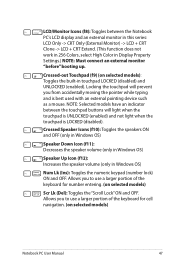
... internal wireless LAN or Bluetooth (on sleep button setting in power management setup). "ZZ" Icon (f1): Places the Notebook PC in suspend mode (either Save-to-RAM or Save-to use the wireless LAN or Bluetooth. Sun Down Icon (f5): Decreases the display brightness Sun Up Icon (f6): Increases the display brightness LCD Icon (f7): Toggles the display panel ON and OFF. (On certain models; Follow the icons instead of the function keys. When enabled, the corresponding wireless indicator will light...
... internal wireless LAN or Bluetooth (on sleep button setting in power management setup). "ZZ" Icon (f1): Places the Notebook PC in suspend mode (either Save-to-RAM or Save-to use the wireless LAN or Bluetooth. Sun Down Icon (f5): Decreases the display brightness Sun Up Icon (f6): Increases the display brightness LCD Icon (f7): Toggles the display panel ON and OFF. (On certain models; Follow the icons instead of the function keys. When enabled, the corresponding wireless indicator will light...
User's Manual for English Edition
Page 47
... Display Property Settings.) NOTE: Must connect an external monitor "before" booting up. LCD/Monitor Icons (f8): Toggles between the touchpad buttons will prevent you to use a larger portion of the keyboard for cell navigation. (on selected models): Toggles the built-in touchpad LOCKED (disabled) and UNLOCKED (enabled). Crossed-out Touchpad (f9) (on selected models) Notebook PC User Manual 47 NOTE: Selected models have an indicator between the Notebook PC's LCD display and an external monitor in this series: LCD Only -> CRT Only (External Monitor) -> LCD...
... Display Property Settings.) NOTE: Must connect an external monitor "before" booting up. LCD/Monitor Icons (f8): Toggles between the touchpad buttons will prevent you to use a larger portion of the keyboard for cell navigation. (on selected models): Toggles the built-in touchpad LOCKED (disabled) and UNLOCKED (enabled). Crossed-out Touchpad (f9) (on selected models) Notebook PC User Manual 47 NOTE: Selected models have an indicator between the Notebook PC's LCD display and an external monitor in this series: LCD Only -> CRT Only (External Monitor) -> LCD...
User's Manual for English Edition
Page 61
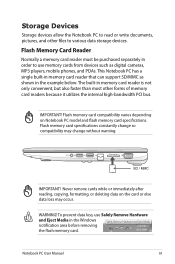
... devices. IMPORTANT! Notebook PC User Manual 61 This Notebook PC has a single built-in memory card reader that can support SD/MMC as digital cameras, MP3 players, mobile phones, and PDAs. Flash memory card compatibility varies depending on the card or else data loss may change so compatibility may occur. The built-in memory card reader is not only convenient, but also faster than most other files to use Safely Remove Hardware...
... devices. IMPORTANT! Notebook PC User Manual 61 This Notebook PC has a single built-in memory card reader that can support SD/MMC as digital cameras, MP3 players, mobile phones, and PDAs. Flash memory card compatibility varies depending on the card or else data loss may change so compatibility may occur. The built-in memory card reader is not only convenient, but also faster than most other files to use Safely Remove Hardware...
User's Manual for English Edition
Page 75
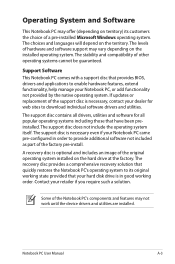
...-install. The recovery disc provides a comprehensive recovery solution that provides BIOS, drivers and applications to download individual software drivers and utilities. The stability and compatibility of hardware and software support may not work until the device drivers and utilities are installed. If updates or replacement of the support disc is optional and includes an image of the Notebook PC's components and features may vary depending on the hard drive at the factory. Support Software This Notebook PC comes with a support disc that quickly restores...
...-install. The recovery disc provides a comprehensive recovery solution that provides BIOS, drivers and applications to download individual software drivers and utilities. The stability and compatibility of hardware and software support may not work until the device drivers and utilities are installed. If updates or replacement of the support disc is optional and includes an image of the Notebook PC's components and features may vary depending on the hard drive at the factory. Support Software This Notebook PC comes with a support disc that quickly restores...
User's Manual for English Edition
Page 76
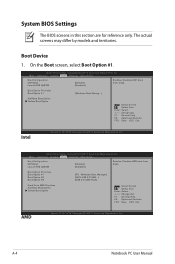
...- Boot Device 1. A-4 Notebook PC User Manual System BIOS Settings The BIOS screens in this section are for reference only. F1: General Help F9: Optimized Defaults F10: Save ESC: Exit Intel Version 2.14.1219. Copyright (C) 2011 American Megatrends, Inc. Boot Option Priorities Boot Option #1 [Windows Boot Manag... ] Add New Boot Option Delete Boot Option : Select Screen : Select Item Enter: Select +/-: Change Opt. Boot Option Priorities Boot Option #1 Boot Option #2 Boot Option #3 [P2: Windows Boot Manager] [UEFI: USB 2.0 USB...] [USB 2.0 USB Flash] Hard Drive BBS...
...- Boot Device 1. A-4 Notebook PC User Manual System BIOS Settings The BIOS screens in this section are for reference only. F1: General Help F9: Optimized Defaults F10: Save ESC: Exit Intel Version 2.14.1219. Copyright (C) 2011 American Megatrends, Inc. Boot Option Priorities Boot Option #1 [Windows Boot Manag... ] Add New Boot Option Delete Boot Option : Select Screen : Select Item Enter: Select +/-: Change Opt. Boot Option Priorities Boot Option #1 Boot Option #2 Boot Option #3 [P2: Windows Boot Manager] [UEFI: USB 2.0 USB...] [USB 2.0 USB Flash] Hard Drive BBS...
User's Manual for English Edition
Page 81
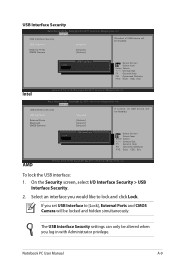
... ESC: Exit Intel Version 2.14.1219. Aptio Setup Utility - Security USB Interface Security USB Interface [UnLock] If Locked, all USB device will be disabled. Select an interface you log in with Administrator privilege. USB Interface Security Aptio Setup Utility - Copyright (C) 2011 American Megatrends, Inc. External Ports Bluetooth CMOS Camera [UnLock] [UnLock] [UnLock] LocK UnLock USB Interface : Select Screen : Select Item Enter: Select +/-: Change Opt. F1: General Help F9: Optimized Defaults F10: Save ESC: Exit AMD Version 2.14...
... ESC: Exit Intel Version 2.14.1219. Aptio Setup Utility - Security USB Interface Security USB Interface [UnLock] If Locked, all USB device will be disabled. Select an interface you log in with Administrator privilege. USB Interface Security Aptio Setup Utility - Copyright (C) 2011 American Megatrends, Inc. External Ports Bluetooth CMOS Camera [UnLock] [UnLock] [UnLock] LocK UnLock USB Interface : Select Screen : Select Item Enter: Select +/-: Change Opt. F1: General Help F9: Optimized Defaults F10: Save ESC: Exit AMD Version 2.14...
User's Manual for English Edition
Page 85
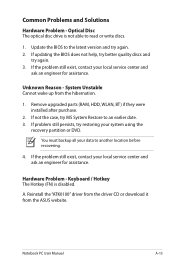
... assistance. Hardware Problem - A. Keyboard / Hotkey The Hotkey (FN) is not able to read or write discs. 1. Notebook PC User Manual A-13 If updating the BIOS does not help, try better quality discs and try restoring your local service center and ask an engineer for assistance. Remove upgraded parts (RAM, HDD, WLAN, BT) if they were installed after purchase. 2. If the problem still exist, contact your system using the recovery partition or DVD. If the problem still...
... assistance. Hardware Problem - A. Keyboard / Hotkey The Hotkey (FN) is not able to read or write discs. 1. Notebook PC User Manual A-13 If updating the BIOS does not help, try better quality discs and try restoring your local service center and ask an engineer for assistance. Remove upgraded parts (RAM, HDD, WLAN, BT) if they were installed after purchase. 2. If the problem still exist, contact your system using the recovery partition or DVD. If the problem still...
User's Manual for English Edition
Page 87
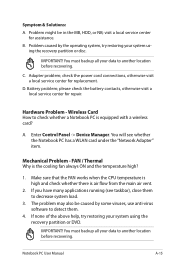
... Problem - visit a local service center for assistance. Notebook PC User Manual A-15 Symptom & Solutions: A. B. Battery problem; C. Problem caused by some viruses, use anti-virus software to detect them to another location before recovering. Wireless Card How to another location before recovering. You must backup all your data to decrease system load. 3. D. A. Problem might be caused by the operating system, try restoring your system using the recovery partition or DVD. Make sure that the FAN works when the CPU...
... Problem - visit a local service center for assistance. Notebook PC User Manual A-15 Symptom & Solutions: A. B. Battery problem; C. Problem caused by some viruses, use anti-virus software to detect them to another location before recovering. Wireless Card How to another location before recovering. You must backup all your data to decrease system load. 3. D. A. Problem might be caused by the operating system, try restoring your system using the recovery partition or DVD. Make sure that the FAN works when the CPU...
User's Manual for English Edition
Page 88
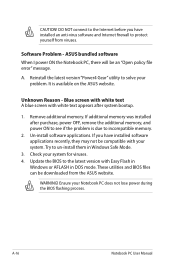
... problem. WARNING! DO NOT connect to solve your system. These utilities and BIOS files can be an "Open policy file error" message. A-16 Notebook PC User Manual Remove additional memory. Update the BIOS to protect yourself from the ASUS website. If you have installed software applications recently, they may not be compatible with Easy Flash in Windows or AFLASH in Windows Safe Mode. 3. ASUS bundled software When I power ON the Notebook PC, there will be downloaded...
... problem. WARNING! DO NOT connect to solve your system. These utilities and BIOS files can be an "Open policy file error" message. A-16 Notebook PC User Manual Remove additional memory. Update the BIOS to protect yourself from the ASUS website. If you have installed software applications recently, they may not be compatible with Easy Flash in Windows or AFLASH in Windows Safe Mode. 3. ASUS bundled software When I power ON the Notebook PC, there will be downloaded...
User's Manual for English Edition
Page 90
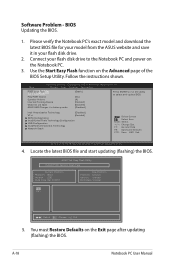
BIOS Updating the BIOS. 1. Use the Start Easy Flash function on the Exit page after updating (flashing) the BIOS. Main Advanced Chipset Boot Security Save & Exit POST Logo Type Start Easy Flash Play POST Sound Speaker Volume Internal Pointing Device Wake On Lid Open ASUS USB Charger+ in your flash disk drive. 2. A-18 Notebook PC User Manual Software Problem - Connect your model from the ASUS website and save it in battery mode [Static] [No] [4] [Enabled] [Enabled] [Disabled] Press ENTER to run the utility to the Notebook PC and power on the Notebook PC...
BIOS Updating the BIOS. 1. Use the Start Easy Flash function on the Exit page after updating (flashing) the BIOS. Main Advanced Chipset Boot Security Save & Exit POST Logo Type Start Easy Flash Play POST Sound Speaker Volume Internal Pointing Device Wake On Lid Open ASUS USB Charger+ in your flash disk drive. 2. A-18 Notebook PC User Manual Software Problem - Connect your model from the ASUS website and save it in battery mode [Static] [No] [4] [Enabled] [Enabled] [Disabled] Press ENTER to run the utility to the Notebook PC and power on the Notebook PC...
User's Manual for English Edition
Page 91
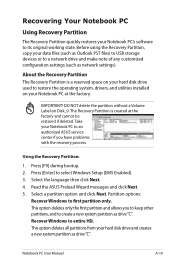
... other partitions, and to restore the operating system, drivers, and utilities installed on Disk_0. This option deletes only the first partition and allows you have problems with the recovery process. Take your hard disk drive and creates a new system partition as network settings). Recover Windows to its original working state. Select a partition option and click Next. DO NOT delete the partition without a Volume Label on your Notebook PC's software to entire HD. Recovering Your Notebook PC Using Recovery Partition The Recovery Partition quickly restores your Notebook PC...
... other partitions, and to restore the operating system, drivers, and utilities installed on Disk_0. This option deletes only the first partition and allows you have problems with the recovery process. Take your hard disk drive and creates a new system partition as network settings). Recover Windows to its original working state. Select a partition option and click Next. DO NOT delete the partition without a Volume Label on your Notebook PC's software to entire HD. Recovering Your Notebook PC Using Recovery Partition The Recovery Partition quickly restores your Notebook PC...
User's Manual for English Edition
Page 92
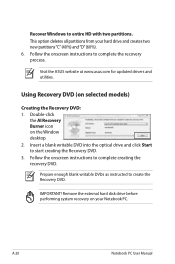
Using Recovery DVD (on the Window desktop. 2. Remove the external hard disk drive before performing system recovery on your hard drive and creates two new partitions "C" (40%) and "D" (60%). 6. Prepare enough blank writable DVDs as instructed to entire HD with two partitions. Recover Windows to create the Recovery DVD. Double-click the AI Recovery Burner icon on selected models) Creating the Recovery DVD: 1. IMPORTANT! Follow the onscreen instructions to complete creating the recovery DVD. Visit the ASUS website at www.asus.com for updated drivers and utilities. Follow...
Using Recovery DVD (on the Window desktop. 2. Remove the external hard disk drive before performing system recovery on your hard drive and creates two new partitions "C" (40%) and "D" (60%). 6. Prepare enough blank writable DVDs as instructed to entire HD with two partitions. Recover Windows to create the Recovery DVD. Double-click the AI Recovery Burner icon on selected models) Creating the Recovery DVD: 1. IMPORTANT! Follow the onscreen instructions to complete creating the recovery DVD. Visit the ASUS website at www.asus.com for updated drivers and utilities. Follow...
User's Manual for English Edition
Page 93
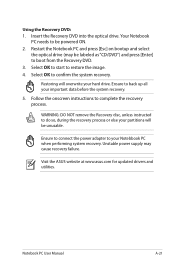
... at www.asus.com for updated drivers and utilities. Notebook PC User Manual A-21 Restoring will be powered ON. 2. Ensure to connect the power adapter to be unusable. Your Notebook PC needs to your hard drive. Select OK to start to complete the recovery process. Follow the onscreen instructions to restore the image. 4. Using the Recovery DVD: 1. Insert the Recovery DVD into the optical drive. WARNING: DO NOT remove the Recovery disc, unless instructed to boot from the Recovery DVD. 3. Unstable power supply may...
... at www.asus.com for updated drivers and utilities. Notebook PC User Manual A-21 Restoring will be powered ON. 2. Ensure to connect the power adapter to be unusable. Your Notebook PC needs to your hard drive. Select OK to start to complete the recovery process. Follow the onscreen instructions to restore the image. 4. Using the Recovery DVD: 1. Insert the Recovery DVD into the optical drive. WARNING: DO NOT remove the Recovery disc, unless instructed to boot from the Recovery DVD. 3. Unstable power supply may...


