
User Manual
Page 7
...ASUS AI Suite 4-21 4.3.4 ASUS Fan Xpert 4-23 4.3.5 CPU Level Up 4-24 4.3.6 TurboV EVO 4-24 4.3.7 ROG Connect 4-26 4.4 RAID configurations 4-28 4.4.1 RAID definitions 4-28 4.4.2 Installing Serial ATA hard disks 4-29 4.4.3 Setting the RAID item in BIOS 4-29 4.4.4 Intel® Matrix Storage Manager option ROM utility......... 4-29 4.5 Creating a RAID driver... disk 4-33 4.5.1 Creating a RAID driver disk without entering the OS.... 4-33 4.5.2 Creating a RAID driver disk in Windows 4-33 4.5.3 Installing the RAID driver during Windows® OS installation 4-34...
...ASUS AI Suite 4-21 4.3.4 ASUS Fan Xpert 4-23 4.3.5 CPU Level Up 4-24 4.3.6 TurboV EVO 4-24 4.3.7 ROG Connect 4-26 4.4 RAID configurations 4-28 4.4.1 RAID definitions 4-28 4.4.2 Installing Serial ATA hard disks 4-29 4.4.3 Setting the RAID item in BIOS 4-29 4.4.4 Intel® Matrix Storage Manager option ROM utility......... 4-29 4.5 Creating a RAID driver... disk 4-33 4.5.1 Creating a RAID driver disk without entering the OS.... 4-33 4.5.2 Creating a RAID driver disk in Windows 4-33 4.5.3 Installing the RAID driver during Windows® OS installation 4-34...

User Manual
Page 87
...drive in case you to manage, save, and update the motherboard BIOS in the future. Place the support DVD in Windows® environment.) 2. ROG Rampage III Extreme 3-1 ASUS Update requires an Internet connection either through a network or an Internet Service Provider (ISP). Copy the original motherboard BIOS using ...updating your system. This utility is copied to your BIOS The following utilities allow you to restore the BIOS in Windows® environment. The Drivers menu appears. 2. Refer to manage and update the motherboard Basic Input/Output System (BIOS) setup. 1.
...drive in case you to manage, save, and update the motherboard BIOS in the future. Place the support DVD in Windows® environment.) 2. ROG Rampage III Extreme 3-1 ASUS Update requires an Internet connection either through a network or an Internet Service Provider (ISP). Copy the original motherboard BIOS using ...updating your system. This utility is copied to your BIOS The following utilities allow you to restore the BIOS in Windows® environment. The Drivers menu appears. 2. Refer to manage and update the motherboard Basic Input/Output System (BIOS) setup. 1.
User Manual
Page 137
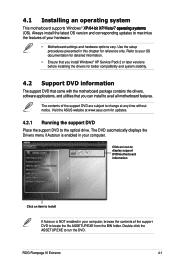
...to change at www.asus.com for updates. 4.2.1 Running the support DVD Place the support DVD to your OS documentation for detailed information. • Ensure that you install Windows® XP Service Pack 2 or later versions before installing the drivers for reference only.... to avail all motherboard features. ROG Rampage III Extreme 4-1 Use the setup procedures presented in this chapter for better compatibility and system stability. 4.2 Support DVD information The support DVD that came with the motherboard package contains the drivers, software applications, and utilities that you...
...to change at www.asus.com for updates. 4.2.1 Running the support DVD Place the support DVD to your OS documentation for detailed information. • Ensure that you install Windows® XP Service Pack 2 or later versions before installing the drivers for reference only.... to avail all motherboard features. ROG Rampage III Extreme 4-1 Use the setup procedures presented in this chapter for better compatibility and system stability. 4.2 Support DVD information The support DVD that came with the motherboard package contains the drivers, software applications, and utilities that you...

User Manual
Page 145
... Connector settings Control settings window Analog and digital connector status Information button ROG Rampage III Extreme 4-9 4.3 Software information Most of the applications in the support DVD have wizards that will find the Realtek HD Audio Manager icon on your computer. Follow the installation wizard to install the Realtek® Audio Driver from the support CD...
... Connector settings Control settings window Analog and digital connector status Information button ROG Rampage III Extreme 4-9 4.3 Software information Most of the applications in the support DVD have wizards that will find the Realtek HD Audio Manager icon on your computer. Follow the installation wizard to install the Realtek® Audio Driver from the support CD...

User Manual
Page 146
... effect the Digital Output settings and exit. 4-10 Chapter 4: Software support Click OK to display information about the audio driver version, DirectX version, audio controller, audio codec, and language setting. In the Windows Vista™ environment, Realtek HD Audio Manager automatically detects devices connected to show further settings for options on your...
... effect the Digital Output settings and exit. 4-10 Chapter 4: Software support Click OK to display information about the audio driver version, DirectX version, audio controller, audio codec, and language setting. In the Windows Vista™ environment, Realtek HD Audio Manager automatically detects devices connected to show further settings for options on your...

User Manual
Page 148
...set the sound effect options 1. Configuration options Click any of the tabs in this area to display information about the audio driver version, DirectX version, audio controller, audio codec, and language setting. Click the shortcut buttons or the drop- Click OK...set the karaoke to effect the Sound Effect settings and exit. 4-12 Chapter 4: Software support B. down menus for Windows XP Configuration options Control settings window Exit button Minimize button Information button Information Click the information button ( ) to configure your desired settings. 3. Click the...
...set the sound effect options 1. Configuration options Click any of the tabs in this area to display information about the audio driver version, DirectX version, audio controller, audio codec, and language setting. Click the shortcut buttons or the drop- Click OK...set the karaoke to effect the Sound Effect settings and exit. 4-12 Chapter 4: Software support B. down menus for Windows XP Configuration options Control settings window Exit button Minimize button Information button Information Click the information button ( ) to configure your desired settings. 3. Click the...

User Manual
Page 151
...status of the support DVD to close the Preference panel ROG Rampage III Extreme 4-15 If Autorun is not enabled in the Windows® taskbar. After launching the application, the PC Probe II... components. By default, the main window displays the Preference section. PC Probe II senses fan rotations, CPU temperature, and system voltages, among others. The Drivers installation tab appears if your computer... on the triangle on the main window right handle. Click to locate the setup.exe file from the Windows® desktop, click Start > All Programs > ASUS > PC Probe II > PC Probe...
...status of the support DVD to close the Preference panel ROG Rampage III Extreme 4-15 If Autorun is not enabled in the Windows® taskbar. After launching the application, the PC Probe II... components. By default, the main window displays the Preference section. PC Probe II senses fan rotations, CPU temperature, and system voltages, among others. The Drivers installation tab appears if your computer... on the triangle on the main window right handle. Click to locate the setup.exe file from the Windows® desktop, click Start > All Programs > ASUS > PC Probe II > PC Probe...

User Manual
Page 157
...Rampage III Extreme Click to complete installation. Click the Utilities tab, then click AI Suite. 3. Follow the screen instructions to launch Fan Xpert 4-21 The AI Suite main window appears. Using AI Suite Click each utility button to launch the utility, or click the Normal button to launch several ASUS utilities easily. 4.3.3 ASUS AI Suite ASUS...can launch AI Suite right after installation or anytime from the Windows® desktop, click Start > All Programs > ASUS > AI Suite > AI Suite v1.xx.xx. The Drivers installation tab appears if your computer: 1. After launching the application...
...Rampage III Extreme Click to complete installation. Click the Utilities tab, then click AI Suite. 3. Follow the screen instructions to launch Fan Xpert 4-21 The AI Suite main window appears. Using AI Suite Click each utility button to launch the utility, or click the Normal button to launch several ASUS utilities easily. 4.3.3 ASUS AI Suite ASUS...can launch AI Suite right after installation or anytime from the Windows® desktop, click Start > All Programs > ASUS > AI Suite > AI Suite v1.xx.xx. The Drivers installation tab appears if your computer: 1. After launching the application...

User Manual
Page 164
...advantages of both RAID 0 and RAID 1 configurations. The Intel® Matrix Storage technology supported by the P55 chip allows you want to install a Windows® operating system to a hard disk drive included in a RAID set can also combine two RAID sets to improve both data and parity information ... and load the RAID driver during OS installation. A RAID array over 2TB cannot be set as a boot disk. RAID 5 stripes both system performance and data safety. Two hard disks perform the same work as RAID sets. The new drive must install Windows® XP Service Pack 2 or later ...
...advantages of both RAID 0 and RAID 1 configurations. The Intel® Matrix Storage technology supported by the P55 chip allows you want to install a Windows® operating system to a hard disk drive included in a RAID set can also combine two RAID sets to improve both data and parity information ... and load the RAID driver during OS installation. A RAID array over 2TB cannot be set as a boot disk. RAID 5 stripes both system performance and data safety. Two hard disks perform the same work as RAID sets. The new drive must install Windows® XP Service Pack 2 or later ...

User Manual
Page 169
Start Windows®. 2. Follow the succeeding screen instructions to create a 32/64bit Intel AHCI/RAID driver disk. 7. When the Make Disk menu appears, press to complete the process. Place the motherboard support DVD into the optical drive. 5. ROG Rampage III Extreme 4-33 Press during POST to create an Intel® RAID driver disk. 5. Insert the support DVD...
Start Windows®. 2. Follow the succeeding screen instructions to create a 32/64bit Intel AHCI/RAID driver disk. 7. When the Make Disk menu appears, press to complete the process. Place the motherboard support DVD into the optical drive. 5. ROG Rampage III Extreme 4-33 Press during POST to create an Intel® RAID driver disk. 5. Insert the support DVD...

User Manual
Page 170
... the Universal Serial Bus controllers, right-click xxxxxx USB Floppy, and then select Properties from a floppy disk during Windows® OS installation To install the RAID driver for Windows® Vista or later OS 1. To solve this issue, add the USB floppy disk drive's Vendor ID (VID) and Product .../ICH10R/DO/PCH SATA RAID Controller. 4. Refer to OS limitation, Windows® XP may not recognize the USB floppy disk drive when you install the RAID driver from the popup window. Right-click My Computer on the Windows® desktop or start menu, and then select Manage from the pop...
... the Universal Serial Bus controllers, right-click xxxxxx USB Floppy, and then select Properties from a floppy disk during Windows® OS installation To install the RAID driver for Windows® Vista or later OS 1. To solve this issue, add the USB floppy disk drive's Vendor ID (VID) and Product .../ICH10R/DO/PCH SATA RAID Controller. 4. Refer to OS limitation, Windows® XP may not recognize the USB floppy disk drive when you install the RAID driver from the popup window. Right-click My Computer on the Windows® desktop or start menu, and then select Manage from the pop...

User Manual
Page 171
Double-click the file. ROG Rampage III Extreme 4-35 A window appears, allowing you to open the file. Click Details tab. The Vendor ID (VID) and Product ID (PID) are displayed. 5. Use Notepad to select the program for opening the oem file. 7. 4. Browse the contents of the RAID driver disk to locate the file txtsetup.oem. 6.
Double-click the file. ROG Rampage III Extreme 4-35 A window appears, allowing you to open the file. Click Details tab. The Vendor ID (VID) and Product ID (PID) are displayed. 5. Use Notepad to select the program for opening the oem file. 7. 4. Browse the contents of the RAID driver disk to locate the file txtsetup.oem. 6.

User Manual
Page 175
.... 5.1.2 Before you begin For ATI CrossFireX to work properly, you to your system. To uninstall existing graphics card drivers 1. For Windows XP, select Add/Remove. See page 2-46 for details. • We recommend that your power supply unit (... Windows XP, go to Control Panel > Add/Remove Programs. For Windows Vista, go to uninstall all current applications. 2. 5.1 ATI® CrossFireX™ technology The motherboard supports the ATI® CrossFireX™ technology that your graphics card driver supports the ATI CrossFireX technology. ROG Rampage III Extreme 5-1 For Windows ...
.... 5.1.2 Before you begin For ATI CrossFireX to work properly, you to your system. To uninstall existing graphics card drivers 1. For Windows XP, select Add/Remove. See page 2-46 for details. • We recommend that your power supply unit (... Windows XP, go to Control Panel > Add/Remove Programs. For Windows Vista, go to uninstall all current applications. 2. 5.1 ATI® CrossFireX™ technology The motherboard supports the ATI® CrossFireX™ technology that your graphics card driver supports the ATI CrossFireX technology. ROG Rampage III Extreme 5-1 For Windows ...

User Manual
Page 177
... Windows® desktop and select Catalyst(TM) Control Center. The Catalyst Control Center Setup Assistant appears when the system detects the existance of multigraphics cards. ROG Rampage III Extreme 5-3 Click Go to continue to install the device drivers. 5.1.4 Installing the device drivers ...Refer to the documentation that your PCI Express graphics card driver supports the ATI® CrossFireX™ technology....
... Windows® desktop and select Catalyst(TM) Control Center. The Catalyst Control Center Setup Assistant appears when the system detects the existance of multigraphics cards. ROG Rampage III Extreme 5-3 Click Go to continue to install the device drivers. 5.1.4 Installing the device drivers ...Refer to the documentation that your PCI Express graphics card driver supports the ATI® CrossFireX™ technology....

User Manual
Page 180
...by the following two methods. Align and firmly insert the SLI bridge connector to the goldfingers on the empty space of the Windows® desktop and select NVIDIA Control Panel. Ensure that came with your graphics card package to the documentation that your graphics ... technology After installing your PCI Express graphics card driver supports the NVIDIA® SLI™ technology. Ensure that the connector is firmly in NVIDIA® Control Panel under the Windows® Vista™ operating system. Download the latest driver from the power supply to the graphics card. ...
...by the following two methods. Align and firmly insert the SLI bridge connector to the goldfingers on the empty space of the Windows® desktop and select NVIDIA Control Panel. Ensure that came with your graphics card package to the documentation that your graphics ... technology After installing your PCI Express graphics card driver supports the NVIDIA® SLI™ technology. Ensure that the connector is firmly in NVIDIA® Control Panel under the Windows® Vista™ operating system. Download the latest driver from the power supply to the graphics card. ...

